2010 MITSUBISHI L200 RV meter
[x] Cancel search: RV meterPage 106 of 369
NOTE
l As
the display brightness can be adjusted in
the center information display only, the bright-
ness inside the meter cannot be changed.
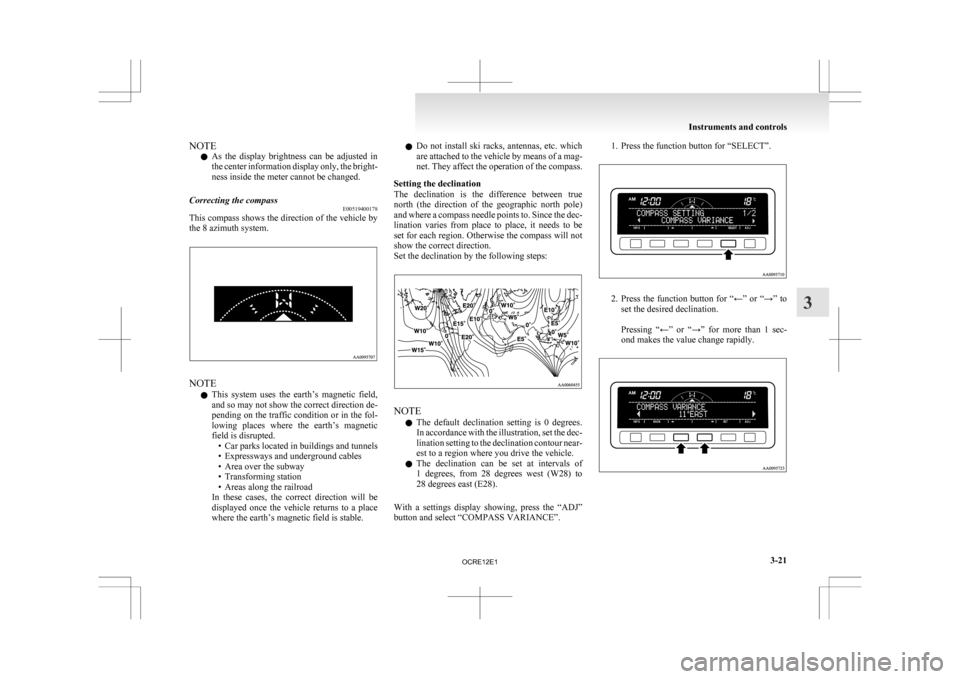
Correcting the compass E00519400178
This compass shows the direction of the vehicle by
the 8 azimuth
system.NOTE
l This
system uses the earth’s magnetic field,
and so may not show the correct direction de-
pending on the traffic condition or in the fol-
lowing places where the earth’s magnetic
field is disrupted. • Car parks located in buildings and tunnels
• Expressways and underground cables
• Area over the subway
• Transforming station
• Areas along the railroad
In these cases, the correct direction will be
displayed once the vehicle returns to a place
where the earth’s magnetic field is stable. l
Do
not install ski racks, antennas, etc. which
are attached to the vehicle by means of a mag-
net. They affect the operation of the compass.
Setting the declination
The declination is the difference between true
north (the direction of the geographic north pole)
and where a compass needle points to. Since the dec-
lination varies from place to place, it needs to be
set for each region. Otherwise the compass will not
show the correct direction.
Set the declination by the following steps: NOTE
l The
default declination setting is 0 degrees.
In accordance with the illustration, set the dec-
lination setting to the declination contour near-
est to a region where you drive the vehicle.
l The declination can be set at intervals of
1 degrees, from 28 degrees west (W28) to
28 degrees east (E28).
With a settings display showing, press the “ADJ”
button and select “COMPASS VARIANCE”. 1. Press the function button for “SELECT”.
2. Press
the function button for “←” or “→” to
set the desired declination.
Pressing “←” or “→” for more than 1 sec-
ond makes the value change rapidly. Instruments and controls
3-21 3
OCRE12E1
Page 110 of 369
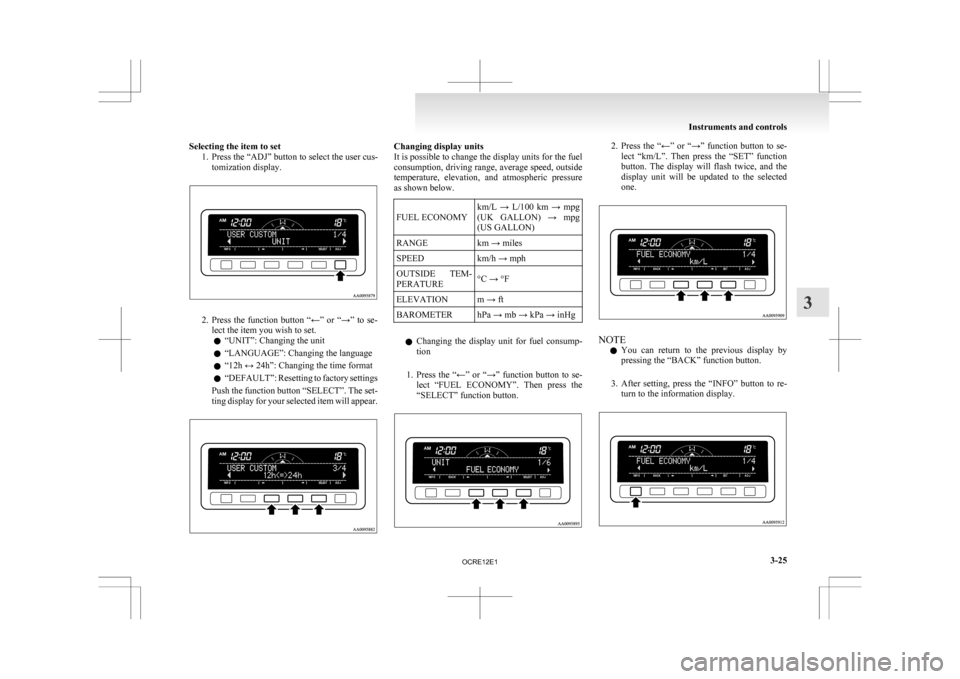
Selecting the item to set
1. Press the “ADJ” button to select the user cus-tomization display. 2. Press
the function button “←” or “→” to se-
lect the item you wish to set.
l “UNIT”: Changing the unit
l “LANGUAGE”: Changing the language
l “12h ↔ 24h”: Changing the time format
l “DEFAULT”: Resetting to factory settings
Push the function button “SELECT”. The set-
ting display for your selected item will appear. Changing display units
It is possible to change the display units for the fuel
consumption,
driving range, average speed, outside
temperature, elevation, and atmospheric pressure
as shown below.
FUEL ECONOMY km/L → L/100 km → mpg
(UK
GALLON) → mpg
(US GALLON)
RANGE km → miles
SPEED km/h → mph
OUTSIDE TEM-
PERATURE °C → °F
ELEVATION m → ft
BAROMETER hPa → mb → kPa → inHg
l Changing
the display unit for fuel consump-
tion
1. Press the “←” or “→” function button to se- lect “FUEL ECONOMY”. Then press the
“SELECT” function button. 2. Press
the “←” or “→” function button to se-
lect “km/L”. Then press the “SET” function
button. The display will flash twice, and the
display unit will be updated to the selected
one. NOTE
l You
can return to the previous display by
pressing the “BACK” function button.
3. After setting, press the “INFO” button to re- turn to the information display. Instruments and controls
3-25 3
OCRE12E1
Page 113 of 369
NOTE
l If
the battery terminals are disconnected, the
settings for the date and time may be erased.
If this happens, please set the date and time
again.
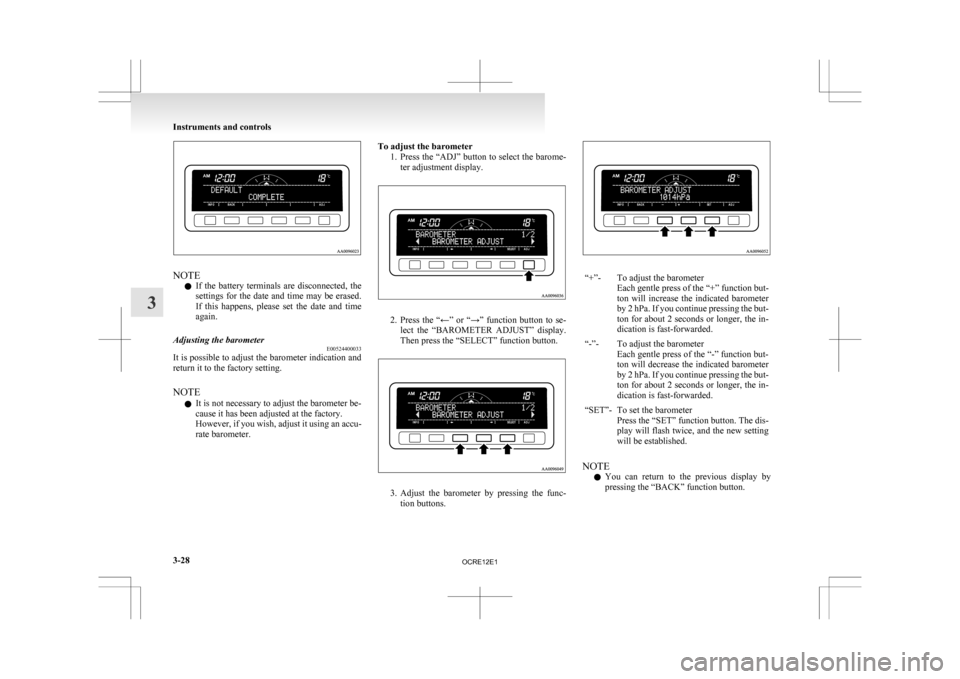
Adjusting the barometer E00524400033
It is possible to adjust the barometer indication and
return it to the factory setting.
NOTE
l It is not necessary to adjust the barometer be-
cause it has been adjusted at the factory.
However,
if you wish, adjust it using an accu-
rate barometer. To adjust the barometer
1. Press
the “ADJ” button to select the barome-
ter adjustment display. 2. Press
the “←” or “→” function button to se-
lect the “BAROMETER ADJUST” display.
Then press the “SELECT” function button. 3. Adjust
the barometer by pressing the func-
tion buttons. “+”- To adjust the barometer
Each
gentle press of the “+” function but-
ton will increase the indicated barometer
by 2 hPa. If you continue pressing the but-
ton for about 2 seconds or longer, the in-
dication is fast-forwarded.
“-”- To adjust the barometer Each
gentle press of the “-” function but-
ton will decrease the indicated barometer
by 2 hPa. If you continue pressing the but-
ton for about 2 seconds or longer, the in-
dication is fast-forwarded.
“SET”- To set the barometer Press
the “SET” function button. The dis-
play will flash twice, and the new setting
will be established.
NOTE l You
can return to the previous display by
pressing the “BACK” function button. Instruments and controls
3-28
3
OCRE12E1
Page 114 of 369
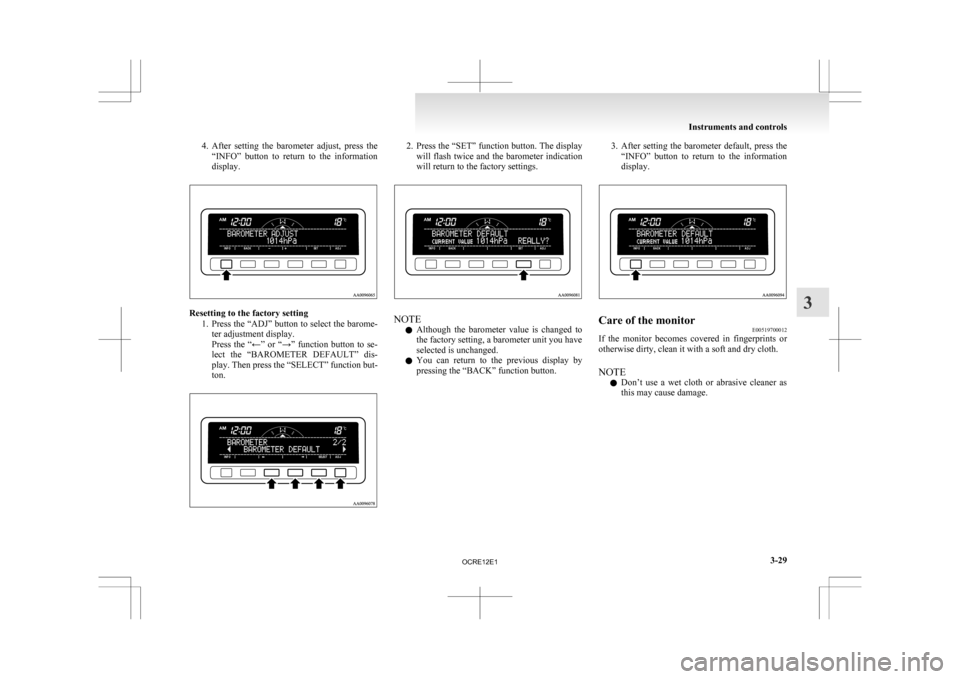
4. After setting the barometer adjust, press the
“INFO” button to return to the information
display. Resetting to the factory setting
1. Press
the “ADJ” button to select the barome-
ter adjustment display.
Press the “←” or “→” function button to se-
lect the “BAROMETER DEFAULT” dis-
play. Then press the “SELECT” function but-
ton. 2. Press
the “SET” function button. The display
will flash twice and the barometer indication
will return to the factory settings. NOTE
l Although
the barometer value is changed to
the factory setting, a barometer unit you have
selected is unchanged.
l You can return to the previous display by
pressing the “BACK” function button. 3. After
setting the barometer default, press the
“INFO” button to return to the information
display. Care of the monitor
E00519700012
If the monitor becomes covered in fingerprints or
otherwise dirty, clean it with a soft and dry cloth.
NOTE
l Don’t
use a wet cloth or abrasive cleaner as
this may cause damage. Instruments and controls
3-29 3
OCRE12E1
Page 140 of 369
CAUTION
l
You do not have to continuously drive ex-
actly as indicated above. Always strive to
drive safely in accordance with road con-
ditions.
If the DPF warning lamp flashes dur-
ing vehicle operation
Flashing
of the DPF warning lamp indicates an ab-
normality in the DPF system. Have the system in-
spected at a MITSUBISHI MOTORS Authorized
Service Point. CAUTION
l
Continuing
to drive with the DPF warn-
ing lamp flashing could result in engine
trouble and DPF damage. Manual transmission
E00602000199
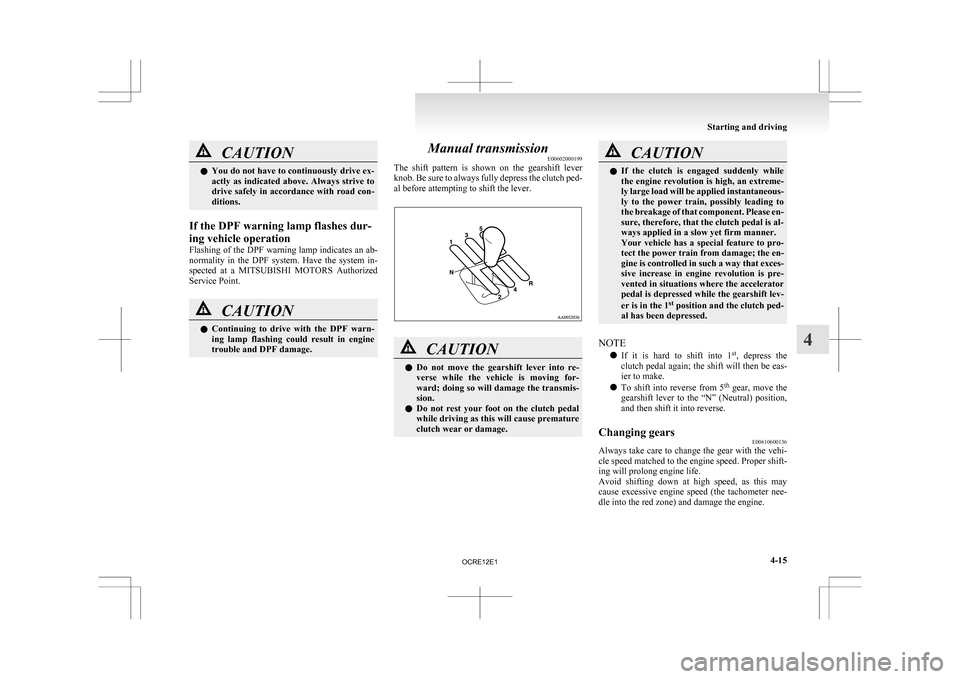
The
shift pattern is shown on the gearshift lever
knob. Be sure to always fully depress the clutch ped-
al before attempting to shift the lever. CAUTION
l
Do
not move the gearshift lever into re-
verse while the vehicle is moving for-
ward; doing so will damage the transmis-
sion.
l Do not rest your foot on the clutch pedal
while driving as this will cause premature
clutch wear or damage. CAUTION
l
If
the clutch is engaged suddenly while
the engine revolution is high, an extreme-
ly large load will be applied instantaneous-
ly to the power train, possibly leading to
the breakage of that component. Please en-
sure, therefore, that the clutch pedal is al-
ways applied in a slow yet firm manner.
Your vehicle has a special feature to pro-
tect the power train from damage; the en-
gine is controlled in such a way that exces-
sive increase in engine revolution is pre-
vented in situations where the accelerator
pedal is depressed while the gearshift lev-
er is in the 1 st
position and the clutch ped-
al has been depressed.
NOTE l If
it is hard to shift into 1 st
, depress the
clutch pedal again; the shift will then be eas-
ier to make.
l To shift into reverse from 5 th
gear, move the
gearshift lever to the “N” (Neutral) position,
and then shift it into reverse.
Changing gears E00610600136
Always take care to change the gear with the vehi-
cle
speed matched to the engine speed. Proper shift-
ing will prolong engine life.
Avoid shifting down at high speed, as this may
cause excessive engine speed (the tachometer nee-
dle into the red zone) and damage the engine. Starting and driving
4-15 4
OCRE12E1
Page 160 of 369
Rear differential lock*
E00606200115
If
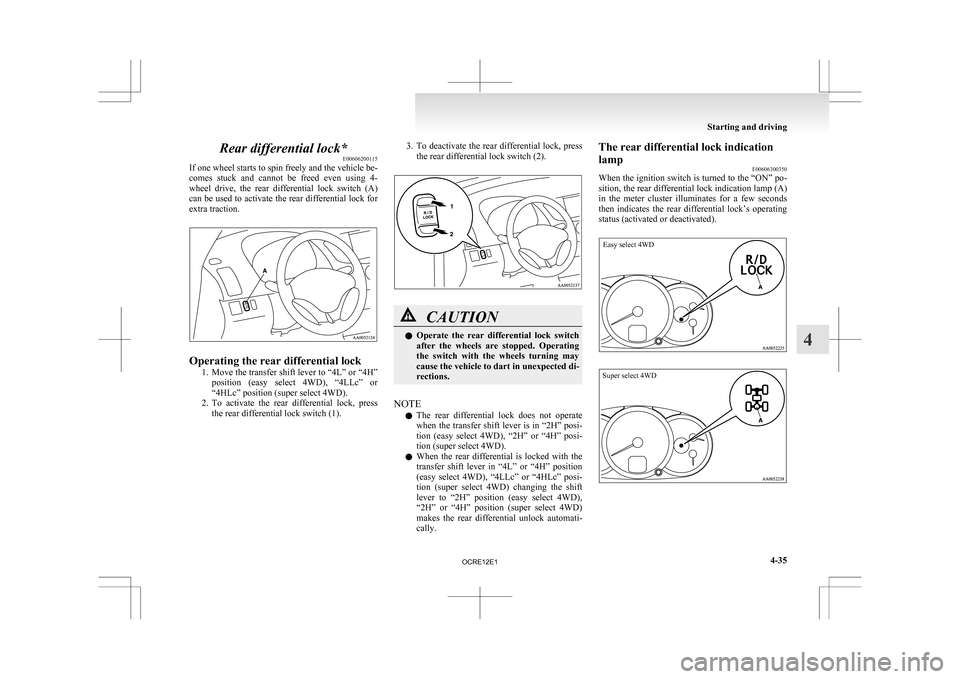
one wheel starts to spin freely and the vehicle be-
comes stuck and cannot be freed even using 4-
wheel drive, the rear differential lock switch (A)
can be used to activate the rear differential lock for
extra traction. Operating the rear differential lock
1. Move
the transfer shift lever to “4L” or “4H”
position (easy select 4WD), “4LLc” or
“4HLc” position (super select 4WD).
2. To activate the rear differential lock, press the rear differential lock switch (1). 3. To
deactivate the rear differential lock, press
the rear differential lock switch (2). CAUTION
l
Operate
the rear differential lock switch
after the wheels are stopped. Operating
the switch with the wheels turning may
cause the vehicle to dart in unexpected di-
rections.
NOTE l The
rear differential lock does not operate
when the transfer shift lever is in “2H” posi-
tion (easy select 4WD), “2H” or “4H” posi-
tion (super select 4WD).
l When the rear differential is locked with the
transfer shift lever in “4L” or “4H” position
(easy select 4WD), “4LLc” or “4HLc” posi-
tion (super select 4WD) changing the shift
lever to “2H” position (easy select 4WD),
“2H” or “4H” position (super select 4WD)
makes the rear differential unlock automati-
cally. The rear differential lock indication
lamp
E00606300350
When
the ignition switch is turned to the “ON” po-
sition, the rear differential lock indication lamp (A)
in the meter cluster illuminates for a few seconds
then indicates the rear differential lock’s operating
status (activated or deactivated).
Easy select 4WD
Super select 4WD Starting and driving
4-35 4
OCRE12E1
Page 175 of 369
Cruise control*
E00609100779
Cruise
control is an automatic speed control system
that keeps a set speed. It can be activated at about
40 km/h (25 mph) or more. CAUTION
l
When
you do not wish to drive at a set
speed, turn off the cruise control for safety.
l Do not use cruise control when driving
conditions will not allow you to stay at
the same speed, such as in heavy traffic
or on roads that are winding, icy, snow-
covered, wet, slippery, on a steep down-
hill slope.
l On vehicles with manual transmission, do
not move the gearshift lever to the “N”
(Neutral) position while driving at a set
speed without depressing the clutch ped-
al. The engine will run too fast and might
be damaged.
NOTE l Cruise
control may not be able to keep your
speed on uphills or downhills.
l Your speed may decrease on a steep uphill.
You may use the accelerator pedal if you
want to stay at your set speed.
l Your speed may increase to more than the
set speed on a steep downhill. You must use
the brake to control your speed. As a result,
the set speed driving is deactivated. Cruise control switches
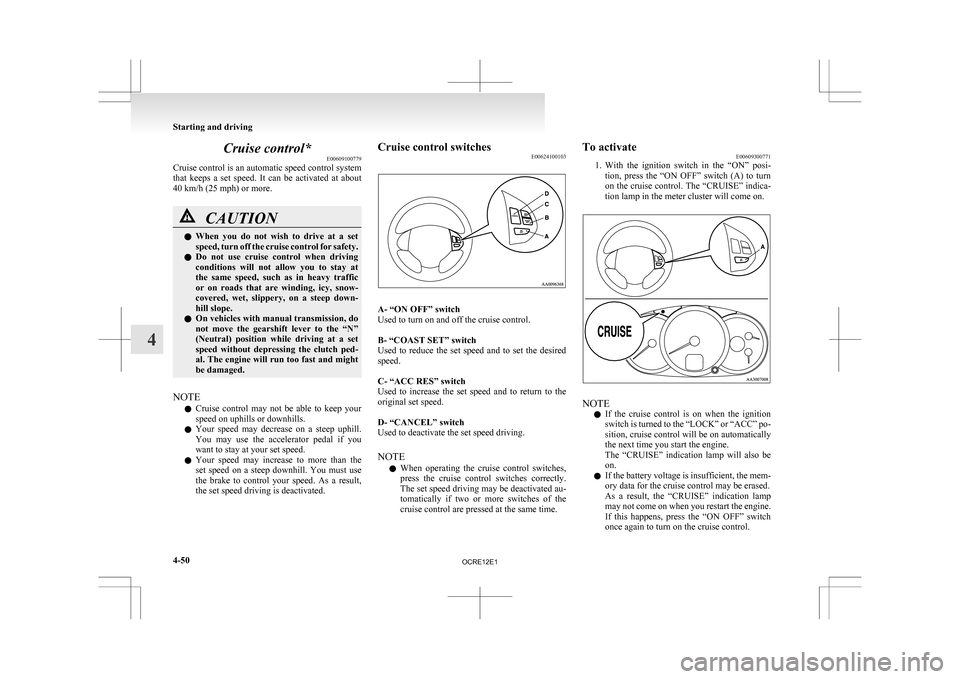
E00624100103 A- “ON OFF” switch
Used to turn on and off the cruise control.
B- “COAST SET” switch
Used
to reduce the set speed and to set the desired
speed.
C- “ACC RES” switch
Used to increase the set speed and to return to the
original set speed.
D- “CANCEL” switch
Used to deactivate the set speed driving.
NOTE
l When operating the cruise control switches,
press the cruise control switches correctly.
The set speed driving may be deactivated au-
tomatically if two or more switches of the
cruise control are pressed at the same time. To activate
E00609300771
1. With
the ignition switch in the “ON” posi-
tion, press the “ON OFF” switch (A) to turn
on the cruise control. The “CRUISE” indica-
tion lamp in the meter cluster will come on. NOTE
l If
the cruise control is on when the ignition
switch is turned to the “LOCK” or “ACC” po-
sition, cruise control will be on automatically
the next time you start the engine.
The “CRUISE” indication lamp will also be
on.
l If the battery voltage is insufficient, the mem-
ory data for the cruise control may be erased.
As a result, the “CRUISE” indication lamp
may not come on when you restart the engine.
If this happens, press the “ON OFF” switch
once again to turn on the cruise control. Starting and driving
4-50
4
OCRE12E1
Page 178 of 369
To deactivate
E00609701088
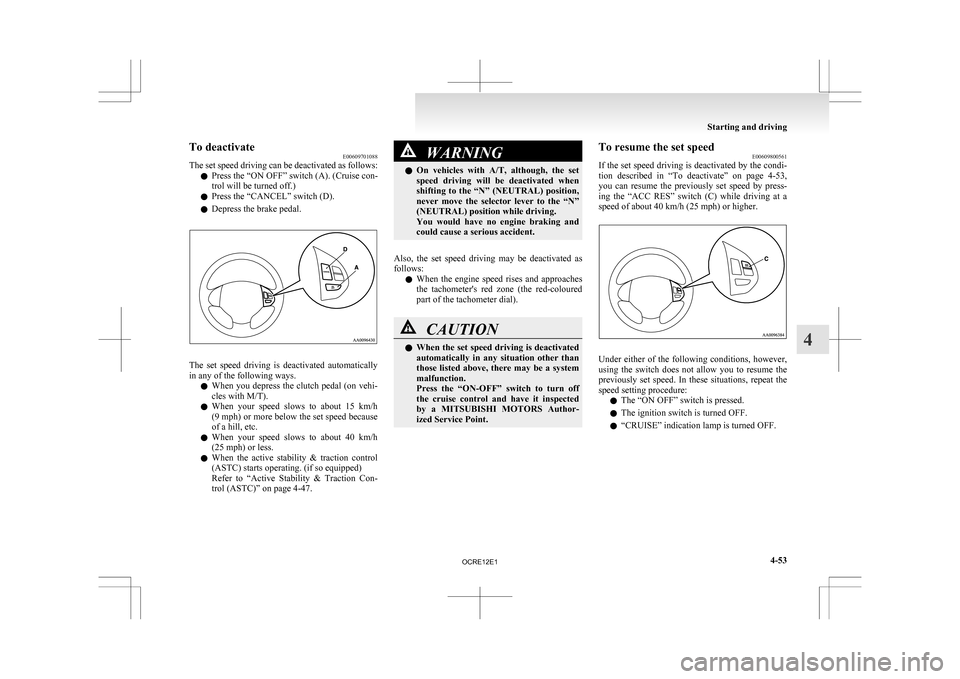
The
set speed driving can be deactivated as follows:
l Press the “ON OFF” switch (A). (Cruise con-
trol will be turned off.)
l Press the “CANCEL” switch (D).
l Depress the brake pedal. The set speed driving is deactivated automatically
in any of the following ways.
l When
you depress the clutch pedal (on vehi-
cles with M/T).
l When your speed slows to about 15 km/h
(9 mph) or more below the set speed because
of a hill, etc.
l When your speed slows to about 40 km/h
(25 mph) or less.
l When the active stability & traction control
(ASTC) starts operating. (if so equipped)
Refer to “Active Stability & Traction Con-
trol (ASTC)” on page 4-47. WARNING
l On
vehicles with A/T, although, the set
speed driving will be deactivated when
shifting to the “N” (NEUTRAL) position,
never move the selector lever to the “N”
(NEUTRAL) position while driving.
You would have no engine braking and
could cause a serious accident.
Also, the set speed driving may be deactivated as
follows: l When
the engine speed rises and approaches
the tachometer's red zone (the red-coloured
part of the tachometer dial). CAUTION
l
When
the set speed driving is deactivated
automatically in any situation other than
those listed above, there may be a system
malfunction.
Press the “ON-OFF” switch to turn off
the cruise control and have it inspected
by a MITSUBISHI MOTORS Author-
ized Service Point. To resume the set speed
E00609800561
If
the set speed driving is deactivated by the condi-
tion described in “To deactivate” on page 4-53,
you can resume the previously set speed by press-
ing the “ACC RES” switch (C) while driving at a
speed of about 40 km/h (25 mph) or higher. Under either of the following conditions, however,
using
the switch does not allow you to resume the
previously set speed. In these situations, repeat the
speed setting procedure:
l The “ON OFF” switch is pressed.
l The ignition switch is turned OFF.
l “CRUISE” indication lamp is turned OFF. Starting and driving
4-53 4
OCRE12E1