2010 MERCEDES-BENZ SLS COUPE rear view mirror
[x] Cancel search: rear view mirrorPage 14 of 361
LINGUATRONIC
Individualisatio n............................... 74
Settings ........................................... 73
Luggage net
Front-passenger footwell ...............259 M
Main-beam headlamps Display message ............................ 301
Maintenance
Battery ........................................... 334
Manual drive program ......................229
Map Adjusting the map scal e.................. 83
Arrival time/distance to destina-
tion .................................................. 88
Calling up ....................................... 103
Centring on vehicle or destination
position ............................................ 84
Information on map .........................88
Map displa y..................................... 84
Moving ............................................. 83
RDS-TMC displays .........................120
Showing geo-coordinates ................89
Showing road names .......................89
Map orientation ................................... 84
Setting ............................................. 84
Map scale
Setting ............................................. 83
Matt paintwork
Cleaning ......................................... 282
Media Interface
Metadata ....................................... 187
MP3 player. ................................... 184
Media Interface mode .......................183
Connectio noption s....................... 183
Media Interface operation
Basi cmenu .................................... 186
Select file ....................................... 186
Switching ....................................... 185
Media list ........................................... 175
Memory card (on-board computer) .235
Memory function ............................... 210
Menu Menu overview .............................. 232
Menu (on-board computer) ...............232
AMG ............................................... 241 Audi
o............................................. 235
Navigation ..................................... 234
Service .......................................... .237
Settings ......................................... 238
Telephone ...................................... 236
Trip ................................................ 232
Menu item
Selecting .......................................... 64
Menu overview
Address book ................................. 151
Bluetooth ®
telephony .................... 133
CD/DVD audio and MP3 mode ...... 172
Convenience telephony .................135
DAB radio mode ............................ .160
MUSIC REGISTER ........................... 180
Navigation ........................................ 81
Radio mode ................................... 160
Video DVD ..................................... 193
Menu system
Showing/hiding .......................83, 194
Mercedes-Benz Contact ....................156
Message see Display message .....................289
see Warning and indicator lamps ...308
Mirrors
Sun visor ........................................ 259
see Exterior mirrors or Rear-view mirror
Mobile phone ..................................... 260
Authorisation ................................. 129
Connecting (Bluetooth ®
interface) .129
Connecting (convenience teleph-
ony) ............................................... 133
De-authorisation ............................ 131
External authorisation ....................131
Installatio n..................................... 347
Telephone menu (on-board com-
puter) ............................................. 236
Modifying the programming
Key ................................................ 200
Motorway information ........................89
MP3 Bit/sampling rates ......................... 166
Copyright ....................................... 167
Disc ............................................... 166
File systems ................................... 166
Formats ......................................... 166 Index
11 BA 197 ECE RE 2010/6a; 1; 2, en-GB
sabbaeu Version: 3.0.3.6 2010-05-07T14:19:43+02:00 - Seite 11
Page 16 of 361
Deleting an entry
........................... 139
Importing an entry from the
mobile phone to the address
book .............................................. 141
PIN
Entering ......................................... 133
Plastic trim
Cleaning ......................................... 285
Playback options ..............178, 183, 189
Postcode Entering ........................................... 95
Power windows
see Side windows
Previous destinations .......................126
Pulling away ...................................... 220R
RACE START ....................................... 226
RACETIMER (on-board computer) ....241
Radio Selecting a statio n(on-board
computer) ...................................... 235
Radio mode
Radio Data System ........................164
Switching to ................................... 158
Range
Calling up (on-board computer) .....233
RDS
Switching on/off ........................... 164
RDS (Radio Data System) .................164
Interrupting an announcement ......164
RDS-TMC traffic reports
Displaying ...................................... 120
Read-aloud function ..........................122
Automatic ...................................... 123
Read-aloud speed
Setting ............................................. 73
Rear aerofoil ...................................... 261
Rear foglamp Display message ............................ 301
Rear-view mirror
Adjusting ....................................... 207
Anti-dazzle mode (automatic) ........209
Dipping (automatic) .......................208
Dipping (manual) ........................... 208
Rear window heating ........................256Rear wing
Display message .................... 305, 306
Redials ................................................ 145
Refuelling ........................................... 266
Remote control Garage door opene r....................... 262
Programming (garage door
opener) .......................................... 262
Reserve fuel ....................................... 349
Display message ............................ 305
Fuel tank ........................................ 349
Warning lamp ................................. 312
Resetting
Factory settings ............................... 78
Restraint system
For children ..................................... 41
See SRS ........................................... 35
Rev counter ........................................ 230
Reversing camera ............................. 250
Cleaning ......................................... 284
Showing/hiding the image .............. .70
Switching on .................................. 250
Reversing lamps
Display message ............................ 301
Road
Entering ........................................... 97
Route
see Route guidance .......................234
Route browser ................................... 118
Route calculation .............................. 101
Route guidance .................................. 111
Cancel ........................................... 119
Continu e........................................ 119
Destination reached ......................115
Following a vehicle transportation ...79
Lane recommendations .................113
Off-road ......................................... 115
On-board computer .......................234
Route mode
Setting ............................................. 85
Route options
Setting ............................................. 86
Route type
Setting ............................................. 85 Index
13 BA 197 ECE RE 2010/6a; 1; 2, en-GB
sabbae uV ersion: 3.0.3.6
2010-05-07T14:19:43+02:00 - Seite 13
Page 25 of 361
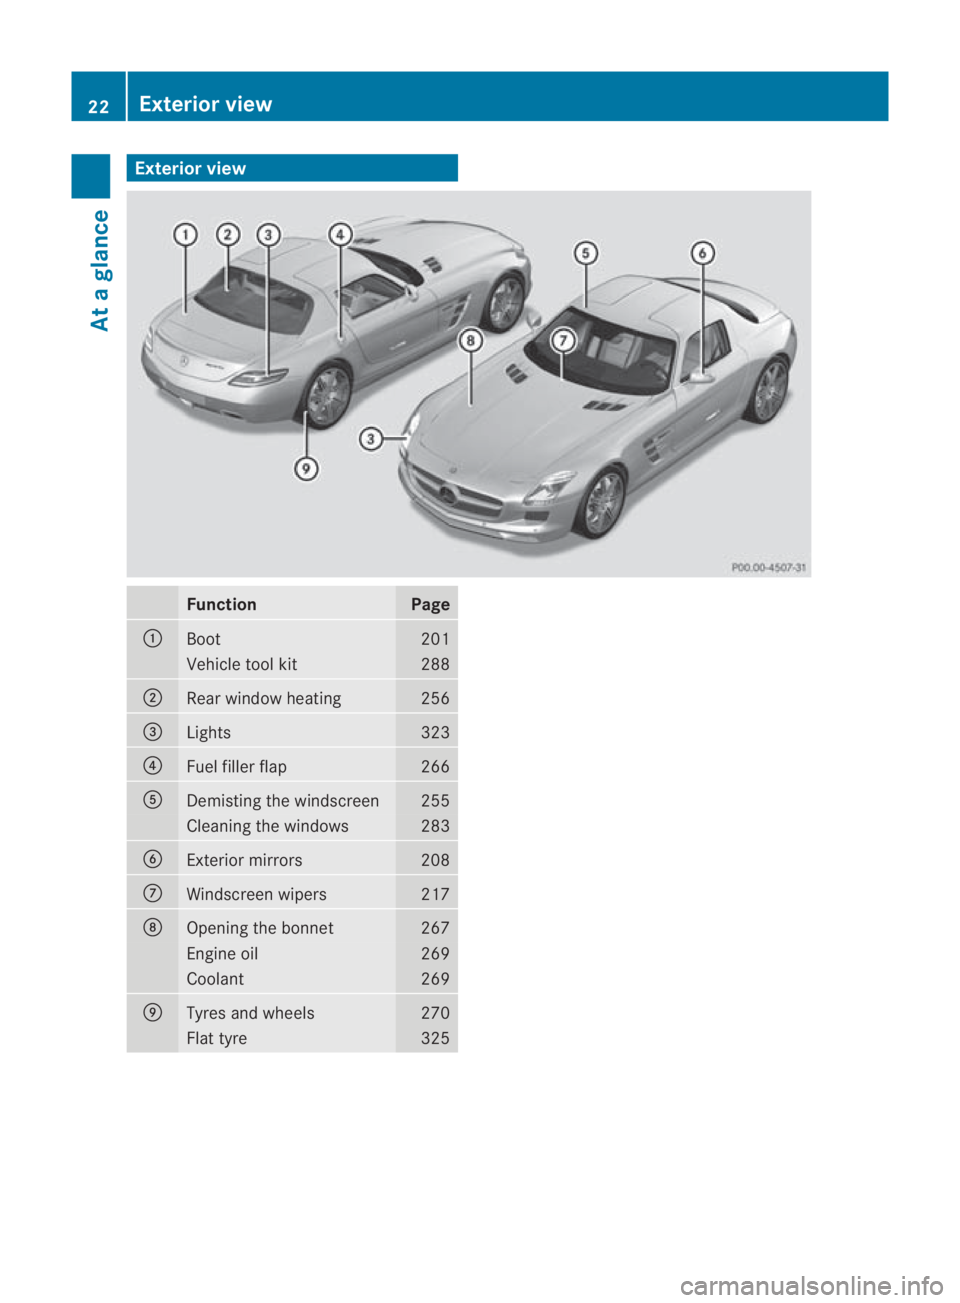
Exterio
rview Function Page
0001
Boot 201
Vehicle tool kit 288
0002
Rear window heating 256
0015
Lights 323
0014
Fuel filler flap 266
0012
Demisting the windscreen 255
Cleaning the windows 283
0013
Exterior mirrors 208
000A
Windscreen wipers 217
000B
Opening the bonnet 267
Engine oil 269
Coolant 269
000C
Tyres and wheels 270
Flat tyre 32522
Exterior viewAt a glance
BA 197 ECE RE 2010/6a; 1; 2, en-GB
sabbaeu Version: 3.0.3.6 2010-05-07T14:19:43+02:00 - Seite22
Page 34 of 361
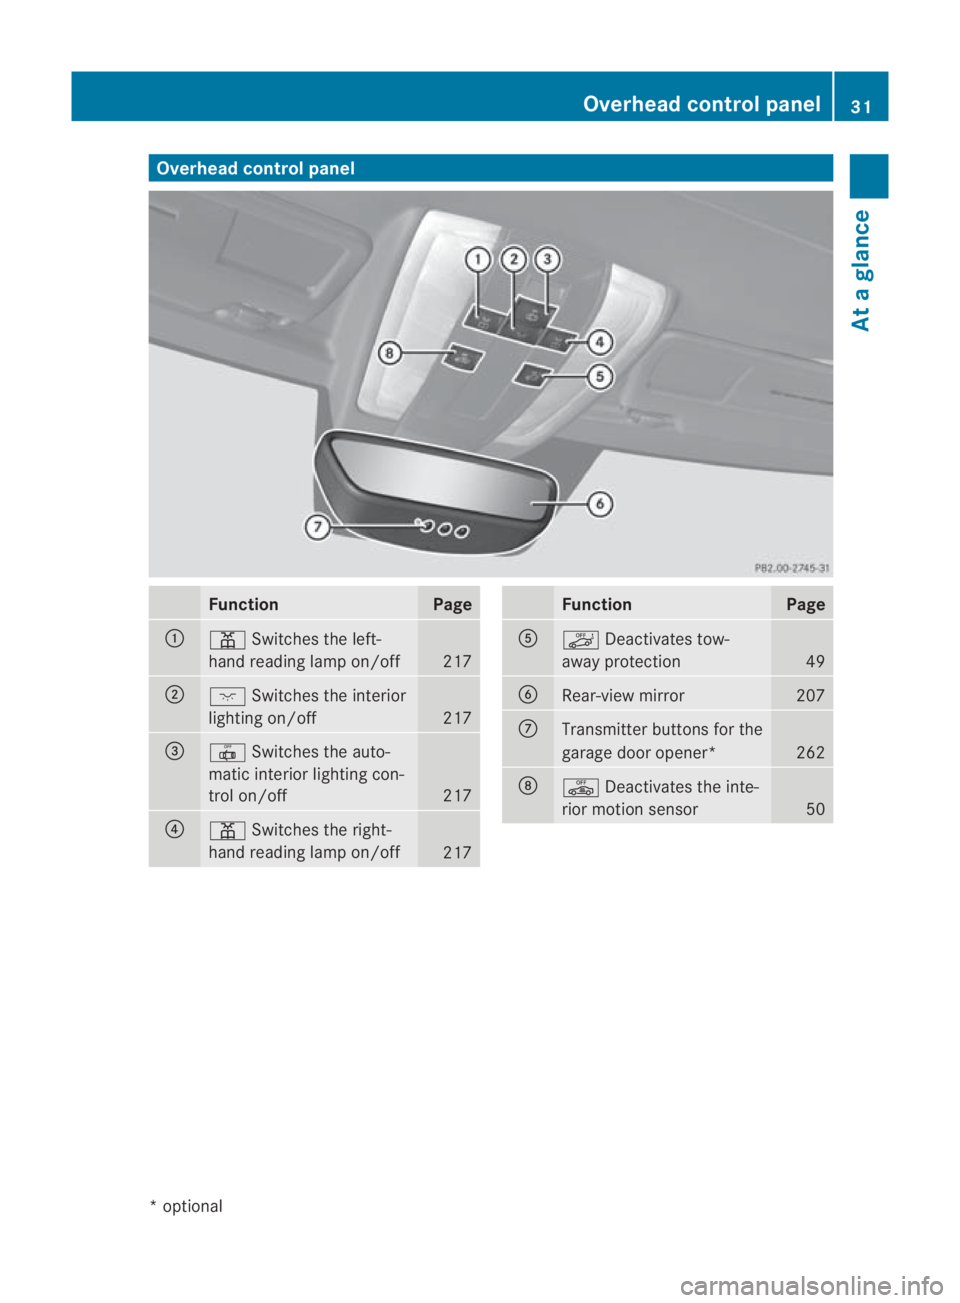
Overhea
dcontrol panel Function Page
0001
0002
Switches the left-
hand reading lamp on/off 217
0002
0007
Switches the interior
lighting on/off 217
0015
0015
Switches the auto-
matic interior lighting con-
trol on/off 217
0014
0002
Switches the right-
hand reading lamp on/off 217 Function Page
0012
0004
Deactivates tow-
away protection 49
0013
Rear-view mirror 207
000A
Transmitter buttons for the
garage door opener*
262
000B
0003
Deactivates the inte-
rior motion sensor 50Overhea
dcontrol panel
31At a glance
*optional
BA 197 ECE RE 2010/6a; 1; 2, en-GB
sabbaeu Version: 3.0.3.6 2010-05-07T14:19:43+02:00 - Seite 31
Page 210 of 361
X
Push release lever 0001down completely.
The steering column is unlocked.
X Adjust the steering wheel to the desired
position.
X Push release lever 0001up completely.
The steering column is locked.
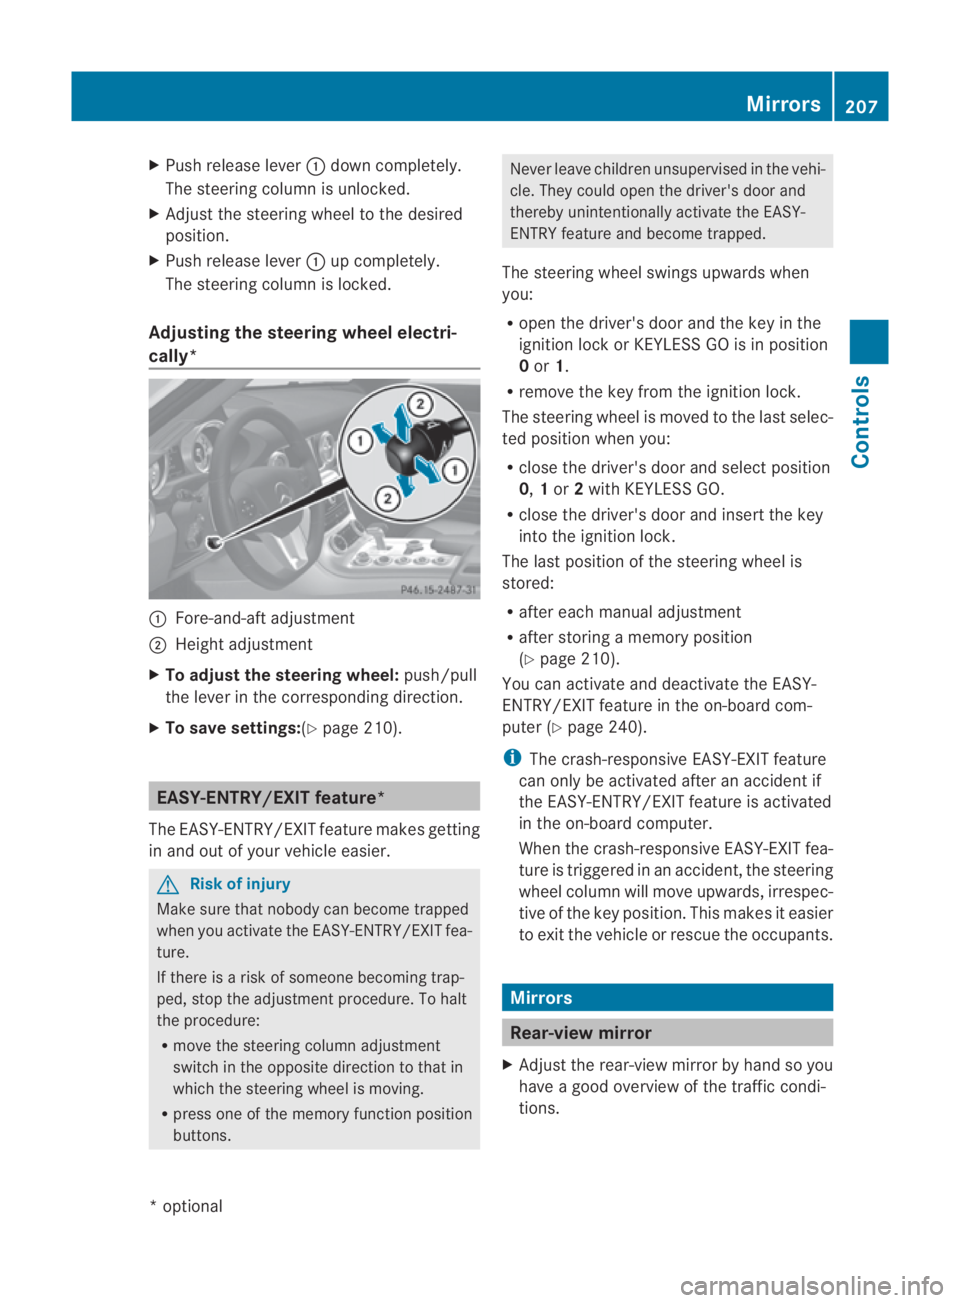
Adjusting the steering wheel electri-
cally* 0001
Fore-and-aft adjustment
0002 Height adjustment
X To adjust the steering wheel: push/pull
the lever in the corresponding direction.
X To save settings: (Ypage 210). EASY-ENTRY/EXIT feature*
The EASY-ENTRY/EXIT feature makes getting
in and out of your vehicle easier. G
Risk of injury
Make sure that nobody can become trapped
when you activate the EASY-ENTRY/EXIT fea-
ture.
If there is a risk of someone becoming trap-
ped, stop the adjustmen tprocedure. To halt
the procedure:
R move the steering column adjustment
switch in the opposite directio nto that in
which the steering wheel is moving.
R press one of the memory function position
buttons. Never leave children unsupervised in the vehi-
cle. They could open the driver's door and
thereby unintentionally activate the EASY-
ENTRY feature and become trapped.
The steering wheel swings upwards when
you:
R open the driver's door and the key in the
ignition lock or KEYLESS GO is in position
0or 1.
R remove the key from the ignition lock.
The steering wheel is moved to the last selec-
ted position when you:
R close the driver's door and select position
0, 1or 2with KEYLESS GO.
R close the driver's door and insert the key
into the ignition lock.
The last position of the steering wheel is
stored:
R after each manual adjustment
R after storing a memory position
(Y page 210).
You can activate and deactivate the EASY-
ENTRY/EXIT feature in the on-board com-
puter (Y page 240).
i The crash-responsive EASY-EXIT feature
can only be activated after an accident if
the EASY-ENTRY/EXIT feature is activated
in the on-board computer.
When the crash-responsive EASY-EXIT fea-
ture is triggered in an accident, the steering
wheel column will move upwards, irrespec-
tive of the key position. This makes it easier
to exit the vehicle or rescue the occupants. Mirrors
Rear-view mirror
X Adjust the rear-view mirror by hand so you
have a good overview of the traffic condi-
tions. Mirrors
207Controls
*optional
BA 197 ECE RE 2010/6a; 1; 2, en-GB
sabbaeu
Version: 3.0.3.6 2010-05-07T14:19:43+02:00 - Seite 207 Z
Page 211 of 361
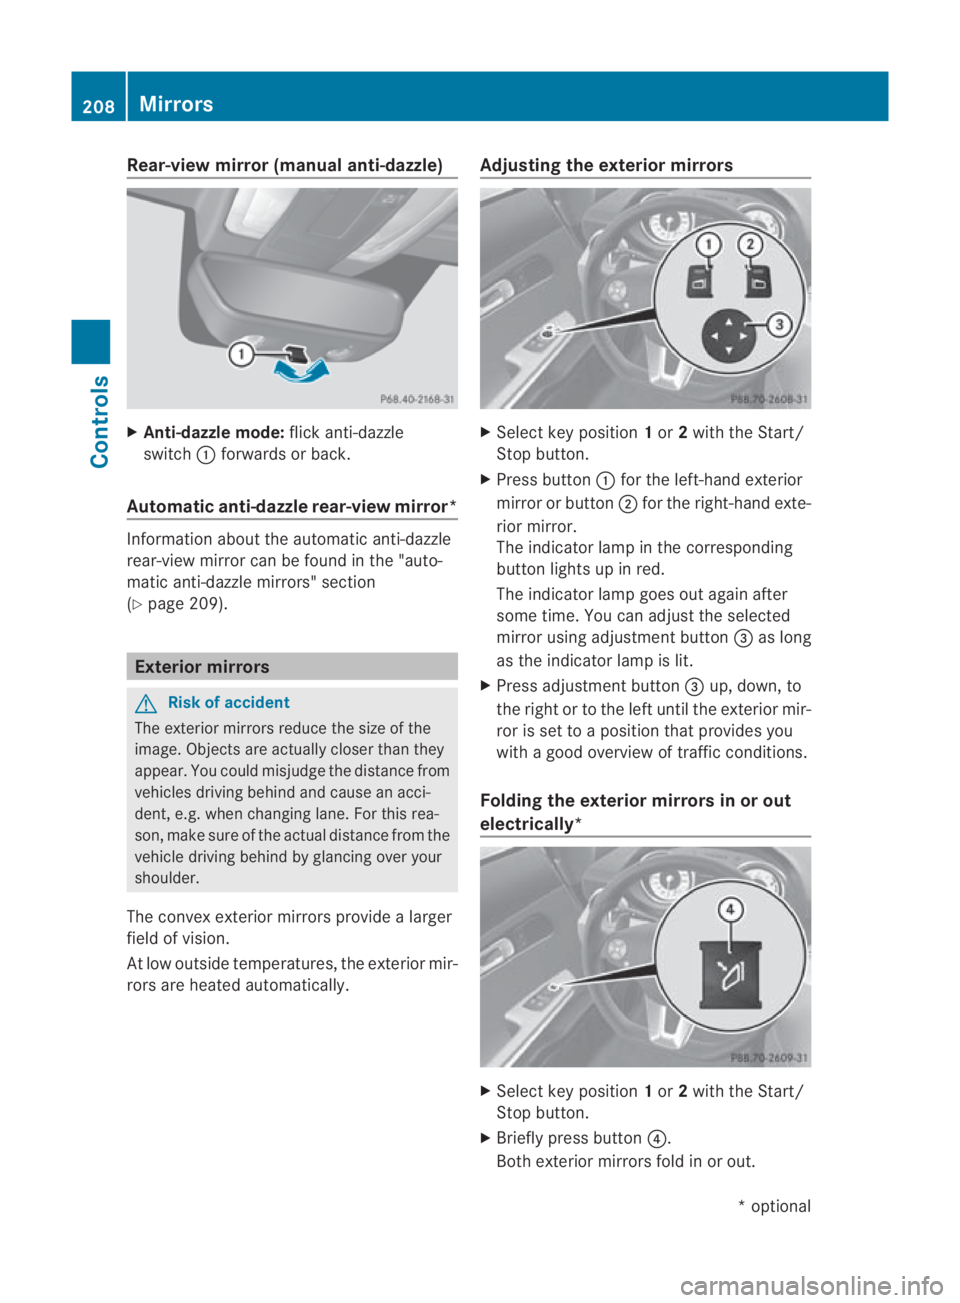
Rear-view mirror (manual anti-dazzle)
X
Anti-dazzle mode: flick anti-dazzle
switch 0001forwards or back.
Automatic anti-dazzle rear-vie wmirror* Information about the automatic anti-dazzle
rear-view mirror can be found in the "auto-
matic anti-dazzle mirrors" section
(Y page 209). Exterior mirrors
G
Risk of accident
The exterior mirrors reduce the size of the
image. Objects are actually close rthan they
appear. You could misjudge the distance from
vehicles driving behind and cause an acci-
dent, e.g. when changing lane. For this rea-
son, make sure of the actual distance from the
vehicle driving behind by glancing over your
shoulder.
The convex exterior mirrors provide a larger
field of vision.
At low outside temperatures, the exterior mir-
rors are heated automatically. Adjusting the exterior mirrors X
Select key position 1or 2with the Start/
Stop button.
X Press button 0001for the left-hand exterior
mirror or button 0002for the right-hand exte-
rior mirror.
The indicator lamp in the corresponding
button lights up in red.
The indicator lamp goes out again after
some time. You can adjust the selected
mirror using adjustment button 0015as long
as the indicator lamp is lit.
X Press adjustment button 0015up, down, to
the right or to the left until the exterior mir-
ror is set to a position that provides you
with a good overview of traffic conditions.
Folding the exterior mirrors in or out
electrically* X
Select key position 1or 2with the Start/
Stop button.
X Briefly press button 0014.
Both exterior mirrors fold in or out. 208
MirrorsControls
*o
ptional
BA 197 ECE RE 2010/6a; 1; 2, en-GB
sabbaeu
Version: 3.0.3.6 2010-05-07T14:19:43+02:00 - Seite 208
Page 212 of 361
i
If you are driving faster than 47 km/h, you
can no longer fold in the exterior mirrors.
Make sure that the exterior mirrors are
always folded out fully while the vehicle is
in motion, as they may otherwise vibrate.
Resetting the exterio rmirrors If the battery has been disconnected or com-
pletely discharged, the exterior mirrors must
be reset .The exterior mirrors will otherwise
not fold in when you select the "Fold in mir-
rors when locking" function in the on-board
computer (Y page 240).
X Select key position 1with the Start/Stop
button.
X Briefly press button 0014.
Folding the exterior mirrors in/out
automatically* If the "Fold in mirrors when locking" function
is activated in the on-board computer
(Y
page 240):
R the exterior mirrors fold in automatically as
soon as you lock the vehicle from the out-
side.
R the exterior mirrors fold out again automat-
ically as soon as you unlock the vehicle and
then open the driver's or front-passenger
door.
i If you have activated this function and fold
in the exterior mirrors using button 0014, they
will not be folded out automatically .You
can then only fold out the exterior mirrors
using button 0014. Automatic anti-dazzle mirrors*
The rear-view mirror and the exterior mirror
on the driver's side automatically go into anti-
dazzle mode if the ignition is switched on and
incident light from headlamps strikes the sen-
sor in the rear-view mirror.
The mirrors do not go into anti-dazzle mode if
reverse gear is engaged. G
Risk of accident
If incident light from headlamps is prevented
from striking the sensor in the rear-view mir-
ror, for instance, by luggage piled too high in
the vehicle, the mirror's automatic anti-dazzle
function will not operate.
Incident light could then dazzle you. This may
distract you from the traffic conditions, and
as a result, you may cause an accident .Inthis
case, adjust the rear-view mirror manually. Parking position for the exterior mir-
ror on the front-passenger side
To make it easier to park, you can set and
store the front-passenger side exterior mirror
position in such a way that you can see the
rear wheel on that side as soon as you engage
reverse gear.
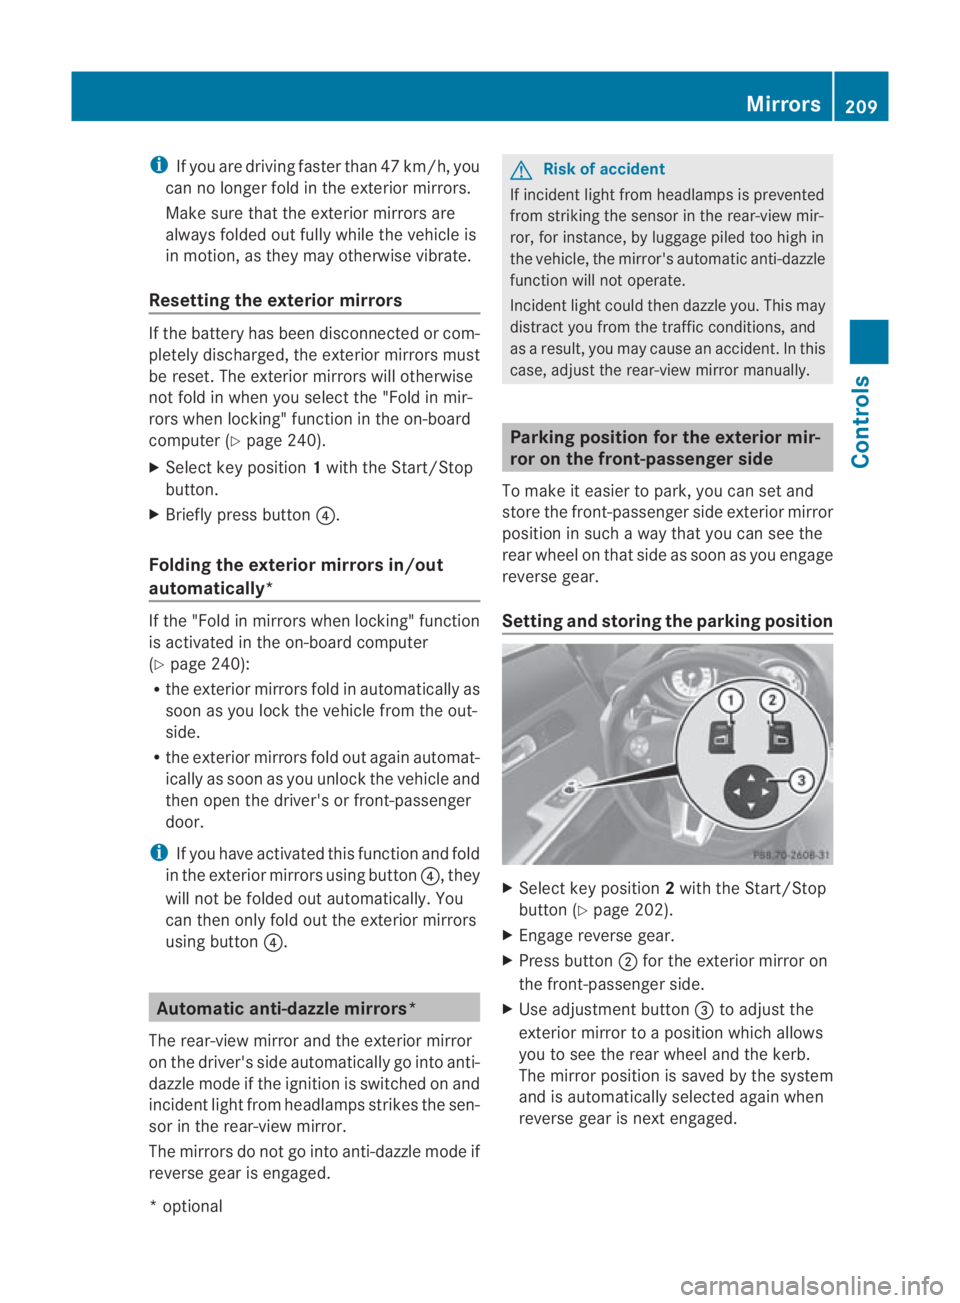
Setting and storing the parking position X
Select key position 2with the Start/Stop
button (Y page 202).
X Engage reverse gear.
X Press button 0002for the exterior mirror on
the front-passenger side.
X Use adjustment button 0015to adjust the
exterior mirror to a position which allows
you to see the rear wheel and the kerb.
The mirror position is saved by the system
and is automatically selected again when
reverse gear is next engaged. Mirrors
209Controls
*optional
BA 197 ECE RE 2010/6a; 1; 2, en-GB
sabbaeu
Version: 3.0.3.6 2010-05-07T14:19:43+02:00 - Seite 209 Z
Page 253 of 361
One or more segments light up as the vehicle
approaches an obstacle, depending on the
vehicle's distance from the obstacle. From
the sixth segment onwards, you will hear an
intermittent warning tone; from the seventh
segment onwards, you will hear a continuous
warning tone for a maximum of two seconds.
This indicates that you have now reached the
minimum distance.
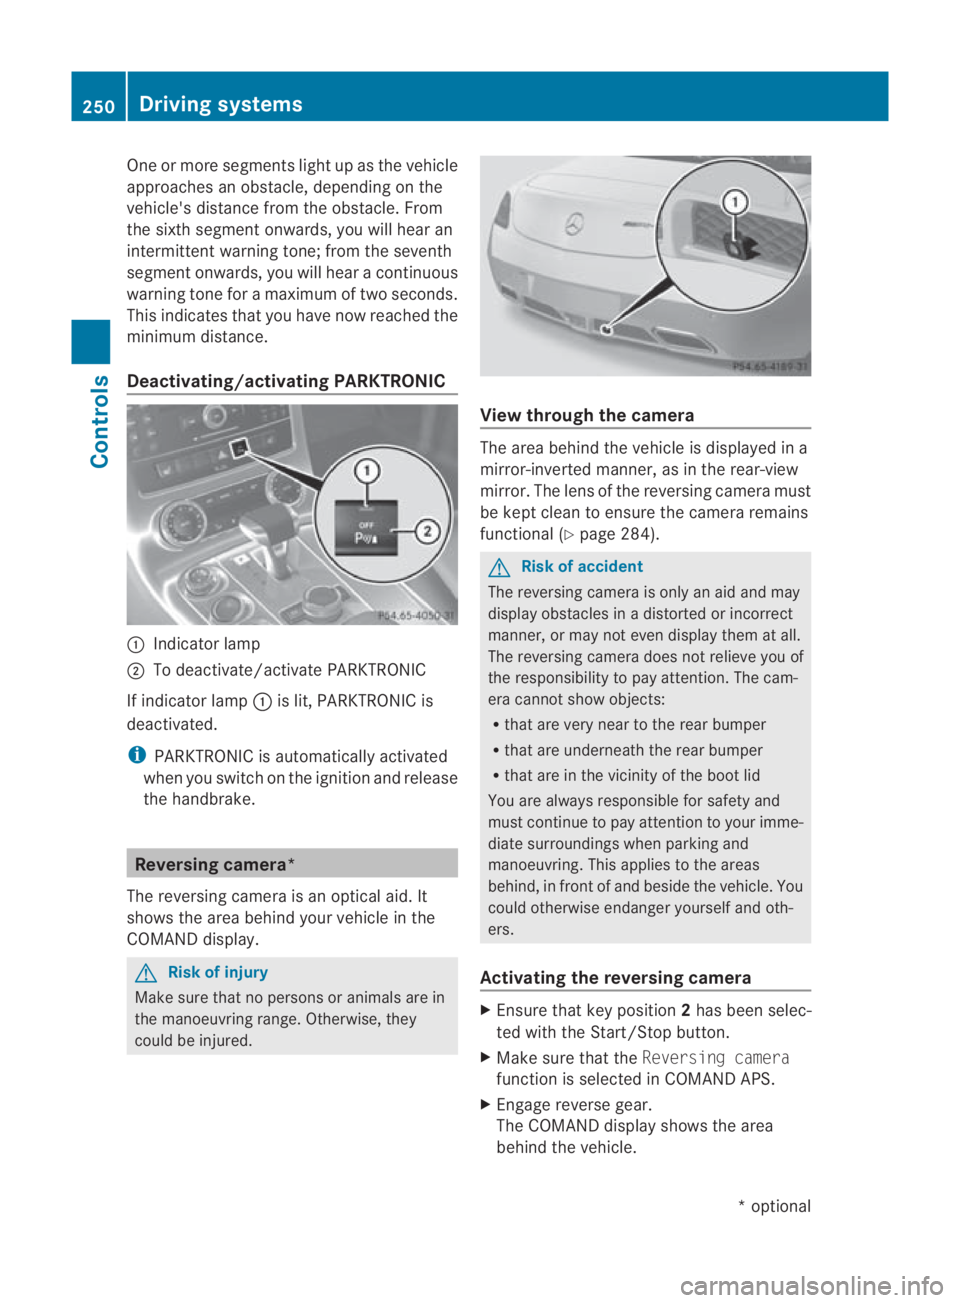
Deactivating/activating PARKTRONIC 0001
Indicator lamp
0002 To deactivate/activate PARKTRONIC
If indicator lamp 0001is lit, PARKTRONIC is
deactivated.
i PARKTRONIC is automatically activated
when you switch on the ignition and release
the handbrake. Reversing camera*
The reversing camera is an optical aid. It
shows the area behind your vehicle in the
COMAND display. G
Risk of injury
Make sure that no persons or animals are in
the manoeuvring range. Otherwise, they
could be injured. View through the camera
The area behind the vehicle is displayed in a
mirror-inverted manner, as in the rear-view
mirror. The lens of the reversing camera must
be kept clean to ensure the camera remains
functional (Y
page 284). G
Risk of accident
The reversing camera is only an aid and may
display obstacles in a distorted or incorrect
manner, or may not even display them at all.
The reversing camera does not relieve you of
the responsibility to pay attention. The cam-
era cannot show objects:
R that are very near to the rear bumper
R that are underneath the rear bumper
R that are in the vicinity of the boot lid
You are always responsible for safety and
must continue to pay attention to your imme-
diate surroundings when parking and
manoeuvring. This applies to the areas
behind, in front of and beside the vehicle. You
could otherwise endanger yourselfa nd oth-
ers.
Activating the reversing camera X
Ensure tha tkey position 2has been selec-
ted with the Start/Stop button.
X Make sure that the Reversing camera
function is selected in COMAND APS.
X Engage reverse gear.
The COMAND display shows the area
behind the vehicle. 250
Driving systemsControls
*o
ptional
BA 197 ECE RE 2010/6a; 1; 2, en-GB
sabbaeu
Version: 3.0.3.6 2010-05-07T14:19:43+02:00 - Seite 250