2010 MERCEDES-BENZ SLS COUPE ECU
[x] Cancel search: ECUPage 262 of 361
R
brake sharply
R change direction suddenly
R are involved in an accident
Only use the cup holders for containers of a
suitable size and which have lids. Otherwise,
the drinks could spill.
Cup holders should not be used for hot drinks.
Otherwise, you may scald yourself. X
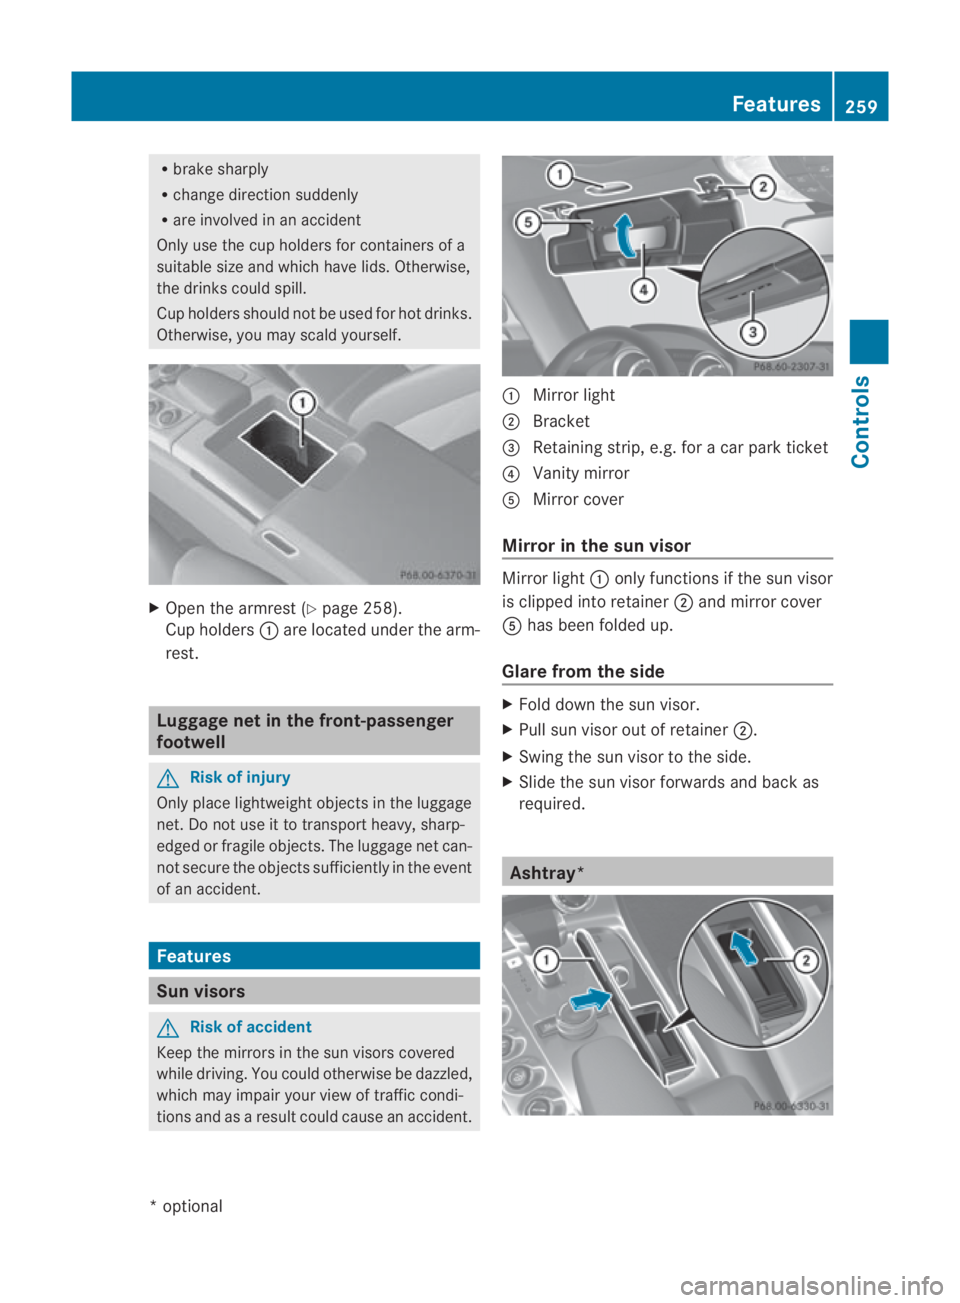
Open the armrest (Y page 258).
Cup holders 0001are located under the arm-
rest. Luggage net in the front-passenger
footwell
G
Risk of injury
Only place lightweight objects in the luggage
net. Do not use it to transport heavy, sharp-
edged or fragile objects. The luggage net can-
not secure the objects sufficiently in the event
of an accident. Features
Sun visors
G
Risk of accident
Keep the mirrors in the sun visors covered
while driving .You could otherwise be dazzled,
which may impair your view of traffic condi-
tions and as a result could cause an accident. 0001
Mirror light
0002 Bracket
0015 Retaining strip, e.g. for a car park ticket
0014 Vanity mirror
0012 Mirror cover
Mirror in the sun visor Mirror light
0001only functions if the sun visor
is clipped into retainer 0002and mirror cover
0012 has been folded up.
Glare from the side X
Fold down the sun visor.
X Pull sun visor out of retainer 0002.
X Swing the sun visor to the side.
X Slide the sun visor forwards and back as
required. Ashtray* Features
259Controls
*optional
BA 197 ECE RE 2010/6a; 1; 2, en-GB
sabbaeu
Version: 3.0.3.6 2010-05-07T14:19:43+02:00 - Seite 259 Z
Page 267 of 361
Deleting the remote control memory
X
Selec tkey position 2with the Start/Stop
button (Y page 202).
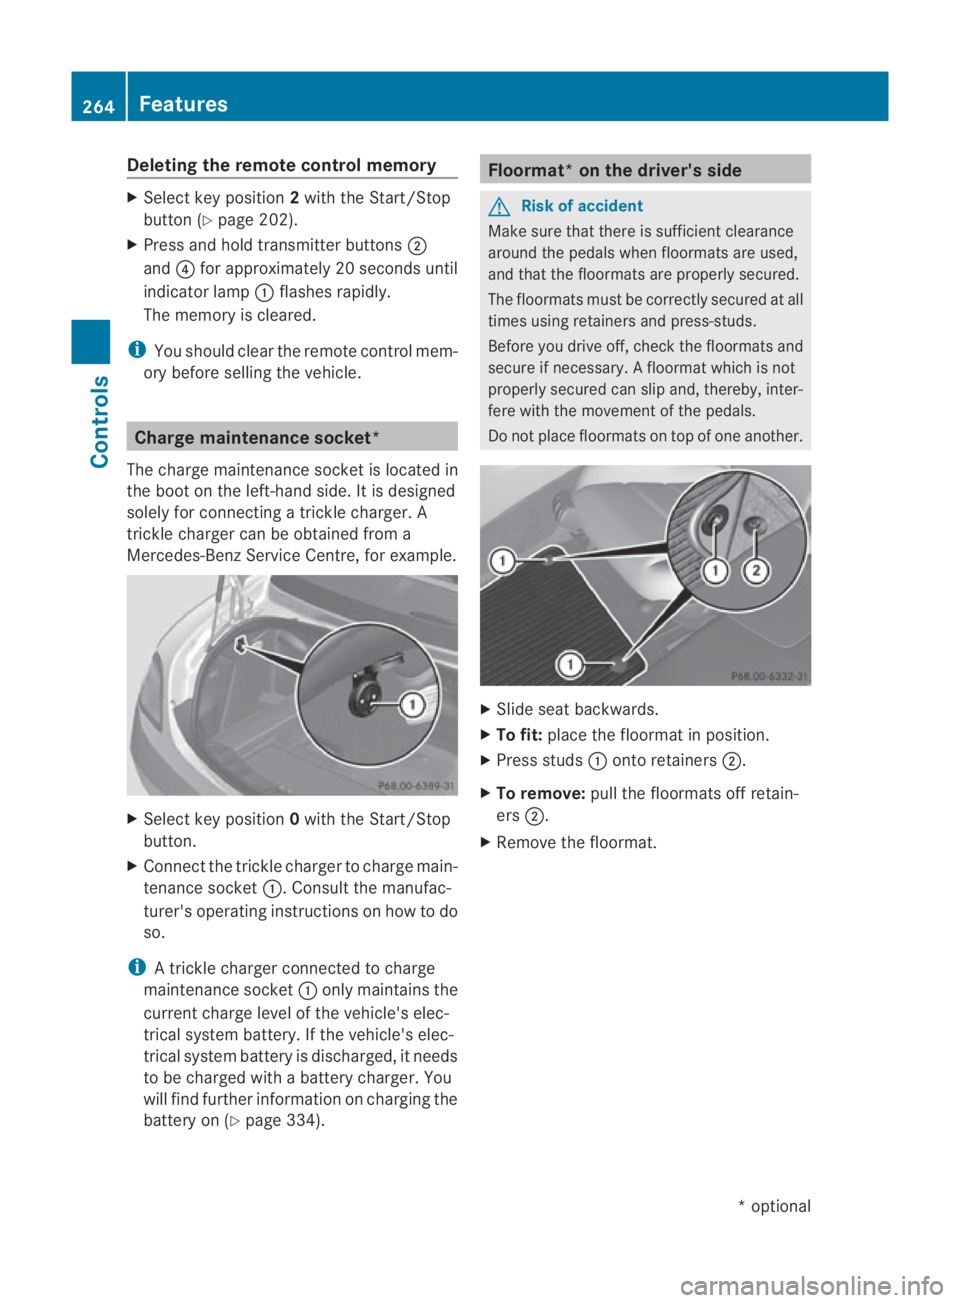
X Press and hold transmitter buttons 0002
and 0014for approximately 20 seconds until
indicator lamp 0001flashes rapidly.
The memory is cleared.
i You should clear the remot econtrol mem-
ory before selling the vehicle. Charge maintenance socket*
The charge maintenance socket is located in
the boot on the left-hand side. It is designed
solely for connecting a trickle charger. A
trickle charger can be obtained from a
Mercedes-Benz Service Centre, for example. X
Select key position 0with the Start/Stop
button.
X Connect the trickle charger to charge main-
tenance socket 0001. Consult the manufac-
turer's operating instructions on how to do
so.
i A trickle charger connected to charge
maintenance socket 0001only maintains the
current charge level of the vehicle's elec-
trical system battery. If the vehicle's elec-
trical system battery is discharged, it needs
to be charged with a battery charger. You
will find further information on charging the
battery on (Y page 334). Floormat* on the driver's side
G
Risk of accident
Make sure that there is sufficient clearance
around the pedals when floormats are used,
and that the floormats are properly secured.
The floormats must be correctly secured at all
times using retainers and press-studs.
Before you drive off, check the floormats and
secure if necessary. Afloormat which is not
properly secured can slip and, thereby, inter-
fere with the movemen tofthe pedals.
Do not place floormats on top of one another. X
Slide seat backwards.
X To fit: place the floormat in position.
X Press studs 0001onto retainers 0002.
X To remove: pull the floormats off retain-
ers 0002.
X Remove the floormat. 264
FeaturesControls
*o
ptional
BA 197 ECE RE 2010/6a; 1; 2, en-GB
sabbaeu
Version: 3.0.3.6 2010-05-07T14:19:43+02:00 - Seite 264
Page 272 of 361
i
If the bonnet can be raised slightly, it is
not properly engaged. Open it again and
close it with a little more force. Engine oil
Depending on driving style, the vehicle con-
sumes a maximum of 0.8 l oil per 1000 km.
The oil consumption may be highert han this
when the vehicle is new or if you frequently
drive at high engine speeds.
Checking the engine oil level X
To check the engine oil, move the vehicle
to level ground. Switch off the engine at
normal operating temperature after run-
ning it in neutral for 30 seconds. X
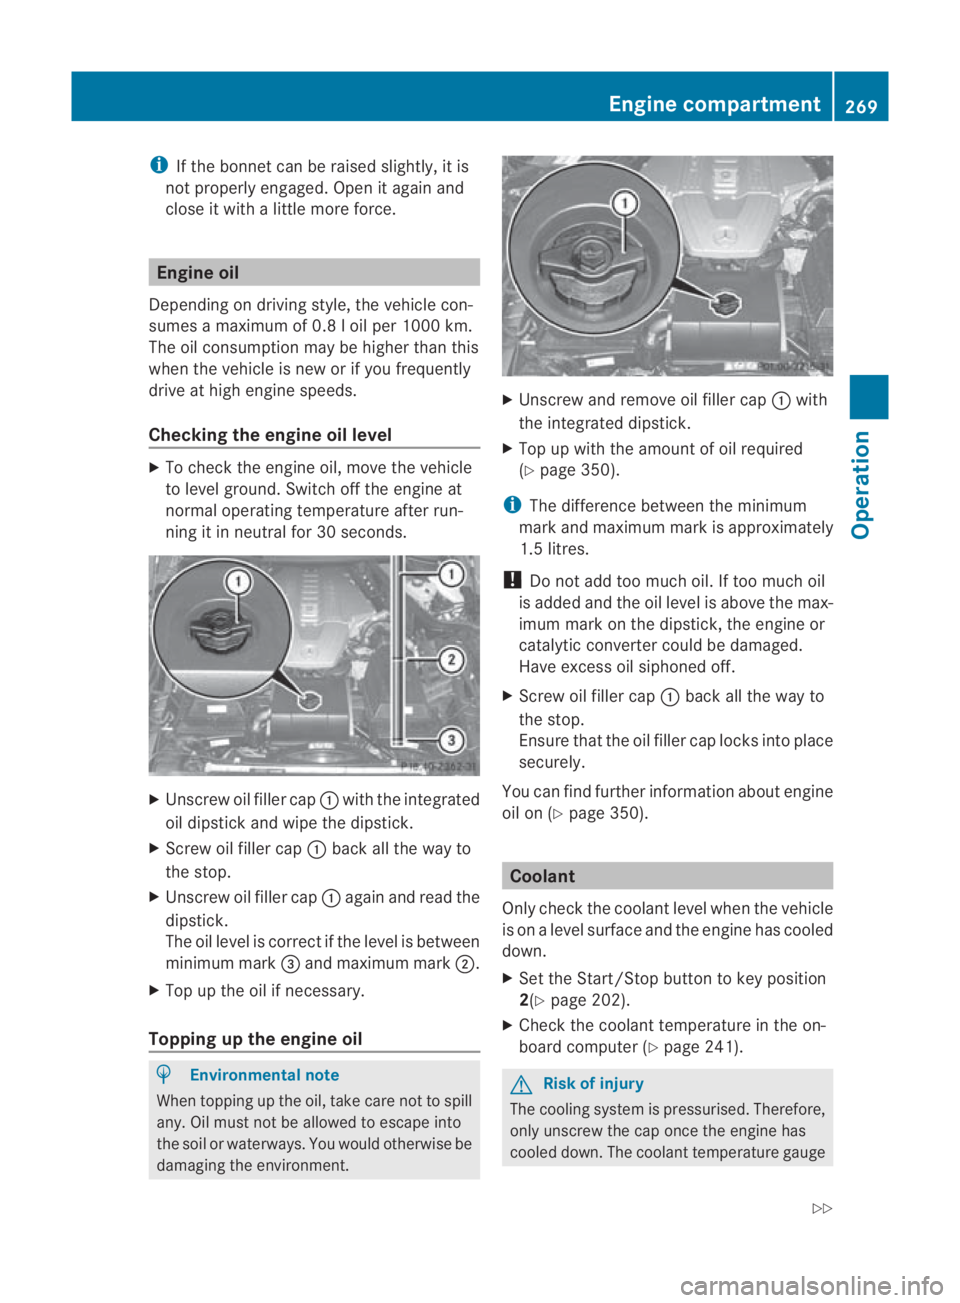
Unscrew oil filler cap 0001with the integrated
oil dipstick and wipe the dipstick.
X Screw oil filler cap 0001back all the way to
the stop.
X Unscrew oil filler cap 0001again and read the
dipstick.
The oil level is correct if the level is between
minimum mark 0015and maximum mark 0002.
X Top up the oil if necessary.
Topping up the engine oil H
Environmental note
When topping up the oil, take care not to spill
any. Oil must not be allowed to escape into
the soil or waterways. You would otherwise be
damaging the environment. X
Unscrew and remove oil filler cap 0001with
the integrated dipstick.
X Top up with the amount of oil required
(Y page 350).
i The difference between the minimum
mark and maximum mark is approximately
1.5 litres.
! Do not add too much oil. If too much oil
is added and the oil level is above the max-
imum mark on the dipstick, the engine or
catalytic converter could be damaged.
Have excess oil siphoned off.
X Screw oil filler cap 0001back all the way to
the stop.
Ensure that the oil filler cap locks into place
securely.
You can find further information about engine
oil on (Y page 350). Coolant
Only check the coolant level when the vehicle
is on a level surface and the engine has cooled
down.
X Set the Start/Stop button to key position
2(Y page 202).
X Check the coolant temperature in the on-
board computer (Y page 241). G
Risk of injury
The cooling system is pressurised. Therefore,
only unscrew the cap once the engine has
cooled down. The coolant temperature gauge Engine compartment
269Operation
BA 197 ECE RE 2010/6a; 1; 2, en-GB
sabbaeu Version: 3.0.3.6 2010-05-07T14:19:43+02:00 - Seite 269 Z
Page 291 of 361
Where will I find...?
Warning triangle
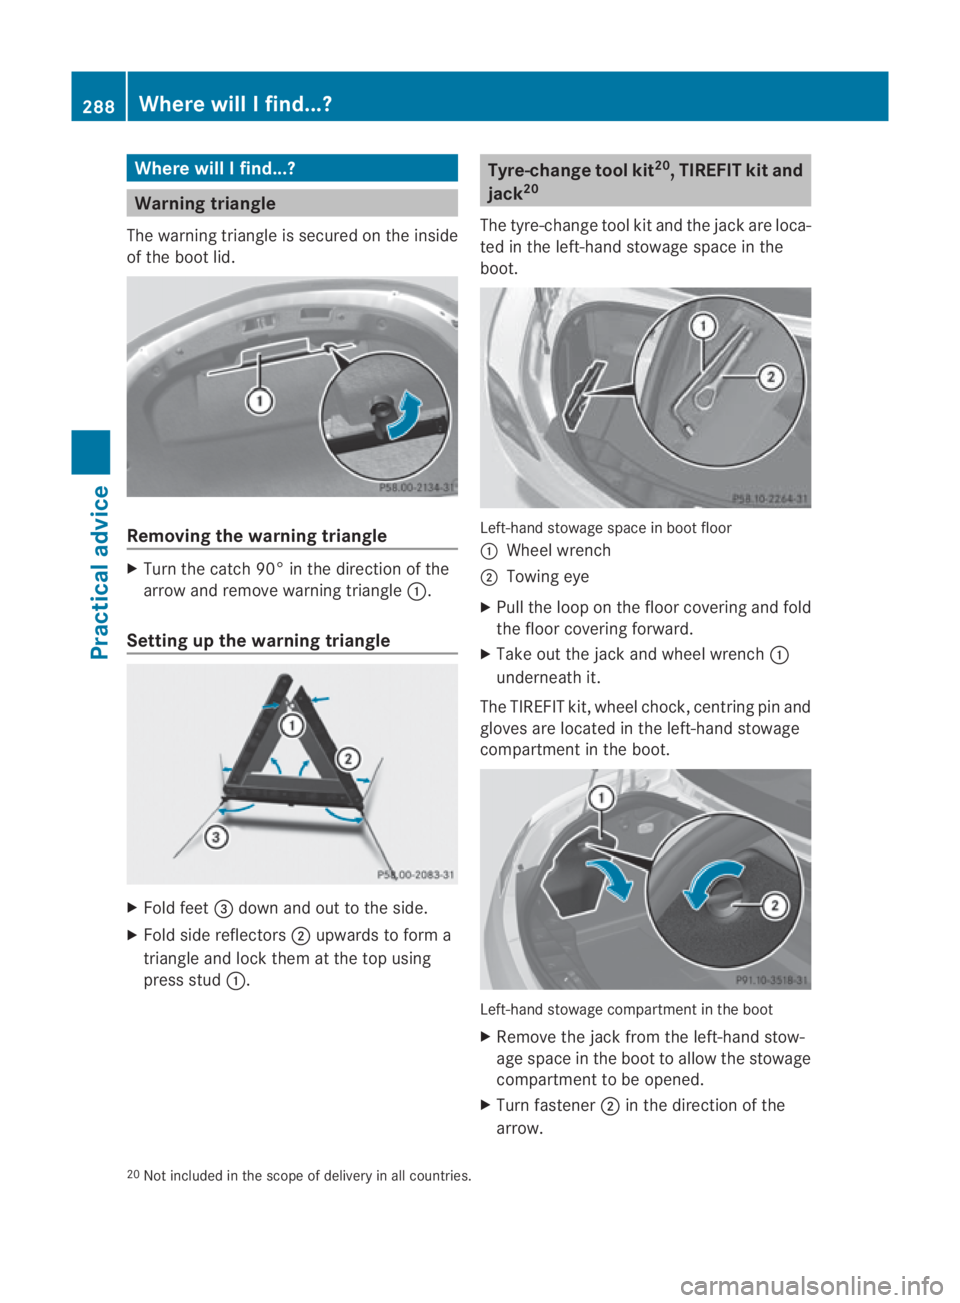
The warning triangle is secured on the inside
of the boot lid. Removing the warning triangle
X
Turn the catch 90° in the direction of the
arrow and remove warning triangle 0001.
Setting up the warning triangle X
Fold feet 0015dow nand ou tto the side.
X Fold side reflectors 0002upwards to form a
triangle and lock them at the top using
press stud 0001. Tyre-change tool kit
20
, TIREFIT kit and
jack 20
The tyre-change tool kit and the jack are loca-
ted in the left-hand stowage space in the
boot. Left-hand stowage space in boot floor
0001
Wheel wrench
0002 Towing eye
X Pull the loop on the floor covering and fold
the floor covering forward.
X Take out the jack and wheel wrench 0001
underneath it.
The TIREFIT kit, wheel chock, centring pin and
gloves are located in the left-hand stowage
compartment in the boot. Left-hand stowage compartment in the boot
X
Remove the jack from the left-hand stow-
age space in the boot to allow the stowage
compartment to be opened.
X Turn fastener 0002in the direction of the
arrow.
20 Not included in the scope of delivery in all countries. 288
Where will I find...?Practical advice
BA 197 ECE RE 2010/6a; 1; 2, en-GB
sabbaeu Version: 3.0.3.6 2010-05-07T14:19:43+02:00 - Seite 288
Page 315 of 361
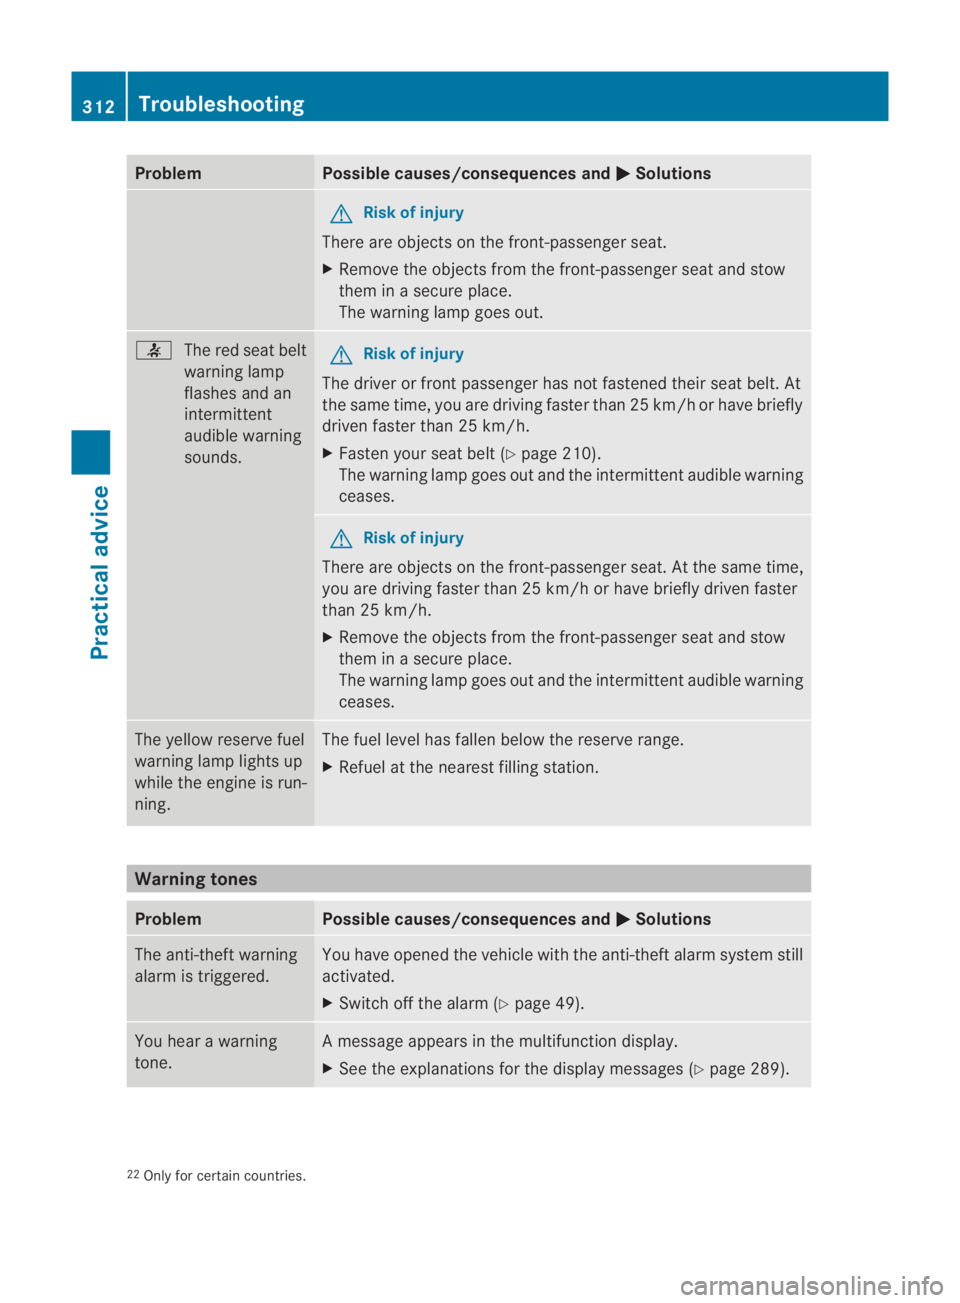
Problem Possible causes/consequences and
0003 Solutions
G
Risk of injury
There are objects on the front-passenger seat.
X Remove the objects from the front-passenger seat and stow
them in a secure place.
The warning lamp goes out. 0019
The red seat belt
warning lamp
flashes and an
intermittent
audible warning
sounds. G
Risk of injury
The driver or front passenger has not fastened their seat belt. At
the same time, you are driving faster than 25 km/ho rhave briefly
driven faster than 25 km/h.
X Faste nyour seat belt (Y page 210).
The warning lamp goes out and the intermittent audible warning
ceases. G
Risk of injury
There are objects on the front-passenger seat. At the same time,
you are driving faster than 25 km/h or have briefly driven faster
than 25 km/h.
X Remove the objects from the front-passenger seat and stow
them in a secure place.
The warning lamp goes out and the intermittent audible warning
ceases. The yellow reserve fuel
warning lamp lights up
while the engine is run-
ning. The fuel level has fallen below the reserve range.
X
Refuel at the nearest filling station. Warning tones
Problem Possible causes/consequences and
0003 Solutions
The anti-theft warning
alarm is triggered. You have opened the vehicle with the anti-theft alarm system still
activated.
X
Switch off the alarm (Y page 49).You hear a warning
tone. Am
essage appears in the multifunction display.
X See the explanations for the display messages ( Ypage 289). 22
Only for certain countries. 312
TroubleshootingPractical advice
BA 197 ECE RE 2010/6a; 1; 2, en-GB
sabbaeu
Version: 3.0.3.6 2010-05-07T14:19:43+02:00 - Seite 312
Page 333 of 361
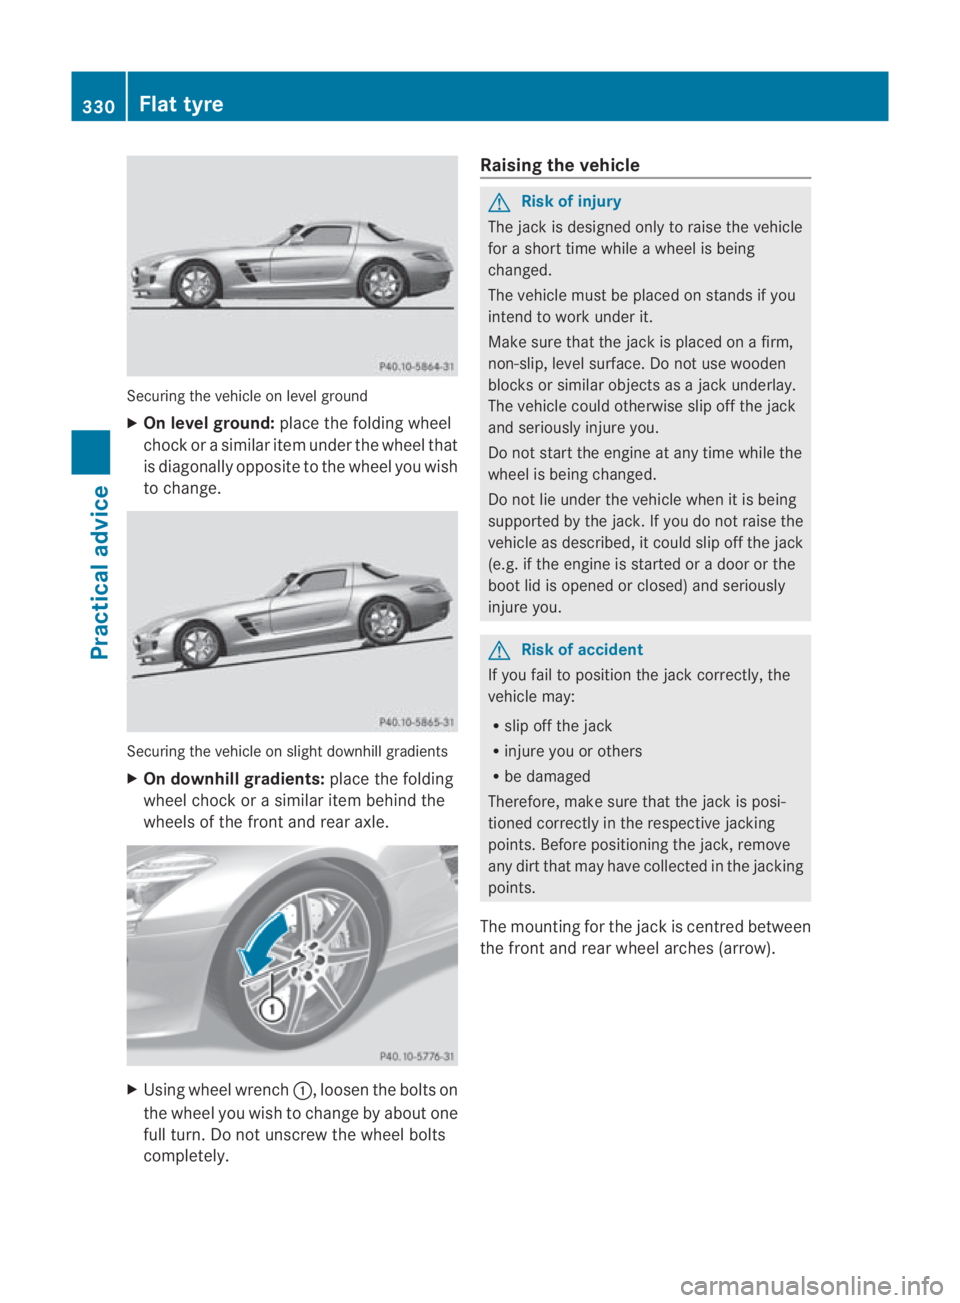
Securing the vehicle on level ground
X
On level ground: place the folding wheel
chock or a similar item under the wheel that
is diagonally opposite to the wheel you wish
to change. Securing the vehicle on slight downhill gradients
X On downhill gradients: place the folding
wheel chock or a similar item behind the
wheels of the front and rea raxle. X
Using wheel wrench 0001, loosenthe bolts on
the wheel you wish to change by about one
full turn. Do not unscrew the wheel bolts
completely. Raising the vehicle G
Risk of injury
The jack is designed only to raise the vehicle
for a short time while awheel is being
changed.
The vehicle must be placed on stands if you
intend to work under it.
Make sure that the jack is placed on a firm,
non-slip, level surface. Do not use wooden
blocks or similar objects as a jack underlay.
The vehicle could otherwise slip off the jack
and seriously injure you.
Do not start the engine at any time while the
wheel is being changed.
Do not lie under the vehicle when it is being
supported by the jack. If you do not raise the
vehicle as described, it could slip off the jack
(e.g. if the engine is started or a door or the
boot lid is opened or closed) and seriously
injure you. G
Risk of accident
If you fail to position the jack correctly, the
vehicle may:
R slip off the jack
R injure you or others
R be damaged
Therefore, make sure that the jack is posi-
tioned correctly in the respective jacking
points. Before positioning the jack, remove
any dirt that may have collected in the jacking
points.
The mounting for the jack is centred between
the front and rear wheel arches (arrow). 330
Flat tyrePractical advice
BA 197 ECE RE 2010/6a; 1; 2, en-GB
sabbaeu
Version: 3.0.3.6 2010-05-07T14:19:43+02:00 - Seite 330
Page 340 of 361
Reconnecting the battery
! Always connect the battery in the order
described below .Never swap the terminal
clamps. You may otherwise damage the
vehicle electronics.
X To reconnect the battery: switch off all
electrical consumers (e.g. radio, blower,
etc.).
X Connec tthe positive terminal clamp and
secure the cover.
X Connect the negative terminal clamp.
X Connect the breather hose.
X Close the bonnet.
i If the battery power supply has been inter-
rupted (e.g. if the battery has been recon-
nected), you must reset the function for
folding the exterior mirrors in/out auto-
matically* by folding the mirrors out once
(Y page 209). Battery
337Practical advice
*optional
BA 197 ECE RE 2010/6a; 1; 2, en-GB
sabbaeu
Version: 3.0.3.6 2010-05-07T14:19:43+02:00 - Seite 337 Z
Page 343 of 361
Towing the vehicle with the rear axle
raised !
The engine must be switched off (key in
ignition lock in position 0or position 1) if
the vehicle is being towed with the front
axle raised or if the parking brake is being
tested on a dynamometer. Otherwise,
intervention by ESP ®
could damage the
brake system.
Towing the vehicle with atow rope or
tow bar G
Ris
kofa ccident
If the brake system is malfunctioning, you
must use a rigid tow bar to tow the vehicle.
Before towing away, mak esure that the steer-
ing can be moved and is not locked.
If there is a malfunctio ninthe power supply
or the vehicle's electrical system, you must
not tow the vehicle. G
Risk of accident
The following can occur if the vehicle is towed:
R the engine may not start.
R the on-board electronics may fail.
R the battery voltage may drop too much.
In these cases, the rear axle will be locked.
As a result, you might lose control of the vehi-
cle, cause an accident and injure yourself and
others.
! Use the key instead of the Start/Stop
button when towing the vehicle.
Start the engine and keep it running. Turn
the key to position 2in the ignition. Set the
transmission selector lever to N.Make sure
that you then leave the key in position 2.
Chec kthe transmission position in the
instrument cluster. When towing the vehicle, proceed as follows:
X
Insert the key into the ignition lock
(Y page 203).
X Start the engine and leave the key in the
ignition.
X Move the transmission selector lever to N.
X Check the transmission position in the
instrumentc luster display (Y page 227).
X Leave the engine running during the entire
towing procedure.
Also observe the following notes:
R When towing, observe the legal require-
ments in all countries concerned.
R If the engine does not start, try jump-start-
ing it (Y page 338). Tow-starting the vehicle
is not permitted.
R If it is not possible to jump-star tthe vehicle,
have it transported to the nearest qualified
specialist workshop, e.g. aMercedes-Benz
Service Centre.
R If the transmission has been damaged,
have the vehicle transported to the nearest
qualified specialist workshop, e.g. a
Mercedes-Benz Service Centre. Observe
the display messages in the instrument
cluster.
R If you are towing the vehicle over a longer
distance, this must be done with the rear
axle raised.
! Make sure that the electric parking brake
is released. If the electric parking brake is
faulty, visit a qualified specialist workshop.
Mercedes-Benzr ecommends that you use
a Mercedes-Benz Service Centre.
! When towing, pull away slowly and
smoothly. If the tractive power is too high,
the vehicles could be damaged.
! Only secure the tow cable or towing bar
to the towing eyes. You could otherwise
damage the vehicle.
! Do not use the towing eye for recovery,
as this could damage the vehicle. If in
doubt, recover the vehicle with a crane. 340
Towing and tow-startingPractical advice
BA 197 ECE RE 2010/6a; 1; 2, en-GB
sabbaeu
Version: 3.0.3.6 2010-05-07T14:19:43+02:00 - Seite 340