2010 MERCEDES-BENZ SLK55AMG warning light
[x] Cancel search: warning lightPage 95 of 312

Activating the instrument cluster
The instrument cluster is activated when you
R open the driver’s door
R switch on the ignition
R press reset button .
R switch on the exterior lamps
i Opening the driver’s door or pressing the
reset button . without switching on the
ignition or the exterior lamps activates the
instrument cluster illumination only for
30 seconds. Adjusting the instrument cluster
illumination
X To brighten illumination: Press knob :
briefly.
X To dim illumination: Press knob ;
briefly.
The illumination brightness for the instrument
cluster changes each time you press
knob :
or ;. Several settings are possible.
i The instrument cluster illumination is
dimmed or brightened automatically to suit
ambient light conditions.
You can only adjust the brightness of the
instrument cluster illumination when it is
dark outside.
i With the exterior lighting switched on, the
brightness of the switches in the center
console will also be adjusted when using
knob : or ;. Resetting trip odometer
X Make sure you are viewing the standard
display
(Y page 96) in the multifunction
display.
X Press and hold reset button .
until the trip
odometer is reset. Tachometer
The red marking on the tachometer
(Y
page 26) denotes excessive engine speed.
! Avoid driving at excessive engine speeds,
as it may result in serious engine damage
that is not covered by the Mercedes-Benz
Limited Warranty.
To help protect the engine, the fuel supply is
interrupted if the engine is operated within
the red marking. Clock
In vehicles with the audio system, the clock
can be set via the control system
(Y page 105).
For setting the time with the COMAND
system, see separate COMAND system
operating instructions. Control system
Introduction
The
control system is activated as soon as the
starter switch is in position 1.
The control system enables you to call up
information about your vehicle and to change
vehicle settings.
For example, you can use the control system
to find out when your vehicle is next due for
maintenance service, to set the language for
messages in the instrument cluster display,
and much more. G
Warning!
A driver’s attention to the road and traffic
conditions must always be his/her primary
focus when driving.
For your safety and the safety of others,
selecting features through the multifunction
steering wheel should only be done by the
driver
when traffic and road conditions permit
it to be done safely. Control system
93
Controls in detail
171_AKB; 3; 60, en-US
d2ureepe, Version: 2.11.8.1 2009-05-11T16:00:23+02:00 - Seite 93 Z
Page 104 of 312

simply a reminder with respect to the
operation of certain systems. They do not
replace the owner’s and/or driver’s
responsibility to maintain the vehicle’s
operating safety. Have all required
maintenance and safety checks performed on
the vehicle. Bring the vehicle to an authorized
Mercedes-Benz Center to address the
malfunction and warning messages.
X Press button V or U repeatedly until
the Vehicle status message memory
menu appears in the multifunction display.
If conditions have occurred causing status
messages to be recorded, the number of
messages appears in the multifunction
display. :
Number of recorded status messages
X Press button & or *.
The stored messages will now be displayed
in the order in which they have occurred.
For malfunction and warning messages,
see “Vehicle status messages in the
multifunction display” ( Y page 236).
Should the vehicle’s system record any
conditions while driving, the number of
messages will reappear in the multifunction
display when the SmartKey in the starter
switch is turned to position 0 or removed
from the starter switch.
Except for high-priority messages, the vehicle
status message memory will be cleared when
you switch off the ignition. Settings menu
Introduction In the
Settings menu there are two
functions: The function To reset, push
reset button for 3 seconds, with which
you can reset all the settings to the original
factory settings and a collection of submenus
with which you can make individual settings
for your vehicle.
The following settings and submenus are
available in the Settings menu:
R Resetting to factory settings
(Y page 102)
R Submenus in the Settings menu
(Y page 103)
R Instrument cluster submenu
(Y page 103)
R Time/Date submenu ( Y page 105)
R Lighting submenu ( Y page 105)
R Vehicle submenu ( Y page 108)
R Convenience submenu ( Y page 108)
Resetting to factory settings You can reset the settings of all submenus to
the factory settings.
For safety reasons, the function
Headlamp
Mode in the Lighting submenu cannot be
reset while driving.
X Press button V or U repeatedly until
the Settings menu appears in the
multifunction display. 102
Control systemControls in detail
171_AKB; 3; 60, en-US
d2ureepe,
Version: 2.11.8.1 2009-05-11T16:00:23+02:00 - Seite 102
Page 110 of 312
X
Move the selection marker with button
W or X to the Lighting submenu.
X Press button & or * repeatedly until
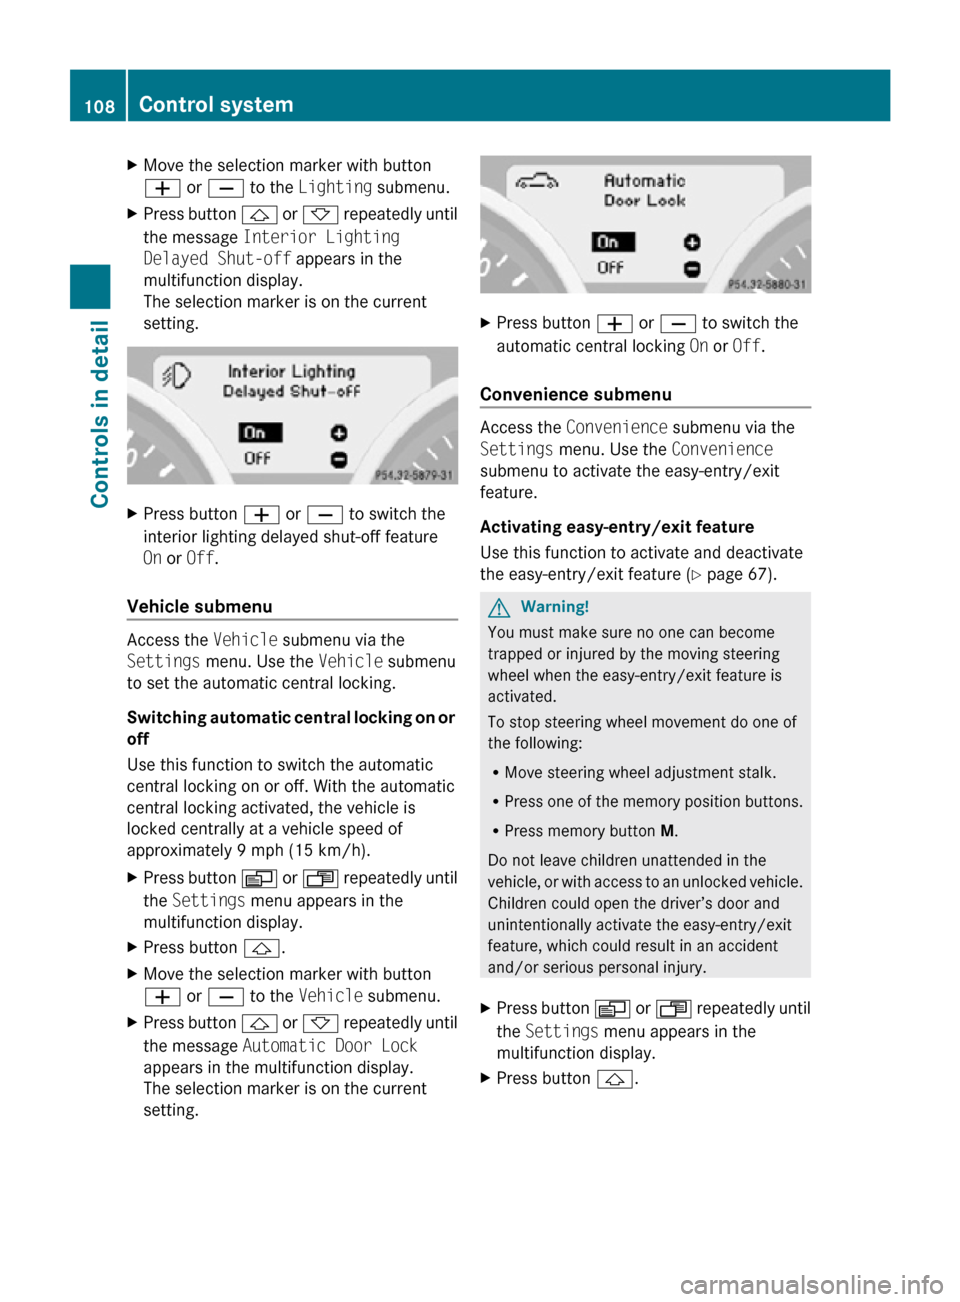
the message Interior Lighting
Delayed Shut-off appears in the
multifunction display.
The selection marker is on the current
setting. X
Press button W or X to switch the
interior lighting delayed shut-off feature
On or Off.
Vehicle submenu Access the
Vehicle submenu via the
Settings menu. Use the Vehicle submenu
to set the automatic central locking.
Switching automatic central locking on or
off
Use this function to switch the automatic
central locking on or off. With the automatic
central locking activated, the vehicle is
locked centrally at a vehicle speed of
approximately 9 mph (15 km/h).
X Press button V or U repeatedly until
the Settings menu appears in the
multifunction display.
X Press button &.
X Move the selection marker with button
W or X to the Vehicle submenu.
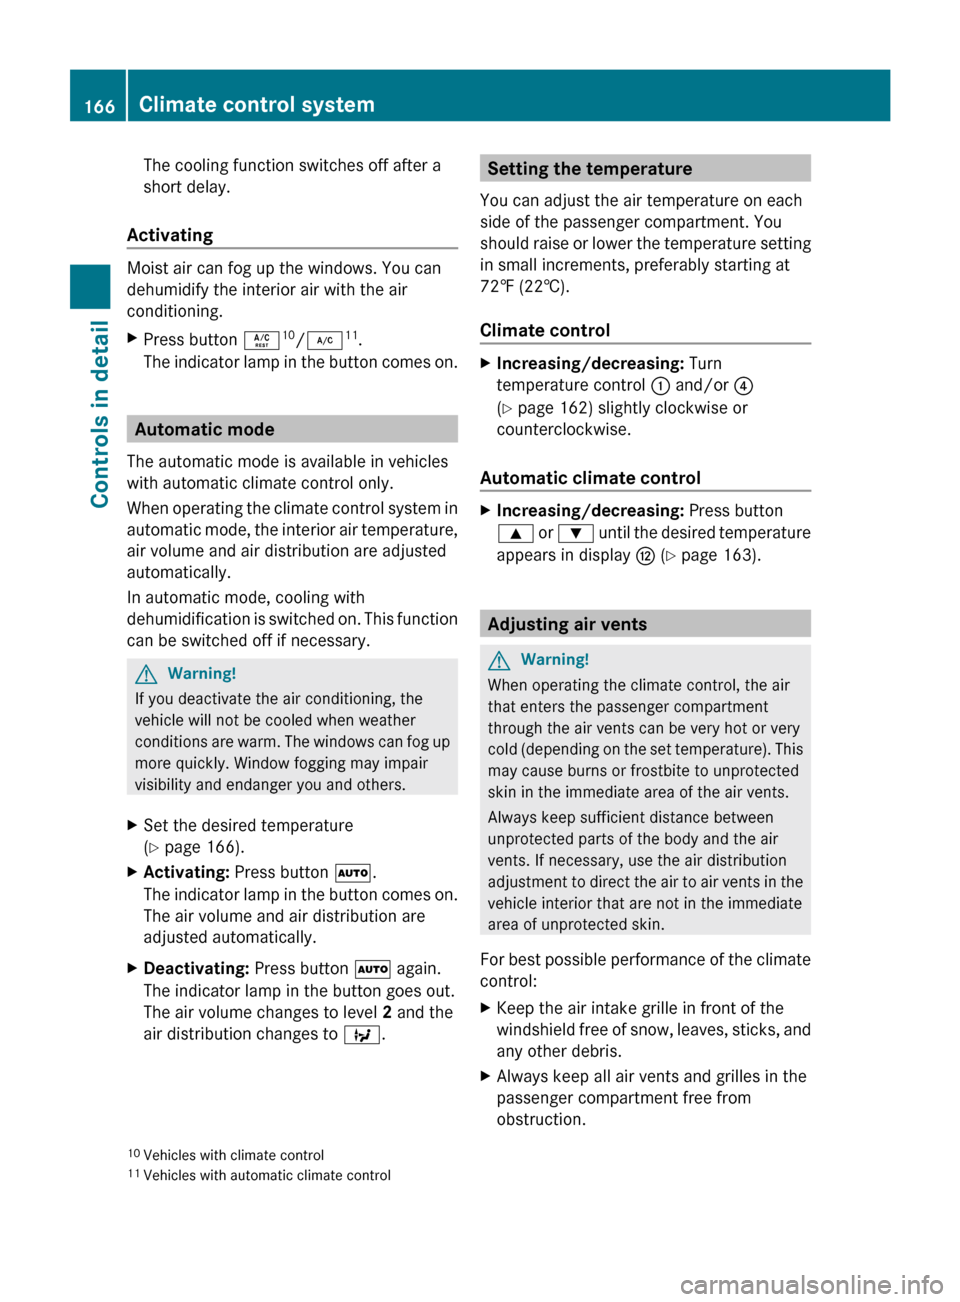
X Press button & or * repeatedly until
the message Automatic Door Lock
appears in the multifunction display.
The selection marker is on the current
setting. X
Press button W or X to switch the
automatic central locking On or Off.
Convenience submenu Access the
Convenience submenu via the
Settings menu. Use the Convenience
submenu to activate the easy-entry/exit
feature.
Activating easy-entry/exit feature
Use this function to activate and deactivate
the easy-entry/exit feature (Y page 67). G
Warning!
You must make sure no one can become
trapped or injured by the moving steering
wheel when the easy-entry/exit feature is
activated.
To stop steering wheel movement do one of
the following:
R Move steering wheel adjustment stalk.
R Press one of the memory position buttons.
R Press memory button M.
Do not leave children unattended in the
vehicle, or with access to an unlocked vehicle.
Children could open the driver’s door and
unintentionally activate the easy-entry/exit
feature, which could result in an accident
and/or serious personal injury.
X Press button V or U repeatedly until
the Settings menu appears in the
multifunction display.
X Press button &. 108
Control systemControls in detail
171_AKB; 3; 60, en-US
d2ureepe,
Version: 2.11.8.1 2009-05-11T16:00:23+02:00 - Seite 108
Page 137 of 312
Loading Disc
display.
i The loading process may take a while,
depending on the type of disc. If you do not
insert a disc, the display will switch back to
the CD changer menu after approximately
20 seconds.
X Press button h, or the load/eject
button V on the audio control unit to
finish the loading process.
The CD changer plays the disc if it has been
inserted correctly and is permissible.
X Interrupting loading procedure: Press
the load/eject button again.
Filling an empty magazine compartment
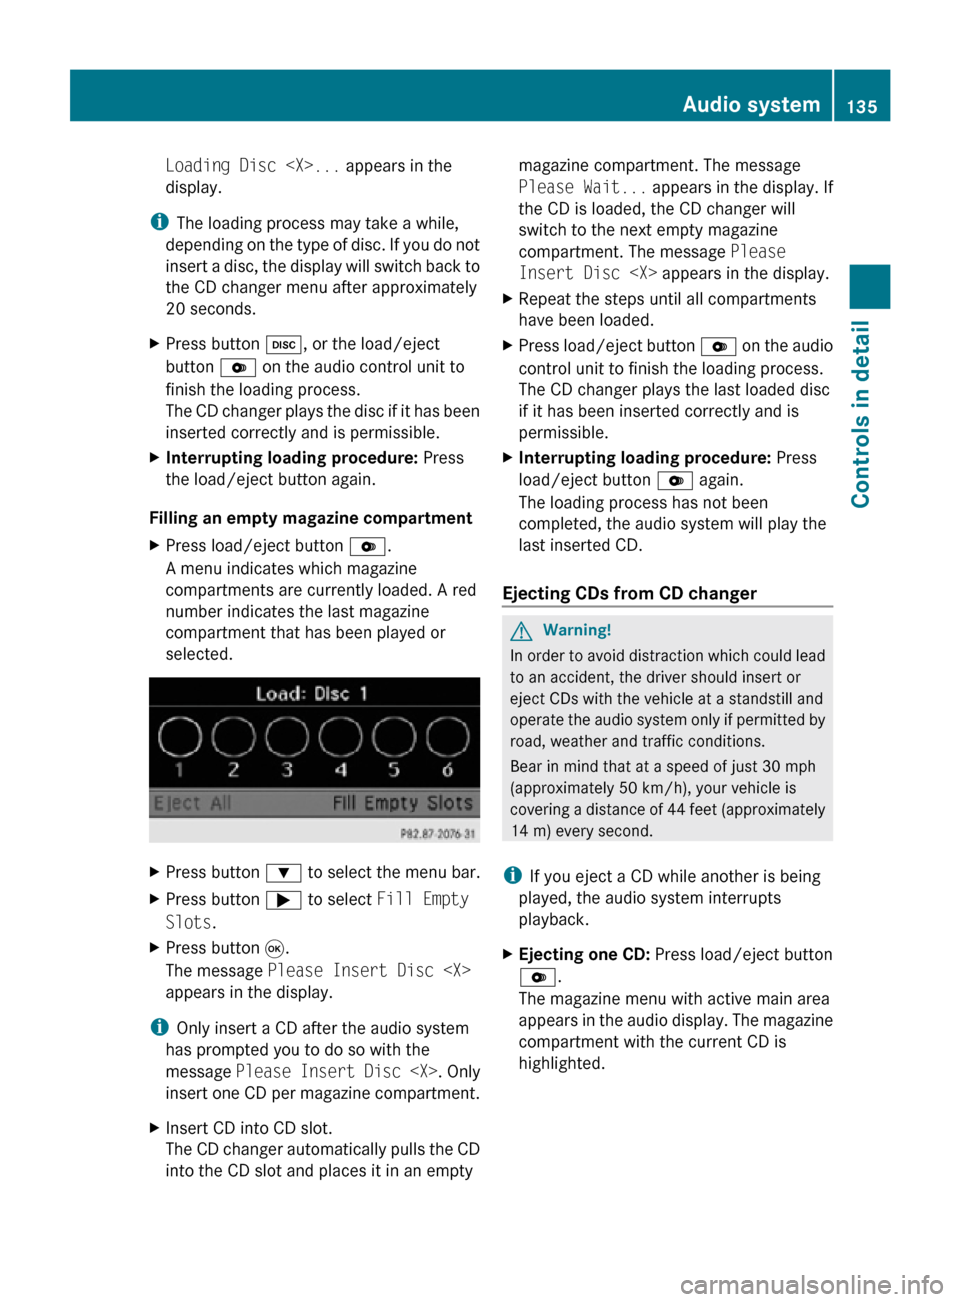
X Press load/eject button V.
A menu indicates which magazine
compartments are currently loaded. A red
number indicates the last magazine
compartment that has been played or
selected. X
Press button : to select the menu bar.
X Press button ; to select Fill Empty
Slots.
X Press button 9.
The message Please Insert Disc
appears in the display.
i Only insert a CD after the audio system
has prompted you to do so with the
message Please Insert Disc
insert one CD per magazine compartment.
X Insert CD into CD slot.
The CD changer automatically pulls the CD
into the CD slot and places it in an empty magazine compartment. The message
Please Wait...
appears in the display. If
the CD is loaded, the CD changer will
switch to the next empty magazine
compartment. The message Please
Insert Disc
X Repeat the steps until all compartments
have been loaded.
X Press load/eject button V on the audio
control unit to finish the loading process.
The CD changer plays the last loaded disc
if it has been inserted correctly and is
permissible.
X Interrupting loading procedure: Press
load/eject button V again.
The loading process has not been
completed, the audio system will play the
last inserted CD.
Ejecting CDs from CD changer G
Warning!
In order to avoid distraction which could lead
to an accident, the driver should insert or
eject CDs with the vehicle at a standstill and
operate the audio system only if permitted by
road, weather and traffic conditions.
Bear in mind that at a speed of just 30 mph
(approximately 50 km/h), your vehicle is
covering a distance of 44 feet (approximately
14 m) every second.
i If you eject a CD while another is being
played, the audio system interrupts
playback.
X Ejecting one CD: Press load/eject button
V.
The magazine menu with active main area
appears in the audio display. The magazine
compartment with the current CD is
highlighted. Audio system
135Controls in detail
171_AKB; 3; 60, en-US
d2ureepe, Version: 2.11.8.1 2009-05-11T16:00:23+02:00 - Seite 135 Z
Page 147 of 312
has been read-in completely, the first list
entry with the entered initial letter is
highlighted.
i If no match is found, the last entry that
matches a previous initial letter is
highlighted.
The quality of the search results depends
on the version and the language of the
software, e.g. iTunes™ used to store data
on the iPod ®
or MP3 player.
USB storage media
i This function is only available for
alphabetically ordered files. It is not
available for playlists.
X Press the respective keypad button once or
multiple times to enter the initial letter of
the desired artist name.
The available initial letters are displayed.
If the file system contains folders only, the
system searches for folders and the
message Please Wait... appears. Once
the search is concluded, the first list entry
with the entered initial letter is highlighted.
If this is not the case, the system searches
for tracks. The message Please Wait...
appears. Once the search is concluded, the
first list entry with the entered initial letter
is highlighted.
Select active partition USB storage media may contain up to
4 partitions (primary or logical; formatted to
FAT16 or FAT32).
X
Selecting partition: h Q Media
Inter QSelect Active Partition.
Playback options The following options are available:
R
Normal Track Sequence
Tracks are played in standard order (e.g.
numerical or alphabetical order).
R Random Tracks Tracks are played in random order.
R Random Categories or Random Folder
(when folder was selected on USB storage
medium)
Tracks of the current category or of the
current folder are played in random order. Audio AUX mode
i This section applies to vehicles without
media interface only.
An external audio source can be connected
to the AUX socket of the audio system. Please
contact an authorized Mercedes-Benz Center
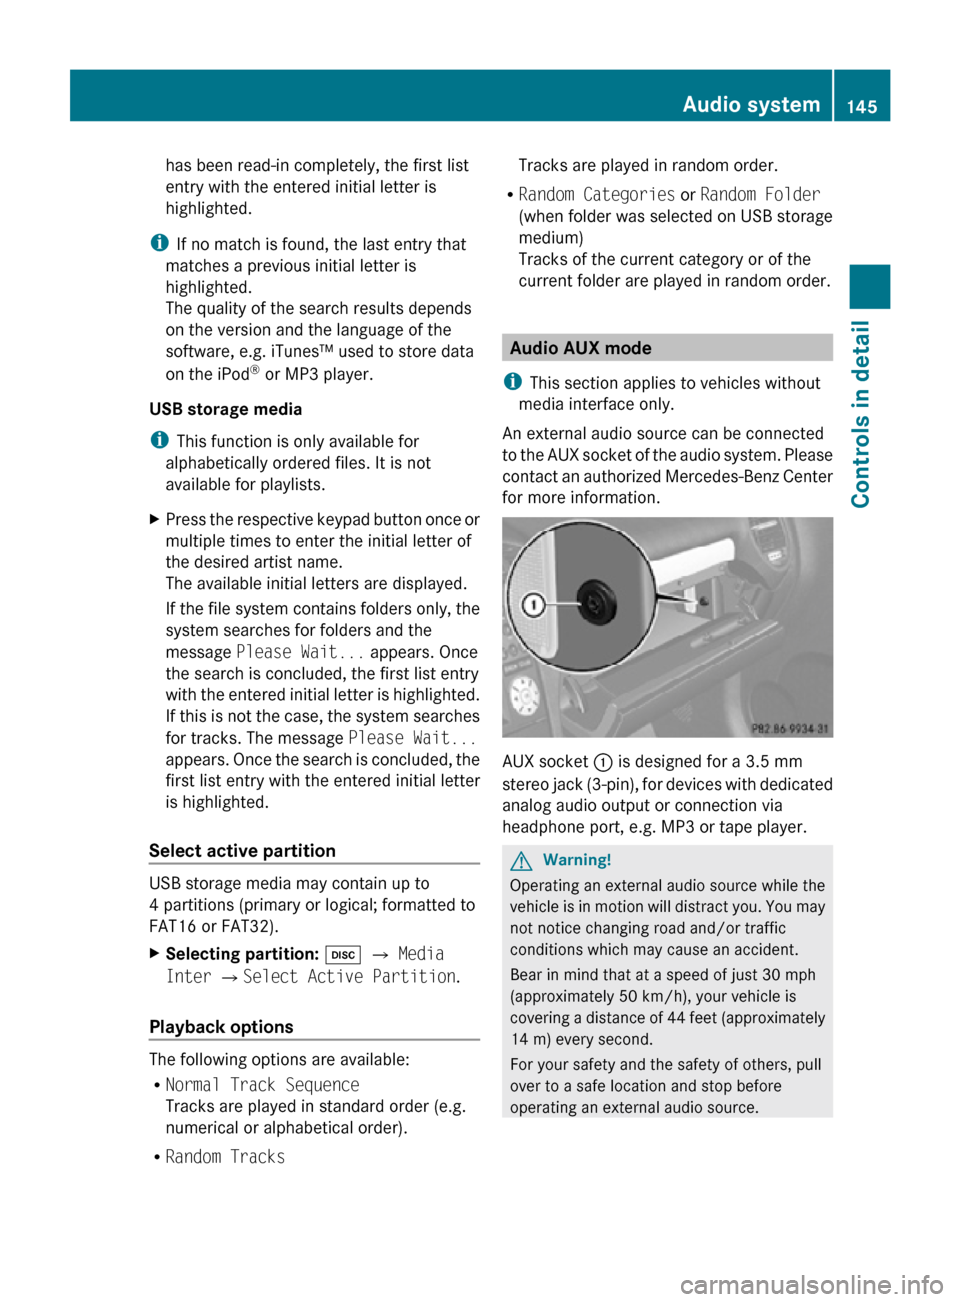
for more information. AUX socket
: is designed for a 3.5 mm
stereo jack (3-pin), for devices with dedicated
analog audio output or connection via
headphone port, e.g. MP3 or tape player. G
Warning!
Operating an external audio source while the
vehicle is in motion will distract you. You may
not notice changing road and/or traffic
conditions which may cause an accident.
Bear in mind that at a speed of just 30 mph
(approximately 50 km/h), your vehicle is
covering a distance of 44 feet (approximately
14 m) every second.
For your safety and the safety of others, pull
over to a safe location and stop before
operating an external audio source. Audio system
145Controls in detail
171_AKB; 3; 60, en-US
d2ureepe, Version: 2.11.8.1 2009-05-11T16:00:23+02:00 - Seite 145 Z
Page 168 of 312
The cooling function switches off after a
short delay.
Activating Moist air can fog up the windows. You can
dehumidify the interior air with the air
conditioning.
X
Press button Á 10
/¿ 11
.
The indicator lamp in the button comes on. Automatic mode
The automatic mode is available in vehicles
with automatic climate control only.
When
operating the climate control system in
automatic mode, the interior air temperature,
air volume and air distribution are adjusted
automatically.
In automatic mode, cooling with
dehumidification is switched on. This function
can be switched off if necessary. G
Warning!
If you deactivate the air conditioning, the
vehicle will not be cooled when weather
conditions
are warm. The windows can fog up
more quickly. Window fogging may impair
visibility and endanger you and others.
X Set the desired temperature
(Y page 166).
X Activating: Press button Ã.
The
indicator lamp in the button comes on.
The air volume and air distribution are
adjusted automatically.
X Deactivating: Press button à again.
The indicator lamp in the button goes out.
The air volume changes to level 2 and the
air distribution changes to Q. Setting the temperature
You can adjust the air temperature on each
side of the passenger compartment. You
should
raise or lower the temperature setting
in small increments, preferably starting at
72‡ (22†).
Climate control X
Increasing/decreasing: Turn
temperature control : and/or ?
(Y page 162) slightly clockwise or
counterclockwise.
Automatic climate control X
Increasing/decreasing: Press button
9
or : until the desired temperature
appears in display H (Y page 163). Adjusting air vents
G
Warning!
When operating the climate control, the air
that enters the passenger compartment
through the air vents can be very hot or very
cold
(depending on the set temperature). This
may cause burns or frostbite to unprotected
skin in the immediate area of the air vents.
Always keep sufficient distance between
unprotected parts of the body and the air
vents. If necessary, use the air distribution
adjustment to direct the air to air vents in the
vehicle interior that are not in the immediate
area of unprotected skin.
For best possible performance of the climate
control:
X Keep the air intake grille in front of the
windshield
free of snow, leaves, sticks, and
any other debris.
X Always keep all air vents and grilles in the
passenger compartment free from
obstruction.
10 Vehicles with climate control
11 Vehicles with automatic climate control 166
Climate control system
Controls in detail
171_AKB; 3; 60, en-US
d2ureepe,
Version: 2.11.8.1 2009-05-11T16:00:23+02:00 - Seite 166
Page 176 of 312
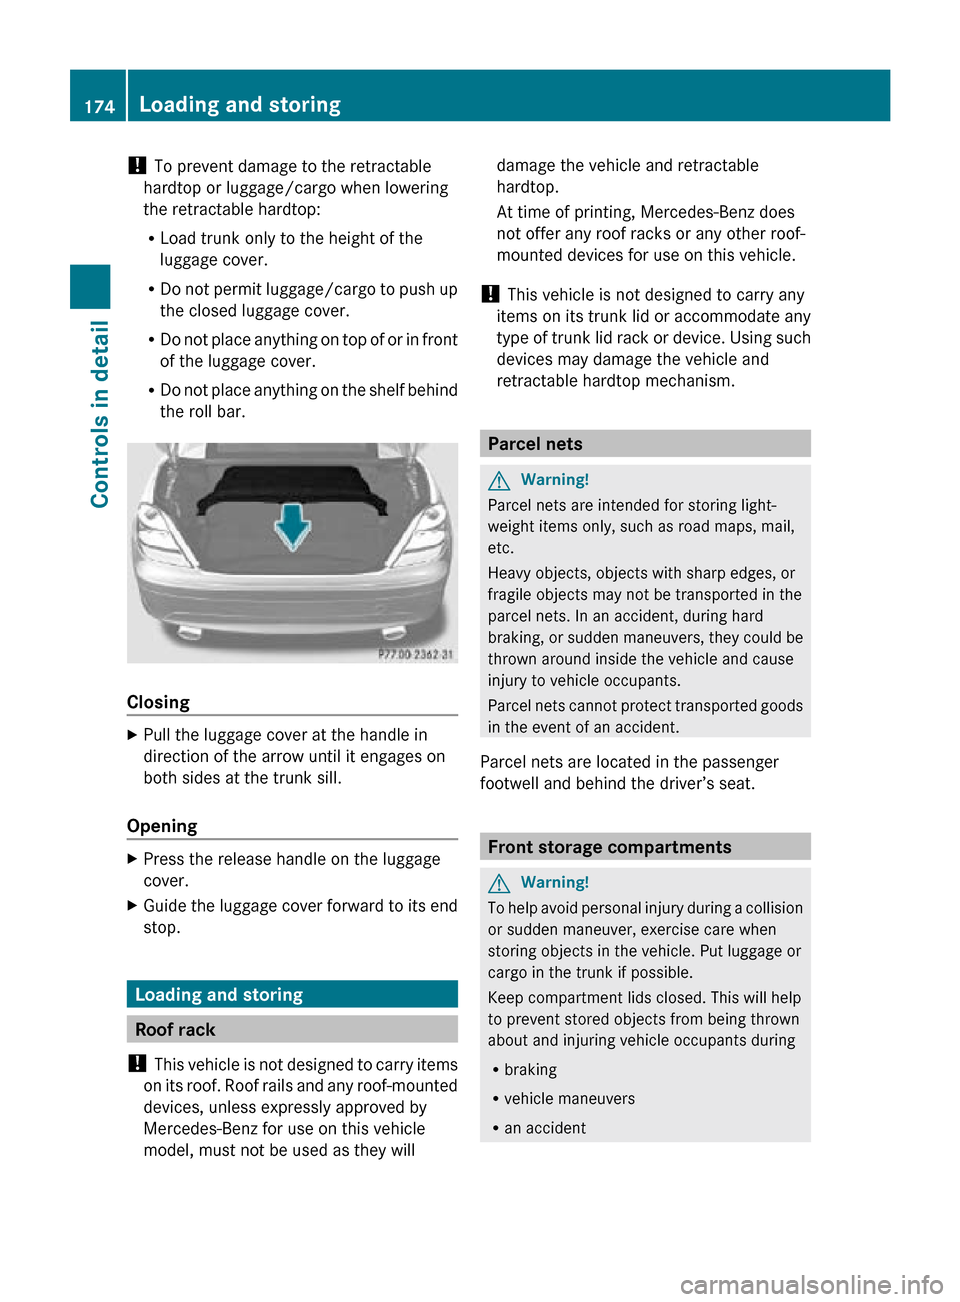
!
To prevent damage to the retractable
hardtop or luggage/cargo when lowering
the retractable hardtop:
R Load trunk only to the height of the
luggage cover.
R Do not permit luggage/cargo to push up
the closed luggage cover.
R Do not place anything on top of or in front
of the luggage cover.
R Do not place anything on the shelf behind
the roll bar. Closing
X
Pull the luggage cover at the handle in
direction of the arrow until it engages on
both sides at the trunk sill.
Opening X
Press the release handle on the luggage
cover.
X Guide the luggage cover forward to its end
stop. Loading and storing
Roof rack
! This vehicle is not designed to carry items
on its roof. Roof rails and any roof-mounted
devices, unless expressly approved by
Mercedes-Benz for use on this vehicle
model, must not be used as they will damage the vehicle and retractable
hardtop.
At time of printing, Mercedes-Benz does
not offer any roof racks or any other roof-
mounted devices for use on this vehicle.
! This vehicle is not designed to carry any
items on its trunk lid or accommodate any
type of trunk lid rack or device. Using such
devices may damage the vehicle and
retractable hardtop mechanism. Parcel nets
G
Warning!
Parcel nets are intended for storing light-
weight items only, such as road maps, mail,
etc.
Heavy objects, objects with sharp edges, or
fragile objects may not be transported in the
parcel nets. In an accident, during hard
braking, or sudden maneuvers, they could be
thrown around inside the vehicle and cause
injury to vehicle occupants.
Parcel nets cannot protect transported goods
in the event of an accident.
Parcel nets are located in the passenger
footwell and behind the driver’s seat. Front storage compartments
G
Warning!
To help avoid personal injury during a collision
or sudden maneuver, exercise care when
storing objects in the vehicle. Put luggage or
cargo in the trunk if possible.
Keep compartment lids closed. This will help
to prevent stored objects from being thrown
about and injuring vehicle occupants during
R braking
R vehicle maneuvers
R an accident 174
Loading and storingControls in detail
171_AKB; 3; 60, en-US
d2ureepe,
Version: 2.11.8.1 2009-05-11T16:00:23+02:00 - Seite 174
Page 178 of 312

Useful features
Cup holder
G
Warning!
In order to help prevent spilling liquids on
vehicle occupants and/or vehicle equipment,
only use containers that fit into the cup
holder. Use lids on open containers and do
not fill containers to a height where the
contents, especially hot liquids, could spill
during braking, vehicle maneuvers, or in an
accident. Liquids spilled on vehicle occupants
may cause serious personal injury. Liquids
spilled on vehicle equipment may cause
damage not covered by the Mercedes-Benz
Limited Warranty.
When not in use, keep the cup holder closed.
An open cup holder may cause injury to you
or others when contacted during braking,
vehicle maneuvers, or in an accident.
Keep in mind that objects placed in the cup
holder may come loose during braking,
vehicle maneuvers, or in an accident and be
thrown around in the vehicle interior. Objects
thrown around in the vehicle interior may
cause an accident and/or serious personal
injury. X
Opening: Press briefly on cover plate :.
X Closing: Press cover plate : until the cup
holder engages. Sun visors
G
Warning!
Do not use the vanity mirror while driving.
Keep the vanity mirrors in the sun visors
closed while vehicle is in motion. Reflected
glare can endanger you and others. :
Vanity mirror lamp
; Mounting
= Holder, e.g. for gas cards
? Vanity mirror
A Sun visor
B Vanity mirror cover
Glare through the windshield X
Flip sun visor A down when you
experience glare.
Glare through a door window i
This feature is only available on vehicles
with interior lighting package.
X Close vanity mirror cover B if opened.
X Disengage sun visor A from mounting ;.
X Pivot sun visor A to the side.
X Adjust sun visor A by pushing or pulling.
Vanity mirror The vanity mirror lamp only functions when
the sun visor is engaged in mounting ;.176
Useful featuresControls in detail
171_AKB; 3; 60, en-US
d2ureepe,
Version: 2.11.8.1 2009-05-11T16:00:23+02:00 - Seite 176