2010 MERCEDES-BENZ SLK300 lock
[x] Cancel search: lockPage 185 of 312
(1-800-367-6372) (USA only) or
1-888-923-8367
(Canada only).
You will be asked to provide your password.
X Then return to your vehicle at the time
arranged with the Customer Assistance
Center and pull the trunk recessed handle
for a minimum of 20 seconds until the
indicator
lamp in the SOS button is flashing.
The message Connecting Call appears in
the multifunction display.
As an alternative, you may unlock the vehicle
via Internet in the “My Tele Aid” section of
“Owner’s
Online”, using your ID and password
(USA only).
i The remote door unlock feature is
available if the relevant cellular phone
network is available.
The SOS button will flash and the message
Connecting Call will appear in the
multifunction display to indicate receipt of
the door unlock command.
If the trunk recessed handle was pulled for
more than 20 seconds before door unlock
authorization was received by the
Customer Assistance Center, you must
wait 15 minutes before pulling the trunk
recessed handle again.
Stolen Vehicle Recovery Services In the event your vehicle was stolen:
X
Report the incident to the police.
The police will issue a numbered incident
report.
X Pass this number on to the Customer
Assistance Center along with your
password.
The Customer Assistance Center will then
attempt to covertly contact the vehicle’s
Tele Aid system. Once the vehicle is
located, the Customer Assistance Center
will contact the local law enforcement and
you. The vehicle’s location will only be
provided to law enforcement.
i If the anti-theft alarm or the tow-away
alarm stays on for more than 30 seconds, a call to the Customer Assistance Center is
initiated automatically by the Tele Aid
system provided Tele Aid service was
subscribed to and properly activated, and
that necessary cellular service and GPS
coverage are available. See “Anti-theft
alarm system”
(Y page 51) and “Tow-away
alarm” ( Y page 52). Garage door opener
The
integrated remote control can operate up
to three separately controlled devices
compatible with HomeLink ®
or some other
systems. G
Warning!
Before programming the integrated remote
control to a garage door opener or gate
operator, make sure people and objects are
out of the way of the device to prevent
potential harm or damage. When
programming
a garage door opener, the door
moves up or down. When programming a gate
operator, the gate opens or closes.
Do not use the integrated remote control with
any garage door opener that lacks safety stop
and reverse features as required by U.S.
federal safety standards (this includes any
garage door opener model manufactured
before April 1, 1982). A garage door that
cannot detect an object - signaling the door
to stop and reverse - does not meet current
U.S. federal safety standards.
When programming a garage door opener,
park vehicle outside the garage.
Do not run the engine while programming the
integrated remote control. Inhalation of
exhaust gas is hazardous to your health. All
exhaust gas contains carbon monoxide (CO),
and inhaling it can cause unconsciousness
and possible death. Useful features
183
Controls in detail
171_AKB; 3; 60, en-US
d2ureepe, Version: 2.11.8.1 2009-05-11T16:00:23+02:00 - Seite 183 Z
Page 193 of 312

fuel is not covered by the Mercedes-Benz
Limited Warranty.
! If you have accidentally filled the tank
with incorrect or non-approved fuel, do not
switch on the ignition. Otherwise the
incorrect or non-approved fuel will get into
the fuel lines. The fuel system must be
drained completely. Contact an authorized
Mercedes-Benz Center to have the fuel
system drained completely.
! To prevent damage to the catalytic
converters, only use premium unleaded
gasoline in this vehicle.
Any noticeable irregularities in engine
operation should be repaired promptly.
Otherwise, excessive unburned fuel may
reach the catalytic converter, causing it to
overheat and potentially start a fire.
i Only use premium unleaded gasoline with
a minimum Posted Octane Rating of 91
(average of 96 RON/86 MON).
Information on gasoline quality can
normally be found on the fuel pump. Please
contact gas station personnel in case
labels on the pump cannot be found.
For more information on gasoline, see
“Premium unleaded gasoline”
(Y page 303), see “Fuel requirements”
(Y page 303), or contact an authorized
Mercedes-Benz Center, or visit
www.mbusa.com (USA only).
Locking/unlocking the vehicle with the
SmartKey automatically locks/unlocks the
fuel filler flap.
i In case the central locking system does
not release the fuel filler flap, or the
opening mechanism is clamping, contact
Roadside Assistance or an authorized
Mercedes-Benz Center.
The fuel filler flap is located on the right-hand
side of the vehicle towards the rear. X
Turn off the engine.
i Leaving the engine running and the fuel
filler cap open can cause the yellow fuel
tank reserve warning lamp to flash and the
malfunction indicator lamp ! (USA
only) or ; (Canada only) to illuminate.
For more information, see also “Practical
hints” (Y page 262).
X Remove the SmartKey from the starter
switch.
X Opening: Press fuel filler flap : at the
point indicated by the arrow.
X Turn fuel filler cap ; counterclockwise.
X Take off fuel filler cap ;.
X Place fuel filler cap ; in direction of arrow
into holder =.
X Fully insert filler nozzle unit and refuel.
X Only fill your tank until the filler nozzle unit
cuts out – do not top off or overfill .
X Closing: Turn fuel filler cap ; clockwise
until it audibly engages.
i Close the fuel filler flap before locking the
vehicle. Otherwise the flap locking pin will
prevent closing the fuel filler flap.
X Close fuel filler flap :. Check regularly and before a long trip
For information on quantities and
requirements of operating agents, see “Fuels,
coolants, lubricants, etc.” (Y page 300). At the gas station
191Operation
171_AKB; 3; 60, en-US
d2ureepe, Version: 2.11.8.1 2009-05-11T16:00:23+02:00 - Seite 191 Z
Page 194 of 312
Check the following:
R
Engine oil level ( Y page 193)
R Tire inflation pressure ( Y page 201)
R Coolant level ( Y page 196)
R Vehicle lighting ( Y page 267)
R Washer system and headlamp cleaning
system (Y page 196)
R Brake fluid ( Y page 197) Engine compartment
Hood
G
Warning!
Do not pull the release lever while the vehicle
is in motion. Otherwise the hood could be
forced open by passing air flow.
This could cause the hood to come loose and
injure you and/or others.
Opening G
Warning!
Do not open the hood when the engine is
overheated. You could be seriously injured.
Observe the coolant temperature display to
determine whether the engine may be
overheated. If you see flames or smoke
coming from the engine compartment, move
away from the vehicle. Wait until the engine
has cooled. If necessary, call the fire
department. G
Warning!
You could be injured when the hood is open –
even when the engine is turned off.
Parts of the engine can become very hot. To
prevent burns, let the engine cool completely
before touching any components on the
vehicle. Comply with all relevant safety
precautions. G
Warning!
To help prevent personal injury, stay clear of
moving parts when the hood is open and the
engine is running.
The radiator fan may continue to run for
approximately 30 seconds or may even
restart after the engine has been turned off.
Stay clear of fan blades. G
Warning!
The engine is equipped with a transistorized
ignition system. Because of the high voltage
it is dangerous to touch any components
(ignition coils, spark plug sockets, diagnostic
socket) of the ignition system
R with the engine running
R while starting the engine
R when the ignition is switched on and the
engine is turned manually X
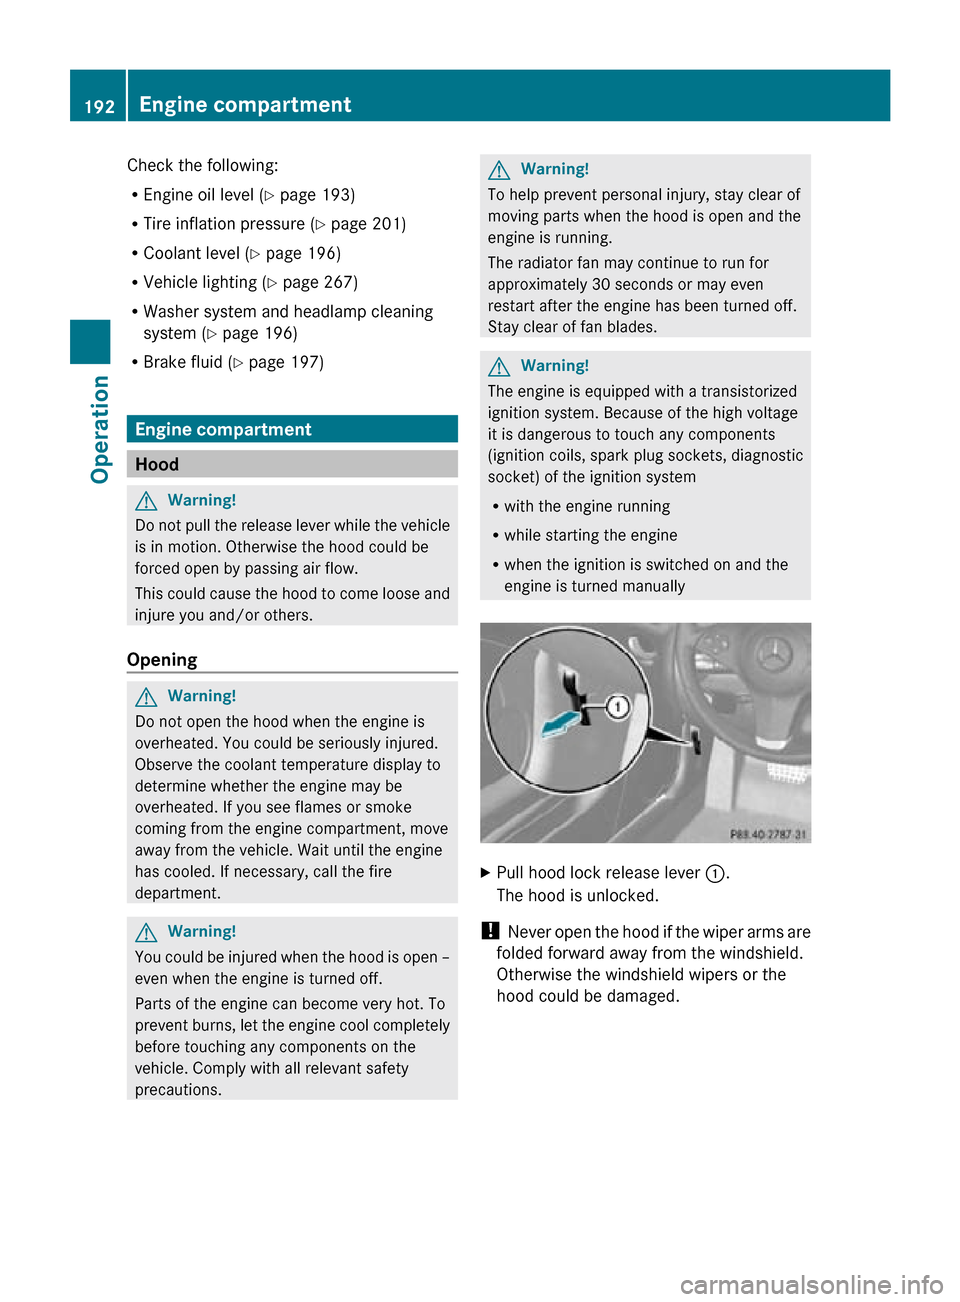
Pull hood lock release lever :.
The hood is unlocked.
! Never open the hood if the wiper arms are
folded forward away from the windshield.
Otherwise the windshield wipers or the
hood could be damaged. 192
Engine compartmentOperation
171_AKB; 3; 60, en-US
d2ureepe,
Version: 2.11.8.1 2009-05-11T16:00:23+02:00 - Seite 192
Page 198 of 312

authorized Mercedes-Benz Center check the
transmission.
Coolant level
The engine coolant is a mixture of water and
anticorrosion/antifreeze.
When checking the coolant level, the vehicle
must be parked on level ground, and the
coolant temperature must be below 158‡
(70†). G
Warning!
In order to avoid any potentially serious burns:
R Use extreme caution when opening the
hood if there are any signs of steam or
coolant leaking from the cooling system, or
if the coolant temperature display indicates
that the coolant is overheated.
R Do not remove the cap on the coolant
expansion tank if the coolant temperature
is above 158‡ (70†). Allow the engine to
cool down before removing the cap. The
coolant expansion tank contains hot fluid
and is under pressure.
R Using a rag, slowly open the cap
approximately 1
/ 2 turn counterclockwise
to relieve excess pressure. If opened
immediately, scalding hot fluid and steam
will be blown out under pressure.
R Do not spill antifreeze on hot engine parts.
Antifreeze contains ethylene glycol which
may burn if it comes into contact with hot
engine parts. Example illustration: SLK 350
X
Using a rag, slowly open cap ;
approximately 1
/ 2 turn counterclockwise
to relieve excess pressure.
X Continue turning cap ; counterclockwise
and remove it.
The coolant level is correct if the level
R for cold coolant: reaches marking bar
= in coolant expansion tank :
R for warm coolant: is approximately 0.6 in
(1.5 cm) higher
X Add coolant as required.
X Screw cap ; back on and tighten it.
For more information on coolant, see the
“Technical data” section ( Y page 301) and
(Y page 304). Washer system and headlamp
cleaning system
G
Warning!
Washer solvent/antifreeze is highly
flammable. Do not spill washer solvent/
antifreeze on hot engine parts, because it may
ignite and burn. You could be seriously
burned.
! Always use washer solvent/antifreeze
where temperatures may fall below
freezing point. Failure to do so could result
in damage to the washer system/fluid
reservoir. 196
Engine compartmentOperation
171_AKB; 3; 60, en-US
d2ureepe,
Version: 2.11.8.1 2009-05-11T16:00:23+02:00 - Seite 196
Page 229 of 312
in the Maintenance Booklet will result in
engine damage and/or other vehicle
damage
not covered by the Mercedes-Benz
Limited Warranty. Vehicle care
Cleaning and care of the vehicle
Notes Regular and proper care will help to maintain
the value of your vehicle.
G
Warning!
Many cleaning products can be hazardous.
Some are poisonous, others are flammable.
Always follow the instructions on the
particular container. Always open your
vehicle’s
doors or windows when cleaning the
inside.
Never use fluids or solvents that are not
designed for cleaning your vehicle.
Always lock away cleaning products and keep
them out of reach of children.
! When cleaning the vehicle, do not use
scouring agents. Never apply strong force
and only use a soft, wet cloth or sponge.
Otherwise you may scratch or damage the
surface to be cleaned.
While in operation, even while parked, your
vehicle is subjected to varying external
influences which, if gone unchecked, can
attack the paintwork as well as the vehicle
underbody and cause lasting damage.
Such damage is caused not only by extreme
and varying climatic conditions, but also by:
R Air pollution
R Road salt
R Tar
R Gravel and stone chipping To avoid paint damage, you should
immediately remove:
R
Grease and oil
R Fuel
R Coolant
R Brake fluid
R Bird droppings
R Insects
R Tree resins etc.
Frequent
washing reduces and/or eliminates
the aggressiveness and potency of the above
adverse influences.
More frequent washings are necessary to
deal with unfavorable conditions:
R near the ocean
R in industrial areas (smoke, exhaust
emissions)
R during winter operation
You should check your vehicle from time to
time for stone chipping or other damage. Any
damage should be repaired as soon as
possible to prevent corrosion.
In doing so, do not neglect the underbody of
the vehicle. A prerequisite for a thorough
check is a washing of the underbody followed
by a thorough inspection. Damaged areas
need to be re-undercoated.
Your vehicle has been treated at the factory
with a wax-base rustproofing in the body
cavities which will last for the lifetime of the
vehicle. Post-production treatment is neither
necessary nor recommended by Mercedes-
Benz because of the possibility of
incompatibility between materials used in the
production process and others applied later.
We have selected vehicle-care products and
compiled recommendations which are
specially matched to our vehicles and which
always reflect the latest technology. You can
obtain Mercedes-Benz approved vehicle-care
products at an authorized Mercedes-Benz
Center. Vehicle care
227
Operation
171_AKB; 3; 60, en-US
d2ureepe, Version: 2.11.8.1 2009-05-11T16:00:23+02:00 - Seite 227 Z
Page 235 of 312
Vehicle equipment ............................
234
Where will I find ...? .......................... 234
Vehicle status messages in the
multifunction display ....................... 236
What to do if … .................................. 256
Unlocking/locking manually ...........264
Opening/closing manually ..............266
Replacing SmartKey batteries ......... 266
Replacing bulbs ................................. 267
Replacing wiper blades ....................271
Flat tire .............................................. 273
Battery ............................................... 282
Jump starting .................................... 283
Towing the vehicle ............................285
Fuses .................................................. 288 233Practical hints
171_AKB; 3; 60, en-US
d2ureepe,
Version: 2.11.8.1 2009-05-11T16:00:23+02:00 - Seite 233
Page 237 of 312
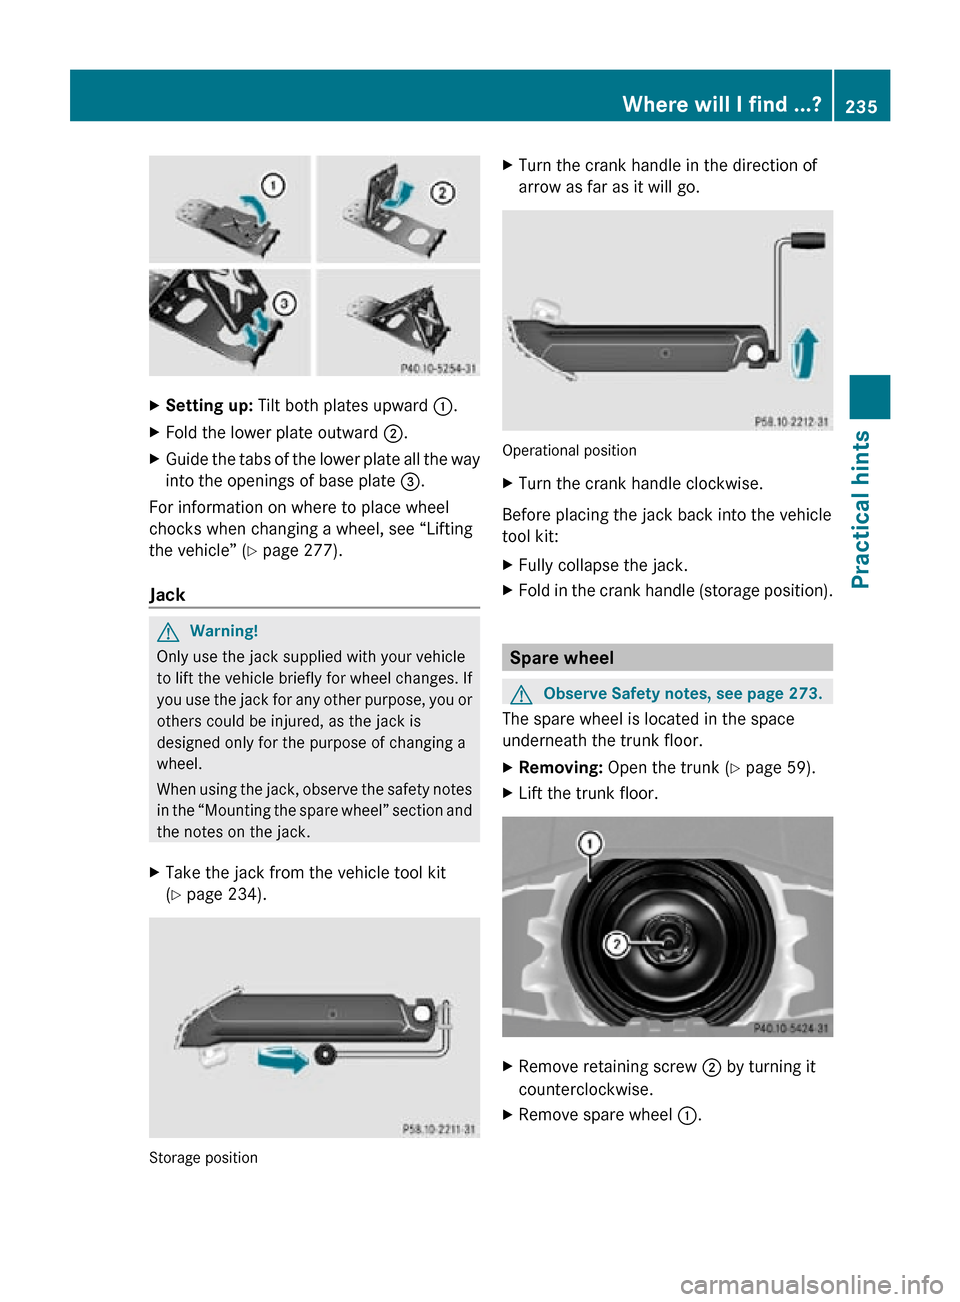
X
Setting up: Tilt both plates upward :.
X Fold the lower plate outward ;.
X Guide the tabs of the lower plate all the way
into the openings of base plate =.
For information on where to place wheel
chocks when changing a wheel, see “Lifting
the vehicle” ( Y page 277).
Jack G
Warning!
Only use the jack supplied with your vehicle
to lift the vehicle briefly for wheel changes. If
you use the jack for any other purpose, you or
others could be injured, as the jack is
designed only for the purpose of changing a
wheel.
When using the jack, observe the safety notes
in the “Mounting the spare wheel” section and
the notes on the jack.
X Take the jack from the vehicle tool kit
(Y page 234). Storage position X
Turn the crank handle in the direction of
arrow as far as it will go. Operational position
X
Turn the crank handle clockwise.
Before placing the jack back into the vehicle
tool kit:
X Fully collapse the jack.
X Fold in the crank handle (storage position). Spare wheel
G
Observe Safety notes, see page 273.
The spare wheel is located in the space
underneath the trunk floor.
X Removing: Open the trunk (Y page 59).
X Lift the trunk floor. X
Remove retaining screw ; by turning it
counterclockwise.
X Remove spare wheel :. Where will I find ...?
235Practical hints
171_AKB; 3; 60, en-US
d2ureepe, Version: 2.11.8.1 2009-05-11T16:00:23+02:00 - Seite 235 Z
Page 238 of 312
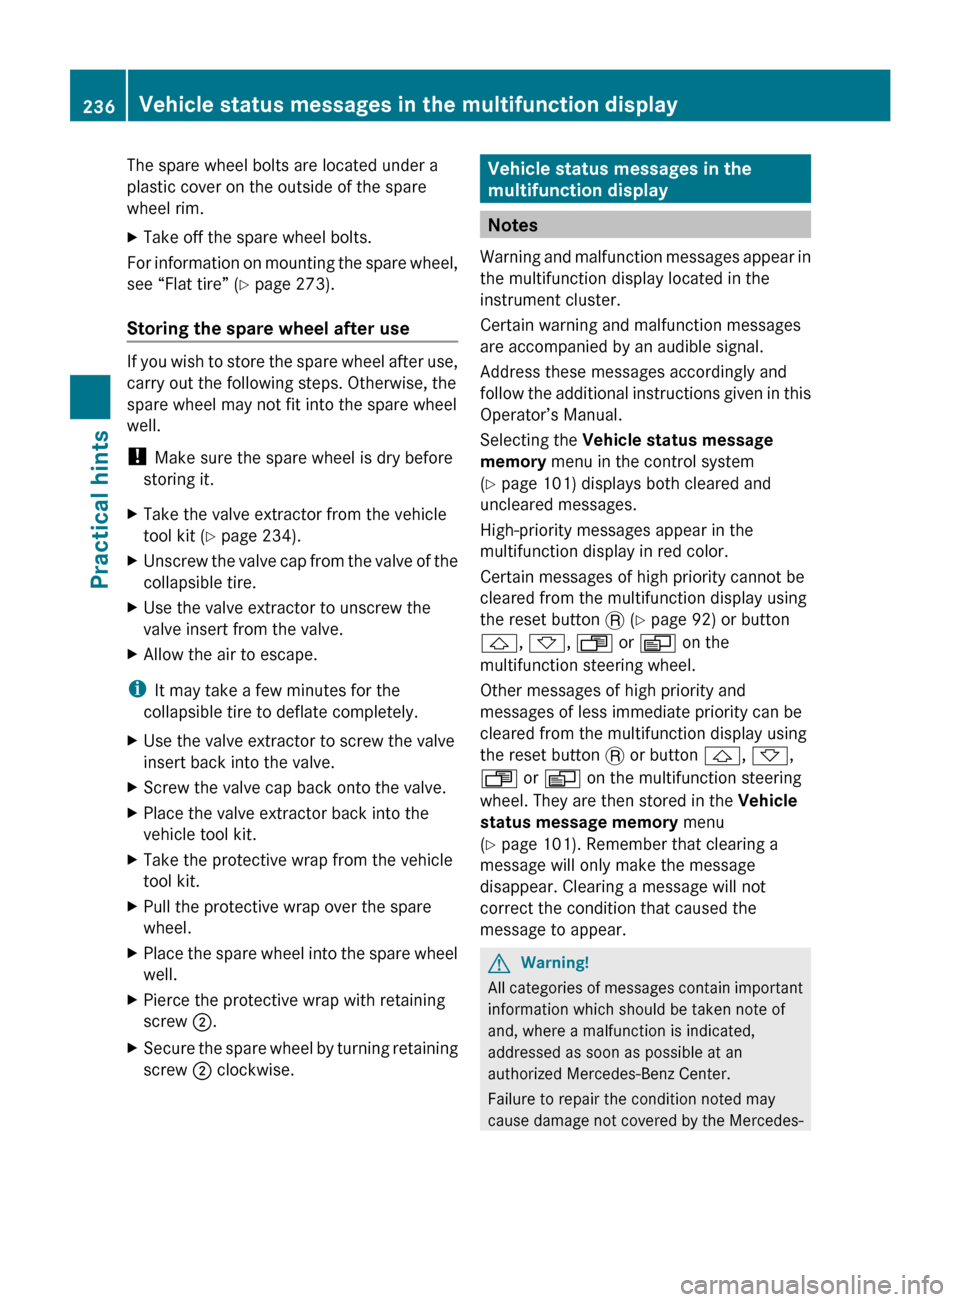
The spare wheel bolts are located under a
plastic cover on the outside of the spare
wheel rim.
X
Take off the spare wheel bolts.
For information on mounting the spare wheel,
see “Flat tire” ( Y page 273).
Storing the spare wheel after use If you wish to store the spare wheel after use,
carry out the following steps. Otherwise, the
spare wheel may not fit into the spare wheel
well.
!
Make sure the spare wheel is dry before
storing it.
X Take the valve extractor from the vehicle
tool kit ( Y page 234).
X Unscrew the valve cap from the valve of the
collapsible tire.
X Use the valve extractor to unscrew the
valve insert from the valve.
X Allow the air to escape.
i It may take a few minutes for the
collapsible tire to deflate completely.
X Use the valve extractor to screw the valve
insert back into the valve.
X Screw the valve cap back onto the valve.
X Place the valve extractor back into the
vehicle tool kit.
X Take the protective wrap from the vehicle
tool kit.
X Pull the protective wrap over the spare
wheel.
X Place the spare wheel into the spare wheel
well.
X Pierce the protective wrap with retaining
screw ;.
X Secure the spare wheel by turning retaining
screw ; clockwise. Vehicle status messages in the
multifunction display
Notes
Warning and malfunction messages appear in
the multifunction display located in the
instrument cluster.
Certain warning and malfunction messages
are accompanied by an audible signal.
Address these messages accordingly and
follow the additional instructions given in this
Operator’s Manual.
Selecting the Vehicle status message
memory menu in the control system
(Y page 101) displays both cleared and
uncleared messages.
High-priority messages appear in the
multifunction display in red color.
Certain messages of high priority cannot be
cleared from the multifunction display using
the reset button . (Y page 92) or button
&, *, U or V on the
multifunction steering wheel.
Other messages of high priority and
messages of less immediate priority can be
cleared from the multifunction display using
the reset button . or button &, *,
U or V on the multifunction steering
wheel. They are then stored in the Vehicle
status message memory menu
(Y page 101). Remember that clearing a
message will only make the message
disappear. Clearing a message will not
correct the condition that caused the
message to appear. G
Warning!
All categories of messages contain important
information which should be taken note of
and, where a malfunction is indicated,
addressed as soon as possible at an
authorized Mercedes-Benz Center.
Failure to repair the condition noted may
cause
damage not covered by the Mercedes- 236
Vehicle status messages in the multifunction display
Practical hints
171_AKB; 3; 60, en-US
d2ureepe,
Version: 2.11.8.1 2009-05-11T16:00:23+02:00 - Seite 236