2010 MERCEDES-BENZ SLK300 lock
[x] Cancel search: lockPage 168 of 312
The cooling function switches off after a
short delay.
Activating Moist air can fog up the windows. You can
dehumidify the interior air with the air
conditioning.
X
Press button Á 10
/¿ 11
.
The indicator lamp in the button comes on. Automatic mode
The automatic mode is available in vehicles
with automatic climate control only.
When
operating the climate control system in
automatic mode, the interior air temperature,
air volume and air distribution are adjusted
automatically.
In automatic mode, cooling with
dehumidification is switched on. This function
can be switched off if necessary. G
Warning!
If you deactivate the air conditioning, the
vehicle will not be cooled when weather
conditions
are warm. The windows can fog up
more quickly. Window fogging may impair
visibility and endanger you and others.
X Set the desired temperature
(Y page 166).
X Activating: Press button Ã.
The
indicator lamp in the button comes on.
The air volume and air distribution are
adjusted automatically.
X Deactivating: Press button à again.
The indicator lamp in the button goes out.
The air volume changes to level 2 and the
air distribution changes to Q. Setting the temperature
You can adjust the air temperature on each
side of the passenger compartment. You
should
raise or lower the temperature setting
in small increments, preferably starting at
72‡ (22†).
Climate control X
Increasing/decreasing: Turn
temperature control : and/or ?
(Y page 162) slightly clockwise or
counterclockwise.
Automatic climate control X
Increasing/decreasing: Press button
9
or : until the desired temperature
appears in display H (Y page 163). Adjusting air vents
G
Warning!
When operating the climate control, the air
that enters the passenger compartment
through the air vents can be very hot or very
cold
(depending on the set temperature). This
may cause burns or frostbite to unprotected
skin in the immediate area of the air vents.
Always keep sufficient distance between
unprotected parts of the body and the air
vents. If necessary, use the air distribution
adjustment to direct the air to air vents in the
vehicle interior that are not in the immediate
area of unprotected skin.
For best possible performance of the climate
control:
X Keep the air intake grille in front of the
windshield
free of snow, leaves, sticks, and
any other debris.
X Always keep all air vents and grilles in the
passenger compartment free from
obstruction.
10 Vehicles with climate control
11 Vehicles with automatic climate control 166
Climate control system
Controls in detail
171_AKB; 3; 60, en-US
d2ureepe,
Version: 2.11.8.1 2009-05-11T16:00:23+02:00 - Seite 166
Page 170 of 312

Adjusting air distribution
The symbols on the control represent the
following functions: Symbol Function
M
Directs air to the windshield and
through the side defroster air
vents
Q
Directs air into the entire
vehicle interior
O
Directs air to the footwells and
through the side air vents
P
Directs air through the center
and side air vents
Climate control
The air distribution can be adjusted manually.
X
Turn air distribution control =
(Y page 162) to the desired symbol.
The
air distribution is adjusted according to
the chosen setting.
You can also turn the control to a position
between two symbols.
Automatic climate control X
Turn air distribution control D
(Y page 163) to the desired symbol.
The
air distribution is adjusted according to
the chosen setting.
You can also turn the control to a position
between two symbols. Adjusting air volume
Climate control X
Decreasing/increasing: Turn air volume
control ; (Y page 162) clockwise or
counterclockwise. Automatic climate control X
Decreasing/increasing: Turn air volume
control : (Y page 163) clockwise or
counterclockwise. Front defroster
You can use this setting to defrost the
windshield, for example if it is iced up.
You can also defog the windshield and the
door windows.
i Keep this setting selected only until the
windshield or the door windows are clear
again.
X Activating: Press button ¬.
The
indicator lamp in the button comes on.
The climate control switches to the
following functions automatically:
R most efficient blower speed and heating
power, depending on outside
temperature
R air flows onto the windshield and the
door windows (side air vents must be
open)
R the air conditioning compressor
switches on at outside temperatures
above approximately 41‡ (5†) for air-
drying
R the air recirculation mode is switched off
X Deactivating: Press button ¬ again.
The indicator lamp in the button goes out.
The previous settings are once again in
effect.
i The cooling remains switched on. 168
Climate control systemControls in detail
171_AKB; 3; 60, en-US
d2ureepe,
Version: 2.11.8.1 2009-05-11T16:00:23+02:00 - Seite 168
Page 172 of 312
X
Activating: Switch off the ignition.
X Press button Á 13
/Ì 14
.
The indicator lamp in the button comes on.
X Deactivating: Press button Á 13
/
Ì 14
.
The indicator lamp in the button goes out.
The residual heat is deactivated
automatically:
R when the ignition is switched on
R after approximately 30 minutes
R if the battery voltage drops
R if the coolant temperature is too low Rear window defroster
G
Warning!
Any accumulation of snow and ice should be
removed
from the rear window before driving.
Visibility could otherwise be impaired,
endangering you and others.
The rear window defroster uses a large
amount of power. To keep the battery drain
to a minimum, switch off the defroster as
soon as the rear window is clear. The
defroster is switched off automatically after
some time of operation depending on the
outside temperature.
X Switch on the ignition.
X Switching on: Press button ¤ on the
respective climate control panel.
The
indicator lamp in the button comes on.
! The rear window defroster cannot be
switched on when the retractable hardtop
is open. The indicator lamp will start
flashing if the hardtop is open.
R Close the retractable hardtop.
The rear window defroster can then be
switched on. X
Switching off: Press button ¤ again.
The rear window defroster switches off when
the battery voltage is too low. The indicator
lamp in button ¤ flashes. Too many
electrical consumers may be operating
simultaneously.
X Switch off consumers that are currently not
needed if required. Retractable hardtop
Safety notes
For safety reasons, the retractable hardtop
can only be opened and closed when the
vehicle is standing still. G
Observe Safety notes, see page 45. G
Warning!
To prevent possible accidents, only drive the
vehicle with the retractable hardtop either
completely
closed and locked, or fully lowered
into its storage compartment.
If the retractable hardtop does not completely
open or close, the roof hydraulics will lose
pressure and the retractable hardtop is
lowered
R after approximately 7 minutes when the
ignition is switched on
R after approximately 15 seconds when the
ignition is switched off
Shortly before the retractable hardtop is
lowered, a warning will sound. In the
multifunction display you will see K and
the message Retractable Roof Lowering .
Properly lock the retractable hardtop before
continuing to drive. Otherwise, the unlocked
hardtop could open while the vehicle is in
motion and cause you to lose control of the
vehicle. You or others could be injured as a
result.
13 Vehicles with climate control
14 Vehicles with automatic climate control 170
Retractable hardtop
Controls in detail
171_AKB; 3; 60, en-US
d2ureepe,
Version: 2.11.8.1 2009-05-11T16:00:23+02:00 - Seite 170
Page 173 of 312
G
Warning!
Before operating the retractable hardtop,
make sure there is no danger of anyone being
injured by the moving parts (retractable
hardtop, roof frame, and trunk lid).
Hands must never be placed near the roof
frame, upper windshield area, hardtop, shelf
behind roll bars, or trunk lid while the
retractable hardtop is being raised or
lowered. Serious personal injury may occur.
If potential danger exists, release the
retractable hardtop switch or button % or
& on the SmartKey. This immediately
interrupts the raising or lowering procedure.
You then can operate the retractable hardtop
switch or press button % or & on the
SmartKey to raise or lower the retractable
hardtop away from the danger zone
! Never sit or place heavy objects on the
rear shelf. Doing so could cause damage to
the retractable hardtop and the rear shelf.
! Please keep in mind that weather
conditions can sometimes change rapidly.
Make sure to close the retractable hardtop
when leaving the vehicle. If water enters
the vehicle interior, vehicle electronics
could be damaged which is not covered by
the Mercedes-Benz Limited Warranty.
! When opening and closing the retractable
hardtop, make sure
R there is sufficient clearance for the
retractable hardtop to move up and for
the trunk lid to move back
R the luggage cover is installed, extended
and closed
R the trunk is loaded only to the height of
the luggage cover
R the luggage/cargo does not push up the
closed luggage cover R
the trunk lid is closed
R the outside temperature is above +5‡
(-15†)
Otherwise the retractable hardtop and
trunk as well as other parts of the vehicle
could be damaged. Opening and closing
With the retractable hardtop switch G
Observe Safety notes, see page 170.
X Engage the parking brake.
X Close the luggage cover ( Y page 173).
X Close the trunk lid.
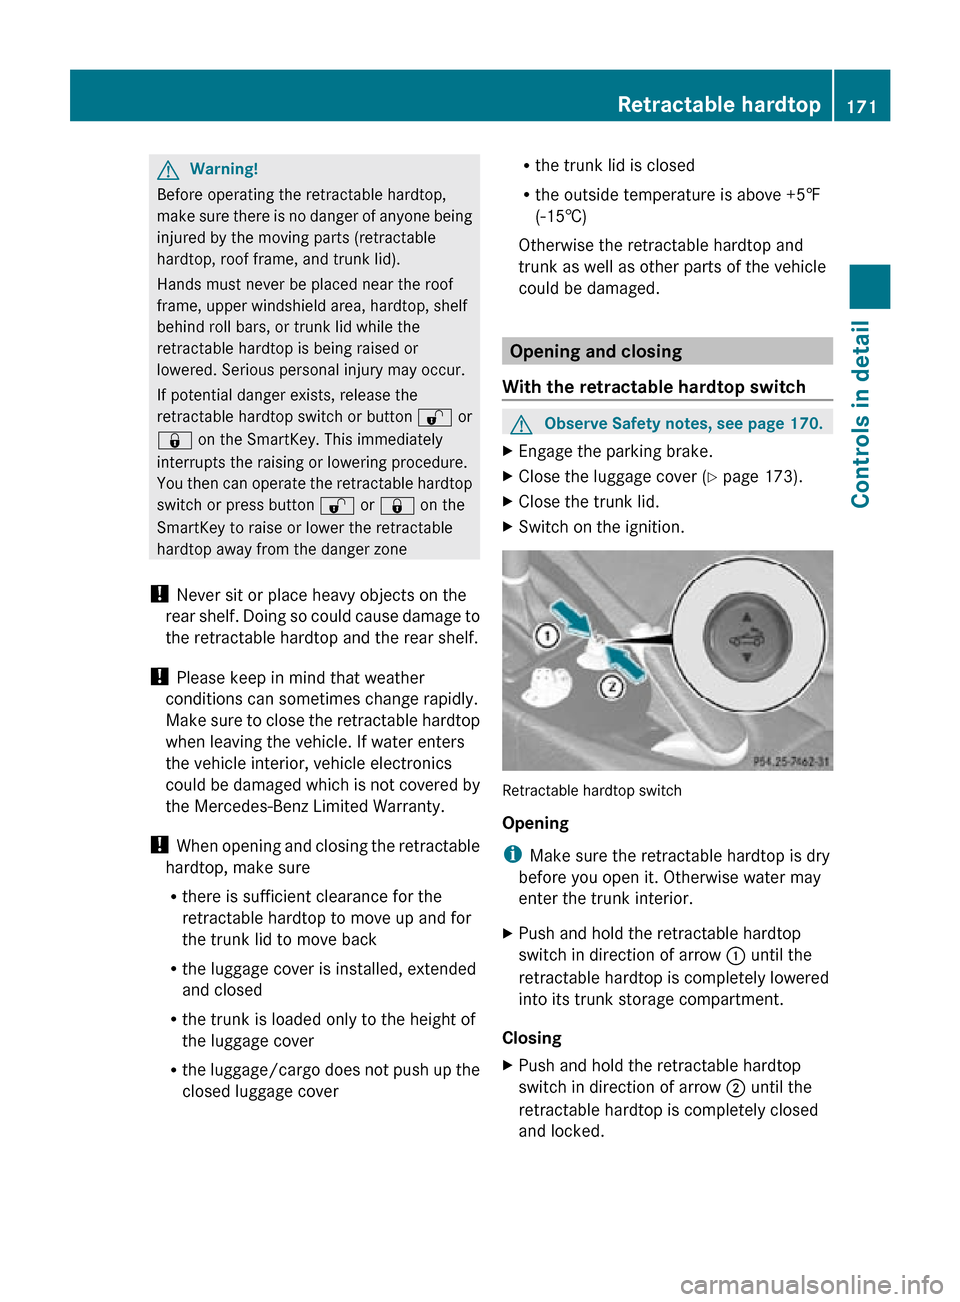
X Switch on the ignition. Retractable hardtop switch
Opening
i
Make sure the retractable hardtop is dry
before you open it. Otherwise water may
enter the trunk interior.
X Push and hold the retractable hardtop
switch in direction of arrow : until the
retractable hardtop is completely lowered
into its trunk storage compartment.
Closing
X Push and hold the retractable hardtop
switch in direction of arrow ; until the
retractable hardtop is completely closed
and locked. Retractable hardtop
171Controls in detail
171_AKB; 3; 60, en-US
d2ureepe, Version: 2.11.8.1 2009-05-11T16:00:23+02:00 - Seite 171 Z
Page 174 of 312
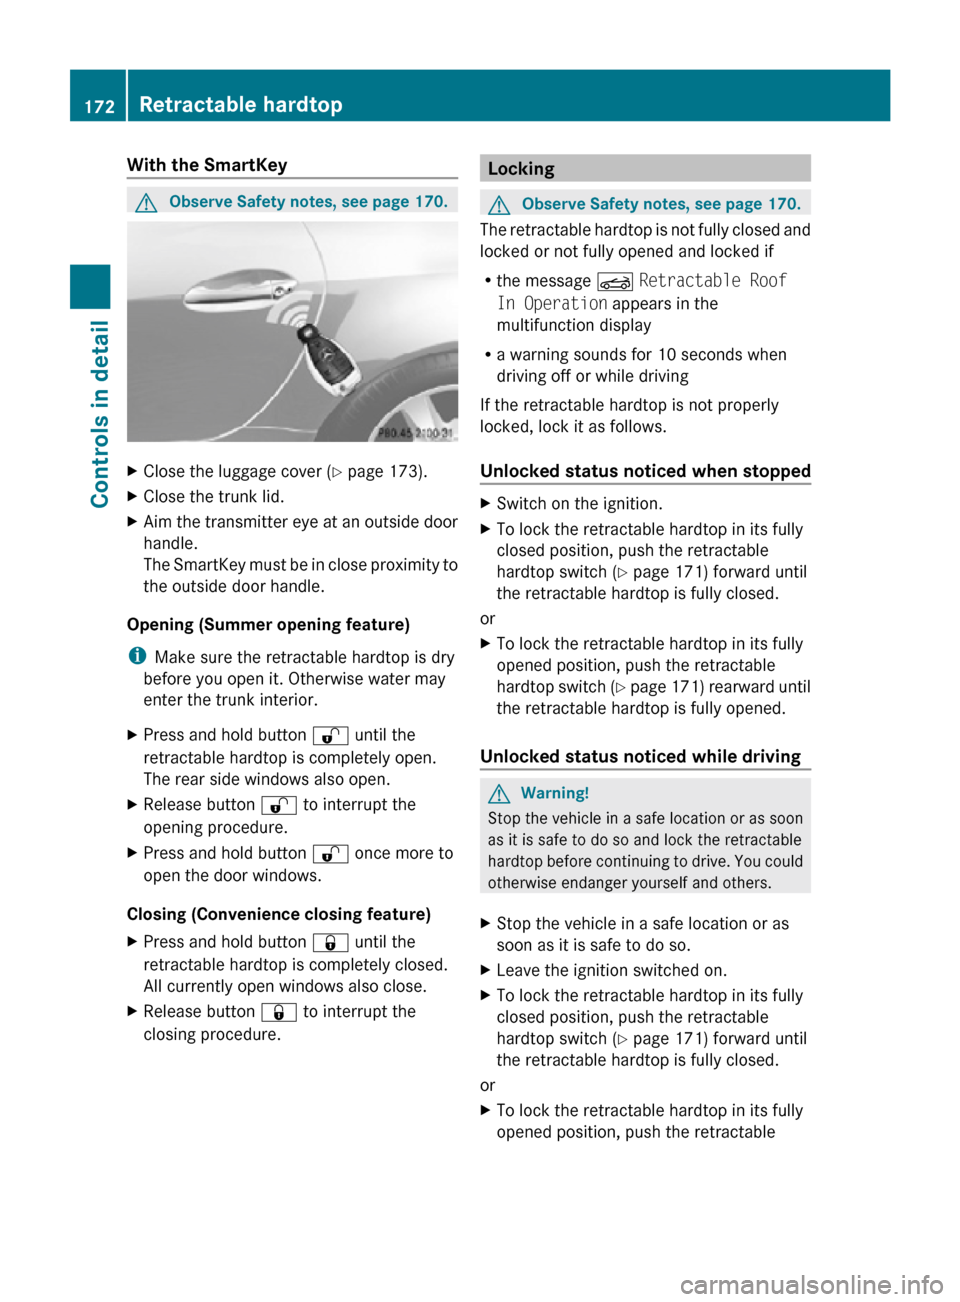
With the SmartKey
G
Observe Safety notes, see page 170. X
Close the luggage cover ( Y page 173).
X Close the trunk lid.
X Aim the transmitter eye at an outside door
handle.
The SmartKey must be in close proximity to
the outside door handle.
Opening (Summer opening feature)
i Make sure the retractable hardtop is dry
before you open it. Otherwise water may
enter the trunk interior.
X Press and hold button % until the
retractable hardtop is completely open.
The rear side windows also open.
X Release button % to interrupt the
opening procedure.
X Press and hold button % once more to
open the door windows.
Closing (Convenience closing feature)
X Press and hold button & until the
retractable hardtop is completely closed.
All currently open windows also close.
X Release button & to interrupt the
closing procedure. Locking
G
Observe Safety notes, see page 170.
The retractable hardtop is not fully closed and
locked or not fully opened and locked if
R the message K Retractable Roof
In Operation appears in the
multifunction display
R a warning sounds for 10 seconds when
driving off or while driving
If the retractable hardtop is not properly
locked, lock it as follows.
Unlocked status noticed when stopped X
Switch on the ignition.
X To lock the retractable hardtop in its fully
closed position, push the retractable
hardtop switch ( Y page 171) forward until
the retractable hardtop is fully closed.
or
X To lock the retractable hardtop in its fully
opened position, push the retractable
hardtop switch (Y page 171) rearward until
the retractable hardtop is fully opened.
Unlocked status noticed while driving G
Warning!
Stop the vehicle in a safe location or as soon
as it is safe to do so and lock the retractable
hardtop before continuing to drive. You could
otherwise endanger yourself and others.
X Stop the vehicle in a safe location or as
soon as it is safe to do so.
X Leave the ignition switched on.
X To lock the retractable hardtop in its fully
closed position, push the retractable
hardtop switch ( Y page 171) forward until
the retractable hardtop is fully closed.
or
X To lock the retractable hardtop in its fully
opened position, push the retractable 172
Retractable hardtopControls in detail
171_AKB; 3; 60, en-US
d2ureepe,
Version: 2.11.8.1 2009-05-11T16:00:23+02:00 - Seite 172
Page 177 of 312
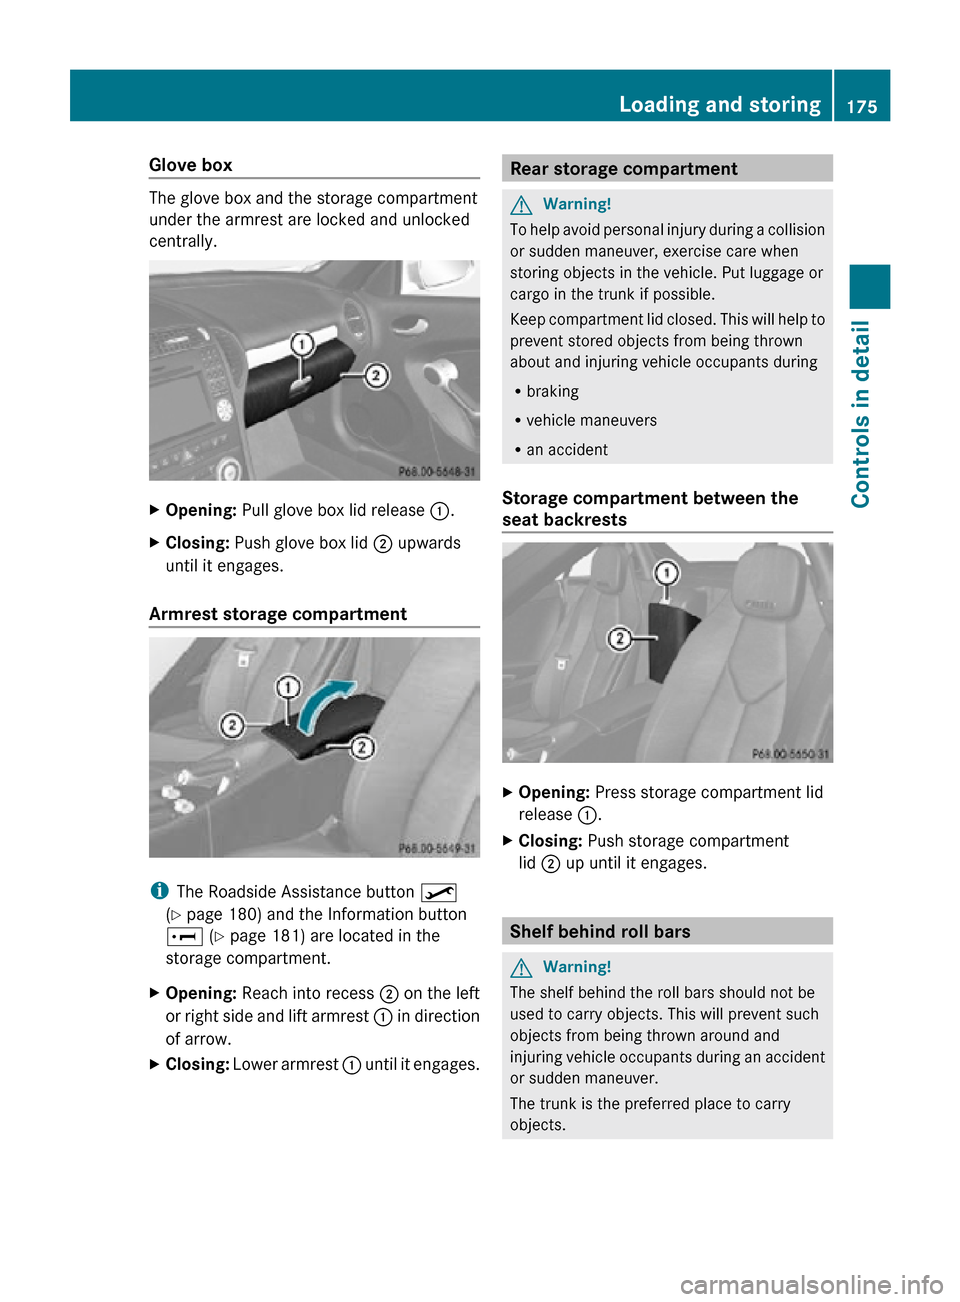
Glove box
The glove box and the storage compartment
under the armrest are locked and unlocked
centrally.
X
Opening: Pull glove box lid release :.
X Closing: Push glove box lid ; upwards
until it engages.
Armrest storage compartment i
The Roadside Assistance button º
(Y page 180) and the Information button
E (Y page 181) are located in the
storage compartment.
X Opening: Reach into recess ; on the left
or right side and lift armrest : in direction
of arrow.
X Closing: Lower armrest : until it engages. Rear storage compartment
G
Warning!
To help avoid personal injury during a collision
or sudden maneuver, exercise care when
storing objects in the vehicle. Put luggage or
cargo in the trunk if possible.
Keep compartment lid closed. This will help to
prevent stored objects from being thrown
about and injuring vehicle occupants during
R braking
R vehicle maneuvers
R an accident
Storage compartment between the
seat backrests X
Opening: Press storage compartment lid
release :.
X Closing: Push storage compartment
lid ; up until it engages. Shelf behind roll bars
G
Warning!
The shelf behind the roll bars should not be
used to carry objects. This will prevent such
objects from being thrown around and
injuring vehicle occupants during an accident
or sudden maneuver.
The trunk is the preferred place to carry
objects. Loading and storing
175Controls in detail
171_AKB; 3; 60, en-US
d2ureepe, Version: 2.11.8.1 2009-05-11T16:00:23+02:00 - Seite 175 Z
Page 180 of 312
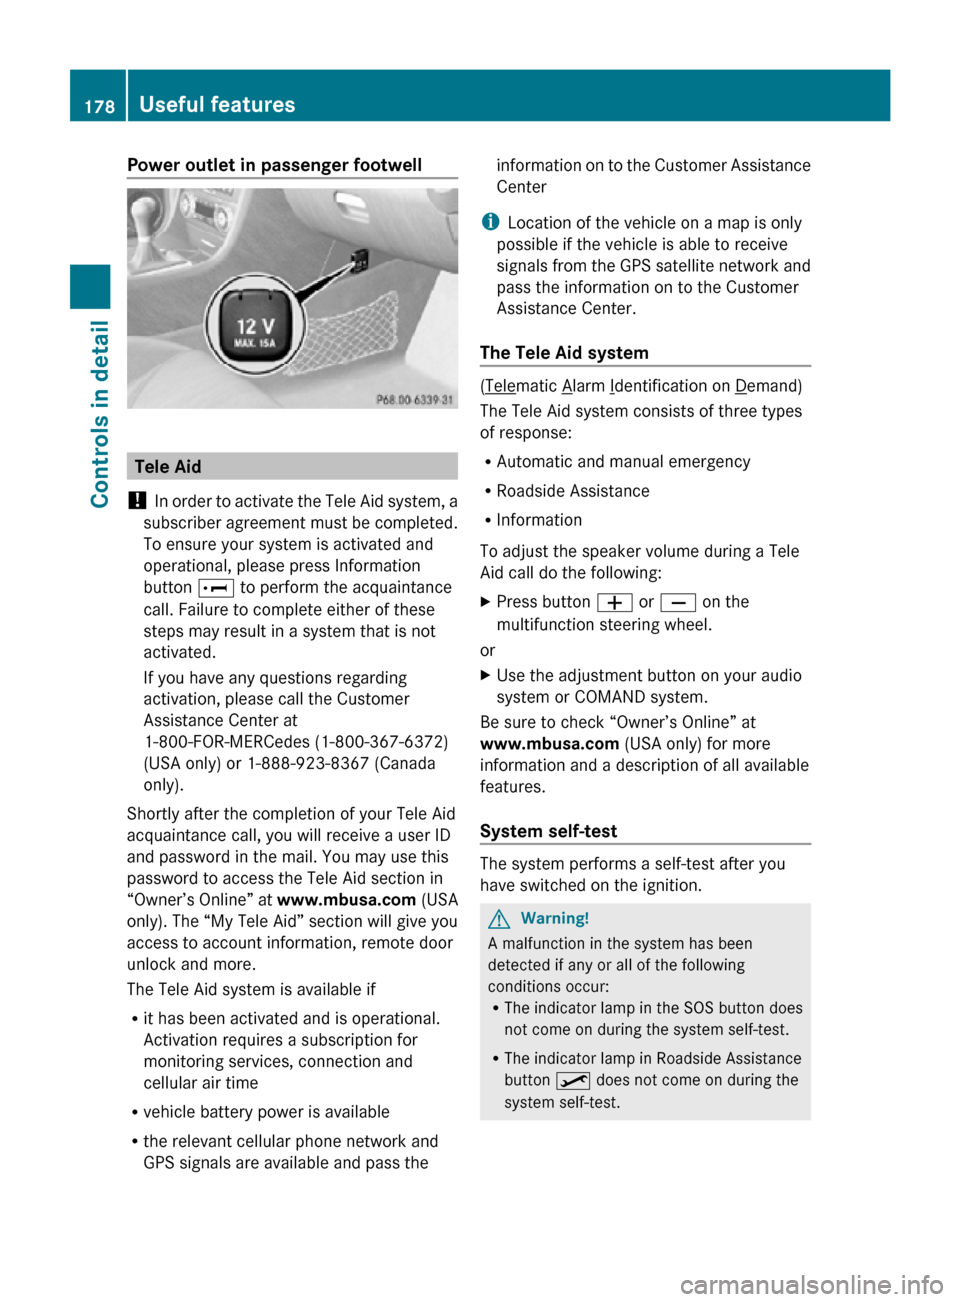
Power outlet in passenger footwell
Tele Aid
! In order to activate the Tele Aid system, a
subscriber agreement must be completed.
To ensure your system is activated and
operational, please press Information
button E to perform the acquaintance
call. Failure to complete either of these
steps may result in a system that is not
activated.
If you have any questions regarding
activation, please call the Customer
Assistance Center at
1-800-FOR-MERCedes (1-800-367-6372)
(USA only) or 1-888-923-8367 (Canada
only).
Shortly after the completion of your Tele Aid
acquaintance call, you will receive a user ID
and password in the mail. You may use this
password to access the Tele Aid section in
“Owner’s Online” at www.mbusa.com (USA
only). The “My Tele Aid” section will give you
access to account information, remote door
unlock and more.
The Tele Aid system is available if
R it has been activated and is operational.
Activation requires a subscription for
monitoring services, connection and
cellular air time
R vehicle battery power is available
R the relevant cellular phone network and
GPS signals are available and pass the information on to the Customer Assistance
Center
i Location of the vehicle on a map is only
possible if the vehicle is able to receive
signals from the GPS satellite network and
pass the information on to the Customer
Assistance Center.
The Tele Aid system ( Telematic Alarm Identification on Demand)
The Tele Aid system consists of three types
of response:
R Automatic and manual emergency
R Roadside Assistance
R Information
To adjust the speaker volume during a Tele
Aid call do the following:
X Press button W or X on the
multifunction steering wheel.
or
X Use the adjustment button on your audio
system or COMAND system.
Be sure to check “Owner’s Online” at
www.mbusa.com (USA only) for more
information and a description of all available
features.
System self-test The system performs a self-test after you
have switched on the ignition.
G
Warning!
A malfunction in the system has been
detected if any or all of the following
conditions occur:
R The indicator lamp in the SOS button does
not come on during the system self-test.
R The indicator lamp in Roadside Assistance
button º does not come on during the
system self-test. 178
Useful featuresControls in detail
171_AKB; 3; 60, en-US
d2ureepe,
Version: 2.11.8.1 2009-05-11T16:00:23+02:00 - Seite 178
Page 184 of 312

i
If the indicator lamp in Information
button : is flashing continuously and
there was no voice connection to the
Customer Assistance Center established,
then the Tele Aid system could not initiate
an Information call (e.g. the relevant
cellular phone network is not available).
The message Call Failed appears in the
multifunction display.
X Terminating calls: Press button ~ on
the multifunction steering wheel.
or
X Press the respective button for ending a
telephone call on the audio system or the
COMAND system.
Call priority If other service calls such as a Roadside
Assistance
call or Information call are active,
an emergency call is still possible. In this
case, the emergency call will take priority and
override all other active calls.
The indicator lamp in the respective button
flashes until the call is concluded. Automatic
initiated emergency calls can only be
terminated by a Customer Assistance Center
representative. All other calls can be
terminated by pressing button ~ on the
multifunction steering wheel or the
respective button for ending a telephone call
on the audio system or the COMAND system.
i When a Tele Aid call has been initiated,
the audio system or the COMAND system
is muted. The mobile phone is no longer
connected to the COMAND system. If you
must use this phone, we recommend that
you use it only with the vehicle at a
standstill in a safe location.
Destination Download to the COMAND
system i
The
components and operating principles
of the COMAND system can be found in the separate COMAND system operating
instructions.
Destination
Download allows you access to a
database of over 10 million points of interest
(POIs) that can be downloaded to your
vehicle’s navigation system. If you know the
destination, the address can be downloaded,
or can be provided with points of interests
near your location.
Route guidance
You will be prompted to confirm that route
guidance to the entered address is to be
started.
X Select Yes using button = or ; on
the COMAND system.
X Press button 9 on the COMAND system
to confirm.
The system calculates the route and
subsequently
starts the route guidance to the
defined address.
i If you select No, you can save the address
to your address book.
i The Destination Download feature is
available if the relevant mobile phone
network is available and data connection is
possible.
Search & Send “Search & Send” is a navigation destination
address entry service. For more information
on “Search & Send”, refer to separate
COMAND system operating instructions.
Remote door unlock
In case you have locked your vehicle
unintentionally
(e.g. SmartKey inside vehicle),
and the reserve SmartKey is not available:
X Contact the Customer Assistance Center
at 1-800-FOR-MERCedes 182
Useful features
Controls in detail
171_AKB; 3; 60, en-US
d2ureepe,
Version: 2.11.8.1 2009-05-11T16:00:23+02:00 - Seite 182