2010 MERCEDES-BENZ S CLASS window
[x] Cancel search: windowPage 95 of 548
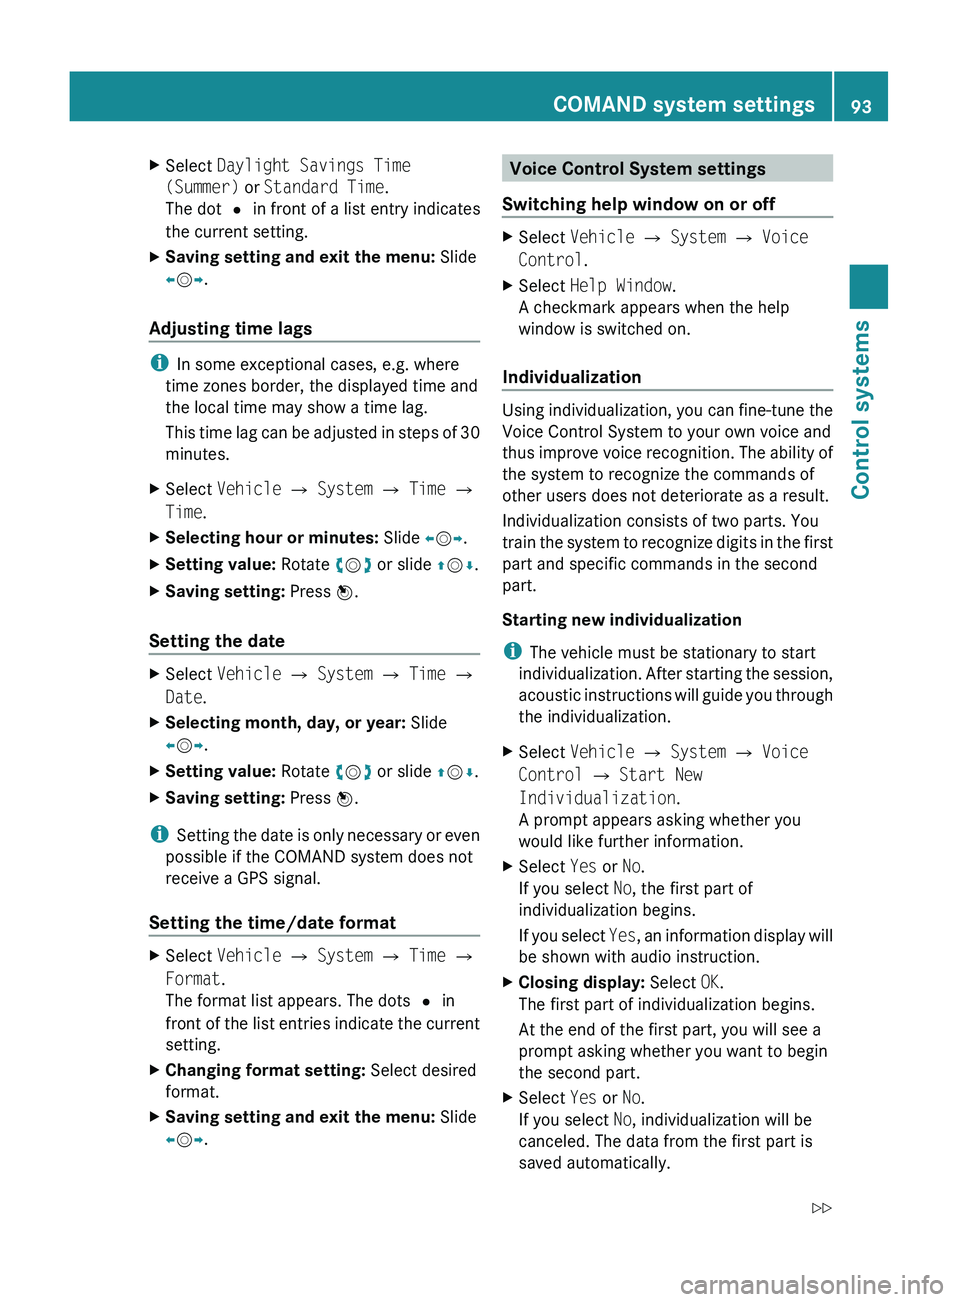
XSelect Daylight Savings Time
(Summer) or Standard Time .
The dot 003F in front of a list entry indicates
the current setting.XSaving setting and exit the menu: Slide
009E 005B 009F.
Adjusting time lags
i
In some exceptional cases, e.g. where
time zones border, the displayed time and
the local time may show a time lag.
This time lag can be adjusted in steps of 30
minutes.
XSelect Vehicle 0054 System 0054 Time 0054
Time .XSelecting hour or minutes: Slide 009E005B 009F.XSetting value: Rotate 0082005B 0083 or slide 00A0005B 0050.XSaving setting: Press 00A1.
Setting the date
XSelect Vehicle 0054 System 0054 Time 0054
Date .XSelecting month, day, or year: Slide
009E 005B 009F.XSetting value: Rotate 0082005B 0083 or slide 00A0005B 0050.XSaving setting: Press 00A1.
i
Setting the date is only necessary or even
possible if the COMAND system does not
receive a GPS signal.
Setting the time/date format
XSelect Vehicle 0054 System 0054 Time 0054
Format .
The format list appears. The dots 003F in
front of the list entries indicate the current
setting.XChanging format setting: Select desired
format.XSaving setting and exit the menu: Slide
009E 005B 009F.Voice Control System settings
Switching help window on or offXSelect Vehicle 0054 System 0054 Voice
Control .XSelect Help Window .
A checkmark appears when the help
window is switched on.
Individualization
Using individualization, you can fine-tune the
Voice Control System to your own voice and
thus improve voice recognition. The ability of
the system to recognize the commands of
other users does not deteriorate as a result.
Individualization consists of two parts. You
train the system to recognize digits in the first
part and specific commands in the second
part.
Starting new individualization
i The vehicle must be stationary to start
individualization. After starting the session,
acoustic instructions will guide you through
the individualization.
XSelect Vehicle 0054 System 0054 Voice
Control 0054 Start New
Individualization .
A prompt appears asking whether you
would like further information.XSelect Yes or No.
If you select No, the first part of
individualization begins.
If you select Yes, an information display will
be shown with audio instruction.XClosing display: Select OK.
The first part of individualization begins.
At the end of the first part, you will see a
prompt asking whether you want to begin
the second part.XSelect Yes or No.
If you select No, individualization will be
canceled. The data from the first part is
saved automatically.COMAND system settings 93Control systems221_AKB; 6; 20, en-USd2ugruen,Version: 2.11.8.12009-09-24T13:28:17+02:00 - Seite 93Z
Page 179 of 548
File structure on a disc
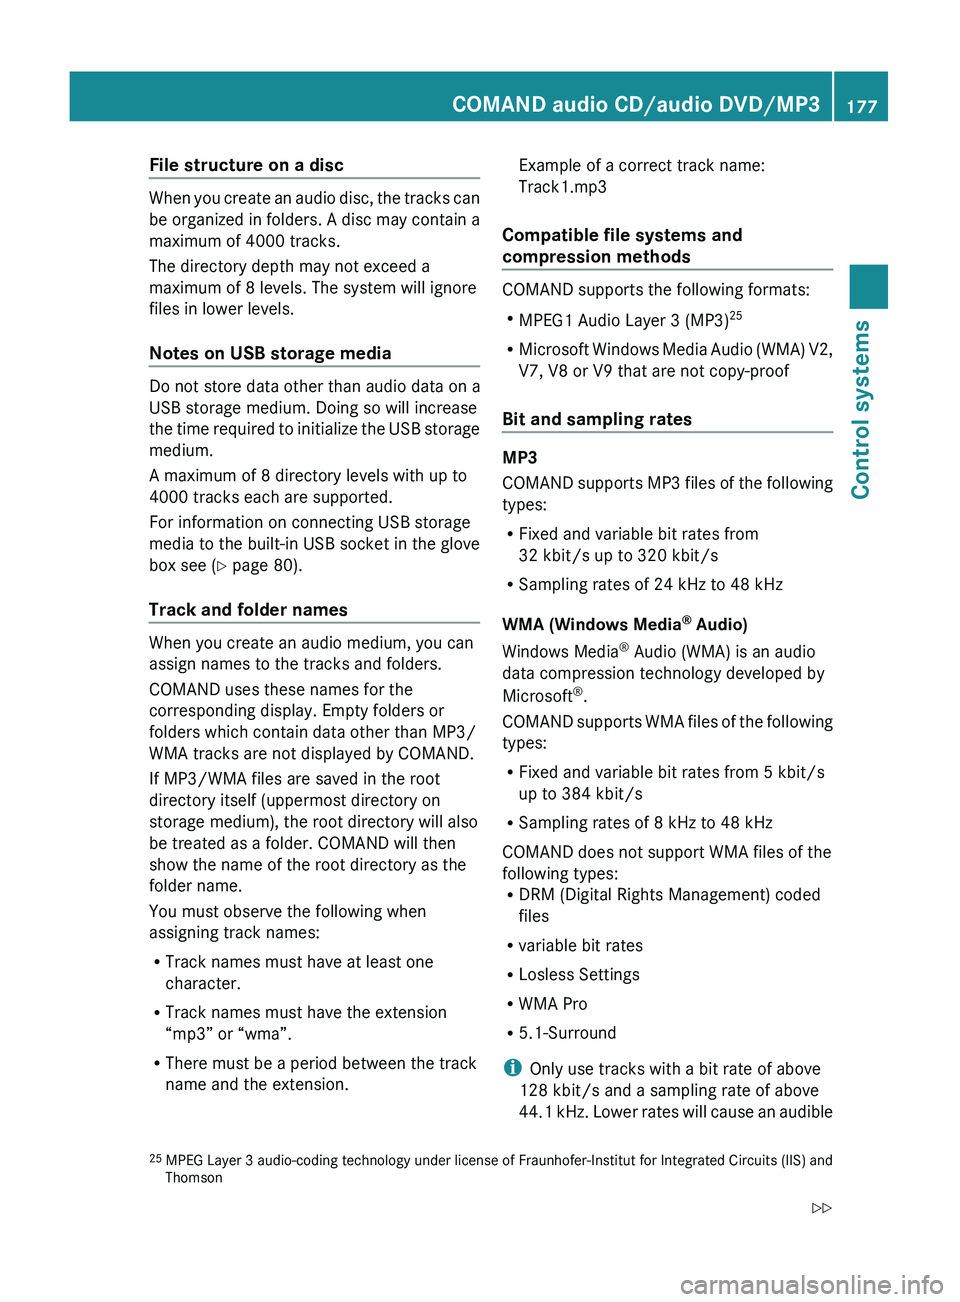
When you create an audio disc, the tracks can
be organized in folders. A disc may contain a
maximum of 4000 tracks.
The directory depth may not exceed a
maximum of 8 levels. The system will ignore
files in lower levels.
Notes on USB storage media
Do not store data other than audio data on a
USB storage medium. Doing so will increase
the time required to initialize the USB storage
medium.
A maximum of 8 directory levels with up to
4000 tracks each are supported.
For information on connecting USB storage
media to the built-in USB socket in the glove
box see ( Y page 80).
Track and folder names
When you create an audio medium, you can
assign names to the tracks and folders.
COMAND uses these names for the
corresponding display. Empty folders or
folders which contain data other than MP3/
WMA tracks are not displayed by COMAND.
If MP3/WMA files are saved in the root
directory itself (uppermost directory on
storage medium), the root directory will also
be treated as a folder. COMAND will then
show the name of the root directory as the
folder name.
You must observe the following when
assigning track names:
R Track names must have at least one
character.
R Track names must have the extension
“mp3” or “wma”.
R There must be a period between the track
name and the extension.
Example of a correct track name:
Track1.mp3
Compatible file systems and
compression methods
COMAND supports the following formats:
R MPEG1 Audio Layer 3 (MP3) 25
R Microsoft Windows Media Audio (WMA) V2,
V7, V8 or V9 that are not copy-proof
Bit and sampling rates
MP3
COMAND supports MP3 files of the following
types:
R Fixed and variable bit rates from
32 kbit/s up to 320 kbit/s
R Sampling rates of 24 kHz to 48 kHz
WMA (Windows Media ®
Audio)
Windows Media ®
Audio (WMA) is an audio
data compression technology developed by
Microsoft ®
.
COMAND supports WMA files of the following
types:
R Fixed and variable bit rates from 5 kbit/s
up to 384 kbit/s
R Sampling rates of 8 kHz to 48 kHz
COMAND does not support WMA files of the
following types:
R DRM (Digital Rights Management) coded
files
R variable bit rates
R Losless Settings
R WMA Pro
R 5.1-Surround
i Only use tracks with a bit rate of above
128 kbit/s and a sampling rate of above
44.1 kHz. Lower rates will cause an audible
25 MPEG Layer 3 audio-coding technology under license of Fraunhofer-Institut for Integrated Circuits (IIS) and
ThomsonCOMAND audio CD/audio DVD/MP3177Control systems221_AKB; 6; 20, en-USd2ugruen,Version: 2.11.8.12009-09-24T13:28:17+02:00 - Seite 177Z
Page 206 of 548
track, provided it has been played for
longer that 8 seconds. When the track has
been played for less than 8 seconds, you
will skip to the track before the current one.
When you select an option other than
Normal Track Sequence , the track is
chosen at random.
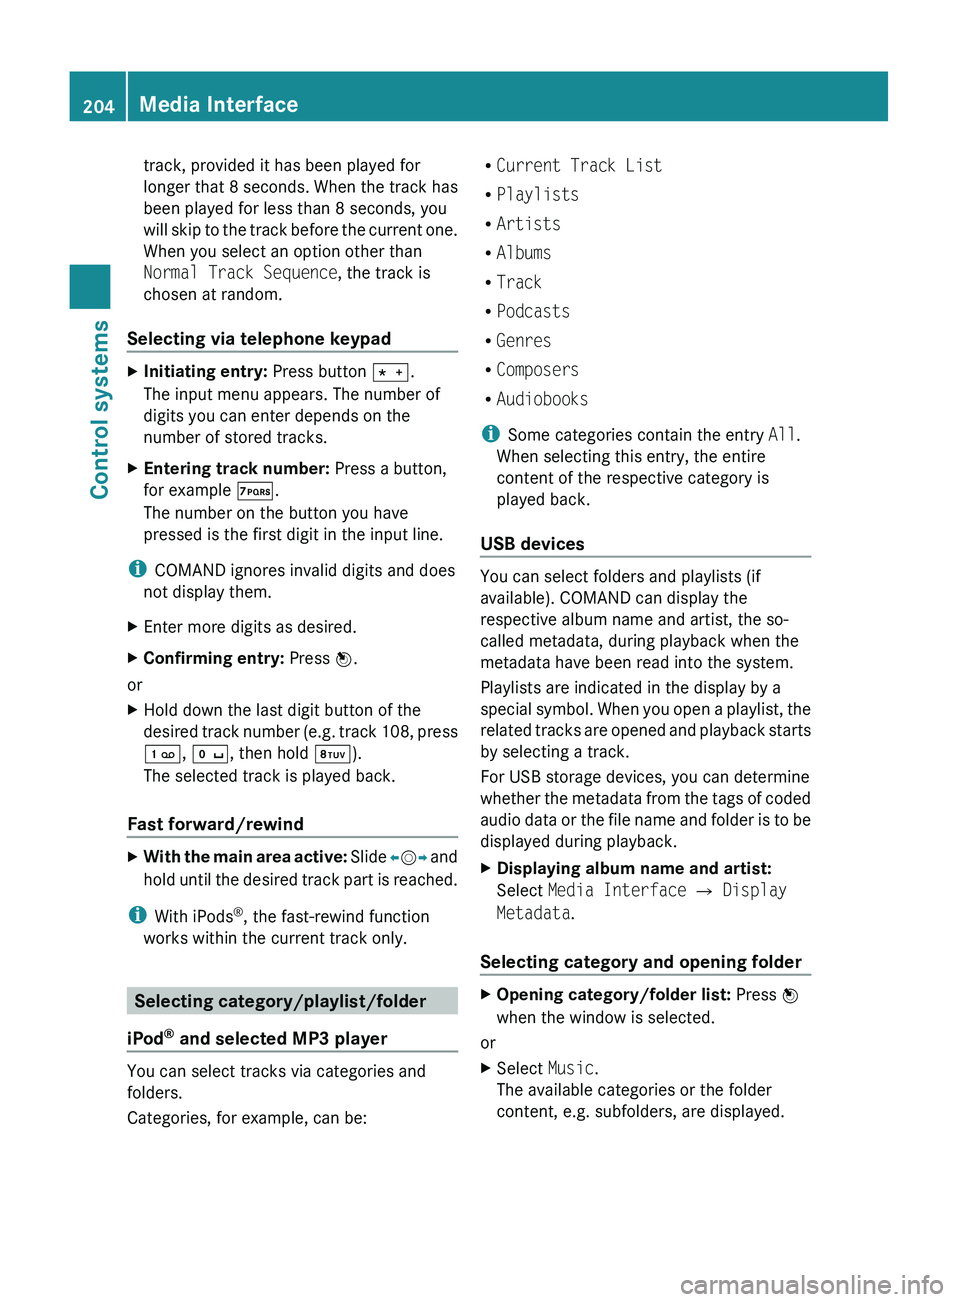
Selecting via telephone keypadXInitiating entry: Press button 010A.
The input menu appears. The number of
digits you can enter depends on the
number of stored tracks.XEntering track number: Press a button,
for example 0107.
The number on the button you have
pressed is the first digit in the input line.
i COMAND ignores invalid digits and does
not display them.
XEnter more digits as desired.XConfirming entry: Press 00A1.
or
XHold down the last digit button of the
desired track number (e.g. track 108, press
0101 , 010B , then hold 0108).
The selected track is played back.
Fast forward/rewind
XWith the main area active: Slide 009E005B 009F and
hold until the desired track part is reached.
i With iPods ®
, the fast-rewind function
works within the current track only.
Selecting category/playlist/folder
iPod ®
and selected MP3 player
You can select tracks via categories and
folders.
Categories, for example, can be:
R Current Track List
R Playlists
R Artists
R Albums
R Track
R Podcasts
R Genres
R Composers
R Audiobooks
i Some categories contain the entry All.
When selecting this entry, the entire
content of the respective category is
played back.
USB devices
You can select folders and playlists (if
available). COMAND can display the
respective album name and artist, the so-
called metadata, during playback when the
metadata have been read into the system.
Playlists are indicated in the display by a
special symbol. When you open a playlist, the
related tracks are opened and playback starts
by selecting a track.
For USB storage devices, you can determine
whether the metadata from the tags of coded
audio data or the file name and folder is to be
displayed during playback.
XDisplaying album name and artist:
Select Media Interface 0054 Display
Metadata .
Selecting category and opening folder
XOpening category/folder list: Press 00A1
when the window is selected.
or
XSelect Music.
The available categories or the folder
content, e.g. subfolders, are displayed.204Media InterfaceControl systems
221_AKB; 6; 20, en-USd2ugruen,Version: 2.11.8.12009-09-24T13:28:17+02:00 - Seite 204
Page 208 of 548
USB storage device
iThis function is available for
alphabetically ordered directories. The
function is not available within playlists for
example.
XWithin a folder, press the respective button
on the telephone keypad once or more to
enter the first character of the desired
artist name. For example, press button
008B three times for an artist whose name
starts with a “C”.
The available characters are displayed on
the bottom of the display.
When the directory contains folders only,
COMAND will search for folders.
Selecting active partition (USB
storage devices only)
You can select this function with USB storage
devices when the storage space is
partitioned. The system supports up to 4
partitions (primary or logical, FAT formatted).
i The Windows formatting program
supports FAT partitions of up to 32 gigabyte
by default.
XSelect Media Interface 0054 Select
Active Partition .
Playback options
The following options are available:
R Normal Track Sequence
Tracks are played back in regular order (e.g.
in numerical or in alphabetical order).
R Random Tracks
All available tracks on the current medium
are played back in random order.
R Category Mix or Random Folder (with
USB devices when Folder was selected)
Tracks of the currently active category or
folder and its subfolders are played back in
random order.XSelecting playback options: Select
Media Interface in the basic display.
The list of options appears. The dot 003F
indicates the currently selected option.XSelect an option.
COMAND vehicle menu
Introduction
GWarning!
HYBRID vehicles: It is imperative that you read
the HYBRID Supplemental Operating
Instructions included in your vehicle literature
portfolio. You may otherwise not receive all
necessary safety information and warning for
the operation of your vehicle.
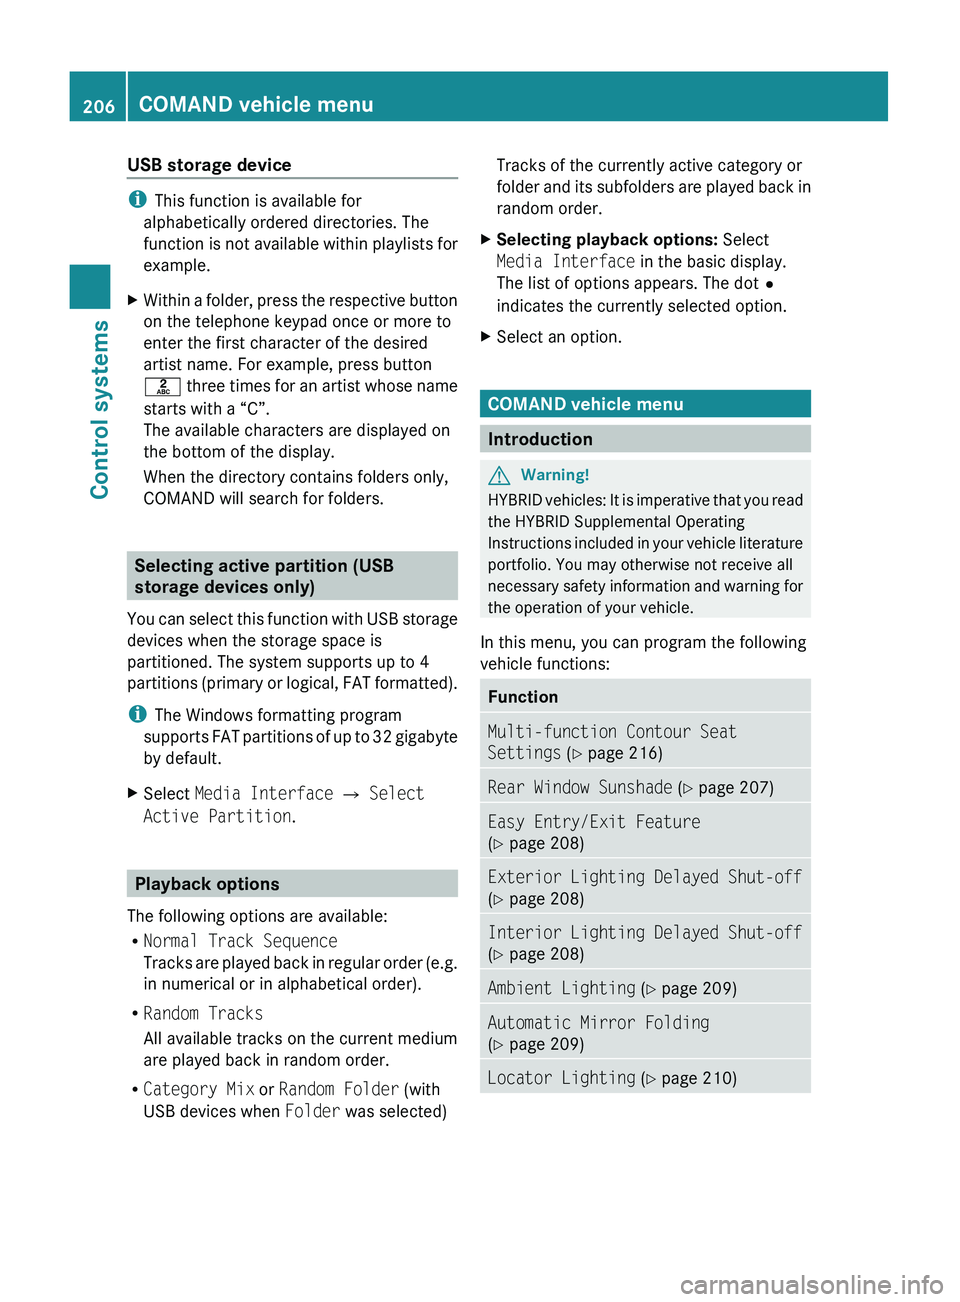
In this menu, you can program the following
vehicle functions:
FunctionMulti-function Contour Seat
Settings (Y page 216)Rear Window Sunshade (Y page 207)Easy Entry/Exit Feature
( Y page 208)Exterior Lighting Delayed Shut-off
( Y page 208)Interior Lighting Delayed Shut-off
( Y page 208)Ambient Lighting (Y page 209)Automatic Mirror Folding
( Y page 209)Locator Lighting (Y page 210)206COMAND vehicle menuControl systems
221_AKB; 6; 20, en-USd2ugruen,Version: 2.11.8.12009-09-24T13:28:17+02:00 - Seite 206
Page 270 of 548
Help window
You can use the help window to view a
selection of valid commands on the COMAND
display.
The help functions can be switched on or off
via COMAND in the System menu
( Y page 93).
Entering digits and spelling
Entering digits
R Digits from “Zero” to “Nine” may be used.
R Speaking phone numbers in digit blocks of
3 to 5 digits has proven a very reliable
method for the input of phone numbers.
Spelling
R The letters of the English alphabet and the
digits 0 - 9 may be used.
R Speak the letters in blocks of 5 - 7 letters
at a time.
R Speak each individual letter clearly.What to do if ...
ProblemPossible cause/consequenceSuggested solutionThe Voice
Control
System does
not
recognize
commands.You have not operated the system
from the driver’s seat.XOperate the Voice Control System
only by the driver as the
microphone is geared to the driver
side.You have spoken unclearly, too
loudly or too quietly.XSpeak the commands in a
continuous manner using a normal
tone.The blower could be set to the
highest setting, vents could be
pointing at microphones or wind
noise could be created due to open
windows.XAvoid loud disturbances.268Voice Control System troubleshootingControl systems
221_AKB; 6; 20, en-USd2ugruen,Version: 2.11.8.12009-09-24T13:28:17+02:00 - Seite 268
Page 275 of 548
Vehicle equipment ............................274
Locking and unlocking .....................274
Starter switch positions ...................284
Seats ..................................................286
Multifunction steering wheel ..........293
Mirrors ...............................................294
Memory function ..............................297
Lighting ..............................................298
Wipers ................................................305
Power windows .................................307
Driving and parking ..........................311
Automatic transmission ...................317
Transfer case ....................................325
Instrument cluster ............................326
Driving systems ................................327
Climate control system ....................363
Rear window defroster .....................372
Power tilt/sliding sunroof ...............373
Panorama roof with power tilt/
sliding panel ......................................375
Loading and storing ..........................379
Useful features .................................384
273Controls in detail221_AKB; 6; 20, en-USd2ugruen,Version: 2.11.8.12009-09-24T13:28:17+02:00 - Seite 273
Page 309 of 548
RRemove blockage.
RTurn the windshield wipers on again.
If the windshield wipers fail to function at
all with the combination switch in position
\000N or \000O,
Rset the combination switch to the next
higher wiper speed
Rhave the windshield wipers checked at
the nearest authorized Mercedes-Benz
Center
Power windows
Opening and closing
The door windows are opened and closed
electrically. The switches for all door windows
are located on the driver’s door control panel.
The switches for the respective door windows
are located on the front passenger door and
on the rear doors.
i Operating the rear door windows from
the rear is not possible when you activate
the override switch (Y page 61).
GObserve Safety notes, see page 56.GWarning!
When opening or closing the door windows,
make sure there is no danger of anyone being
harmed by the opening/closing procedure.
The door windows are equipped with the
express operation and automatic reversal
function. If in express operation mode a door
window encounters an obstruction that
blocks its path, the automatic reversal
function will stop the door window and open
it slightly.
The door windows operate differently when
the switch is pulled and held. See the “Closing
when a door window is blocked” section in
this chapter for details.
The closing of the door windows can be
immediately halted by releasing the switch or,
if the switch was pulled past the resistance
point and released, by either pressing or
pulling the respective switch.
Activate the override switch when children
are riding in the back seats of the vehicle. The
children may otherwise injure themselves,
e.g. by becoming trapped in the door window
opening.
GWarning!
Do not keep any part of your body up against
the window pane when opening a window. The
downward motion of the pane may pull that
part of your body down between the window
pane and the door frame and trap it there. If
there is a risk of entrapment, release the
switch and pull it to close the window.
iYou can also open or close the door
windows using the SmartKey, see
“Summer opening feature” (Y page 309)
and “Convenience closing feature”
(Y page 309).
iAfter switching off the ignition or
removing the SmartKey from the starter
switch, you can operate the door windows
until you open the driver’s or front
passenger door. If no door was opened you
can operate the door windows for up to
5 minutes.
Power windows307Controls in detail221_AKB; 6; 20, en-USd2ugruen,Version: 2.11.8.12009-09-24T13:28:17+02:00 - Seite 307Z
Page 310 of 548
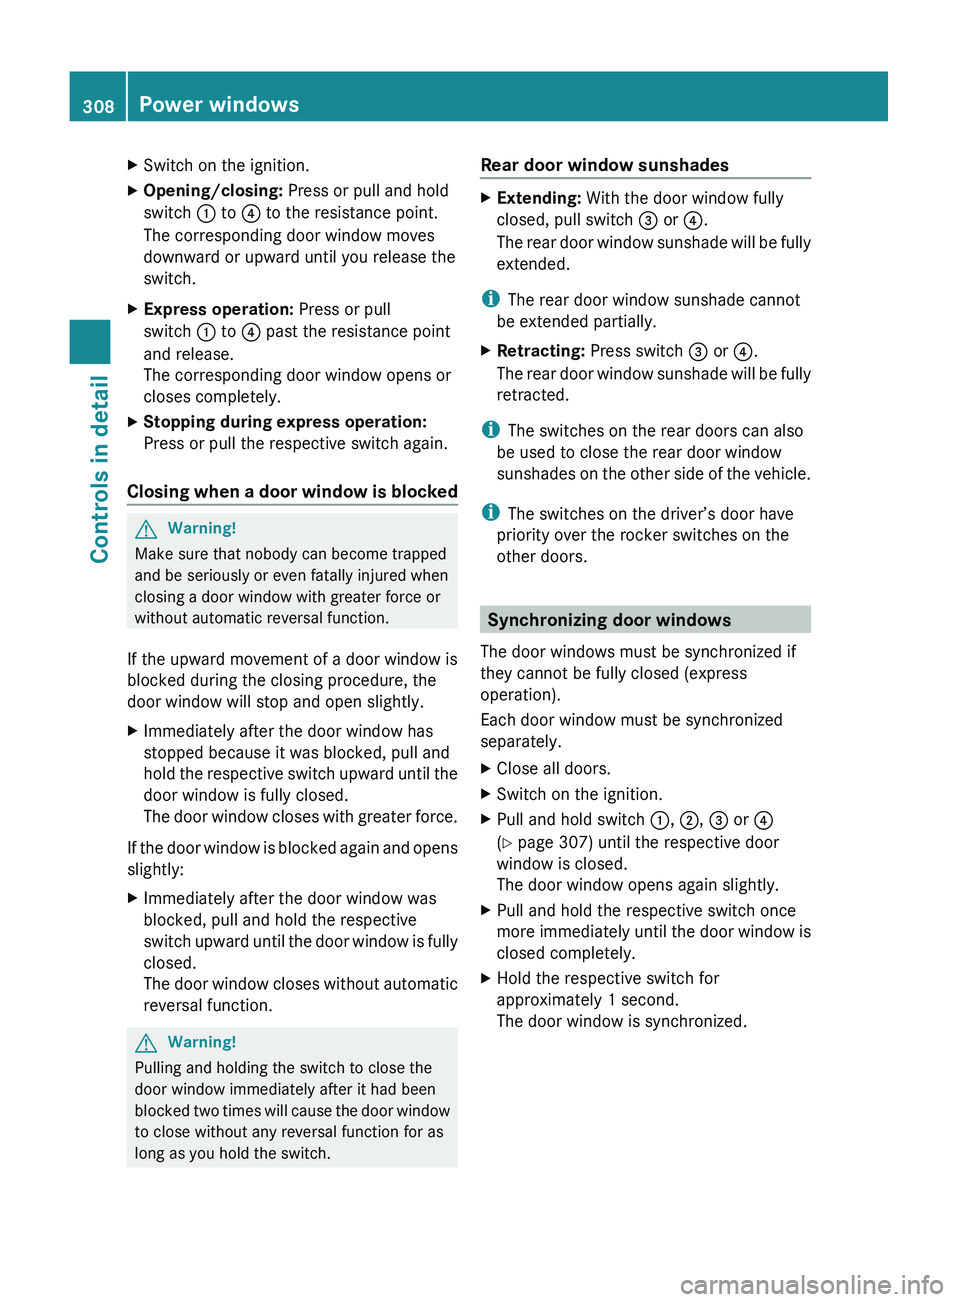
XSwitch on the ignition.XOpening/closing: Press or pull and hold
switch 0046 to 0088 to the resistance point.
The corresponding door window moves
downward or upward until you release the
switch.XExpress operation: Press or pull
switch 0046 to 0088 past the resistance point
and release.
The corresponding door window opens or
closes completely.XStopping during express operation:
Press or pull the respective switch again.
Closing when a door window is blocked
GWarning!
Make sure that nobody can become trapped
and be seriously or even fatally injured when
closing a door window with greater force or
without automatic reversal function.
If the upward movement of a door window is
blocked during the closing procedure, the
door window will stop and open slightly.
XImmediately after the door window has
stopped because it was blocked, pull and
hold the respective switch upward until the
door window is fully closed.
The door window closes with greater force.
If the door window is blocked again and opens
slightly:
XImmediately after the door window was
blocked, pull and hold the respective
switch upward until the door window is fully
closed.
The door window closes without automatic
reversal function.GWarning!
Pulling and holding the switch to close the
door window immediately after it had been
blocked two times will cause the door window
to close without any reversal function for as
long as you hold the switch.
Rear door window sunshades XExtending: With the door window fully
closed, pull switch 008A or 0088.
The rear door window sunshade will be fully
extended.
i The rear door window sunshade cannot
be extended partially.
XRetracting: Press switch 008A or 0088.
The rear door window sunshade will be fully
retracted.
i The switches on the rear doors can also
be used to close the rear door window
sunshades on the other side of the vehicle.
i The switches on the driver’s door have
priority over the rocker switches on the
other doors.
Synchronizing door windows
The door windows must be synchronized if
they cannot be fully closed (express
operation).
Each door window must be synchronized
separately.
XClose all doors.XSwitch on the ignition.XPull and hold switch 0046, 0047 , 008A or 0088
( Y page 307) until the respective door
window is closed.
The door window opens again slightly.XPull and hold the respective switch once
more immediately until the door window is
closed completely.XHold the respective switch for
approximately 1 second.
The door window is synchronized.308Power windowsControls in detail
221_AKB; 6; 20, en-USd2ugruen,Version: 2.11.8.12009-09-24T13:28:17+02:00 - Seite 308