2010 MERCEDES-BENZ S CLASS battery location
[x] Cancel search: battery locationPage 84 of 548

REAR LLeft screen7REAR RRight screen 7
i
In position COMAND, you can operate
various COMAND functions via remote
control buttons 0088 and 0086.
Switching SPLITVIEW or rear screens on/
off
i When the SmartKey is in starter switch
position 0 or 1 or removed from the starter
switch, the rear screens switch off after 30
minutes automatically. A corresponding
message appears on the screens prior to
switching off.
You can switch the screens back on. Keep
in mind however that this will drain the
vehicle battery.
XSwitching on with the COMAND system
already on: Aim the remote control on the
screen.XPress button 0046.XSwitching off: Aim the remote control on
the screen.XPress button 0046.
Switching button backlight on/off
XPress button 0047.
i
When you do not use the remote control
for approximately 15 seconds, the button
backlight switches off automatically.
Mute on/off (for wired headphones or
COMAND)
XPress button 0087.Selecting menu or menu item and
confirming selectionXSelecting menu or menu item: Press
arrow buttons 0088.XConfirming selection: Press button 0086.
Headphone
GWarning!
The driver should not wear a headphone while
operating the vehicle under any
circumstances. The use of a headphone while
driving the vehicle could drastically impair the
ability to react to audible traffic conditions
(e.g. emergency sirens from police/fire/
ambulance, another car’s horn, etc.).
GWarning!
When not in use, headphones or external
video sources should be stored in a safe
location (e.g. one of the vehicle’s storage
compartments) so that they are not loose
within the passenger compartment during
braking, vehicle maneuvers or a traffic
accident. Objects moving within the
passenger compartment could cause serious
personal injury to vehicle occupants.
GWarning!
Due to a potential choking hazard, wired
headphone usage by children should only
occur with adult supervision.
For information on using SPLITVIEW, see
( Y page 90).
For information on using the Rear Seat
Entertainment System, see ( Y page 189).
7
This function is only available in vehicles with Rear Seat Entertainment System82COMAND introductionControl systems
221_AKB; 6; 20, en-USd2ugruen,Version: 2.11.8.12009-09-24T13:28:17+02:00 - Seite 82
Page 301 of 548

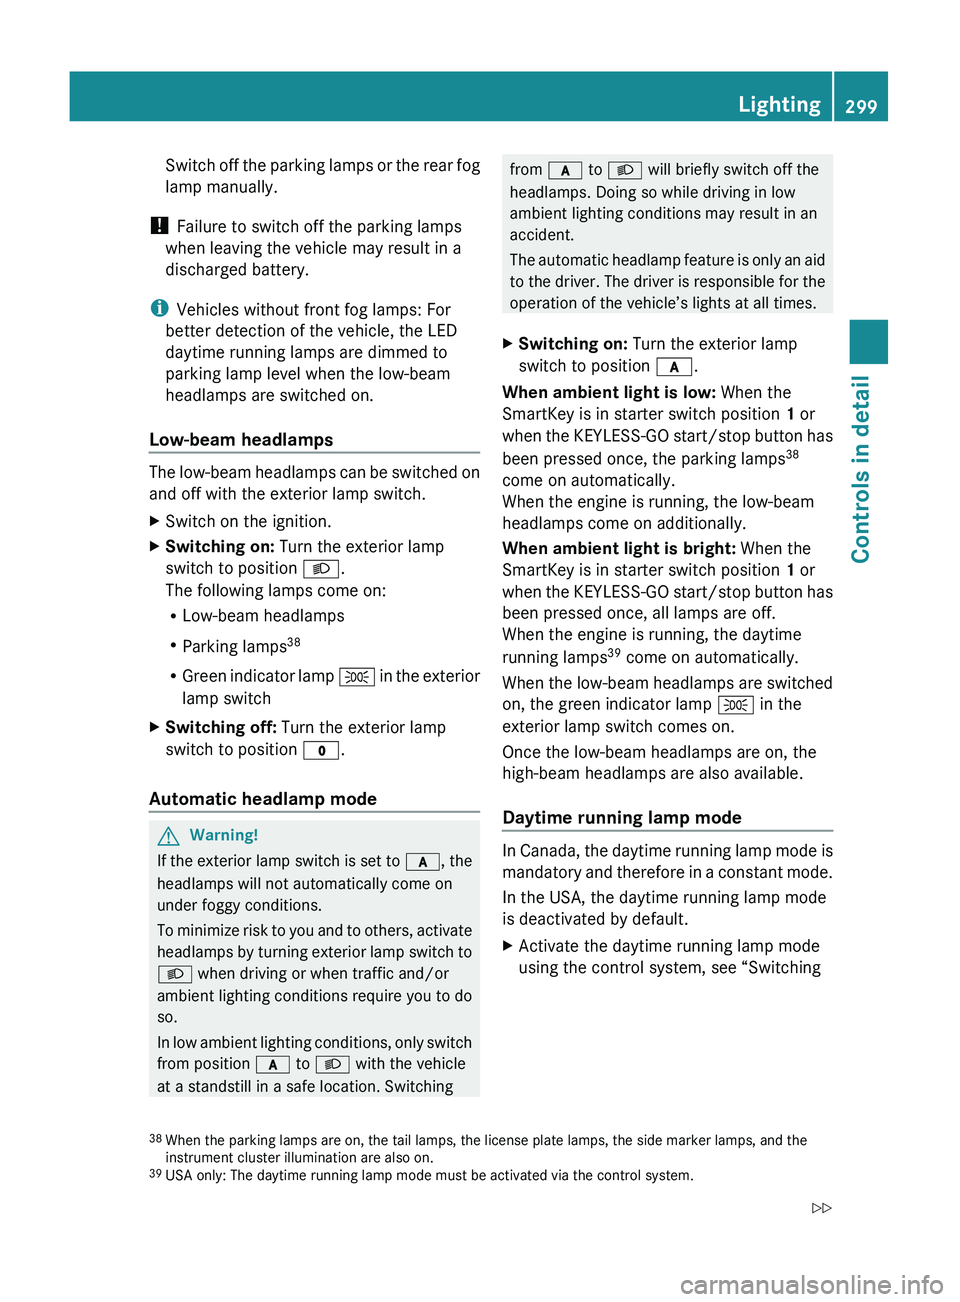
Switch off the parking lamps or the rear fog
lamp manually.
! Failure to switch off the parking lamps
when leaving the vehicle may result in a
discharged battery.
i Vehicles without front fog lamps: For
better detection of the vehicle, the LED
daytime running lamps are dimmed to
parking lamp level when the low-beam
headlamps are switched on.
Low-beam headlamps
The low-beam headlamps can be switched on
and off with the exterior lamp switch.
XSwitch on the ignition.XSwitching on: Turn the exterior lamp
switch to position 0064.
The following lamps come on:
R Low-beam headlamps
R Parking lamps 38
R Green indicator lamp 006C in the exterior
lamp switchXSwitching off: Turn the exterior lamp
switch to position 0027.
Automatic headlamp mode
GWarning!
If the exterior lamp switch is set to 0066, the
headlamps will not automatically come on
under foggy conditions.
To minimize risk to you and to others, activate
headlamps by turning exterior lamp switch to
0064 when driving or when traffic and/or
ambient lighting conditions require you to do
so.
In low ambient lighting conditions, only switch
from position 0066 to 0064 with the vehicle
at a standstill in a safe location. Switching
from 0066 to 0064 will briefly switch off the
headlamps. Doing so while driving in low
ambient lighting conditions may result in an
accident.
The automatic headlamp feature is only an aid
to the driver. The driver is responsible for the
operation of the vehicle’s lights at all times.XSwitching on: Turn the exterior lamp
switch to position 0066.
When ambient light is low: When the
SmartKey is in starter switch position 1 or
when the KEYLESS-GO start/stop button has
been pressed once, the parking lamps 38
come on automatically.
When the engine is running, the low-beam
headlamps come on additionally.
When ambient light is bright: When the
SmartKey is in starter switch position 1 or
when the KEYLESS-GO start/stop button has
been pressed once, all lamps are off.
When the engine is running, the daytime
running lamps 39
come on automatically.
When the low-beam headlamps are switched
on, the green indicator lamp 006C in the
exterior lamp switch comes on.
Once the low-beam headlamps are on, the
high-beam headlamps are also available.
Daytime running lamp mode
In Canada, the daytime running lamp mode is
mandatory and therefore in a constant mode.
In the USA, the daytime running lamp mode
is deactivated by default.
XActivate the daytime running lamp mode
using the control system, see “Switching38 When the parking lamps are on, the tail lamps, the license plate lamps, the side marker lamps, and the
instrument cluster illumination are also on.
39 USA only: The daytime running lamp mode must be activated via the control system.Lighting299Controls in detail221_AKB; 6; 20, en-USd2ugruen,Version: 2.11.8.12009-09-24T13:28:17+02:00 - Seite 299Z
Page 391 of 548

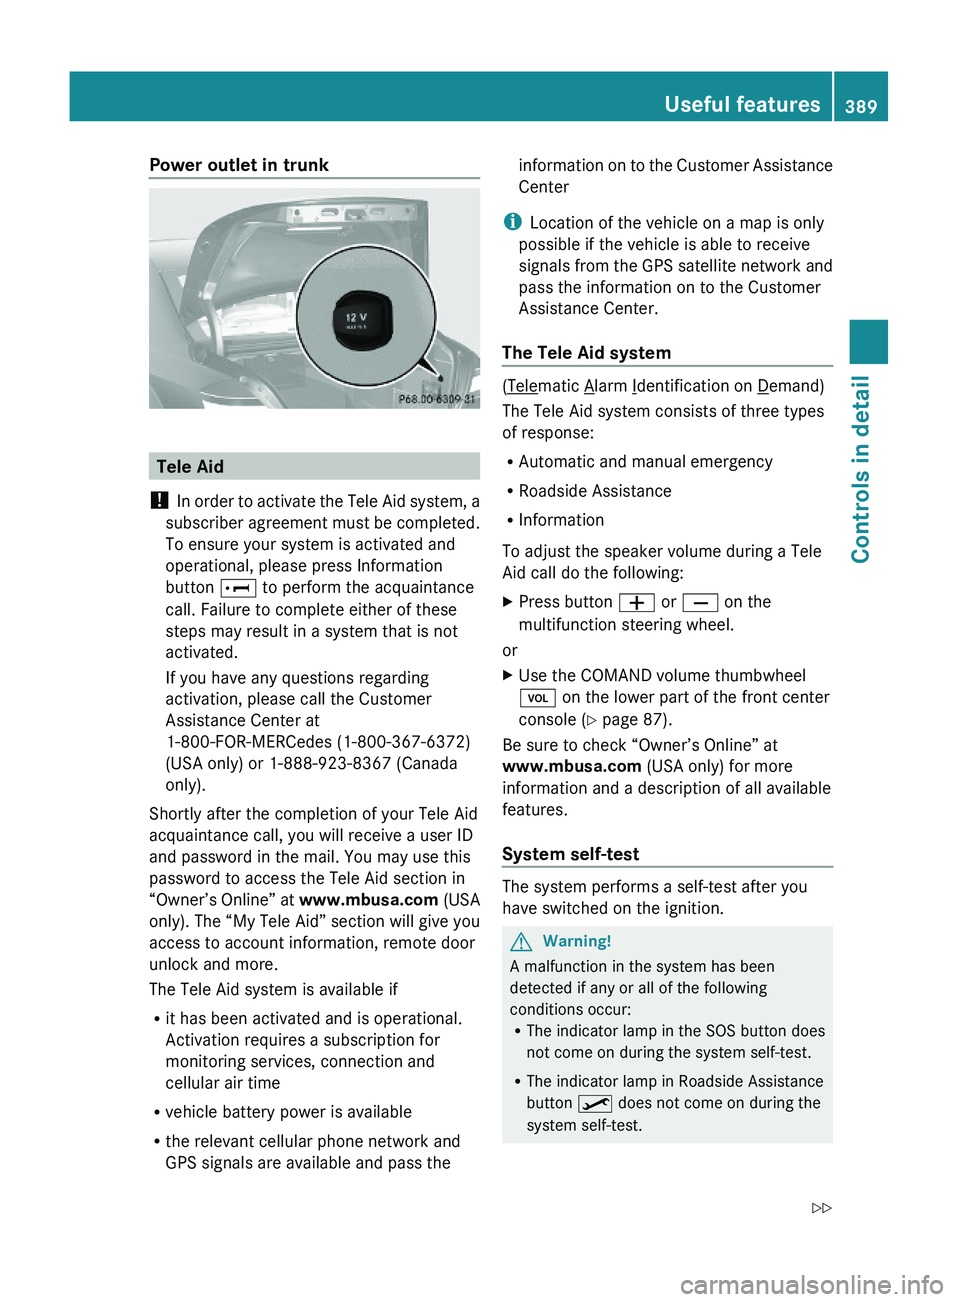
Power outlet in trunk
Tele Aid
! In order to activate the Tele Aid system, a
subscriber agreement must be completed.
To ensure your system is activated and
operational, please press Information
button \000] to perform the acquaintance
call. Failure to complete either of these
steps may result in a system that is not
activated.
If you have any questions regarding
activation, please call the Customer
Assistance Center at
1-800-FOR-MERCedes (1-800-367-6372)
(USA only) or 1-888-923-8367 (Canada
only).
Shortly after the completion of your Tele Aid
acquaintance call, you will receive a user ID
and password in the mail. You may use this
password to access the Tele Aid section in
“Owner’s Online” at www.mbusa.com (USA
only). The “My Tele Aid” section will give you
access to account information, remote door
unlock and more.
The Tele Aid system is available if
Rit has been activated and is operational.
Activation requires a subscription for
monitoring services, connection and
cellular air time
Rvehicle battery power is available
Rthe relevant cellular phone network and
GPS signals are available and pass the
information on to the Customer Assistance
Center
iLocation of the vehicle on a map is only
possible if the vehicle is able to receive
signals from the GPS satellite network and
pass the information on to the Customer
Assistance Center.
The Tele Aid system
(Telematic Alarm Identification on Demand)
The Tele Aid system consists of three types
of response:
RAutomatic and manual emergency
RRoadside Assistance
RInformation
To adjust the speaker volume during a Tele
Aid call do the following:
XPress button \000Z or \000[ on the
multifunction steering wheel.
or
XUse the COMAND volume thumbwheel
\000M on the lower part of the front center
console (Y page 87).
Be sure to check “Owner’s Online” at
www.mbusa.com (USA only) for more
information and a description of all available
features.
System self-test
The system performs a self-test after you
have switched on the ignition.
GWarning!
A malfunction in the system has been
detected if any or all of the following
conditions occur:RThe indicator lamp in the SOS button does
not come on during the system self-test.
RThe indicator lamp in Roadside Assistance
button \000
Page 463 of 548

Display messagesPossible causes/consequences and 0050 SolutionsParking
GuidanceCurrently
Unavailabl
e See
Oper.
ManualThe Advanced Parking Guidance is deactivated because the
area around the sensors in the front or the rear bumper is
dirty.XClean the front and rear bumper ( Y page 443).The Advanced Parking Guidance is deactivated because the
battery voltage is insufficient.XHave the battery checked at an authorized Mercedes-Benz
Center.The Advanced Parking Guidance is switched off because the
radar sensor system is temporarily inoperative due to
electromagnetic interference near television and radio
transmitter stations, toll stations, speed measuring systems,
etc.XWait to see if the interference is temporary. Try in a location
where the interfering source might not be present.Parking
GuidanceCanceledThe Advanced Parking Guidance has been canceled because:
R the vehicle is sliding
R the bumper became dirty in the area of the sensors
R there has been a malfunctionXUse the Advanced Parking Guidance again later.
If the parking space symbol is not shown in the multifunction
display at a speed below 10 mph (16 km/h):
XClean the bumpers ( Y page 443).
or
XRestart the engine.
or
XContact an authorized Mercedes-Benz Center.Parking
GuidanceFinishedAdvanced Parking Guidance: The vehicle is in the end
position.
The display message disappears automatically.Radar
SensorsDeactivate
d See
Oper.
ManualYou have attempted to activate the DISTRONIC PLUS or the
PRE-SAFE ®
Brake even though you have switched off the
radar sensors on the vehicle.XCheck if switching on the radar sensors is permitted
( Y page 236).XSwitch on the radar sensors using the instrument cluster
control system.Vehicle status messages in the multifunction display461Practical hints221_AKB; 6; 20, en-USd2ugruen,Version: 2.11.8.12009-09-24T13:28:17+02:00 - Seite 461Z
Page 465 of 548

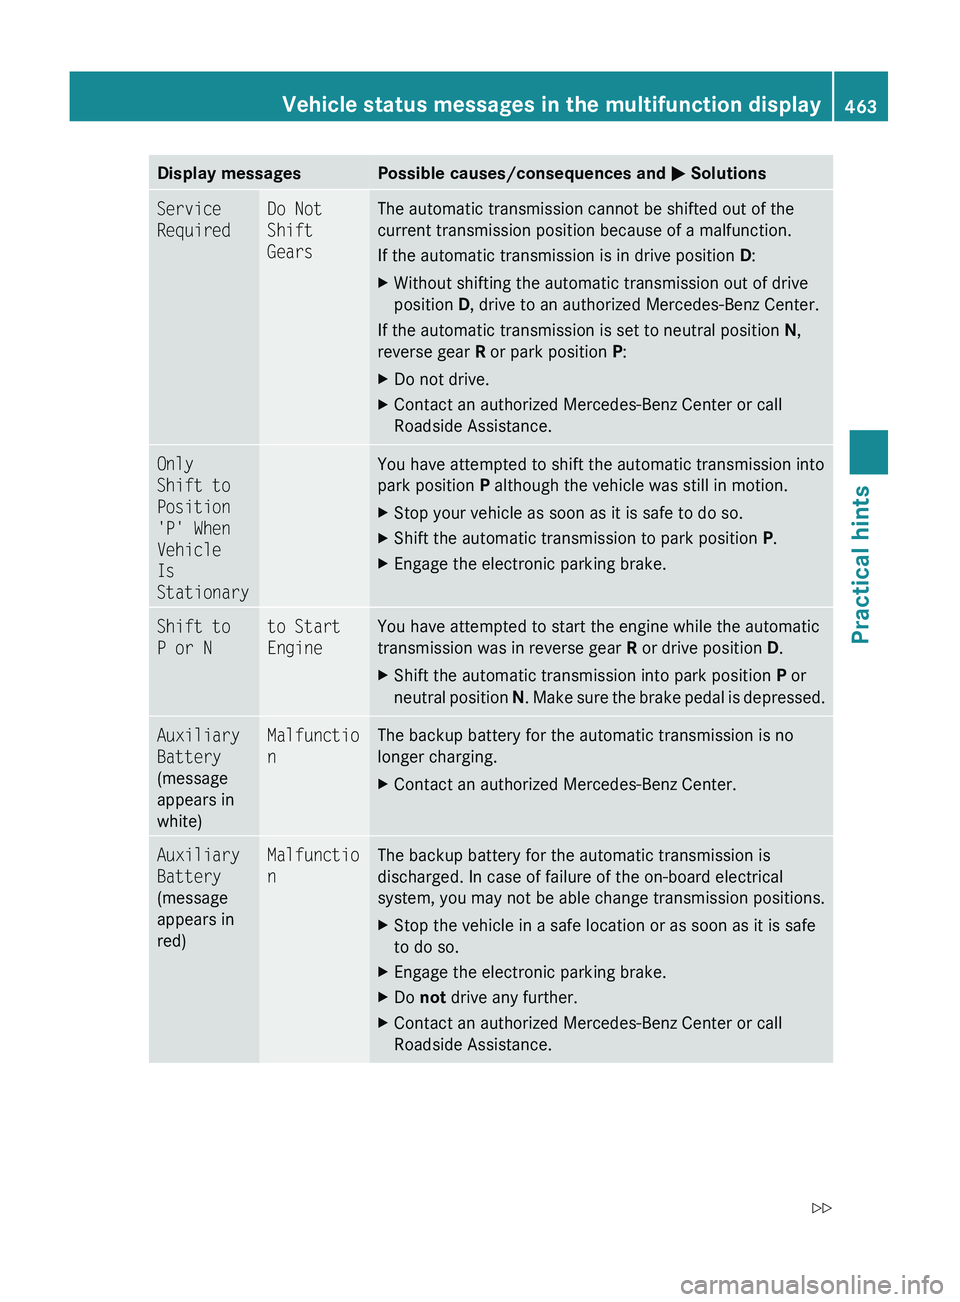
Display messagesPossible causes/consequences and 0050 SolutionsService
RequiredDo Not
Shift
GearsThe automatic transmission cannot be shifted out of the
current transmission position because of a malfunction.
If the automatic transmission is in drive position D:XWithout shifting the automatic transmission out of drive
position D, drive to an authorized Mercedes-Benz Center.
If the automatic transmission is set to neutral position N,
reverse gear R or park position P:
XDo not drive.XContact an authorized Mercedes-Benz Center or call
Roadside Assistance.Only
Shift to
Position
'P' When
Vehicle
Is
StationaryYou have attempted to shift the automatic transmission into
park position P although the vehicle was still in motion.XStop your vehicle as soon as it is safe to do so.XShift the automatic transmission to park position P.XEngage the electronic parking brake.Shift to
P or Nto Start
EngineYou have attempted to start the engine while the automatic
transmission was in reverse gear R or drive position D.XShift the automatic transmission into park position P or
neutral position N. Make sure the brake pedal is depressed.Auxiliary
Battery
(message
appears in
white)Malfunctio
nThe backup battery for the automatic transmission is no
longer charging.XContact an authorized Mercedes-Benz Center.Auxiliary
Battery
(message
appears in
red)Malfunctio
nThe backup battery for the automatic transmission is
discharged. In case of failure of the on-board electrical
system, you may not be able change transmission positions.XStop the vehicle in a safe location or as soon as it is safe
to do so.XEngage the electronic parking brake.XDo not drive any further.XContact an authorized Mercedes-Benz Center or call
Roadside Assistance.Vehicle status messages in the multifunction display463Practical hints221_AKB; 6; 20, en-USd2ugruen,Version: 2.11.8.12009-09-24T13:28:17+02:00 - Seite 463Z
Page 484 of 548

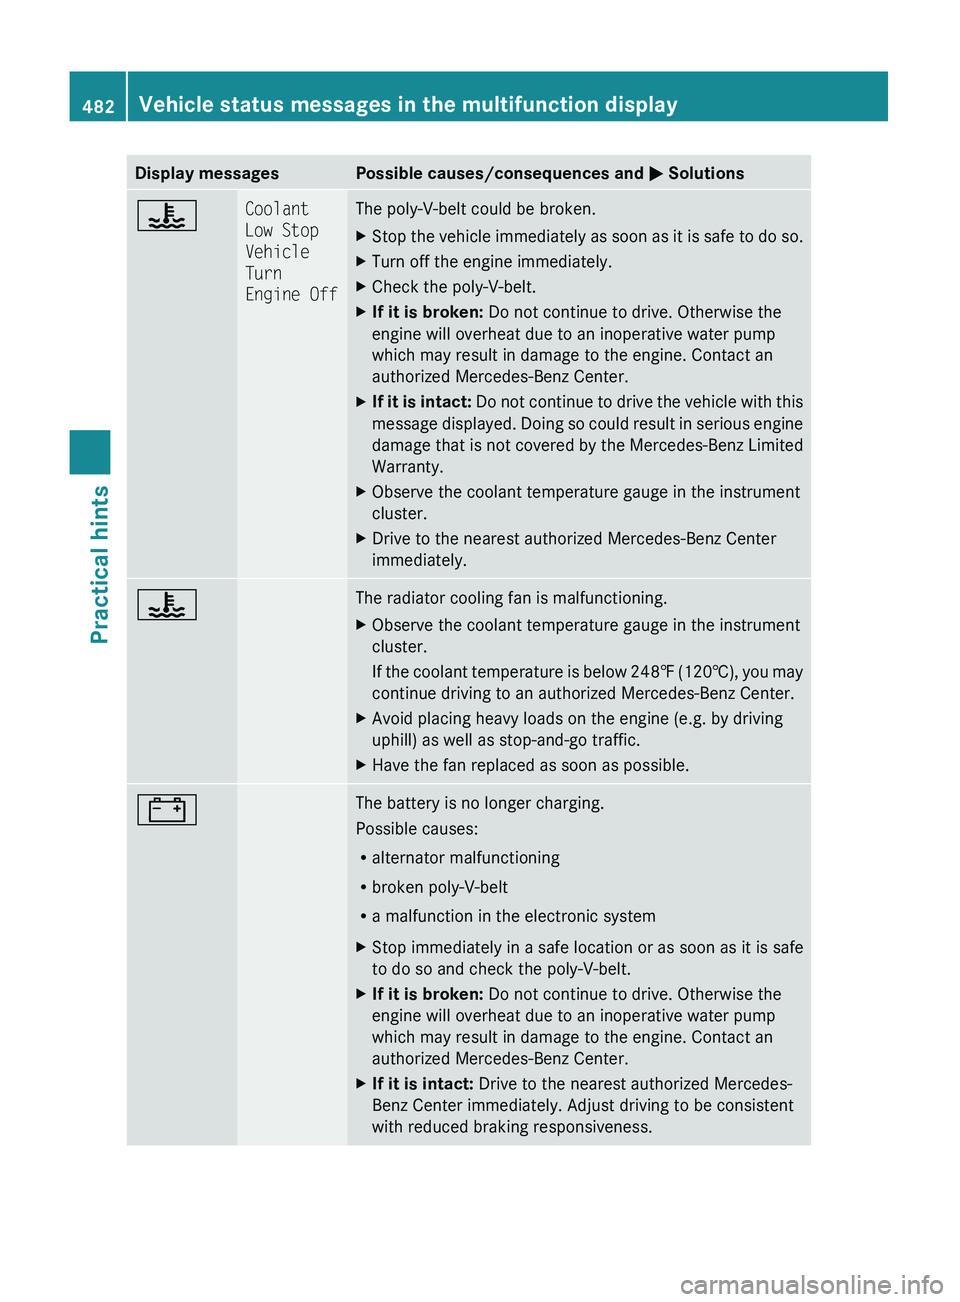
Display messagesPossible causes/consequences and 0050 Solutions00AECoolant
Low Stop
Vehicle
Turn
Engine OffThe poly-V-belt could be broken.XStop the vehicle immediately as soon as it is safe to do so.XTurn off the engine immediately.XCheck the poly-V-belt.XIf it is broken: Do not continue to drive. Otherwise the
engine will overheat due to an inoperative water pump
which may result in damage to the engine. Contact an
authorized Mercedes-Benz Center.XIf it is intact: Do not continue to drive the vehicle with this
message displayed. Doing so could result in serious engine
damage that is not covered by the Mercedes-Benz Limited
Warranty.XObserve the coolant temperature gauge in the instrument
cluster.XDrive to the nearest authorized Mercedes-Benz Center
immediately.00AEThe radiator cooling fan is malfunctioning.XObserve the coolant temperature gauge in the instrument
cluster.
If the coolant temperature is below 248‡ (120†), you may
continue driving to an authorized Mercedes-Benz Center.XAvoid placing heavy loads on the engine (e.g. by driving
uphill) as well as stop-and-go traffic.XHave the fan replaced as soon as possible.003FThe battery is no longer charging.
Possible causes:
R alternator malfunctioning
R broken poly-V-belt
R a malfunction in the electronic systemXStop immediately in a safe location or as soon as it is safe
to do so and check the poly-V-belt.XIf it is broken: Do not continue to drive. Otherwise the
engine will overheat due to an inoperative water pump
which may result in damage to the engine. Contact an
authorized Mercedes-Benz Center.XIf it is intact: Drive to the nearest authorized Mercedes-
Benz Center immediately. Adjust driving to be consistent
with reduced braking responsiveness.482Vehicle status messages in the multifunction displayPractical hints
221_AKB; 6; 20, en-USd2ugruen,Version: 2.11.8.12009-09-24T13:28:17+02:00 - Seite 482
Page 519 of 548

necessary safety information and warning for
the operation of your vehicle.
! To prevent damage during transport, do
not tie down vehicle by its chassis or
suspension parts.
If circumstances do not permit the
recommended towing methods, the vehicle
may be towed with all wheels on the ground
or front axle raised (except vehicles with
4MATIC) only so far as necessary to have the
vehicle moved to a safe location where the
recommended towing methods can be
employed.
! Before towing the vehicle observe the
following instructions:
RDo not tow-start the vehicle. You could
otherwise seriously damage the
automatic transmission which is not
covered by the Mercedes-Benz Limited
Warranty.
RDo not tow with sling-type equipment.
Towing with sling-type equipment over
bumpy roads will damage radiator and
supports.
RTowing of the vehicle should only be
done using the properly installed towing
eye bolt. Never attach a tow cable, tow
rope or tow rod to the vehicle chassis,
frame or suspension parts.
GWarning!
With the engine not running, there is no power
assistance for the brake and steering
systems. In this case, it is important to keep
in mind that a considerably higher degree of
effort is necessary to brake and steer the
vehicle. Adapt your driving accordingly.
! Avoid pulling the vehicle abruptly or
diagonally, since it could result in damage
to the chassis alignment.
! Do not use the towing eye bolt for
recovery, as this could damage the vehicle.
If in doubt, recover the vehicle with a crane.
iIf the battery is disconnected or
discharged
Rthe SmartKey will not turn in the starter
switch
Rthe automatic transmission will remain in
park position P
For more information see “Battery”
(Y page 512) or “Jump starting”
(Y page 514).
Installing towing eye bolt
Depending on whether you are towing a
vehicle or you are being towed, the towing eye
bolt can be screwed into threaded holes
which are located behind covers on each
bumper.
The towing eye bolt is supplied with the
vehicle tool kit, located underneath the trunk
floor (Y page 450).
XTake the vehicle tool kit out of the trunk.
Removing cover in front bumper
XPress mark on cover \000F as indicated by the
arrow.
XLift cover \000F off to reveal the threaded hole
for the towing eye bolt.
Towing the vehicle517Practical hints221_AKB; 6; 20, en-USd2ugruen,Version: 2.11.8.12009-09-24T13:28:17+02:00 - Seite 517Z