2010 MERCEDES-BENZ R320 ignition
[x] Cancel search: ignitionPage 222 of 364
Vehicle equipment
i This Operator’s Manual describes all
features, standard or optional, potentially
available for your vehicle at the time of
purchase. Please be aware that your
vehicle might not be equipped with all
features described in this manual. The first 1000 miles (1500 km)
The more cautiously you treat your vehicle
during
the break-in period, the more satisfied
you will be with its performance later on.
R Drive your vehicle during the first
1 000 miles (1 500 km) at varying but
moderate vehicle and engine speeds.
R During this period, avoid heavy loads (full
throttle driving) and excessive engine
speeds (no more than 2
/ 3 of maximum rpm
in each gear).
R Select C as the preferred shift program
(Y page 120) for the first 1 000 miles
(1 500 km).
R Avoid accelerating by kickdown.
R Do not attempt to slow the vehicle down by
shifting to a lower gear using the gear
selector lever.
R Select gear ranges 3, 2 or 1 (Y page 119)
only when driving at moderate speeds (for
hill driving).
After 1 000 miles (1 500 km) you may
gradually increase vehicle and engine speeds
to the permissible maximum.
All of the above instructions, as may apply to
your vehicle type, also apply when driving the
first 1 000 miles (1 500 km) after the engine,
the transfer case, the front differential or the
rear differential have been replaced.
i Always obey applicable speed limits. At the gas station
Refueling
G
Warning!
Gasoline and diesel fuels are highly flammable
and poisonous. They burn violently and can
cause serious injury.
Never allow sparks, flames or smoking
materials near gasoline or diesel fuel!
Turn off the engine before refueling.
Whenever you are around gasoline or diesel
fuel, avoid inhaling fumes and any skin or
clothing contact. Extinguish all smoking
materials.
Direct skin contact with fuels and the
inhalation of fuel vapors are damaging your
health. G
Warning!
Overfilling of the fuel tank may create
pressure in the system which could cause a
gas discharge. This could cause the gas to
spray
back out when removing the fuel pump
nozzle, which could cause personal injury. G
Warning!
Do not fill diesel tanks with gasoline. Do not
mix diesel fuel with gasoline. Otherwise the
fuel
system and engine could be damaged. In
addition, the vehicle could catch fire.
! Never use diesel fuel in vehicles with
gasoline engine. Never refuel vehicles with
gasoline engine with diesel fuel. Even small
amounts of incorrect fuel will damage the
fuel system and engine. Damage resulting
from the use of non-approved fuels or fuel
additives or resulting from mixing gasoline
with diesel fuel or vice versa is not covered
by the Mercedes-Benz Limited Warranty.
! If you have accidentally filled the tank
with incorrect or non-approved fuel, do not
switch on the ignition. Otherwise the
incorrect or non-approved fuel will get into
the fuel lines. The fuel system must be 220
At the gas station
Operation
251_AKB; 4; 52, en-US
d2ureepe,
Version: 2.11.8.1 2009-03-23T09:22:52+01:00 - Seite 220
Page 225 of 364
vehicle. Comply with all relevant safety
precautions.
G
Warning!
To help prevent personal injury, stay clear of
moving parts when the hood is open and the
engine is running.
The radiator fan may continue to run for
approximately 30 seconds or may even
restart after the engine has been turned off.
Stay clear of fan blades. G
Warning!
Vehicles with gasoline engine:
The engine is equipped with a transistorized
ignition system. Because of the high voltage
it is dangerous to touch any components
(ignition coils, spark plug sockets, diagnostic
socket) of the ignition system
R with the engine running
R while starting the engine
R when the ignition is switched on and the
engine is turned manually G
Warning!
Vehicles with diesel engine:
The engine is equipped with a high-voltage
electronic control unit for the injection
system. Because of the high voltage it is
dangerous to touch any components of the
injection system (injectors, electrical wires)
R with the engine running
R while starting the engine
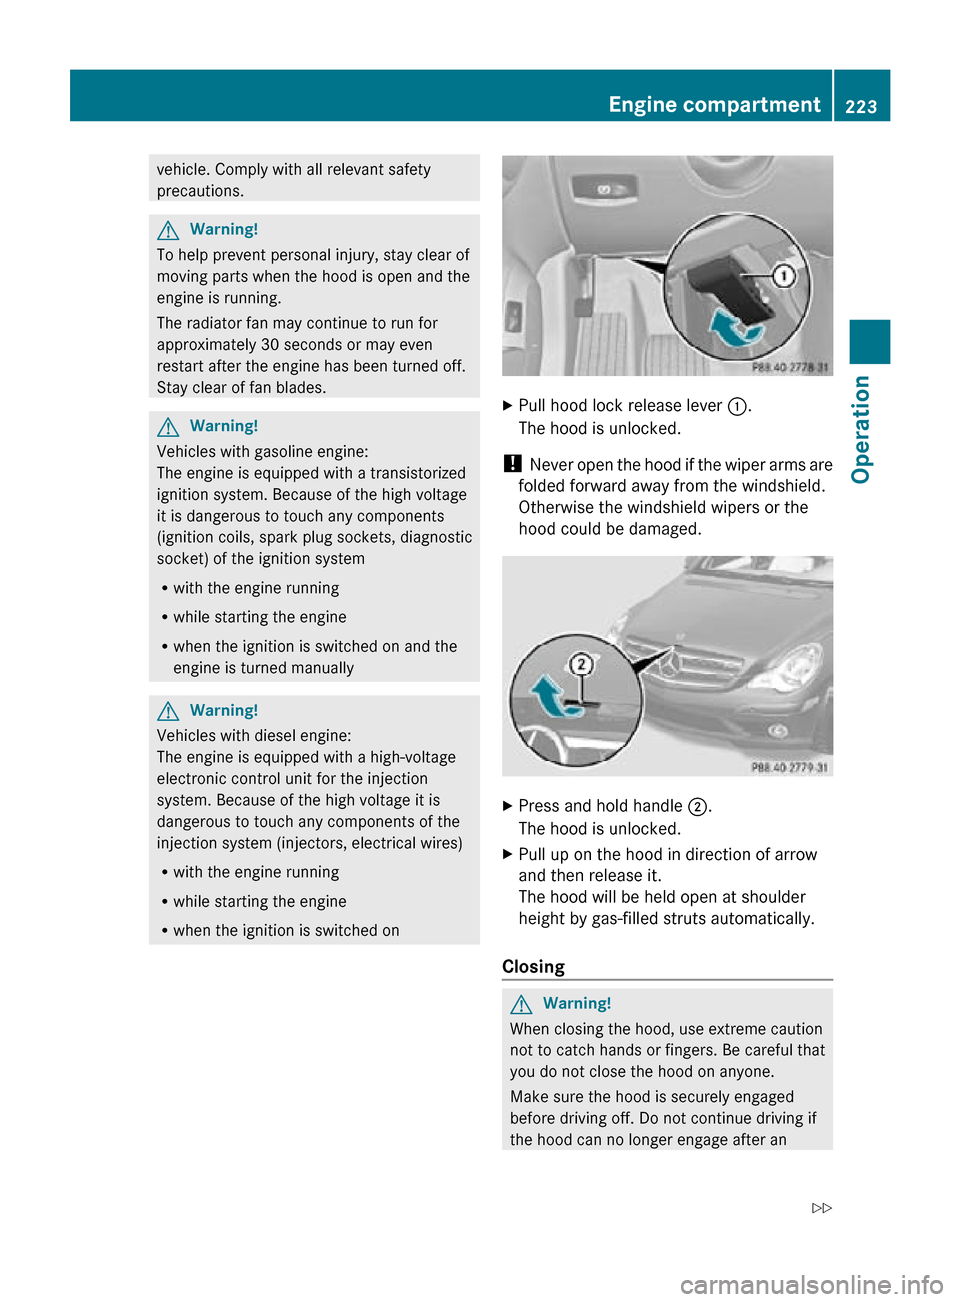
R when the ignition is switched on X
Pull hood lock release lever :.
The hood is unlocked.
! Never open the hood if the wiper arms are
folded forward away from the windshield.
Otherwise the windshield wipers or the
hood could be damaged. X
Press and hold handle ;.
The hood is unlocked.
X Pull up on the hood in direction of arrow
and then release it.
The hood will be held open at shoulder
height by gas-filled struts automatically.
Closing G
Warning!
When closing the hood, use extreme caution
not to catch hands or fingers. Be careful that
you do not close the hood on anyone.
Make sure the hood is securely engaged
before driving off. Do not continue driving if
the hood can no longer engage after an Engine compartment
223Operation
251_AKB; 4; 52, en-US
d2ureepe, Version: 2.11.8.1 2009-03-23T09:22:52+01:00 - Seite 223 Z
Page 234 of 364

i
The recommended tire inflation pressures
for your vehicle can be found on
Rthe Tire and Loading Information placard
located on the driver’s door B-pillar
(Y page 236)
R the tire inflation pressure label on the
inside of the fuel filler flap
The tire inflation pressures are not listed in
the Operator’s Manual. G
Warning!
The tire pressure loss warning system does
not
provide a warning for wrongly selected tire
inflation pressures. Always adjust tire
inflation pressure according to the Tire and
Loading Information placard on the driver’s
door B-pillar or on the tire inflation pressure
label located on the inside of the fuel filler flap.
The tire pressure loss warning system does
not replace regular checks of the tire inflation
pressures since a gradual pressure loss in
more than one tire cannot be detected by the
tire pressure loss warning system.
The tire pressure loss warning system is not
able to issue a warning due to a sudden
dramatic loss of tire inflation pressure (e.g.
tire blowout caused by a foreign object). In
this case bring the vehicle to a halt by carefully
applying the brakes and avoiding abrupt
steering maneuvers.
Restarting the tire pressure loss warning
system
The tire pressure loss warning system must
be restarted in the following situations:
R after you have changed the tire inflation
pressure
R after you have replaced the wheels or tires
R after you have installed new wheels or tires
X Using the Tire and Loading Information
placard on the driver’s door
B-pillar or, if
available, the tire inflation pressure label on
the inside of the fuel filler flap, make sure
the tire inflation pressure of all four tires is
correct. G
Warning!
The tire pressure loss warning system can
only
warn you in a reliable manner if you have
set the correct tire inflation pressures for
each tire.
If an incorrect tire inflation pressure was set,
the system will monitor the pressure
according to the incorrect value.
X Switch on the ignition.
X Make sure the standard display appears in
the multifunction display
(Y page 126).
X Press button * or & on the
multifunction steering wheel repeatedly
until the following message appears in the
multifunction display:
Run Flat Indicator
Active
Menu: R-Button
X Press the reset button (Y page 122).
The following message will appear in the
multifunction display:
Restart
Run Flat Indicator?
X If you wish to confirm: Press button
W.
The following message will appear in the
multifunction display:
Run Flat Indicator
Restarted
After a certain “learning phase”, the tire
pressure loss warning system checks the
set pressure values for all four tires.
X If you wish to cancel:
Press button X.
Advanced Tire Pressure Monitoring
System (Advanced TPMS), (USA only) Your vehicle is equipped with the Advanced
Tire Pressure Monitoring System (Advanced
TPMS).
It measures the tire inflation pressure
in the vehicle’s tires and issues warnings in
case of pressure loss in one or more of the
tires. 232
Tires and wheels
Operation
251_AKB; 4; 52, en-US
d2ureepe,
Version: 2.11.8.1 2009-03-23T09:22:52+01:00 - Seite 232
Page 236 of 364
malfunction using the TPMS telltale
flashing and illumination sequence.
The telltale extinguishes after a few
minutes driving if the malfunction has been
corrected.
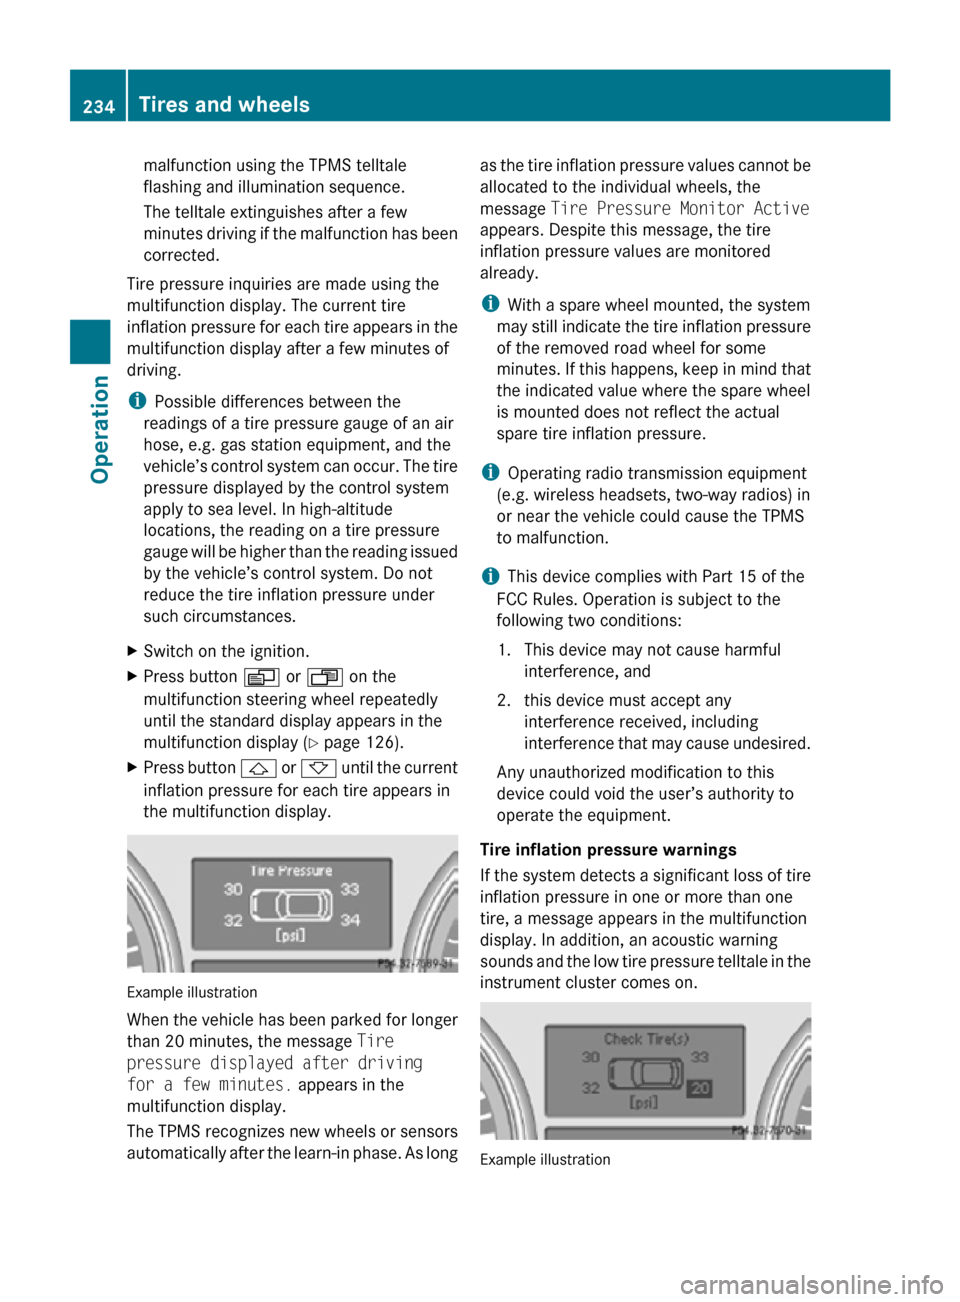
Tire pressure inquiries are made using the
multifunction display. The current tire
inflation pressure for each tire appears in the
multifunction display after a few minutes of
driving.
i Possible differences between the
readings of a tire pressure gauge of an air
hose, e.g. gas station equipment, and the
vehicle’s control system can occur. The tire
pressure displayed by the control system
apply to sea level. In high-altitude
locations, the reading on a tire pressure
gauge will be higher than the reading issued
by the vehicle’s control system. Do not
reduce the tire inflation pressure under
such circumstances.
X Switch on the ignition.
X Press button V or U on the
multifunction steering wheel repeatedly
until the standard display appears in the
multifunction display ( Y page 126).
X Press button & or * until the current
inflation pressure for each tire appears in
the multifunction display. Example illustration
When the vehicle has been parked for longer
than 20 minutes, the message Tire
pressure displayed after driving
for a few minutes. appears in the
multifunction display.
The TPMS recognizes new wheels or sensors
automatically after the learn-in phase. As long as the tire inflation pressure values cannot be
allocated to the individual wheels, the
message
Tire Pressure Monitor Active
appears. Despite this message, the tire
inflation pressure values are monitored
already.
i With a spare wheel mounted, the system
may still indicate the tire inflation pressure
of the removed road wheel for some
minutes. If this happens, keep in mind that
the indicated value where the spare wheel
is mounted does not reflect the actual
spare tire inflation pressure.
i Operating radio transmission equipment
(e.g. wireless headsets, two-way radios) in
or near the vehicle could cause the TPMS
to malfunction.
i This device complies with Part 15 of the
FCC Rules. Operation is subject to the
following two conditions:
1. This device may not cause harmful interference, and
2. this device must accept any interference received, including
interference that may cause undesired.
Any unauthorized modification to this
device could void the user’s authority to
operate the equipment.
Tire inflation pressure warnings
If the system detects a significant loss of tire
inflation pressure in one or more than one
tire, a message appears in the multifunction
display. In addition, an acoustic warning
sounds and the low tire pressure telltale in the
instrument cluster comes on. Example illustration234
Tires and wheelsOperation
251_AKB; 4; 52, en-US
d2ureepe,
Version: 2.11.8.1 2009-03-23T09:22:52+01:00 - Seite 234
Page 237 of 364
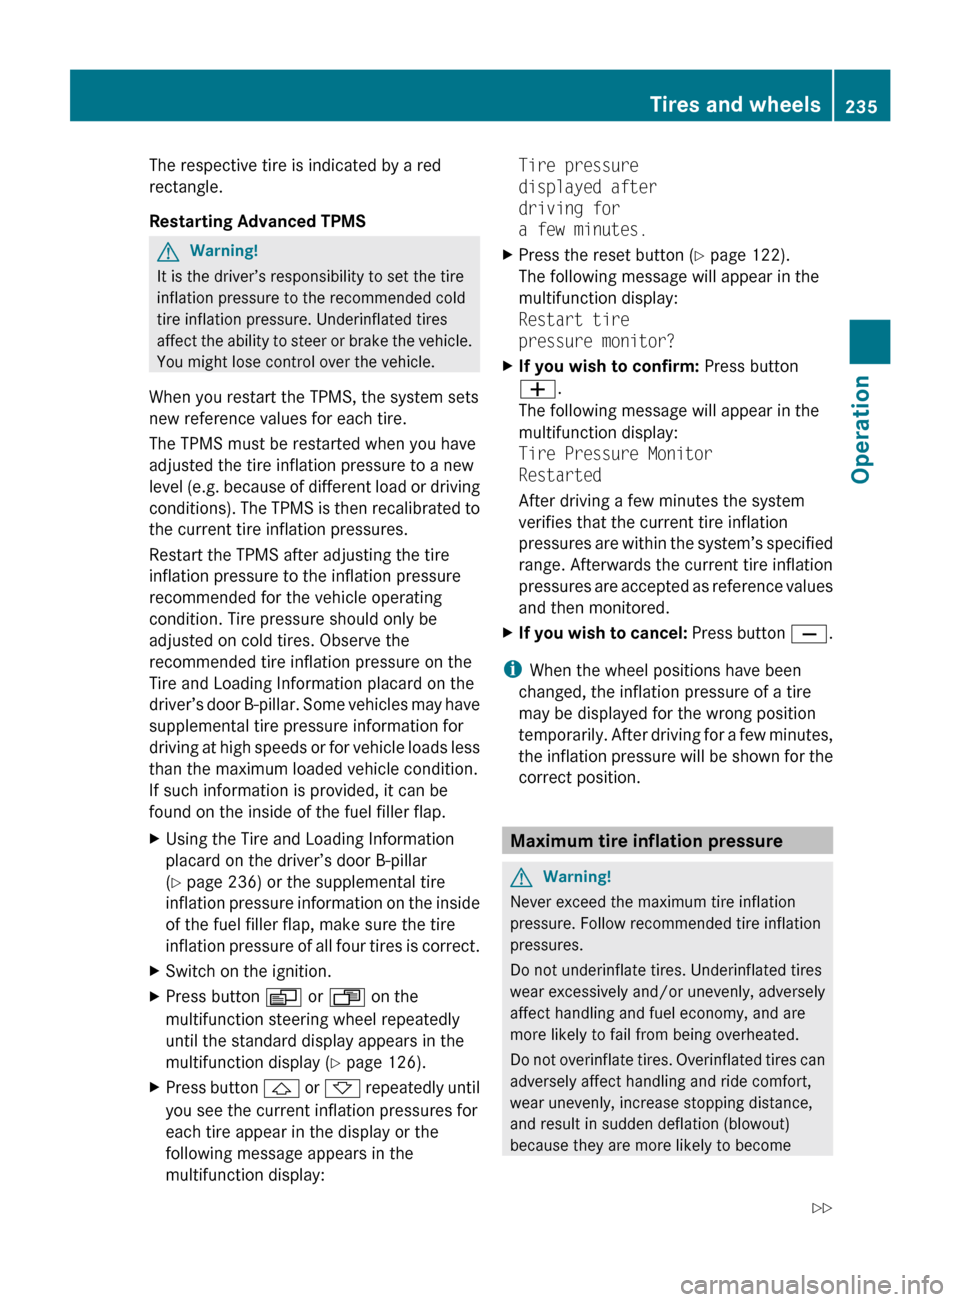
The respective tire is indicated by a red
rectangle.
Restarting Advanced TPMS
G
Warning!
It is the driver’s responsibility to set the tire
inflation pressure to the recommended cold
tire inflation pressure. Underinflated tires
affect
the ability to steer or brake the vehicle.
You might lose control over the vehicle.
When you restart the TPMS, the system sets
new reference values for each tire.
The TPMS must be restarted when you have
adjusted the tire inflation pressure to a new
level (e.g. because of different load or driving
conditions). The TPMS is then recalibrated to
the current tire inflation pressures.
Restart the TPMS after adjusting the tire
inflation pressure to the inflation pressure
recommended for the vehicle operating
condition. Tire pressure should only be
adjusted on cold tires. Observe the
recommended tire inflation pressure on the
Tire and Loading Information placard on the
driver’s door B-pillar. Some vehicles may have
supplemental tire pressure information for
driving at high speeds or for vehicle loads less
than the maximum loaded vehicle condition.
If such information is provided, it can be
found on the inside of the fuel filler flap.
X Using the Tire and Loading Information
placard on the driver’s door
B-pillar
(Y page 236) or the supplemental tire
inflation pressure information on the inside
of the fuel filler flap, make sure the tire
inflation pressure of all four tires is correct.
X Switch on the ignition.
X Press button V or U on the
multifunction steering wheel repeatedly
until the standard display appears in the
multifunction display
(Y page 126).
X Press button &
or * repeatedly until
you see the current inflation pressures for
each tire appear in the display or the
following message appears in the
multifunction display: Tire pressure
displayed after
driving for
a few minutes.
X Press the reset button (Y page 122).
The following message will appear in the
multifunction display:
Restart tire
pressure monitor?
X If you wish to confirm: Press button
W.
The following message will appear in the
multifunction display:
Tire Pressure Monitor
Restarted
After driving a few minutes the system
verifies that the current tire inflation
pressures
are within the system’s specified
range. Afterwards the current tire inflation
pressures are accepted as reference values
and then monitored.
X If you wish to cancel:
Press button X.
i When the wheel positions have been
changed, the inflation pressure of a tire
may be displayed for the wrong position
temporarily.
After driving for a few minutes,
the inflation pressure will be shown for the
correct position. Maximum tire inflation pressure
G
Warning!
Never exceed the maximum tire inflation
pressure. Follow recommended tire inflation
pressures.
Do not underinflate tires. Underinflated tires
wear excessively and/or unevenly, adversely
affect handling and fuel economy, and are
more likely to fail from being overheated.
Do
not overinflate tires. Overinflated tires can
adversely affect handling and ride comfort,
wear unevenly, increase stopping distance,
and result in sudden deflation (blowout)
because they are more likely to become Tires and wheels
235
Operation
251_AKB; 4; 52, en-US
d2ureepe, Version: 2.11.8.1 2009-03-23T09:22:52+01:00 - Seite 235 Z
Page 257 of 364
!
Only conduct operational or performance
tests on a two-axle dynamometer. If such
tests are necessary, contact an authorized
Mercedes-Benz Center. You could
otherwise seriously damage the brake
system or the transfer case which is not
covered by the Mercedes-Benz Limited
Warranty.
! Because the ESP ®
operates
automatically, the engine and ignition must
be shut off (SmartKey in starter switch
position 0 or 1 or KEYLESS-GO start/stop
button in position 0 or 1) when the parking
brake is being tested on a brake test
dynamometer. Such testing should be no
longer than 10 seconds.
Active braking action through the ESP ®
may otherwise seriously damage the brake
system which is not covered by the
Mercedes-Benz Limited Warranty.
If your brake system is only subjected to
moderate loads, you should occasionally test
the effectiveness of the brakes by applying
above-normal braking pressure at higher
speeds. This will also enhance the grip of the
brake pads. G
Warning!
Make sure not to endanger any other road
users when carrying out these braking
maneuvers.
Refer to the description of the Brake Assist
System (BAS) ( Y page 64).
Parking brake When driving on wet roads or dirt covered
surfaces, road salt and/or dirt can get into
the parking brake. To prevent corrosion and a reduction in the
braking power of the parking brake, observe
the following:
X
From time to time, lightly engage the
parking brake before driving off.
X Drive a distance of approximately 110 yds
(100 m) at a maximum speed of 12 mph
(20 km/h). G
Warning!
While performing this procedure please
assure that the vehicle is stopped before
applying the parking brake. Otherwise the
rear wheels could lock up. You could lose
control of the vehicle and cause an accident.
In addition, the vehicle’s brake lights do not
light up when the parking brake is engaged.
Make sure not to endanger any other road
users when you engage the parking brake. Driving off
Warm up the engine smoothly. Do not place
full load on the engine until the operating
temperature has been reached.
! When
driving off on a slippery surface, do
not allow a drive wheel to spin for an
extended period with the ESP ®
switched
off. Doing so may cause serious damage to
the drivetrain which is not covered by the
Mercedes-Benz Limited Warranty.
! Simultaneously depressing the
accelerator pedal and applying the brakes
reduces engine performance and causes
premature brake and drivetrain wear which
is not covered by the Mercedes-Benz
Limited Warranty. Hydroplaning
Depending
on the depth of the water layer on
the road, hydroplaning may occur, even at low
speeds and with new tires. In heavy rain or
when conditions indicate possible
hydroplaning: Driving instructions
255
Operation
251_AKB; 4; 52, en-US
d2ureepe, Version: 2.11.8.1 2009-03-23T09:22:52+01:00 - Seite 255 Z
Page 263 of 364
Maintenance service indicator
message
The maintenance service indicator message
will notify you when the next maintenance
service is required.
Starting approximately 1 month before the
next maintenance service is required, one of
the following messages will appear in the
multifunction display. The messages will
appear while you are driving or when you
switch on the ignition (example service A):
Service A In XXXXX Miles (km)
Service A In XXX Days
Service A In X Day
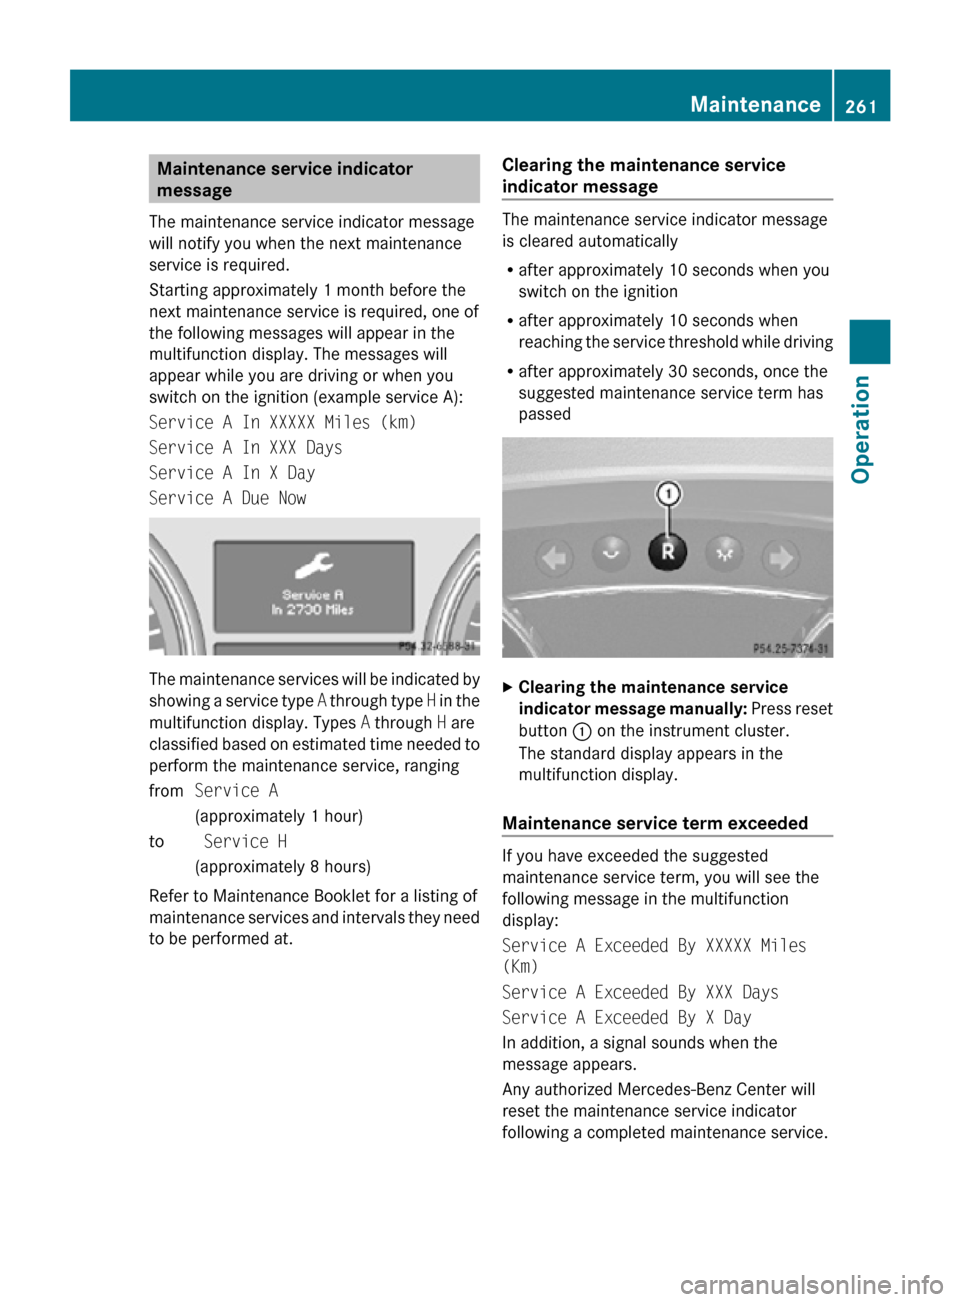
Service A Due Now The maintenance services will be indicated by
showing a service type
A through type H in the
multifunction display. Types A through H are
classified based on estimated time needed to
perform the maintenance service, ranging
from Service A
(approximately 1 hour)
to Service H
(approximately 8 hours)
Refer to Maintenance Booklet for a listing of
maintenance services and intervals they need
to be performed at. Clearing the maintenance service
indicator message The maintenance service indicator message
is cleared automatically
R
after approximately 10 seconds when you
switch on the ignition
R after approximately 10 seconds when
reaching the service threshold while driving
R after approximately 30 seconds, once the
suggested maintenance service term has
passed X
Clearing the maintenance service
indicator message manually: Press reset
button : on the instrument cluster.
The standard display appears in the
multifunction display.
Maintenance service term exceeded If you have exceeded the suggested
maintenance service term, you will see the
following message in the multifunction
display:
Service A Exceeded By XXXXX Miles
(Km)
Service A Exceeded By XXX Days
Service A Exceeded By X Day
In addition, a signal sounds when the
message appears.
Any authorized Mercedes-Benz Center will
reset the maintenance service indicator
following a completed maintenance service. Maintenance
261Operation
251_AKB; 4; 52, en-US
d2ureepe, Version: 2.11.8.1 2009-03-23T09:22:52+01:00 - Seite 261 Z
Page 264 of 364
Calling up the maintenance service
indicator display
i The menu overview can be found on
(Y page 126).
You can call up the maintenance service
indicator display at any time to check when
the next maintenance service is required.
X Switch on the ignition.
X Press button V or U on the
multifunction steering wheel repeatedly
until the standard display
(Y page 126)
appears in the multifunction display.
X Press button * or & on the
multifunction steering wheel until the
maintenance
service indicator display with
the service symbol ¯ and the
maintenance service deadline appears in
the multifunction display.
i If
the battery was disconnected, the days
of disconnection will not be included in the
count shown by the maintenance service
indicator. To arrive at the true maintenance
service deadline, you will need to subtract
these days from the days shown in the
maintenance service indicator message or
maintenance service indicator display.
Do not confuse the maintenance service
indicator with the engine oil level indicator
4. Resetting the maintenance service
indicator
In
the event that the maintenance service on
your vehicle is not carried out at an authorized
Mercedes-Benz Center, you can have the
maintenance service indicator reset.
The automotive maintenance facility carrying
out the maintenance service will find the
information for resetting the maintenance
service indicator in the maintenance-relevant
literature for your vehicle. Such literature is available at any authorized
Mercedes-Benz Center or directly from
Mercedes-Benz.
!
If the maintenance service indicator was
reset inadvertently, have an authorized
Mercedes-Benz Center correct it.
Only reset the maintenance service
indicator
if the proper maintenance service
has been performed. Resetting the system
without performing the proper
maintenance service as called for by the
maintenance service indicator will result in
engine damage and/or other vehicle
damage not covered by the Mercedes-Benz
Limited Warranty. Vehicle care
Cleaning and care of the vehicle
Notes Regular and proper care will help to maintain
the value of your vehicle.
G
Warning!
Many cleaning products can be hazardous.
Some are poisonous, others are flammable.
Always follow the instructions on the
particular container. Always open your
vehicle’s
doors or windows when cleaning the
inside.
Never use fluids or solvents that are not
designed for cleaning your vehicle.
Always lock away cleaning products and keep
them out of reach of children.
! When cleaning the vehicle, do not use
scouring agents. Never apply strong force
and only use a soft, wet cloth or sponge.
Otherwise you may scratch or damage the
surface to be cleaned.
While in operation, even while parked, your
vehicle is subjected to varying external
influences which, if gone unchecked, can 262
Vehicle care
Operation
251_AKB; 4; 52, en-US
d2ureepe,
Version: 2.11.8.1 2009-03-23T09:22:52+01:00 - Seite 262