2010 MERCEDES-BENZ R320 brake
[x] Cancel search: brakePage 153 of 364
X
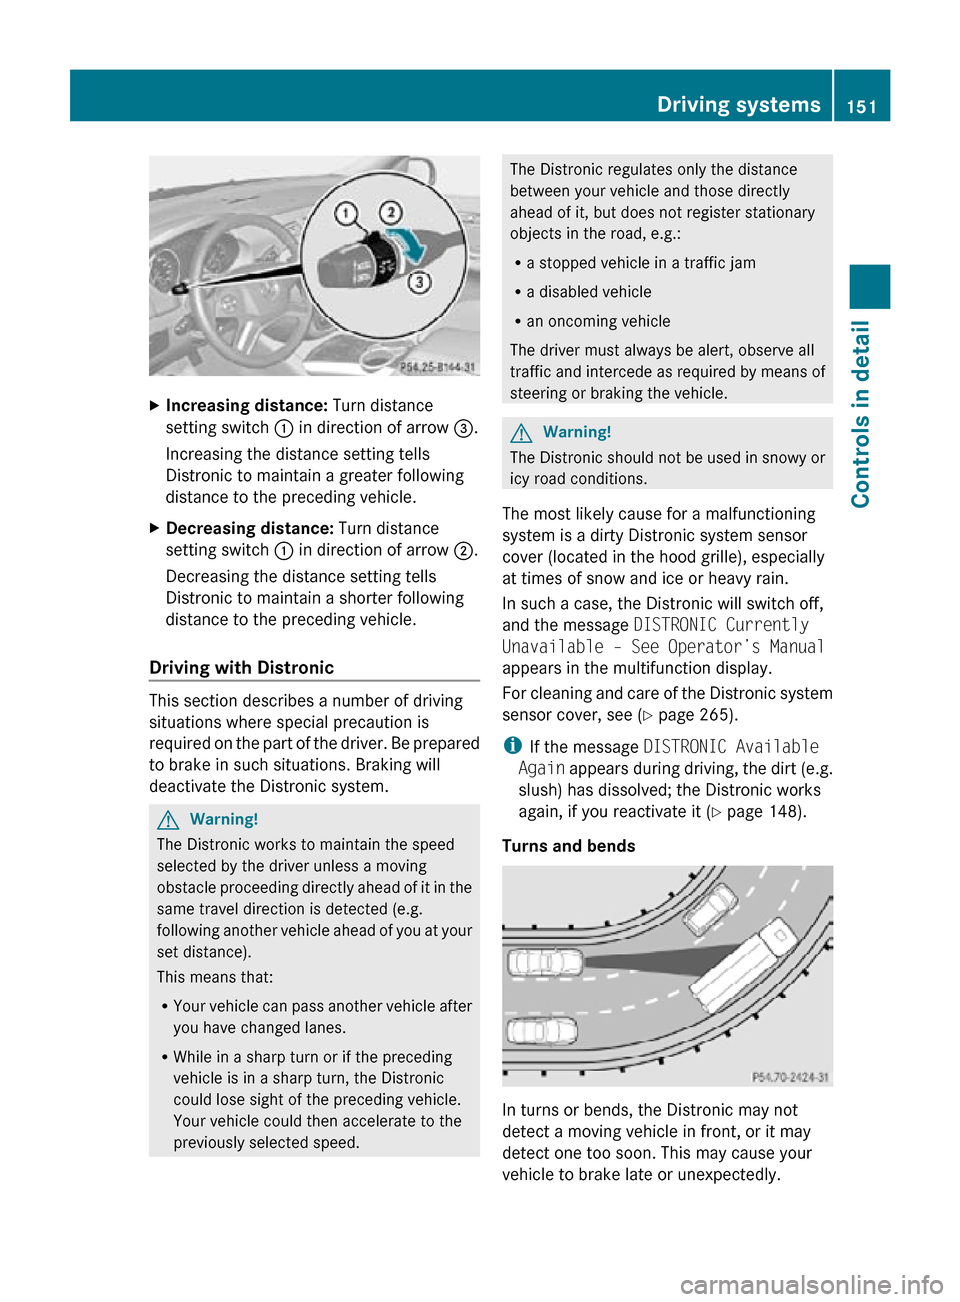
Increasing distance: Turn distance
setting switch : in direction of arrow =.
Increasing the distance setting tells
Distronic to maintain a greater following
distance to the preceding vehicle.
X Decreasing distance: Turn distance
setting switch : in direction of arrow ;.
Decreasing the distance setting tells
Distronic to maintain a shorter following
distance to the preceding vehicle.
Driving with Distronic This section describes a number of driving
situations where special precaution is
required on the part of the driver. Be prepared
to brake in such situations. Braking will
deactivate the Distronic system.
G
Warning!
The Distronic works to maintain the speed
selected by the driver unless a moving
obstacle proceeding directly ahead of it in the
same travel direction is detected (e.g.
following another vehicle ahead of you at your
set distance).
This means that:
R Your vehicle can pass another vehicle after
you have changed lanes.
R While in a sharp turn or if the preceding
vehicle is in a sharp turn, the Distronic
could lose sight of the preceding vehicle.
Your vehicle could then accelerate to the
previously selected speed. The Distronic regulates only the distance
between your vehicle and those directly
ahead of it, but does not register stationary
objects in the road, e.g.:
R
a stopped vehicle in a traffic jam
R a disabled vehicle
R an oncoming vehicle
The driver must always be alert, observe all
traffic and intercede as required by means of
steering or braking the vehicle. G
Warning!
The Distronic should not be used in snowy or
icy road conditions.
The most likely cause for a malfunctioning
system is a dirty Distronic system sensor
cover (located in the hood grille), especially
at times of snow and ice or heavy rain.
In such a case, the Distronic will switch off,
and the message DISTRONIC Currently
Unavailable – See Operator’s Manual
appears in the multifunction display.
For cleaning and care of the Distronic system
sensor cover, see (Y page 265).
i If the message DISTRONIC Available
Again appears during driving, the dirt (e.g.
slush) has dissolved; the Distronic works
again, if you reactivate it ( Y page 148).
Turns and bends In turns or bends, the Distronic may not
detect a moving vehicle in front, or it may
detect one too soon. This may cause your
vehicle to brake late or unexpectedly. Driving systems
151Controls in detail
251_AKB; 4; 52, en-US
d2ureepe, Version: 2.11.8.1 2009-03-23T09:22:52+01:00 - Seite 151 Z
Page 154 of 364
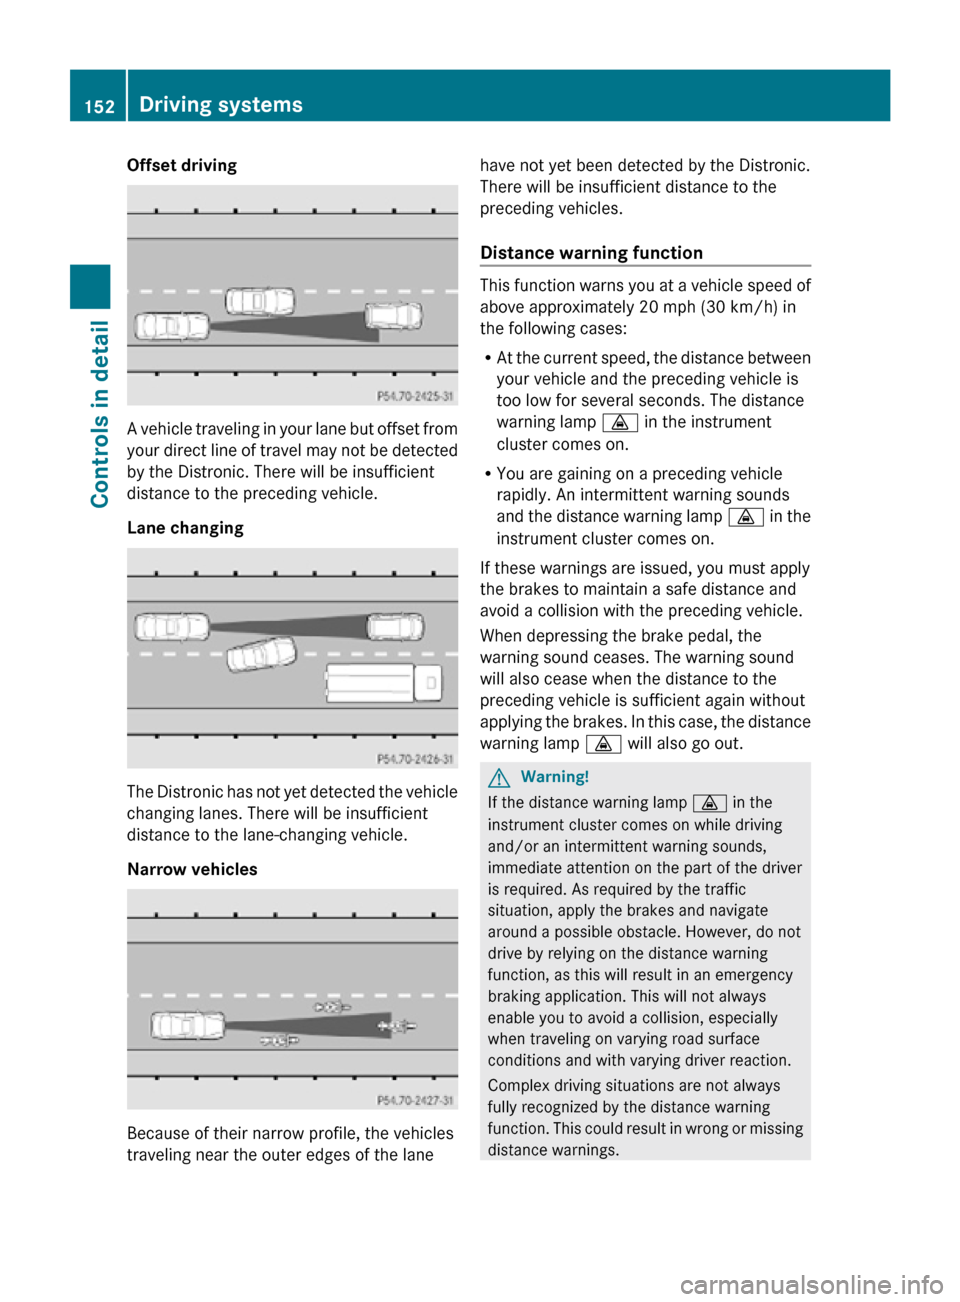
Offset driving
A vehicle traveling in your lane but offset from
your direct line of travel may not be detected
by the Distronic. There will be insufficient
distance to the preceding vehicle.
Lane changing
The Distronic has not yet detected the vehicle
changing lanes. There will be insufficient
distance to the lane-changing vehicle.
Narrow vehicles
Because of their narrow profile, the vehicles
traveling near the outer edges of the lane have not yet been detected by the Distronic.
There will be insufficient distance to the
preceding vehicles.
Distance warning function This function warns you at a vehicle speed of
above approximately 20 mph (30 km/h) in
the following cases:
R
At the current speed, the distance between
your vehicle and the preceding vehicle is
too low for several seconds. The distance
warning lamp · in the instrument
cluster comes on.
R You are gaining on a preceding vehicle
rapidly. An intermittent warning sounds
and the distance warning lamp · in the
instrument cluster comes on.
If these warnings are issued, you must apply
the brakes to maintain a safe distance and
avoid a collision with the preceding vehicle.
When depressing the brake pedal, the
warning sound ceases. The warning sound
will also cease when the distance to the
preceding vehicle is sufficient again without
applying the brakes. In this case, the distance
warning lamp · will also go out. G
Warning!
If the distance warning lamp · in the
instrument cluster comes on while driving
and/or an intermittent warning sounds,
immediate attention on the part of the driver
is required. As required by the traffic
situation, apply the brakes and navigate
around a possible obstacle. However, do not
drive by relying on the distance warning
function, as this will result in an emergency
braking application. This will not always
enable you to avoid a collision, especially
when traveling on varying road surface
conditions and with varying driver reaction.
Complex driving situations are not always
fully recognized by the distance warning
function. This could result in wrong or missing
distance warnings. 152
Driving systemsControls in detail
251_AKB; 4; 52, en-US
d2ureepe,
Version: 2.11.8.1 2009-03-23T09:22:52+01:00 - Seite 152
Page 155 of 364
X
Activating/deactivating: Activate or
deactivate the distance warning function in
the control system (Y page 138).
When activated, the distance warning
function indicator Ä appears in the
multifunction display. Hill-start assist system
G
Warning!
The hill-start assist system is not designed to
function as a parking brake. It does not
prevent the vehicle from moving when parked
on an incline.
Always engage the parking brake in addition
to shifting the automatic transmission into
park position P.
On uphill grades, the hill-start assist system
maintains the pressure in the brake system
for approximately 1 second after you have
released the brake pedal. Therefore, you can
start off smoothly without the vehicle moving
immediately after releasing the brake pedal.
X Depress the brake pedal.
X Shift the automatic transmission into drive
position D or reverse gear R.
X Release the brake pedal.
X Carefully depress the accelerator pedal.
The hill-start assist system is inactive
R when starting off on a level road or downhill
grades
R with the automatic transmission in neutral
position N
R with the parking brake engaged
R if the ESP ®
has switched off due to a
malfunction Rear-axle level control
The rear-axle level control adjusts the vehicle
level for the rear axle. The rear-axle level
control is beneficial because it keeps the vehicle level at the rear axle constant,
independent of the load.
i
Observe the information on towing a
trailer, see “Trailer towing” ( Y page 256). AIRMATIC
The AIRMATIC lets you select the chassis and
suspension setup. The chassis and
suspension setup adjusts the damping
behavior and the ride height for your vehicle.
The AIRMATIC consists of two components.
The Adaptive Damping System (ADS)
(Y page 153) and the vehicle level control
(Y page 154). Adaptive Damping System (ADS)
The Adaptive Damping System (ADS) is
controlled electronically and operates
continuously. It adjusts the damping
characteristics to the current operating and
driving conditions. The damping is adjusted
individually for each wheel. Driving safety and
tire comfort are increased.
The fine tuning of the damping is dependent
on:
R your driving style
R road surface conditions
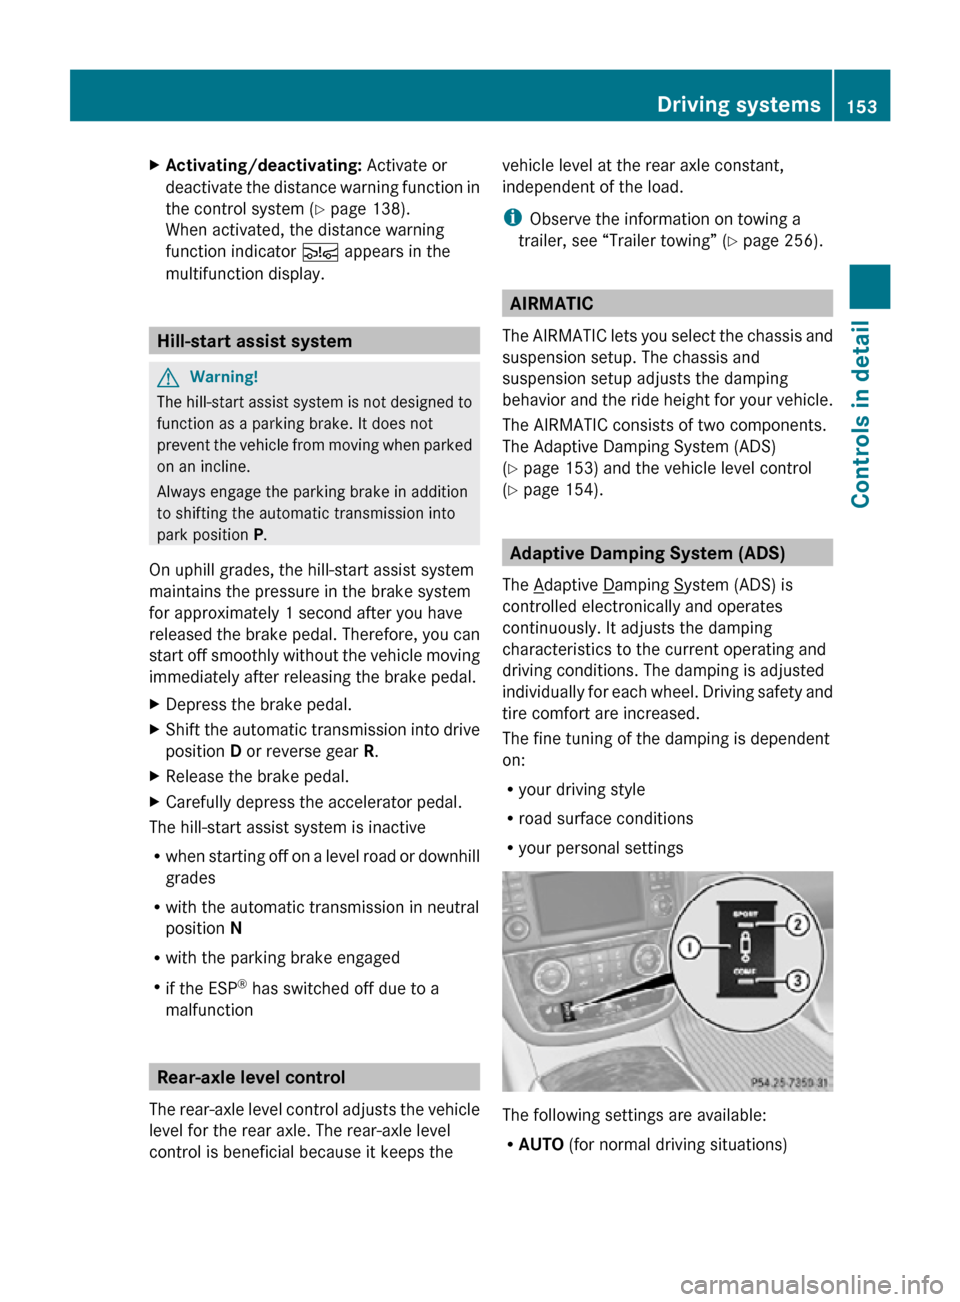
R your personal settings The following settings are available:
R
AUTO (for normal driving situations) Driving systems
153Controls in detail
251_AKB; 4; 52, en-US
d2ureepe, Version: 2.11.8.1 2009-03-23T09:22:52+01:00 - Seite 153 Z
Page 158 of 364
X
Close all doors and the tailgate.
X Start the engine.
When indicator lamp ; is on:
X Press switch :.
Indicator lamp ; flashes. The vehicle
adjusts to the highway level.
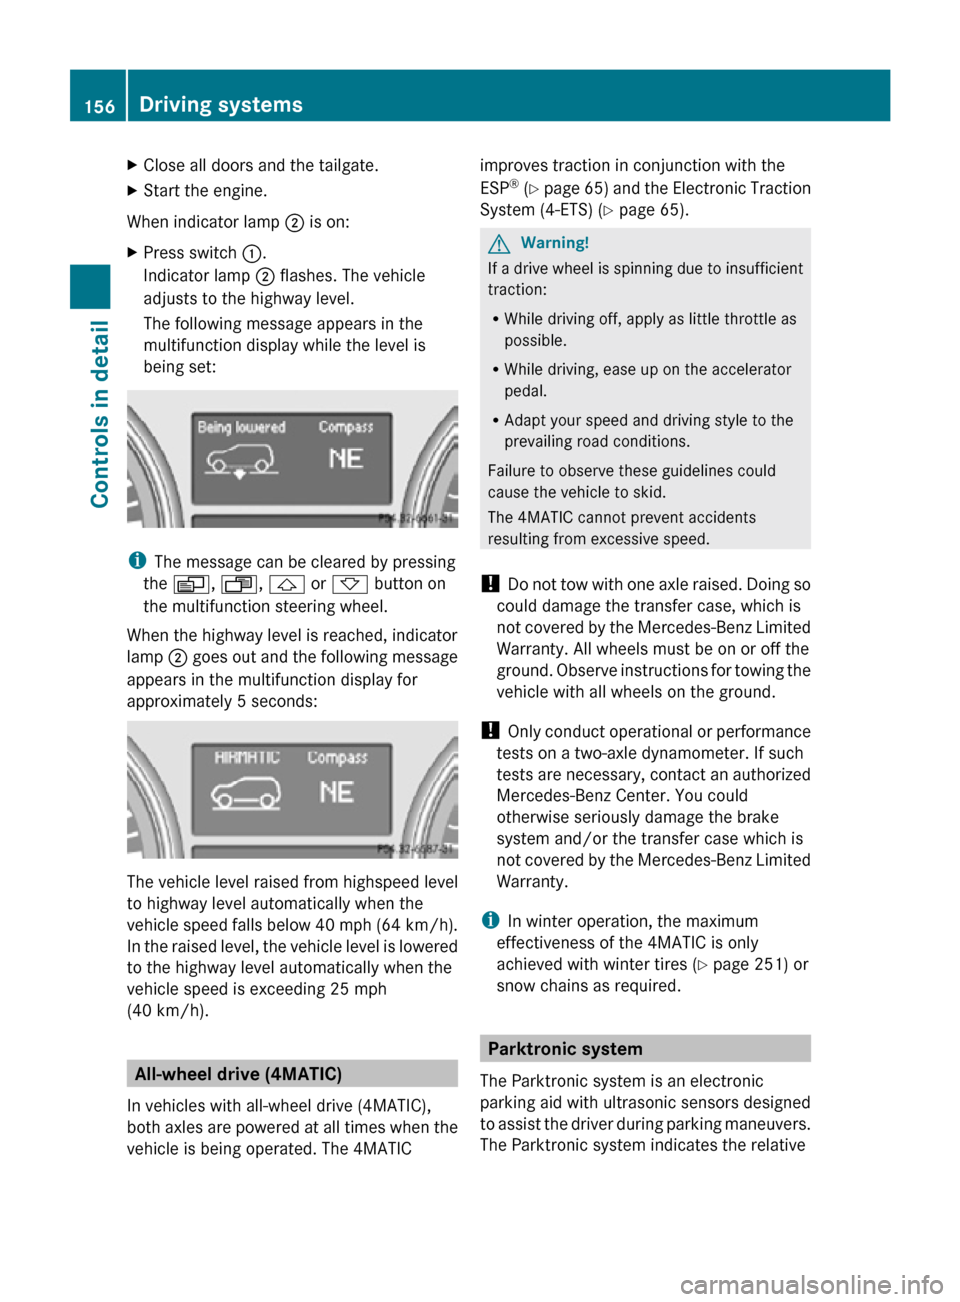
The following message appears in the
multifunction display while the level is
being set: i
The message can be cleared by pressing
the V, U, & or * button on
the multifunction steering wheel.
When the highway level is reached, indicator
lamp ; goes out and the following message
appears in the multifunction display for
approximately 5 seconds: The vehicle level raised from highspeed level
to highway level automatically when the
vehicle speed falls below 40 mph (64 km/h).
In the raised level, the vehicle level is lowered
to the highway level automatically when the
vehicle speed is exceeding 25 mph
(40 km/h).
All-wheel drive (4MATIC)
In vehicles with all-wheel drive (4MATIC),
both axles are powered at all times when the
vehicle is being operated. The 4MATIC improves traction in conjunction with the
ESP
®
(Y page 65) and the Electronic Traction
System (4-ETS) (Y page 65). G
Warning!
If a drive wheel is spinning due to insufficient
traction:
R While driving off, apply as little throttle as
possible.
R While driving, ease up on the accelerator
pedal.
R Adapt your speed and driving style to the
prevailing road conditions.
Failure to observe these guidelines could
cause the vehicle to skid.
The 4MATIC cannot prevent accidents
resulting from excessive speed.
! Do not tow with one axle raised. Doing so
could damage the transfer case, which is
not covered by the Mercedes-Benz Limited
Warranty. All wheels must be on or off the
ground. Observe instructions for towing the
vehicle with all wheels on the ground.
! Only conduct operational or performance
tests on a two-axle dynamometer. If such
tests are necessary, contact an authorized
Mercedes-Benz Center. You could
otherwise seriously damage the brake
system and/or the transfer case which is
not covered by the Mercedes-Benz Limited
Warranty.
i In winter operation, the maximum
effectiveness of the 4MATIC is only
achieved with winter tires ( Y page 251) or
snow chains as required. Parktronic system
The Parktronic system is an electronic
parking aid with ultrasonic sensors designed
to assist the driver during parking maneuvers.
The Parktronic system indicates the relative 156
Driving systemsControls in detail
251_AKB; 4; 52, en-US
d2ureepe,
Version: 2.11.8.1 2009-03-23T09:22:52+01:00 - Seite 156
Page 159 of 364
distance between the vehicle and an obstacle
visually and audibly.
The Parktronic system is activated
automatically when
R
you switch on the ignition
and
R you release the parking brake
and
R the automatic transmission is in drive
position D, reverse gear R, or neutral
position N
The Parktronic system deactivates at speeds
above approximately 11 mph (18 km/h). At
lower speeds, the Parktronic system
activates again.
The Parktronic system also deactivates when
you shift the automatic transmission into
park position P or engage the parking brake.
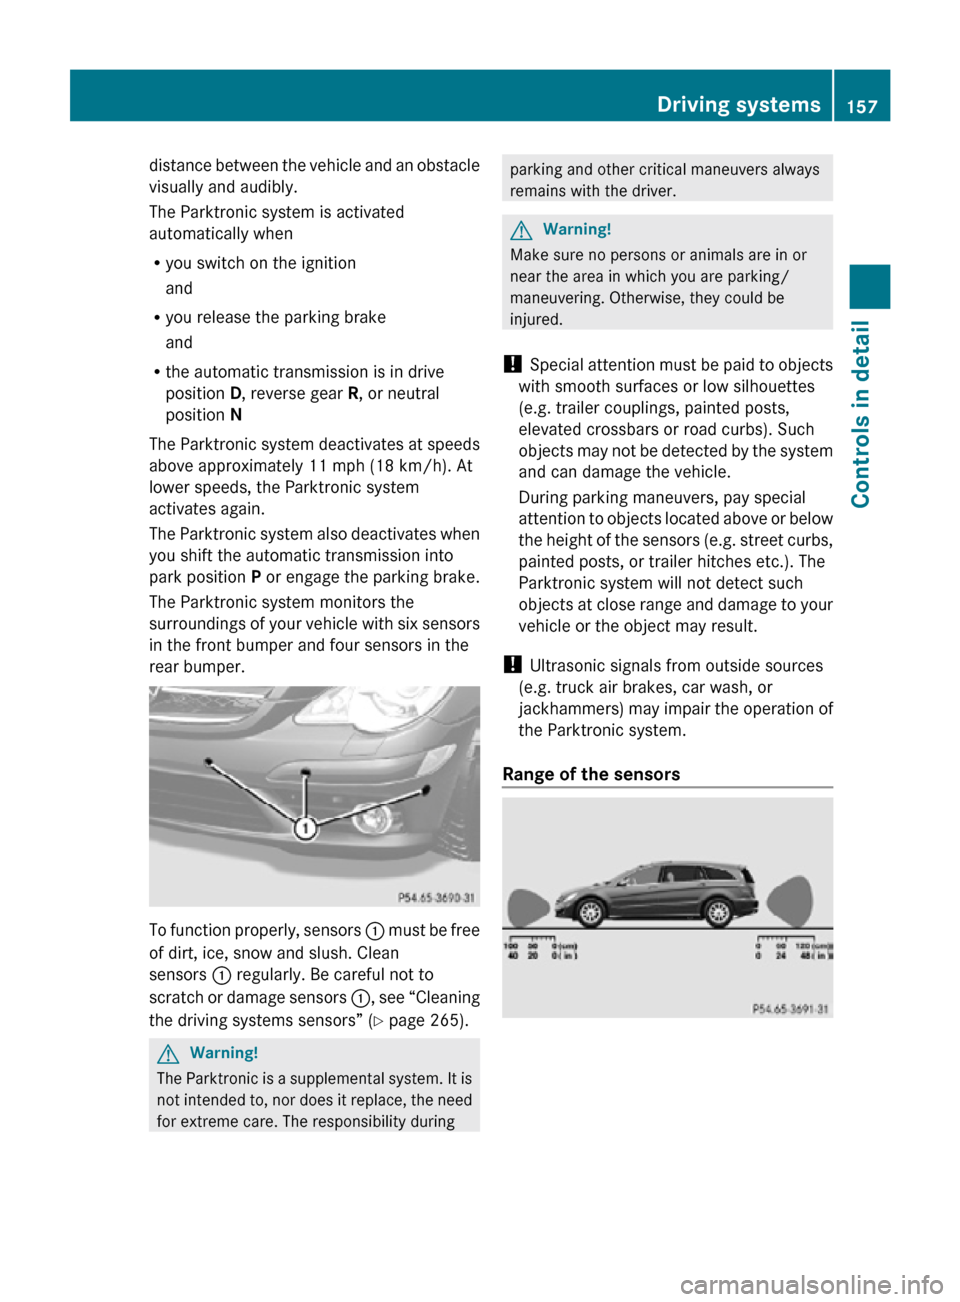
The Parktronic system monitors the
surroundings of your vehicle with six sensors
in the front bumper and four sensors in the
rear bumper. To function properly, sensors
: must be free
of dirt, ice, snow and slush. Clean
sensors : regularly. Be careful not to
scratch or damage sensors :, see “Cleaning
the driving systems sensors” (Y page 265). G
Warning!
The Parktronic is a supplemental system. It is
not intended to, nor does it replace, the need
for extreme care. The responsibility during parking and other critical maneuvers always
remains with the driver.
G
Warning!
Make sure no persons or animals are in or
near the area in which you are parking/
maneuvering. Otherwise, they could be
injured.
! Special attention must be paid to objects
with smooth surfaces or low silhouettes
(e.g. trailer couplings, painted posts,
elevated crossbars or road curbs). Such
objects may not be detected by the system
and can damage the vehicle.
During parking maneuvers, pay special
attention to objects located above or below
the height of the sensors (e.g. street curbs,
painted posts, or trailer hitches etc.). The
Parktronic system will not detect such
objects at close range and damage to your
vehicle or the object may result.
! Ultrasonic signals from outside sources
(e.g. truck air brakes, car wash, or
jackhammers) may impair the operation of
the Parktronic system.
Range of the sensors Driving systems
157Controls in detail
251_AKB; 4; 52, en-US
d2ureepe, Version: 2.11.8.1 2009-03-23T09:22:52+01:00 - Seite 157 Z
Page 161 of 364
R
Front area: An intermittent acoustic
warning lasting a maximum of 2 seconds
will sound as the first red distance segment
illuminates. A constant acoustic warning
lasting a maximum of 2 seconds will sound
for the second red distance segment. The
signal is canceled when the automatic
transmission is shifted into park
position P or the parking brake is engaged.
R Rear area: An intermittent acoustic
warning lasting a maximum of 2 seconds
will sound as the first red distance segment
illuminates. A constant acoustic warning
lasting a maximum of 2 seconds will sound
for the second red distance segment. The
signal is canceled when the automatic
transmission is shifted into drive
position D, or park position P, or the
parking brake is engaged.
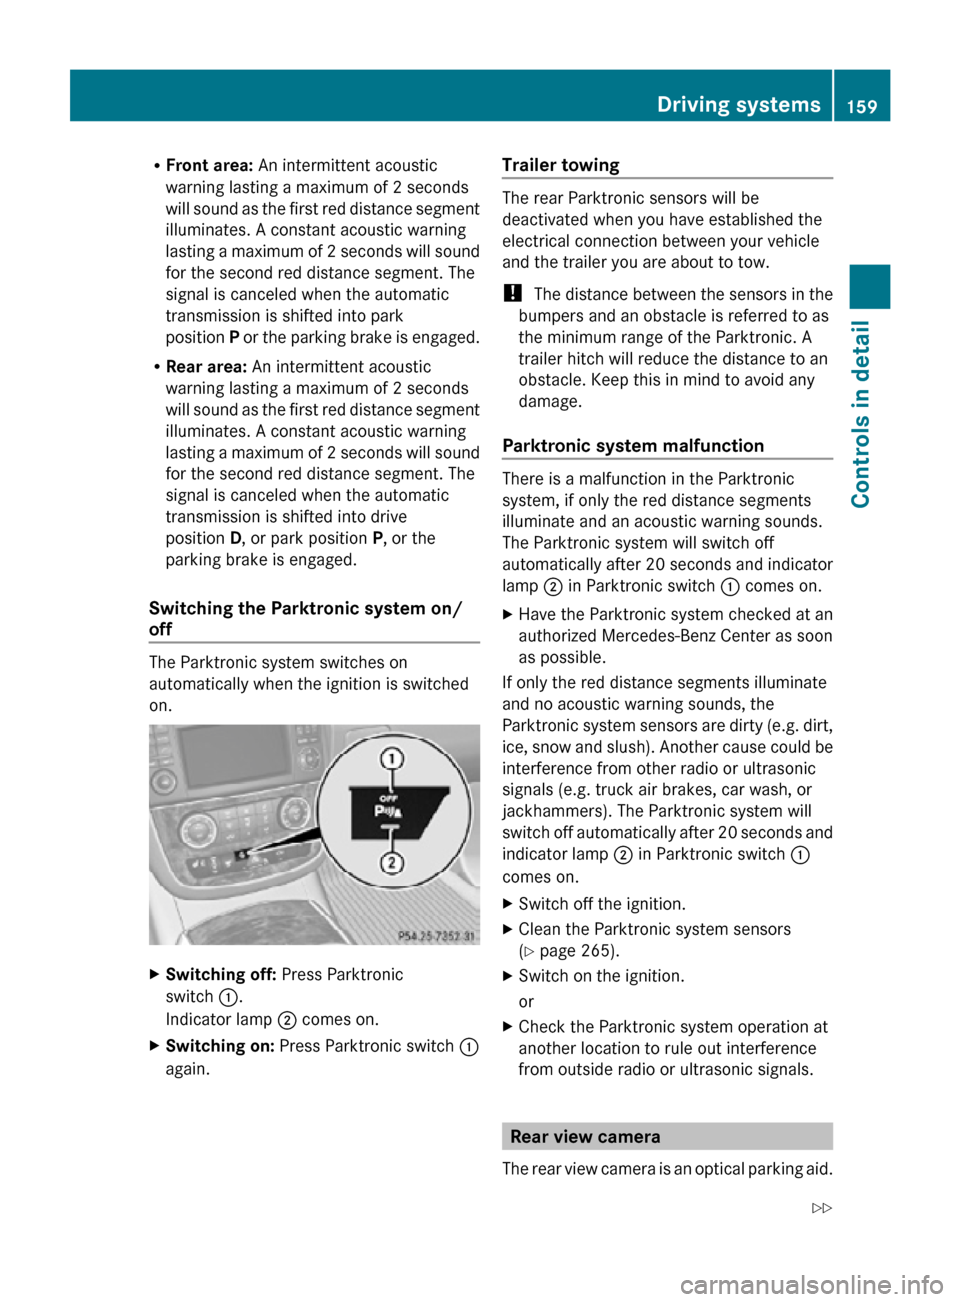
Switching the Parktronic system on/
off The Parktronic system switches on
automatically when the ignition is switched
on.
X
Switching off: Press Parktronic
switch :.
Indicator lamp ; comes on.
X Switching on: Press Parktronic switch :
again. Trailer towing The rear Parktronic sensors will be
deactivated when you have established the
electrical connection between your vehicle
and the trailer you are about to tow.
!
The distance between the sensors in the
bumpers and an obstacle is referred to as
the minimum range of the Parktronic. A
trailer hitch will reduce the distance to an
obstacle. Keep this in mind to avoid any
damage.
Parktronic system malfunction There is a malfunction in the Parktronic
system, if only the red distance segments
illuminate and an acoustic warning sounds.
The Parktronic system will switch off
automatically after 20 seconds and indicator
lamp
; in Parktronic switch : comes on.
X Have the Parktronic system checked at an
authorized Mercedes-Benz Center as soon
as possible.
If only the red distance segments illuminate
and no acoustic warning sounds, the
Parktronic system sensors are dirty (e.g. dirt,
ice, snow and slush). Another cause could be
interference from other radio or ultrasonic
signals (e.g. truck air brakes, car wash, or
jackhammers). The Parktronic system will
switch off automatically after 20 seconds and
indicator lamp ; in Parktronic switch :
comes on.
X Switch off the ignition.
X Clean the Parktronic system sensors
(Y page 265).
X Switch on the ignition.
or
X Check the Parktronic system operation at
another location to rule out interference
from outside radio or ultrasonic signals. Rear view camera
The rear view camera is an optical parking aid. Driving systems
159Controls in detail
251_AKB; 4; 52, en-US
d2ureepe, Version: 2.11.8.1 2009-03-23T09:22:52+01:00 - Seite 159 Z
Page 224 of 364
i
Leaving the engine running and the fuel
filler cap open can cause the yellow fuel
tank
reserve warning lamp to flash and the
malfunction indicator lamp ! (USA
only) or ; (Canada only) to illuminate.
For more information, see also “Practical
hints” (Y page 305).
X Remove the SmartKey from the starter
switch.
KEYLESS-GO: Open the driver’s door (this
puts the starter switch in position 0, same
as with the SmartKey removed from the
starter switch). The driver’s door then can
be closed again.
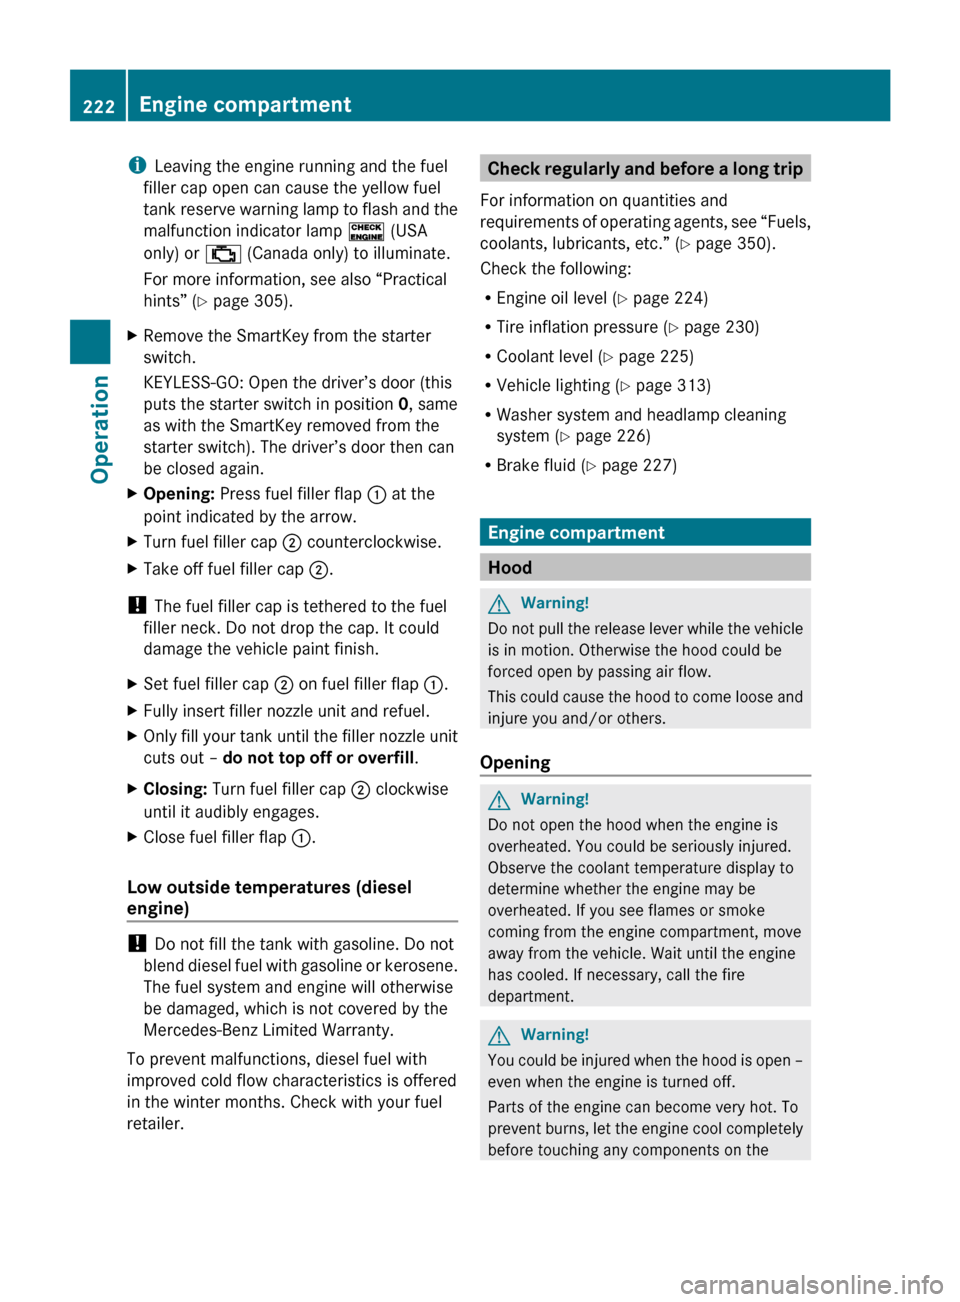
X Opening: Press fuel filler flap : at the
point indicated by the arrow.
X Turn fuel filler cap ; counterclockwise.
X Take off fuel filler cap ;.
! The fuel filler cap is tethered to the fuel
filler neck. Do not drop the cap. It could
damage the vehicle paint finish.
X Set fuel filler cap ; on fuel filler flap :.
X Fully insert filler nozzle unit and refuel.
X Only fill your tank until the filler nozzle unit
cuts out – do not top off or overfill .
X Closing: Turn fuel filler cap ; clockwise
until it audibly engages.
X Close fuel filler flap :.
Low outside temperatures (diesel
engine) !
Do not fill the tank with gasoline. Do not
blend
diesel fuel with gasoline or kerosene.
The fuel system and engine will otherwise
be damaged, which is not covered by the
Mercedes-Benz Limited Warranty.
To prevent malfunctions, diesel fuel with
improved cold flow characteristics is offered
in the winter months. Check with your fuel
retailer. Check regularly and before a long trip
For information on quantities and
requirements
of operating agents, see “Fuels,
coolants, lubricants, etc.” (Y page 350).
Check the following:
R Engine oil level ( Y page 224)
R Tire inflation pressure ( Y page 230)
R Coolant level ( Y page 225)
R Vehicle lighting ( Y page 313)
R Washer system and headlamp cleaning
system (Y page 226)
R Brake fluid ( Y page 227) Engine compartment
Hood
G
Warning!
Do not pull the release lever while the vehicle
is in motion. Otherwise the hood could be
forced open by passing air flow.
This
could cause the hood to come loose and
injure you and/or others.
Opening G
Warning!
Do not open the hood when the engine is
overheated. You could be seriously injured.
Observe the coolant temperature display to
determine whether the engine may be
overheated. If you see flames or smoke
coming from the engine compartment, move
away from the vehicle. Wait until the engine
has cooled. If necessary, call the fire
department. G
Warning!
You could be injured when the hood is open –
even when the engine is turned off.
Parts of the engine can become very hot. To
prevent
burns, let the engine cool completely
before touching any components on the 222
Engine compartment
Operation
251_AKB; 4; 52, en-US
d2ureepe,
Version: 2.11.8.1 2009-03-23T09:22:52+01:00 - Seite 222
Page 229 of 364
Brake fluid level
! If you find that the brake fluid in the brake
fluid reservoir has fallen to the minimum
mark or below, have the brake system
checked for brake pad thickness and leaks
immediately. Contact an authorized
Mercedes-Benz Center immediately. Do
not add brake fluid as this will not solve the
problem. For more information, see
“Practical hints”.
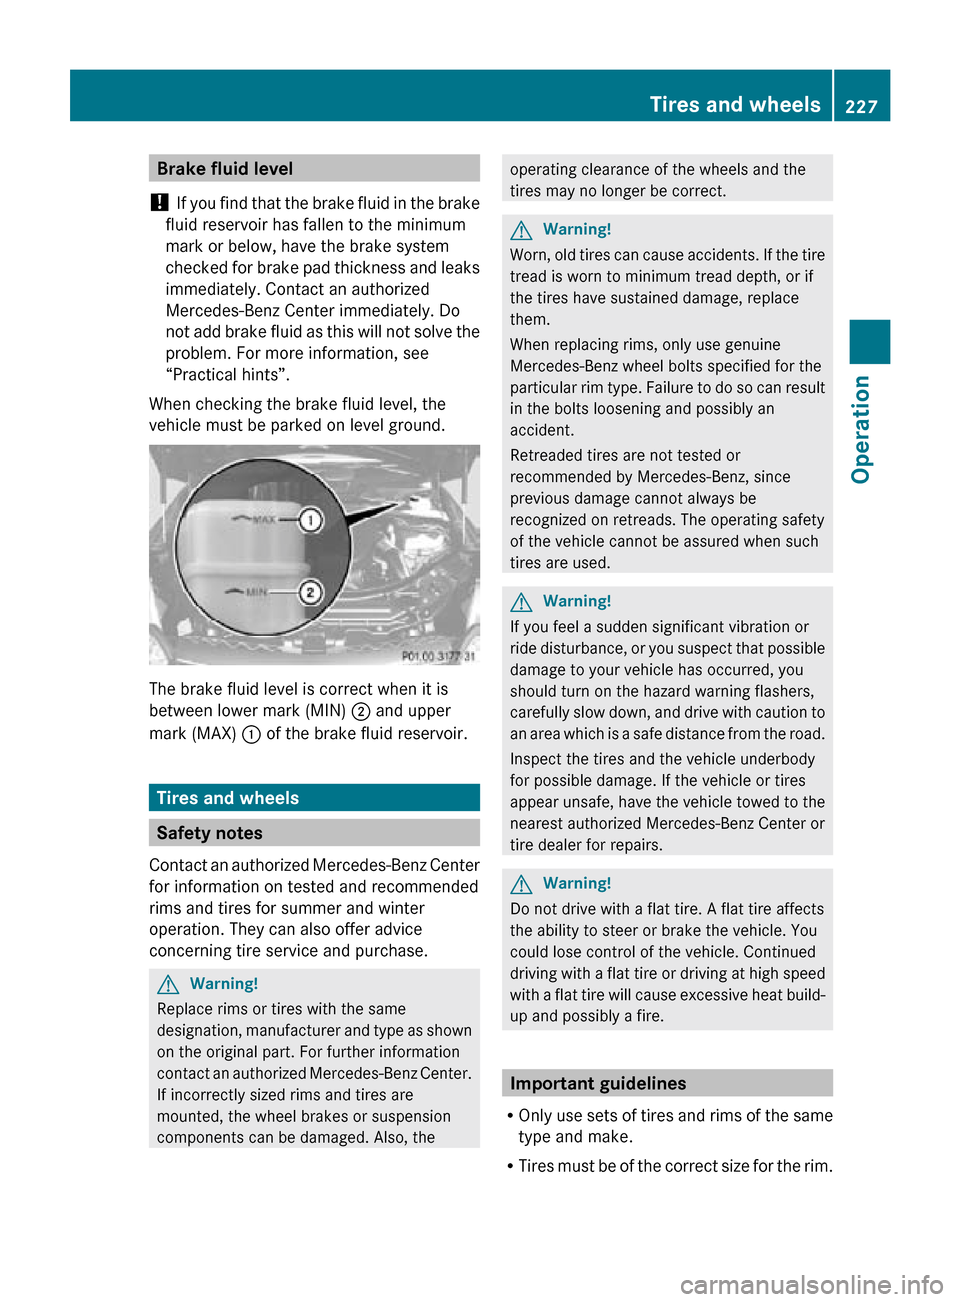
When checking the brake fluid level, the
vehicle must be parked on level ground. The brake fluid level is correct when it is
between lower mark (MIN)
; and upper
mark (MAX) : of the brake fluid reservoir. Tires and wheels
Safety notes
Contact an authorized Mercedes-Benz Center
for information on tested and recommended
rims and tires for summer and winter
operation. They can also offer advice
concerning tire service and purchase. G
Warning!
Replace rims or tires with the same
designation, manufacturer and type as shown
on the original part. For further information
contact an authorized Mercedes-Benz Center.
If incorrectly sized rims and tires are
mounted, the wheel brakes or suspension
components can be damaged. Also, the operating clearance of the wheels and the
tires may no longer be correct.
G
Warning!
Worn, old tires can cause accidents. If the tire
tread is worn to minimum tread depth, or if
the tires have sustained damage, replace
them.
When replacing rims, only use genuine
Mercedes-Benz wheel bolts specified for the
particular rim type. Failure to do so can result
in the bolts loosening and possibly an
accident.
Retreaded tires are not tested or
recommended by Mercedes-Benz, since
previous damage cannot always be
recognized on retreads. The operating safety
of the vehicle cannot be assured when such
tires are used. G
Warning!
If you feel a sudden significant vibration or
ride disturbance, or you suspect that possible
damage to your vehicle has occurred, you
should turn on the hazard warning flashers,
carefully slow down, and drive with caution to
an area which is a safe distance from the road.
Inspect the tires and the vehicle underbody
for possible damage. If the vehicle or tires
appear unsafe, have the vehicle towed to the
nearest authorized Mercedes-Benz Center or
tire dealer for repairs. G
Warning!
Do not drive with a flat tire. A flat tire affects
the ability to steer or brake the vehicle. You
could lose control of the vehicle. Continued
driving with a flat tire or driving at high speed
with a flat tire will cause excessive heat build-
up and possibly a fire. Important guidelines
R Only use sets of tires and rims of the same
type and make.
R Tires must be of the correct size for the rim. Tires and wheels
227Operation
251_AKB; 4; 52, en-US
d2ureepe, Version: 2.11.8.1 2009-03-23T09:22:52+01:00 - Seite 227 Z