2010 MERCEDES-BENZ R320 power steering
[x] Cancel search: power steeringPage 84 of 364
R
Adjust the head restraint so that it is as
close
to the head as possible. The center of
the head restraint must support the back of
the head at eye level.
R Never place hands under the seat or near
any moving parts while a seat is being
adjusted.
Failure to do so could result in an accident
and/or serious personal injury. G
Warning!
The power seats can be operated at any time.
Therefore, do not leave children unattended
in the vehicle, or with access to an unlocked
vehicle. A child’s unsupervised access to a
vehicle could result in an accident and/or
serious personal injury. G
Warning!
According to accident statistics, children are
safer when properly restrained in the rear
seating positions than in the front seating
position. Thus, we strongly recommend that
children
be placed in the rear seats whenever
possible. Regardless of seating position,
children 12 years old and under must be
seated and properly secured in an
appropriately sized infant restraint, toddler
restraint, or booster seat recommended for
the size and weight of the child. For additional
information, see “Children in the vehicle”.
A child’s risk of serious or fatal injuries is
significantly increased if the child restraints
are not properly secured in the vehicle and/
or the child is not properly secured in the child
restraint. G
Warning!
For your protection, drive only with properly
positioned head restraints.
Adjust
the head restraint so that it is as close
to the head as possible and the center of the
head restraint supports the back of the head
at eye level. This will reduce the potential for
injury to the head and neck in the event of an
accident or similar situation. Do not drive the vehicle without the seat head
restraints. Head restraints are intended to
help reduce injuries during an accident.
Seat adjustment
! When moving the seats, make sure there
are no items in the footwell or behind the
seats. Otherwise, you could damage the
seats and/or the items.
Power seats !
When the second-row seats are folded
forward, e.g. for cargo volume expansion,
the front seats may not be moved to the
rearmost position. Otherwise you could
damage the front and second-row seats.
! When
adjusting the seat backrest tilt and
head restraint height, make sure the sun
visor is folded up. If the head restraint is in
the uppermost position, it could hit and
damage the sun visor.
i Vehicles without memory function:
The seats can be adjusted within 5 minutes
after either front door has been opened.
The counter resets each time
R you open or close a front door
R you insert the SmartKey into the starter
switch
R you remove the SmartKey from the
starter switch
R you switch the ignition on or off
Just like in vehicles with memory function,
the power seats can be operated at any
time when the ignition is switched on.
i The memory function (Y page 96) lets
you store the settings for the seat position
together with the settings for the steering
wheel (electrical) and exterior rear view
mirrors. 82
Seats
Controls in detail
251_AKB; 4; 52, en-US
d2ureepe,
Version: 2.11.8.1 2009-03-23T09:22:52+01:00 - Seite 82
Page 95 of 364
i
When the current position for the steering
wheel is in the uppermost tilt position, the
steering wheel will no longer be able to
move upward when the easy-entry/exit
feature is activated.
The adjustment procedure is briefly
interrupted when the engine is started. G
Warning!
Let the system complete the adjustment
procedure before setting the vehicle in
motion. All steering wheel adjustment must
be completed before setting the vehicle in
motion. Driving off with the steering wheel
still adjusting could cause the driver to lose
control of the vehicle.
Crash-responsive exit aid When you open the driver’s door after an
accident has occurred, the steering column
moves up. The position of the SmartKey in the
starter switch is insignificant. This function
facilitates exiting as well as rescue of vehicle
occupants.
The crash-responsive exit aid can only be
triggered when the easy-entry/exit feature is
activated via the control system.
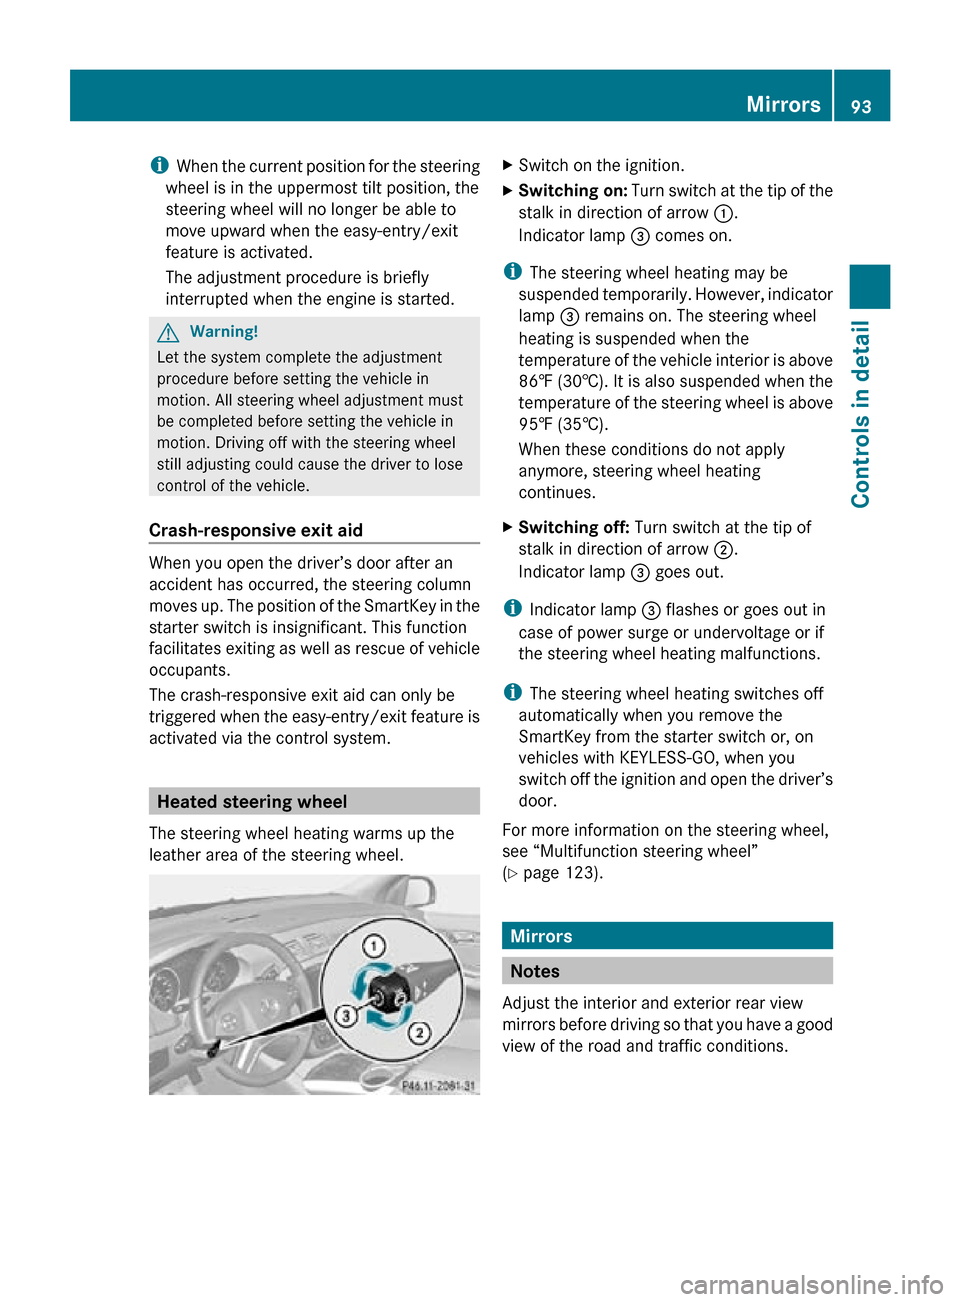
Heated steering wheel
The steering wheel heating warms up the
leather area of the steering wheel. X
Switch on the ignition.
X Switching on: Turn switch at the tip of the
stalk in direction of arrow :.
Indicator lamp = comes on.
i The steering wheel heating may be
suspended temporarily. However, indicator
lamp = remains on. The steering wheel
heating is suspended when the
temperature of the vehicle interior is above
86‡ (30†). It is also suspended when the
temperature of the steering wheel is above
95‡ (35†).
When these conditions do not apply
anymore, steering wheel heating
continues.
X Switching off: Turn switch at the tip of
stalk in direction of arrow ;.
Indicator lamp = goes out.
i Indicator lamp = flashes or goes out in
case of power surge or undervoltage or if
the steering wheel heating malfunctions.
i The steering wheel heating switches off
automatically when you remove the
SmartKey from the starter switch or, on
vehicles with KEYLESS-GO, when you
switch off the ignition and open the driver’s
door.
For more information on the steering wheel,
see “Multifunction steering wheel”
(Y page 123). Mirrors
Notes
Adjust the interior and exterior rear view
mirrors before driving so that you have a good
view of the road and traffic conditions. Mirrors
93Controls in detail
251_AKB; 4; 52, en-US
d2ureepe, Version: 2.11.8.1 2009-03-23T09:22:52+01:00 - Seite 93 Z
Page 112 of 364
windows and the tilt/sliding panel are
closed completely.
X Press and hold the lock button on an
outside door handle again.
The roller sunblinds extend.
X Release the lock button on the outside door
handle to interrupt the closing procedure.
When tilt/sliding panel is closed:
X Press and hold the lock button on an
outside door handle ( Y page 73) until the
windows and the roller sunblinds are
closed completely.
X Release the lock button on the outside door
handle to interrupt the closing procedure. Driving and parking
Safety notes
G
Warning!
Make sure absolutely no objects are
obstructing the pedals’ range of movement.
Keep the driver’s footwell clear of all
obstacles. If there are any floormats or
carpets in the footwell, make sure the pedals
still have sufficient clearance.
During sudden driving or braking maneuvers
the objects could get caught between the
pedals. You could then no longer brake or
accelerate. This could lead to accidents and
injury. G
Warning!
With the engine not running, there is no power
assistance for the brake and steering
systems. In this case, it is important to keep
in mind that a considerably higher degree of
effort is necessary to brake and steer the
vehicle. Adapt your driving accordingly. Starting the engine
G
Warning!
Inhalation of exhaust gas is hazardous to your
health. All exhaust gas contains carbon
monoxide (CO), and inhaling it can cause
unconsciousness and possible death.
Do not run the engine in confined areas (such
as a garage) which are not properly ventilated.
If you think that exhaust gas fumes are
entering the vehicle while driving, have the
cause determined and corrected
immediately. If you must drive under these
conditions, drive only with at least one
window fully open at all times.
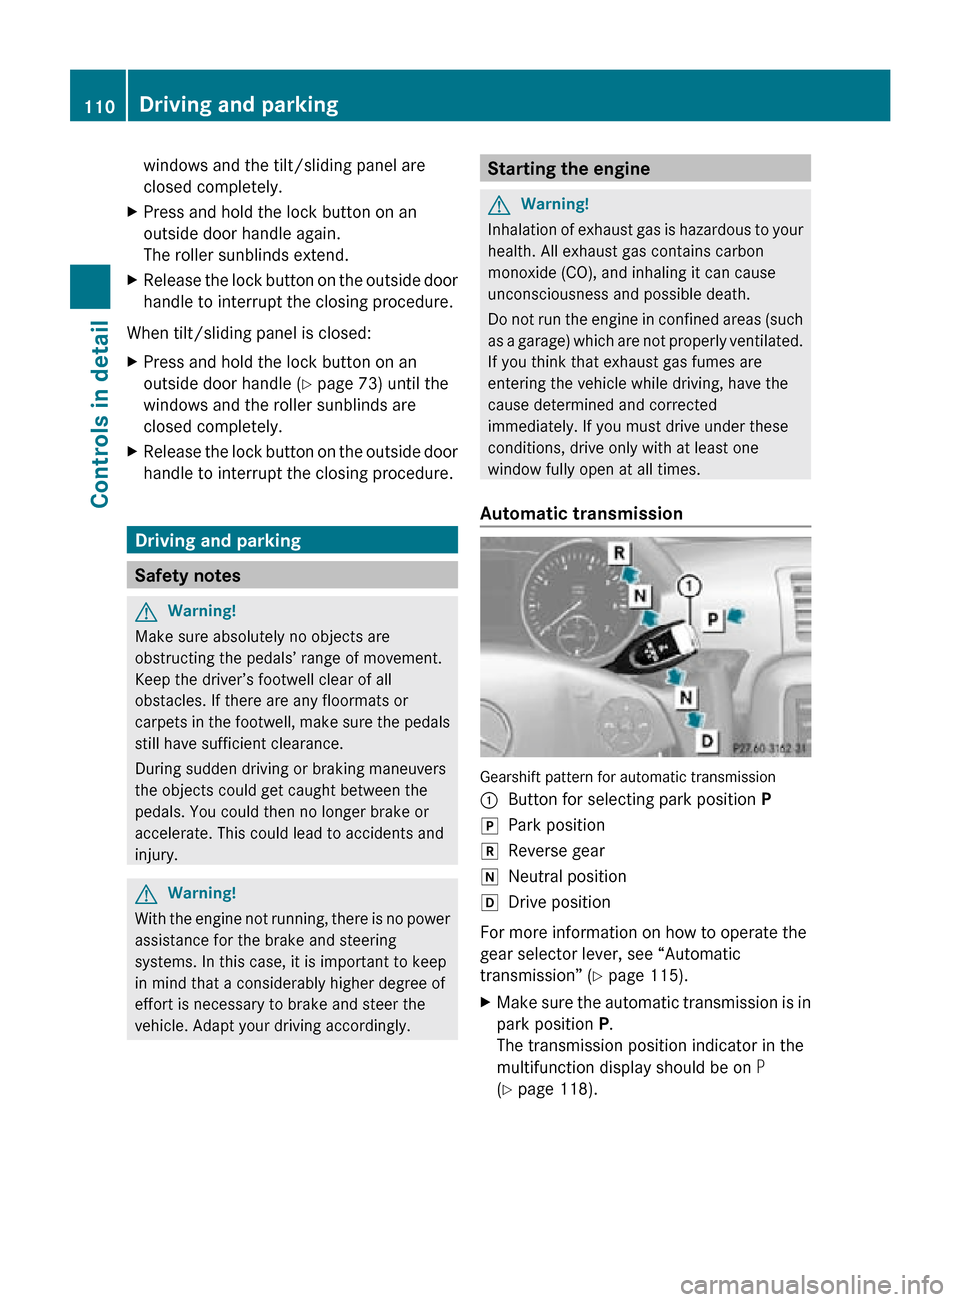
Automatic transmission Gearshift pattern for automatic transmission
:
Button for selecting park position P
j Park position
k Reverse gear
i Neutral position
h Drive position
For more information on how to operate the
gear selector lever, see “Automatic
transmission” (Y page 115).
X Make sure the automatic transmission is in
park position P.
The transmission position indicator in the
multifunction display should be on P
(Y page 118). 110
Driving and parkingControls in detail
251_AKB; 4; 52, en-US
d2ureepe,
Version: 2.11.8.1 2009-03-23T09:22:52+01:00 - Seite 110
Page 116 of 364
Parking
G
Warning!
Do not park this vehicle in areas where
combustible materials such as grass, hay or
leaves can come into contact with the hot
exhaust system. These materials could be
ignited and cause a vehicle fire.
Vehicle movement may result in serious
personal injury or damage to the vehicle or
vehicle drivetrain. Therefore, always do the
following before turning off the engine and
leaving the vehicle:
R Keep right foot on the brake pedal.
R Engage the parking brake.
R Shift the automatic transmission into park
position P.
R Slowly release the brake pedal.
R When parked on an incline, always turn the
front wheels towards the road curb.
R Turn the SmartKey in the starter switch to
position 0 and remove the SmartKey from
the starter switch, or press the KEYLESS-
GO start/stop button.
R Take the SmartKey with you and lock the
vehicle when leaving.
Parking brake G
Warning!
Engaging the parking brake while the vehicle
is in motion can cause the rear wheels to lock
up. You could lose control of the vehicle and
cause an accident. In addition, the vehicle’s
brake lights do not light up when the parking
brake is engaged. G
Warning!
When leaving the vehicle, always remove the
SmartKey from the starter switch, take it with
you, and lock the vehicle. Do not leave
children unattended in the vehicle, or with
access to an unlocked vehicle. Children could
release the parking brake and/or shift the automatic transmission out of park position
P, either of which could result in an accident
and/or serious personal injury.
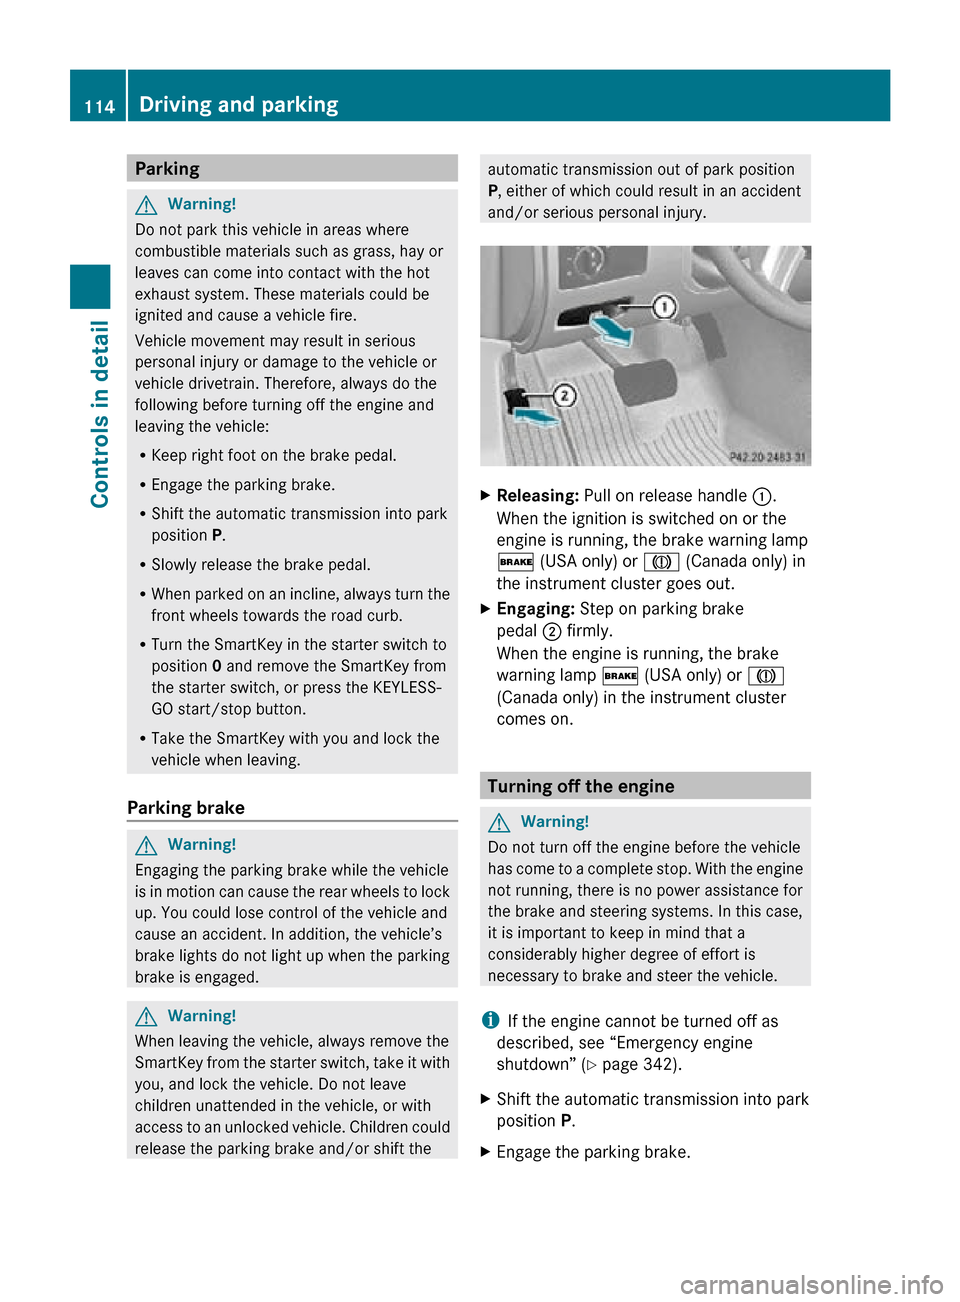
X
Releasing: Pull on release handle :.
When the ignition is switched on or the
engine is running, the brake warning lamp
$ (USA only) or J (Canada only) in
the instrument cluster goes out.
X Engaging: Step on parking brake
pedal ; firmly.
When the engine is running, the brake
warning lamp $ (USA only) or J
(Canada only) in the instrument cluster
comes on. Turning off the engine
G
Warning!
Do not turn off the engine before the vehicle
has come to a complete stop. With the engine
not running, there is no power assistance for
the brake and steering systems. In this case,
it is important to keep in mind that a
considerably higher degree of effort is
necessary to brake and steer the vehicle.
i If the engine cannot be turned off as
described, see “Emergency engine
shutdown” ( Y page 342).
X Shift the automatic transmission into park
position P.
X Engage the parking brake. 114
Driving and parkingControls in detail
251_AKB; 4; 52, en-US
d2ureepe,
Version: 2.11.8.1 2009-03-23T09:22:52+01:00 - Seite 114
Page 147 of 364
X
Briefly pull the cruise control lever in
direction of arrow ?.
If no speed is stored, the current speed is
set and stored.
X Remove your foot from the accelerator
pedal.
The last stored speed is deleted from memory
when the engine is turned off. Distronic
Safety notes When activated, the Distronic adaptive cruise
control increases the driving convenience
afforded
by the cruise control while traveling
on expressways and other major roadways.
R If the Distronic distance sensor detects a
slower moving vehicle directly ahead, your
vehicle speed will be reduced so that you
follow that vehicle at your preset following
distance.
R If there is no vehicle directly ahead of you,
the Distronic will function in the same way
as standard cruise control ( Y page 142).G
Warning!
The Distronic requires familiarity with its
operational characteristics. We strongly
recommend that you review the following
information carefully before operating the
system. G
Warning!
When the Distronic is braking, the brake pedal
is retracted (i.e. depressed automatically).
The pedals’ range of motion must not be
impeded by any obstacles:
R Do not place any objects in the footwell.
R Make sure that the floormats and carpets
are securely in place.
R Do
not rest your foot underneath the brake
pedal, as it could otherwise be trapped. You could otherwise cause an accident and
injure yourself and/or others.
G
Warning!
The Distronic is a convenience system. Its
speed adjustment reduction capability is
intended to make cruise control more
effective
and usable when traffic speeds vary.
It is not however, intended to, nor does it,
replace the need for extreme care.
The responsibility for the vehicle’s speed,
distance to the preceding vehicle and, most
importantly, brake operation to ensure a safe
stopping distance, always remains with the
driver.
The Distronic cannot take street and traffic
conditions into account. Complex driving
situations are not always fully recognized by
the Distronic. This could result in wrong or
missing distance warnings. G
Warning!
The Distronic adaptive cruise control is not a
substitute for active driving involvement. It
does
not react to pedestrians or on stationary
objects, nor does it recognize or predict the
lane curvature or the movement of preceding
vehicles.
The Distronic can only apply 20% of the
maximum braking power of the vehicle.
It is the driver’s responsibility at all times to
be attentive to the road, weather and traffic
conditions. Additionally, the driver must
provide the steering, braking and other driving
inputs necessary to remain in control of the
vehicle.
High-frequency sources such as toll stations,
speed measuring systems etc. can cause the
Distronic system to malfunction. G
Warning!
The Distronic cannot take road and traffic
conditions into account. Only use the
Distronic if the road, weather and traffic
conditions make it advisable to travel at a
constant speed. Driving systems
145
Controls in detail
251_AKB; 4; 52, en-US
d2ureepe, Version: 2.11.8.1 2009-03-23T09:22:52+01:00 - Seite 145 Z
Page 158 of 364
X
Close all doors and the tailgate.
X Start the engine.
When indicator lamp ; is on:
X Press switch :.
Indicator lamp ; flashes. The vehicle
adjusts to the highway level.
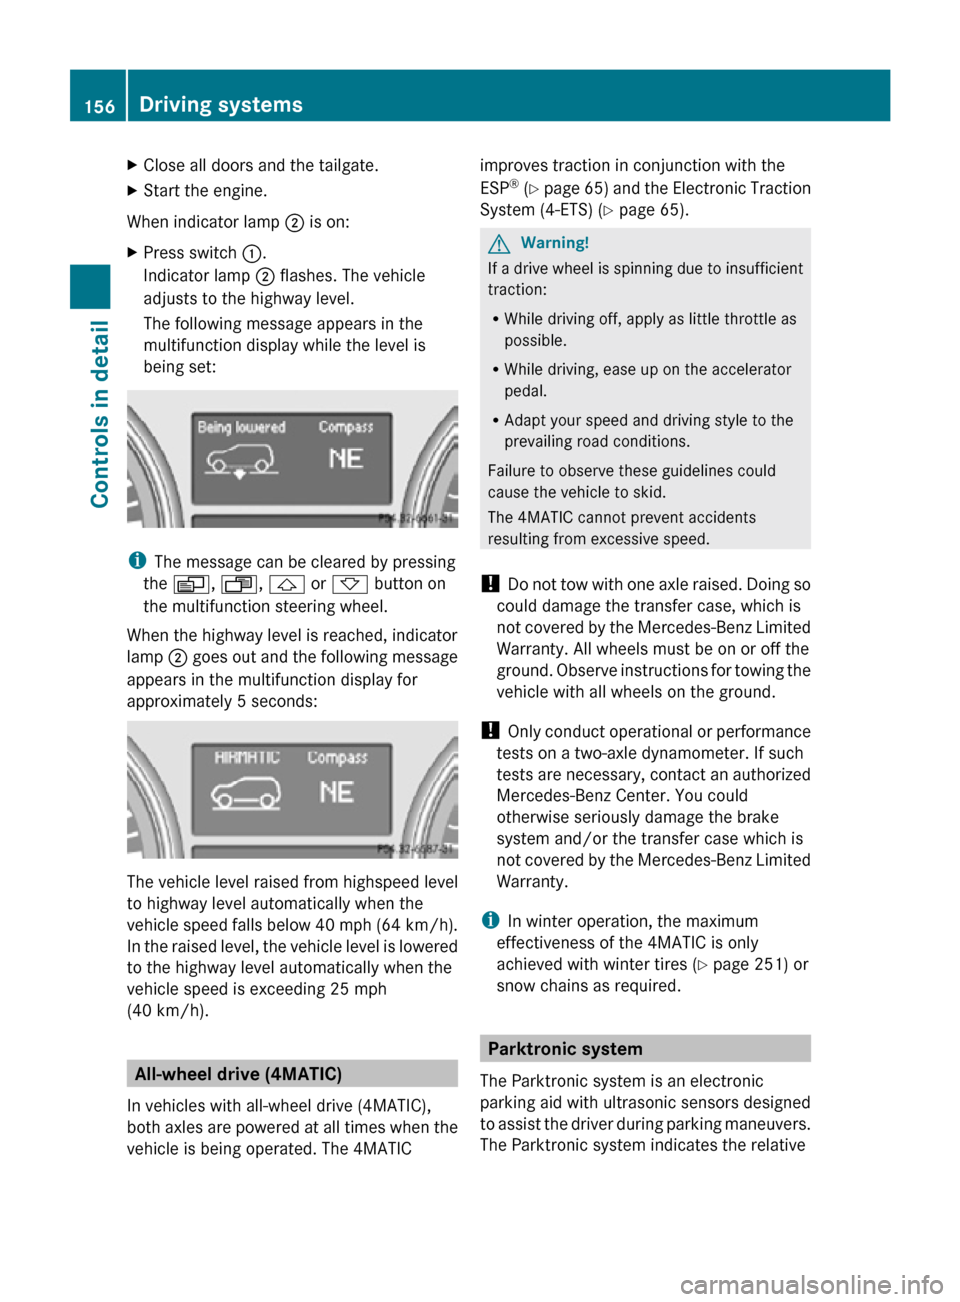
The following message appears in the
multifunction display while the level is
being set: i
The message can be cleared by pressing
the V, U, & or * button on
the multifunction steering wheel.
When the highway level is reached, indicator
lamp ; goes out and the following message
appears in the multifunction display for
approximately 5 seconds: The vehicle level raised from highspeed level
to highway level automatically when the
vehicle speed falls below 40 mph (64 km/h).
In the raised level, the vehicle level is lowered
to the highway level automatically when the
vehicle speed is exceeding 25 mph
(40 km/h).
All-wheel drive (4MATIC)
In vehicles with all-wheel drive (4MATIC),
both axles are powered at all times when the
vehicle is being operated. The 4MATIC improves traction in conjunction with the
ESP
®
(Y page 65) and the Electronic Traction
System (4-ETS) (Y page 65). G
Warning!
If a drive wheel is spinning due to insufficient
traction:
R While driving off, apply as little throttle as
possible.
R While driving, ease up on the accelerator
pedal.
R Adapt your speed and driving style to the
prevailing road conditions.
Failure to observe these guidelines could
cause the vehicle to skid.
The 4MATIC cannot prevent accidents
resulting from excessive speed.
! Do not tow with one axle raised. Doing so
could damage the transfer case, which is
not covered by the Mercedes-Benz Limited
Warranty. All wheels must be on or off the
ground. Observe instructions for towing the
vehicle with all wheels on the ground.
! Only conduct operational or performance
tests on a two-axle dynamometer. If such
tests are necessary, contact an authorized
Mercedes-Benz Center. You could
otherwise seriously damage the brake
system and/or the transfer case which is
not covered by the Mercedes-Benz Limited
Warranty.
i In winter operation, the maximum
effectiveness of the 4MATIC is only
achieved with winter tires ( Y page 251) or
snow chains as required. Parktronic system
The Parktronic system is an electronic
parking aid with ultrasonic sensors designed
to assist the driver during parking maneuvers.
The Parktronic system indicates the relative 156
Driving systemsControls in detail
251_AKB; 4; 52, en-US
d2ureepe,
Version: 2.11.8.1 2009-03-23T09:22:52+01:00 - Seite 156
Page 210 of 364

monitoring services, connection and
cellular air time.
R vehicle battery power is available.
R the relevant cellular phone network and
GPS signals are available and pass the
information on to the Response Center.
i Location of the vehicle on a map is only
possible if the vehicle is able to receive
signals
from the GPS satellite network and
pass the information on to the Response
Center.
The Tele Aid system ( Telematic Alarm Identification on Demand)
The Tele Aid system consists of three types
of response:
R Automatic and manual emergency
R Roadside Assistance
R Information
The Tele Aid system is operational providing
that
the vehicle’s battery is charged, properly
connected, not damaged, and cellular and
GPS coverage is available. The Tele Aid
system utilizes the cellular network for
communication and the GPS ( Global
Positioning System) satellites for vehicle
location. If either of these signals are
unavailable, the Tele Aid system may not
function and if this occurs, assistance must
be summoned by other means.
i A Tele Aid call cannot be canceled. Even
if the Tele Aid system is not activated or
operational, the system will attempt to
connect the respective call. This may take
as
long as five minutes or more. As long as
the Tele Aid system attempts to connect a
call, you cannot operate the COMAND
system. Also, most functions in the control
system, such as the telephone function, are
suspended. Therefore, it is not advisable to
initiate any Tele Aid call unless the Tele Aid
system is activated and operational. To adjust the speaker volume during a Tele
Aid call do the following:
X
Press button W or X on the
multifunction steering wheel.
or
X Use the adjustment button on your
COMAND system.
System self-test The system performs a self-test after you
have switched on the ignition.
G
Warning!
A malfunction in the system has been
detected if any or all of the following
conditions occur:
R The indicator lamp in the SOS button does
not come on during the system self-test.
R The indicator lamp in Roadside Assistance
button º does not come on during the
system self-test.
R The indicator lamp in Information button
E does not come on during the system
self-test.
R The indicator lamp in the SOS button,
Roadside Assistance button º, or
Information button E remains
illuminated constantly in red after the
system self-test.
R The message Tele Aid Inoperative or
Tele Aid Not Activated appears in the
multifunction
display after the system self-
test
If a malfunction is indicated as outlined above,
the system may not operate as expected. In
case of an emergency, help will have to be
summoned by other means.
Have the system checked at the nearest
Mercedes-Benz Center or contact the
Response Center at 1-800-756-9018 (in the
USA) or 1-888-923-8367 (in Canada) as soon
as possible. 208
Useful features
Controls in detail
251_AKB; 4; 52, en-US
d2ureepe,
Version: 2.11.8.1 2009-03-23T09:22:52+01:00 - Seite 208
Page 250 of 364
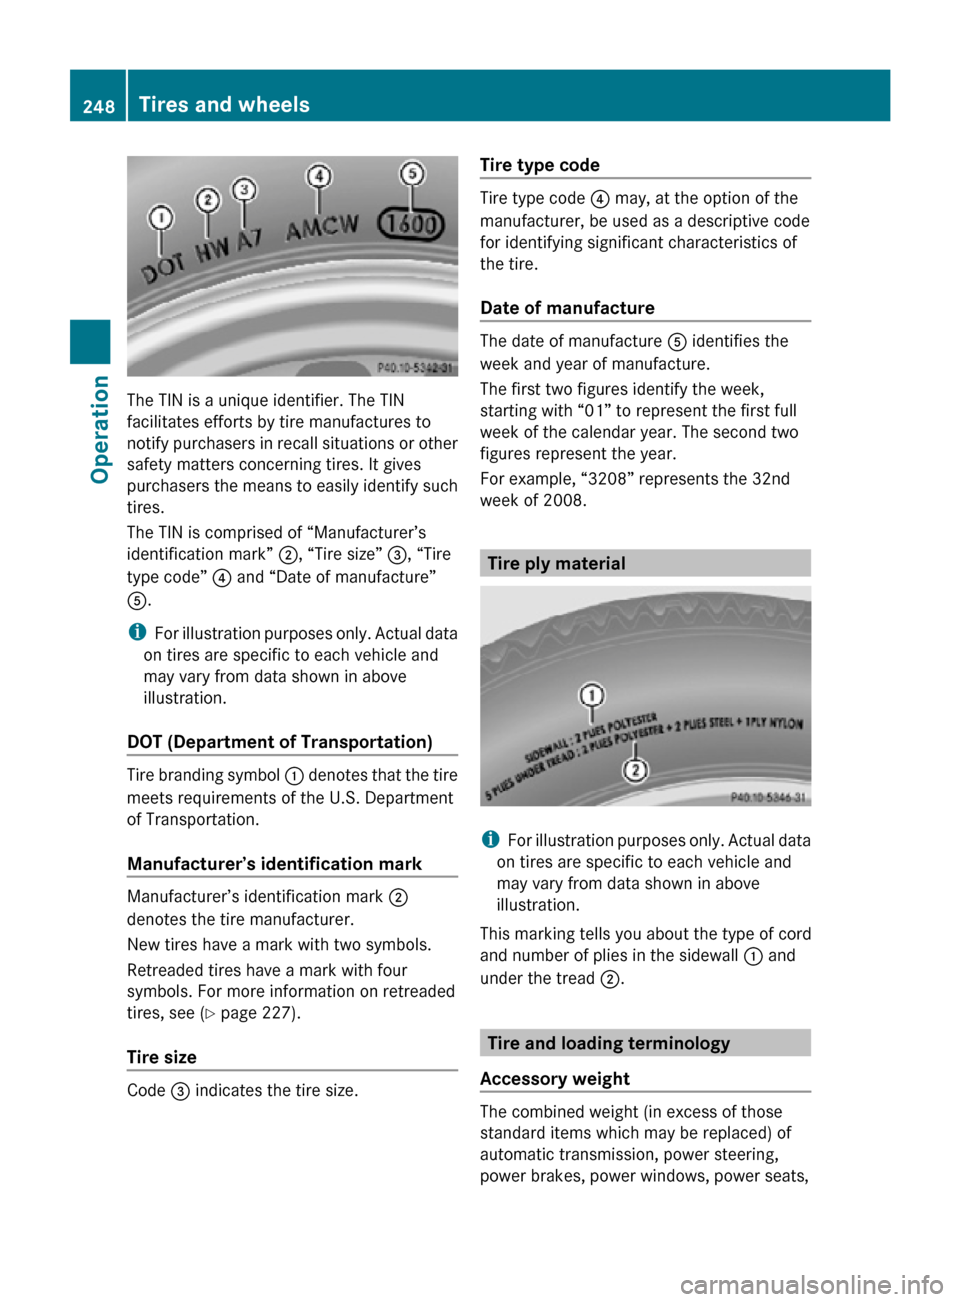
The TIN is a unique identifier. The TIN
facilitates efforts by tire manufactures to
notify purchasers in recall situations or other
safety matters concerning tires. It gives
purchasers the means to easily identify such
tires.
The TIN is comprised of “Manufacturer’s
identification mark” ;, “Tire size”
=, “Tire
type code” ? and “Date of manufacture”
A.
i For illustration purposes only. Actual data
on tires are specific to each vehicle and
may vary from data shown in above
illustration.
DOT (Department of Transportation) Tire branding symbol
: denotes that the tire
meets requirements of the U.S. Department
of Transportation.
Manufacturer’s identification mark Manufacturer’s identification mark ;
denotes the tire manufacturer.
New tires have a mark with two symbols.
Retreaded tires have a mark with four
symbols. For more information on retreaded
tires, see (
Y page 227).
Tire size Code
= indicates the tire size. Tire type code Tire type code
? may, at the option of the
manufacturer, be used as a descriptive code
for identifying significant characteristics of
the tire.
Date of manufacture The date of manufacture
A identifies the
week and year of manufacture.
The first two figures identify the week,
starting with “01” to represent the first full
week of the calendar year. The second two
figures represent the year.
For example, “3208” represents the 32nd
week of 2008. Tire ply material
i
For illustration purposes only. Actual data
on tires are specific to each vehicle and
may vary from data shown in above
illustration.
This marking tells you about the type of cord
and number of plies in the sidewall : and
under the tread ;. Tire and loading terminology
Accessory weight The combined weight (in excess of those
standard items which may be replaced) of
automatic transmission, power steering,
power brakes, power windows, power seats,248
Tires and wheelsOperation
251_AKB; 4; 52, en-US
d2ureepe,
Version: 2.11.8.1 2009-03-23T09:22:52+01:00 - Seite 248