2010 MERCEDES-BENZ R320 child lock
[x] Cancel search: child lockPage 61 of 364
G
Warning!
After installing top tether straps, make sure
the seats are locked properly, the seat
backrests are in an upright position and they
are locked properly.
An outboard second-row seat is locked
properly only when the lock status indicator
is in hinged position and the red marking is
barely visible.
If a seat and seat backrest are not locked
properly, the seat could move forward and the
seat backrest could fold. The child seat would
no longer be supported properly or positioned
to provide its intended benefit. That could
cause serious or even fatal injuries.
X Lower the head restraint if necessary
(Y page 88).
Make sure top tether strap ? can pass
freely between the head restraint and top
of the seat backrest.
X Install the child restraint system and
tighten top tether strap ? according to the
child restraint manufacturer’s instructions.
After removing the child restraint system and
top tether strap ?:
X Reinstall anchorage ring cover :.
Second-row middle seat G
Warning!
Only install a child seat in the second-row
middle seat position if the outboard seat belt
buckle is not obstructed or overlapped by the
child seat. Not all child seats, including some
Mercedes-Benz approved child seats, can be
used in this seating position. Contact an
authorized Mercedes-Benz Center for more
information.
Do not use the LATCH anchors or seat belt
buckle for the outboard seats in conjunction
with a child seat in the second-row middle
seat position. Child seats in the middle
seating position must only be secured by the
middle seat position seat belt inserted into the seat belt buckle for the second-row
middle seat.
G
Warning!
Please be aware that installation of a child
seat in the second-row middle seat position
can prevent the folding forward of the
outboard second-row seats which can
obstruct access to and exit from the third-row
seats. In case of an accident it will be difficult
for occupants of the third-row seats to leave
the vehicle. Serious injuries could result.
Install a child seat in one of the outboard
seating positions according to the installation
instructions if access to the third-row seats is
required.
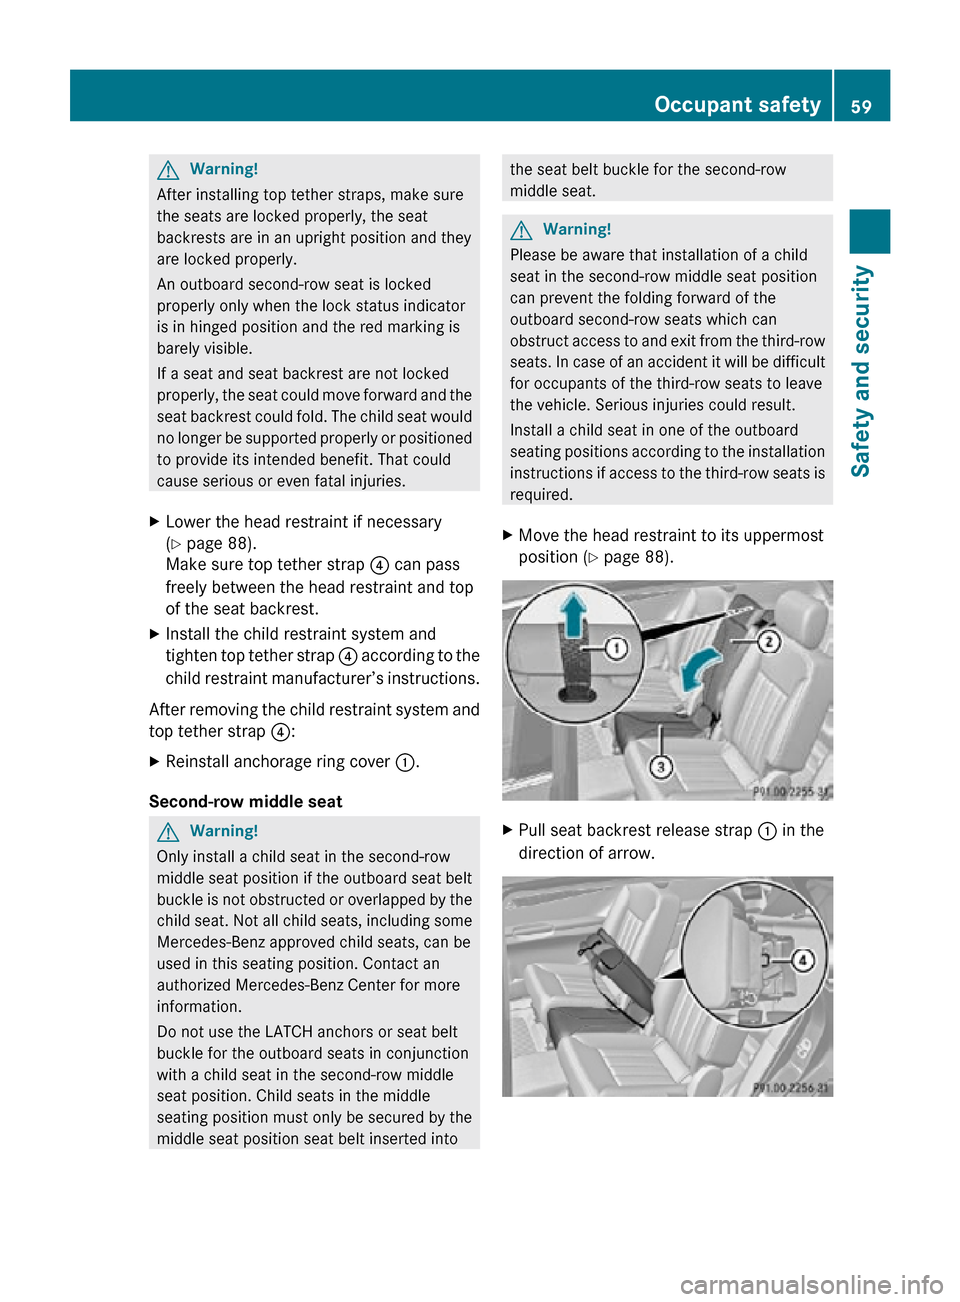
X Move the head restraint to its uppermost
position (Y page 88). X
Pull seat backrest release strap : in the
direction of arrow. Occupant safety
59Safety and security
251_AKB; 4; 52, en-US
d2ureepe, Version: 2.11.8.1 2009-03-23T09:22:52+01:00 - Seite 59 Z
Page 62 of 364
X
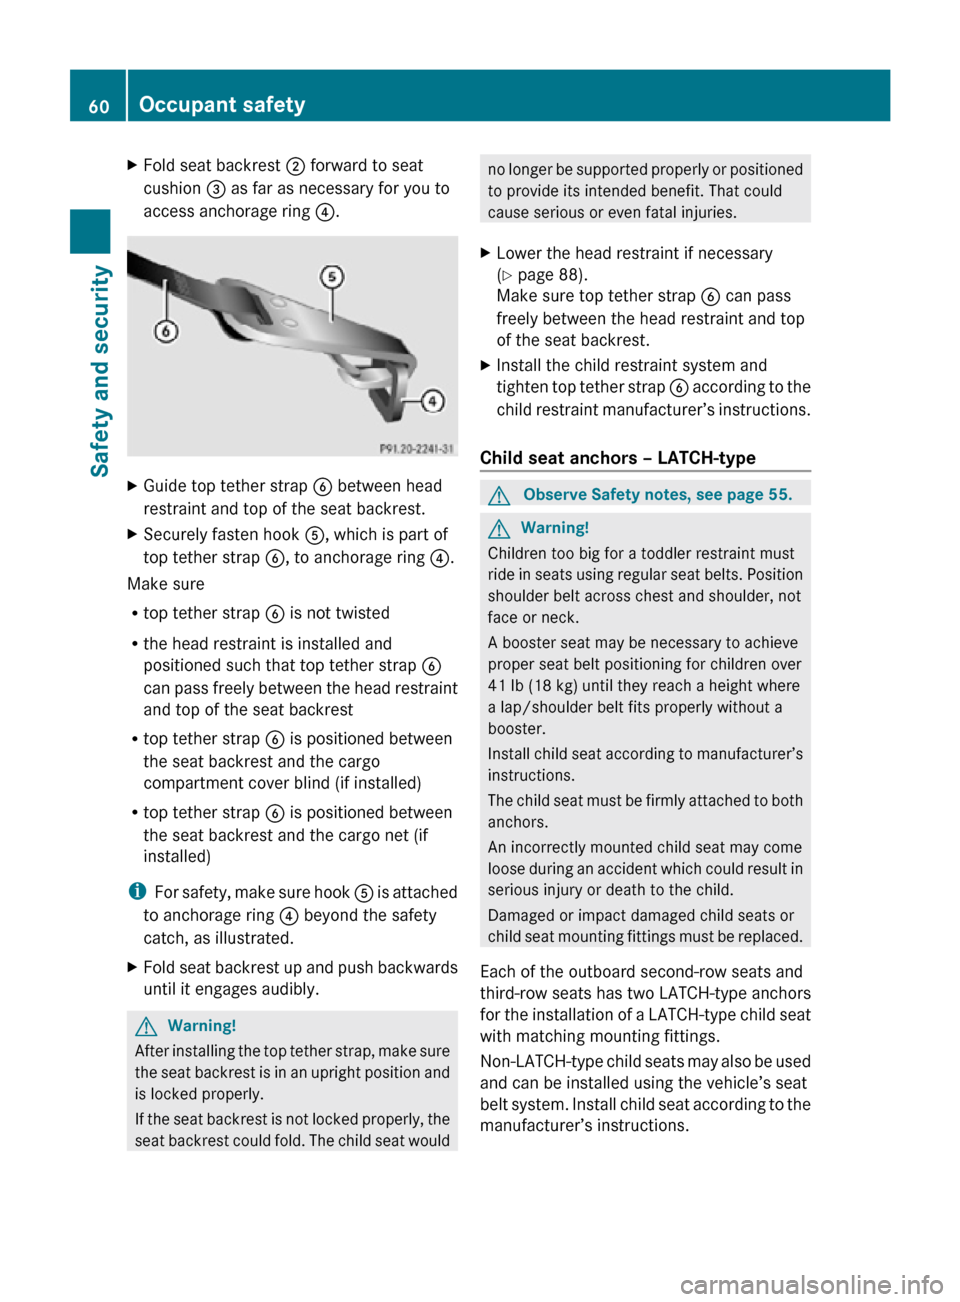
Fold seat backrest ; forward to seat
cushion = as far as necessary for you to
access anchorage ring ?. X
Guide top tether strap B between head
restraint and top of the seat backrest.
X Securely fasten hook A, which is part of
top tether strap B, to anchorage ring ?.
Make sure
R top tether strap B is not twisted
R the head restraint is installed and
positioned such that top tether strap B
can pass freely between the head restraint
and top of the seat backrest
R top tether strap B is positioned between
the seat backrest and the cargo
compartment cover blind (if installed)
R top tether strap B is positioned between
the seat backrest and the cargo net (if
installed)
i For safety, make sure hook A is attached
to anchorage ring ? beyond the safety
catch, as illustrated.
X Fold seat backrest up and push backwards
until it engages audibly. G
Warning!
After installing the top tether strap, make sure
the seat backrest is in an upright position and
is locked properly.
If the seat backrest is not locked properly, the
seat backrest could fold. The child seat would no longer be supported properly or positioned
to provide its intended benefit. That could
cause serious or even fatal injuries.
X Lower the head restraint if necessary
(Y page 88).
Make sure top tether strap B can pass
freely between the head restraint and top
of the seat backrest.
X Install the child restraint system and
tighten top tether strap B according to the
child restraint manufacturer’s instructions.
Child seat anchors – LATCH-type G
Observe Safety notes, see page 55. G
Warning!
Children too big for a toddler restraint must
ride in seats using regular seat belts. Position
shoulder belt across chest and shoulder, not
face or neck.
A booster seat may be necessary to achieve
proper seat belt positioning for children over
41 lb (18 kg) until they reach a height where
a lap/shoulder belt fits properly without a
booster.
Install child seat according to manufacturer’s
instructions.
The child seat must be firmly attached to both
anchors.
An incorrectly mounted child seat may come
loose during an accident which could result in
serious injury or death to the child.
Damaged or impact damaged child seats or
child seat mounting fittings must be replaced.
Each of the outboard second-row seats and
third-row seats has two LATCH-type anchors
for the installation of a LATCH-type child seat
with matching mounting fittings.
Non-LATCH-type child seats may also be used
and can be installed using the vehicle’s seat
belt system. Install child seat according to the
manufacturer’s instructions. 60
Occupant safetySafety and security
251_AKB; 4; 52, en-US
d2ureepe,
Version: 2.11.8.1 2009-03-23T09:22:52+01:00 - Seite 60
Page 63 of 364
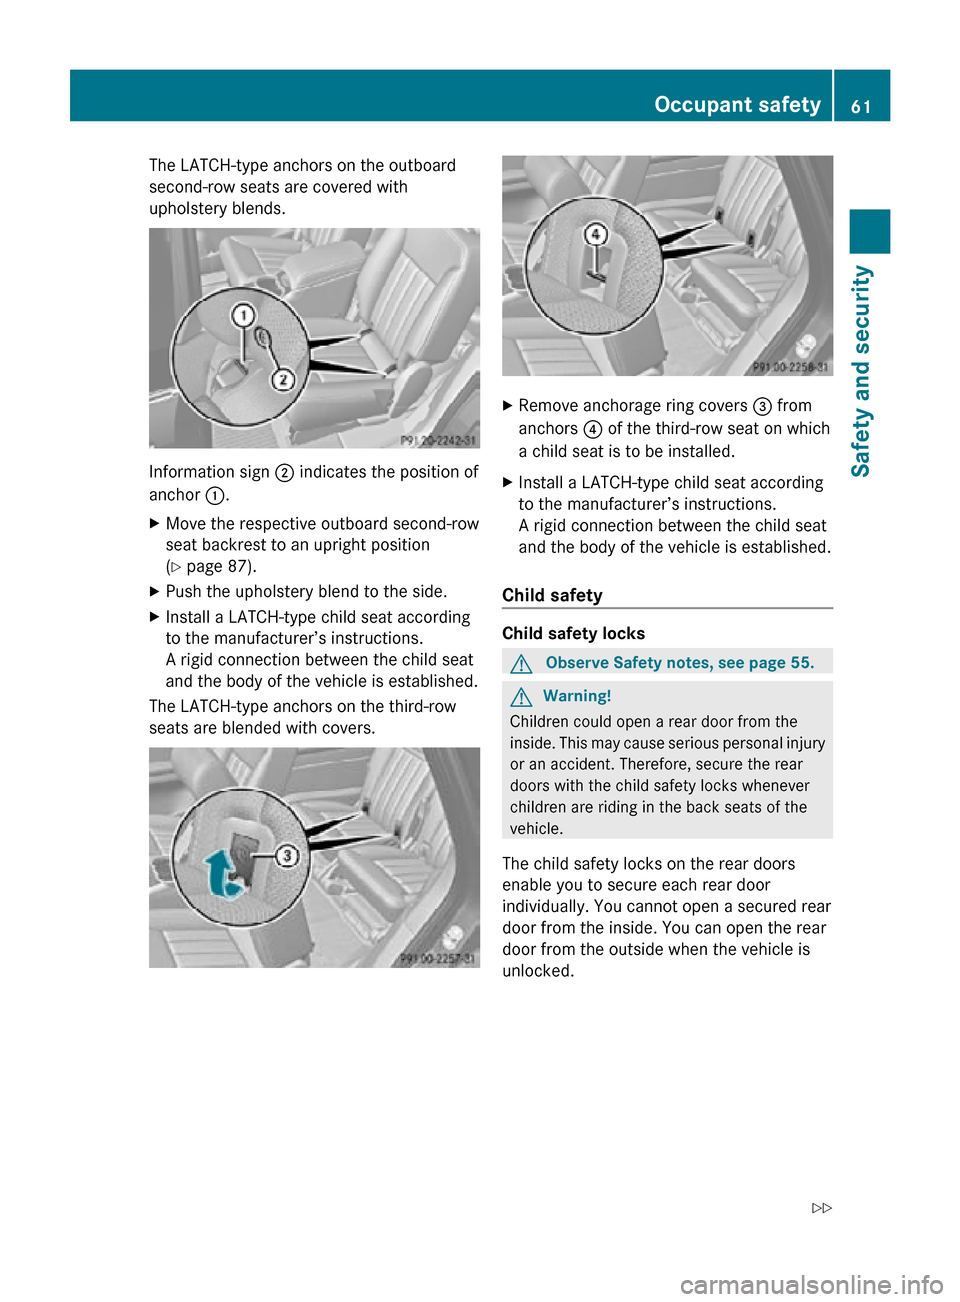
The LATCH-type anchors on the outboard
second-row seats are covered with
upholstery blends.
Information sign
; indicates the position of
anchor :.
X Move the respective outboard second-row
seat backrest to an upright position
(Y page 87).
X Push the upholstery blend to the side.
X Install a LATCH-type child seat according
to the manufacturer’s instructions.
A rigid connection between the child seat
and the body of the vehicle is established.
The LATCH-type anchors on the third-row
seats are blended with covers. X
Remove anchorage ring covers = from
anchors ? of the third-row seat on which
a child seat is to be installed.
X Install a LATCH-type child seat according
to the manufacturer’s instructions.
A rigid connection between the child seat
and the body of the vehicle is established.
Child safety Child safety locks
G
Observe Safety notes, see page 55. G
Warning!
Children could open a rear door from the
inside. This may cause serious personal injury
or an accident. Therefore, secure the rear
doors with the child safety locks whenever
children are riding in the back seats of the
vehicle.
The child safety locks on the rear doors
enable you to secure each rear door
individually. You cannot open a secured rear
door from the inside. You can open the rear
door from the outside when the vehicle is
unlocked. Occupant safety
61Safety and security
251_AKB; 4; 52, en-US
d2ureepe, Version: 2.11.8.1 2009-03-23T09:22:52+01:00 - Seite 61 Z
Page 64 of 364

X
Securing: Press the lever down in direction
of arrow ;.
X Check to make sure the child safety locks
are working properly.
X Releasing: Press the lever up in direction
of arrow :.
Override switch G
Observe Safety notes, see page 55.
With the override switch you can disable the
rear door window switches in the rear door
panels. This can be useful, for instance, when
you have children riding in the rear passenger
compartment. G
Warning!
Activate the override switch when children
are riding in the back seats of the vehicle. The
children may otherwise injure themselves,
e.g. by becoming trapped in the rear door
window opening. X
Activating: Press override switch :.
The switch engages in recessed position. The rear door windows can no longer be
operated using the respective switch
located in the rear doors.
You can still operate the rear door windows
using the switches located on the door
control panel of the driver’s door.
X Deactivating: Press override switch :
again.
The switch disengages from its recessed
position back to its original position.
The rear door windows can be operated
again using the respective switch located
in the rear doors.
For more information on power windows, see
the “Controls in detail” section
(Y page 106). Panic alarm
Example illustration: SmartKey with KEYLESS-GO
X
Activating: Press and hold !
button : for at least 1 second.
An audible alarm and flashing exterior
lamps will operate briefly.
X Deactivating: Press ! button : again.
or
X Insert the SmartKey into the starter switch.
or
X Press the KEYLESS-GO start/stop button.
The SmartKey with KEYLESS-GO must be
inside the vehicle. 62
Panic alarmSafety and security
251_AKB; 4; 52, en-US
d2ureepe,
Version: 2.11.8.1 2009-03-23T09:22:52+01:00 - Seite 62
Page 76 of 364
Opening the doors from the inside
You can open a door from the inside even
when it is locked unless it is secured with the
child safety lock ( Y page 61).
Open door only when conditions are safe to
do so. Example illustration driver’s door
If the vehicle has previously been locked with
the SmartKey or with KEYLESS-GO, opening
a door from the inside will trigger the anti-
theft alarm system.
To cancel the alarm, see (
Y page 68).
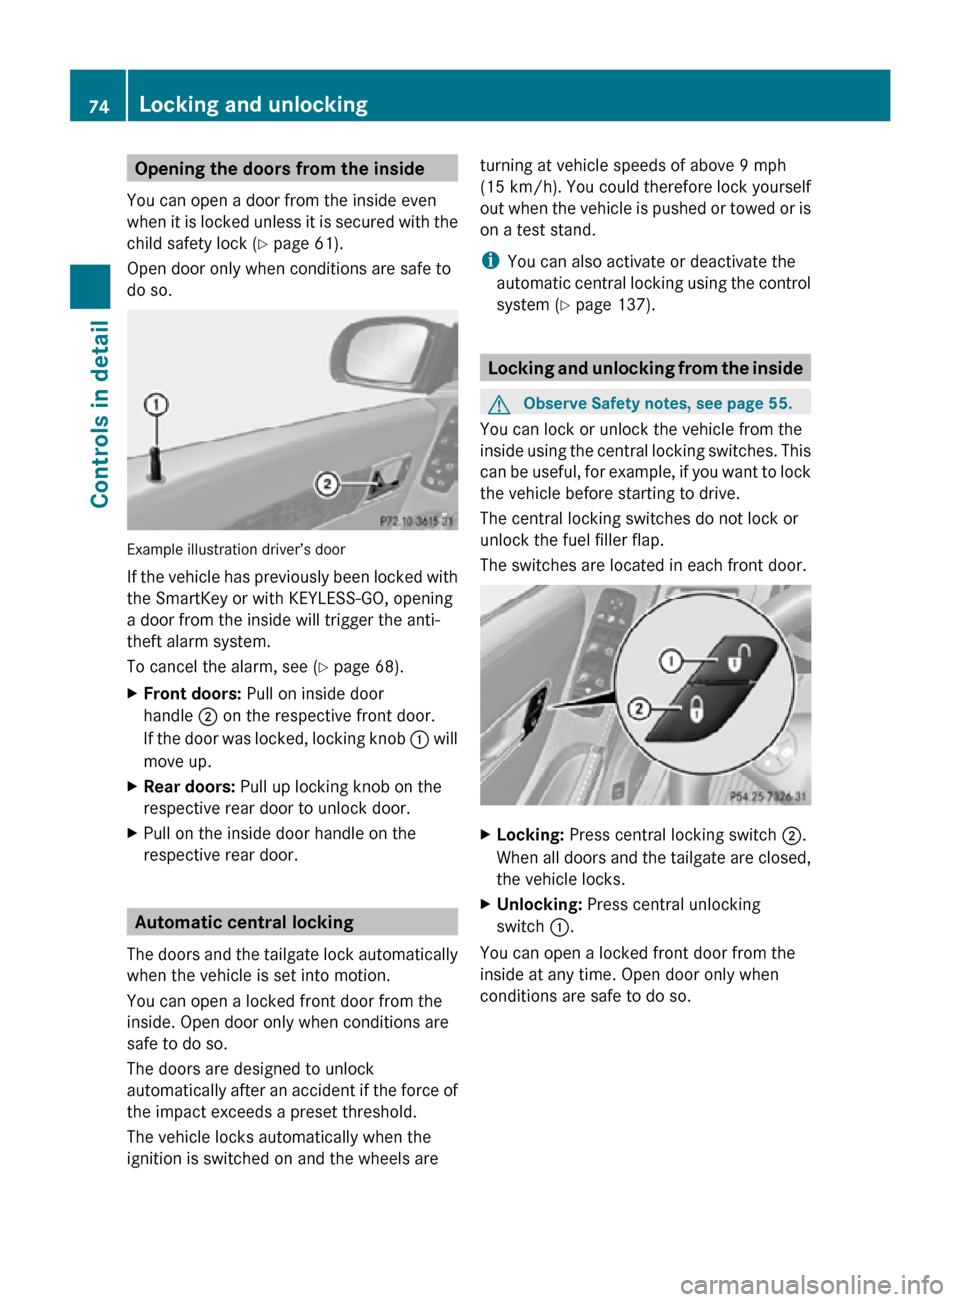
X Front doors: Pull on inside door
handle ; on the respective front door.
If the door was locked, locking knob : will
move up.
X Rear doors: Pull up locking knob on the
respective rear door to unlock door.
X Pull on the inside door handle on the
respective rear door. Automatic central locking
The doors and the tailgate lock automatically
when the vehicle is set into motion.
You can open a locked front door from the
inside. Open door only when conditions are
safe to do so.
The doors are designed to unlock
automatically after an accident if the force of
the impact exceeds a preset threshold.
The vehicle locks automatically when the
ignition is switched on and the wheels are turning at vehicle speeds of above 9 mph
(15 km/h). You could therefore lock yourself
out when the vehicle is pushed or towed or is
on a test stand.
i
You can also activate or deactivate the
automatic central locking using the control
system (Y page 137). Locking and unlocking from the inside
G
Observe Safety notes, see page 55.
You can lock or unlock the vehicle from the
inside using the central locking switches. This
can be useful, for example, if you want to lock
the vehicle before starting to drive.
The central locking switches do not lock or
unlock the fuel filler flap.
The switches are located in each front door. X
Locking: Press central locking switch ;.
When all doors and the tailgate are closed,
the vehicle locks.
X Unlocking: Press central unlocking
switch :.
You can open a locked front door from the
inside at any time. Open door only when
conditions are safe to do so. 74
Locking and unlockingControls in detail
251_AKB; 4; 52, en-US
d2ureepe,
Version: 2.11.8.1 2009-03-23T09:22:52+01:00 - Seite 74
Page 77 of 364
If the vehicle was previously locked with the
central locking switch
R
and the SmartKey is set to factory settings,
the complete vehicle is unlocked when a
front door is opened from the inside
R and the SmartKey is set to selective
settings, only the front door opened from
the inside is unlocked
If the vehicle has been locked centrally with
the SmartKey or with KEYLESS-GO, it will not
unlock using the central unlocking switch. Tailgate
G
Warning!
Make sure the tailgate is closed when the
engine is running and while driving. Among
other dangers, deadly carbon monoxide (CO)
gases may enter vehicle interior resulting in
unconsciousness and death.
A minimum height clearance of 7.20 ft
(2.20 m) is required to open the tailgate.
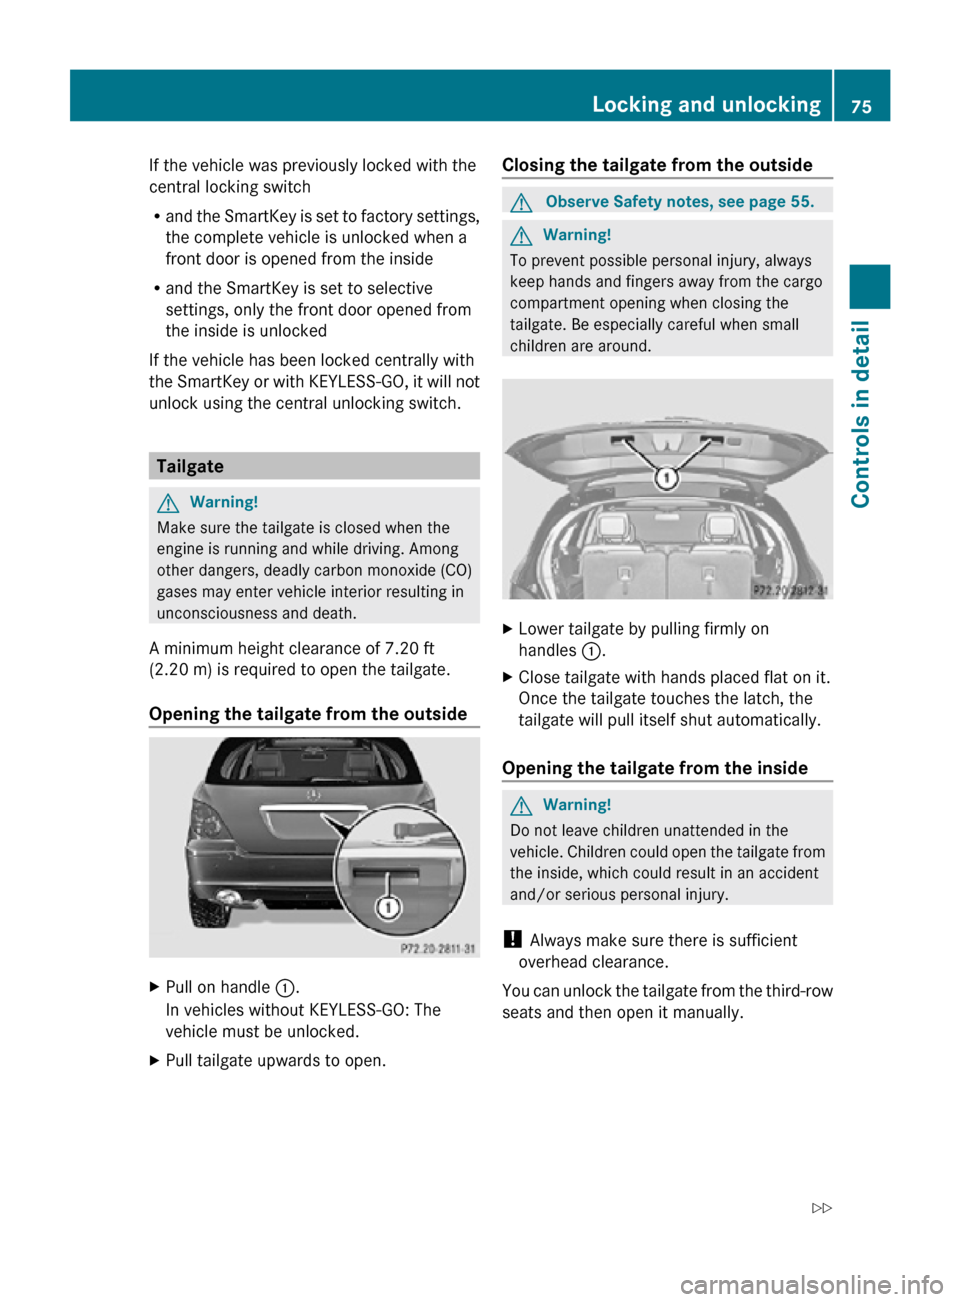
Opening the tailgate from the outside X
Pull on handle :.
In vehicles without KEYLESS-GO: The
vehicle must be unlocked.
X Pull tailgate upwards to open. Closing the tailgate from the outside G
Observe Safety notes, see page 55. G
Warning!
To prevent possible personal injury, always
keep hands and fingers away from the cargo
compartment opening when closing the
tailgate. Be especially careful when small
children are around. X
Lower tailgate by pulling firmly on
handles :.
X Close tailgate with hands placed flat on it.
Once the tailgate touches the latch, the
tailgate will pull itself shut automatically.
Opening the tailgate from the inside G
Warning!
Do not leave children unattended in the
vehicle. Children could open the tailgate from
the inside, which could result in an accident
and/or serious personal injury.
! Always make sure there is sufficient
overhead clearance.
You can unlock the tailgate from the third-row
seats and then open it manually. Locking and unlocking
75Controls in detail
251_AKB; 4; 52, en-US
d2ureepe, Version: 2.11.8.1 2009-03-23T09:22:52+01:00 - Seite 75 Z
Page 79 of 364
Closing the tailgate from the outside
G
Observe Safety notes, see page 55. G
Warning!
Monitor the closing procedure carefully to
make sure no one is in danger of being
injured. To prevent possible personal injury,
always keep hands and fingers away from the
cargo compartment opening when closing the
tailgate. Be especially careful when small
children are around. To stop the closing
procedure, do one of the following:
R Press or pull the remote tailgate opening/
closing switch on the driver’s door.
R Press the tailgate closing switch.
R Press the KEYLESS-GO locking/closing
switch.
R Pull outside handle on the tailgate.
R When no SmartKey is inserted in the starter
switch (vehicles with KEYLESS-GO: Make
sure the vehicle’s on-board electronics
have status 0): Press button F on the
SmartKey.
Do not leave the SmartKey in the vehicle. You
may lock yourself out.
If the vehicle was previously centrally locked
with the SmartKey or KEYLESS-GO, the
tailgate will lock automatically when it is
closed. The turn signal lamps flash three
times to confirm locking. Vehicles without KEYLESS-GO Vehicles with KEYLESS-GO
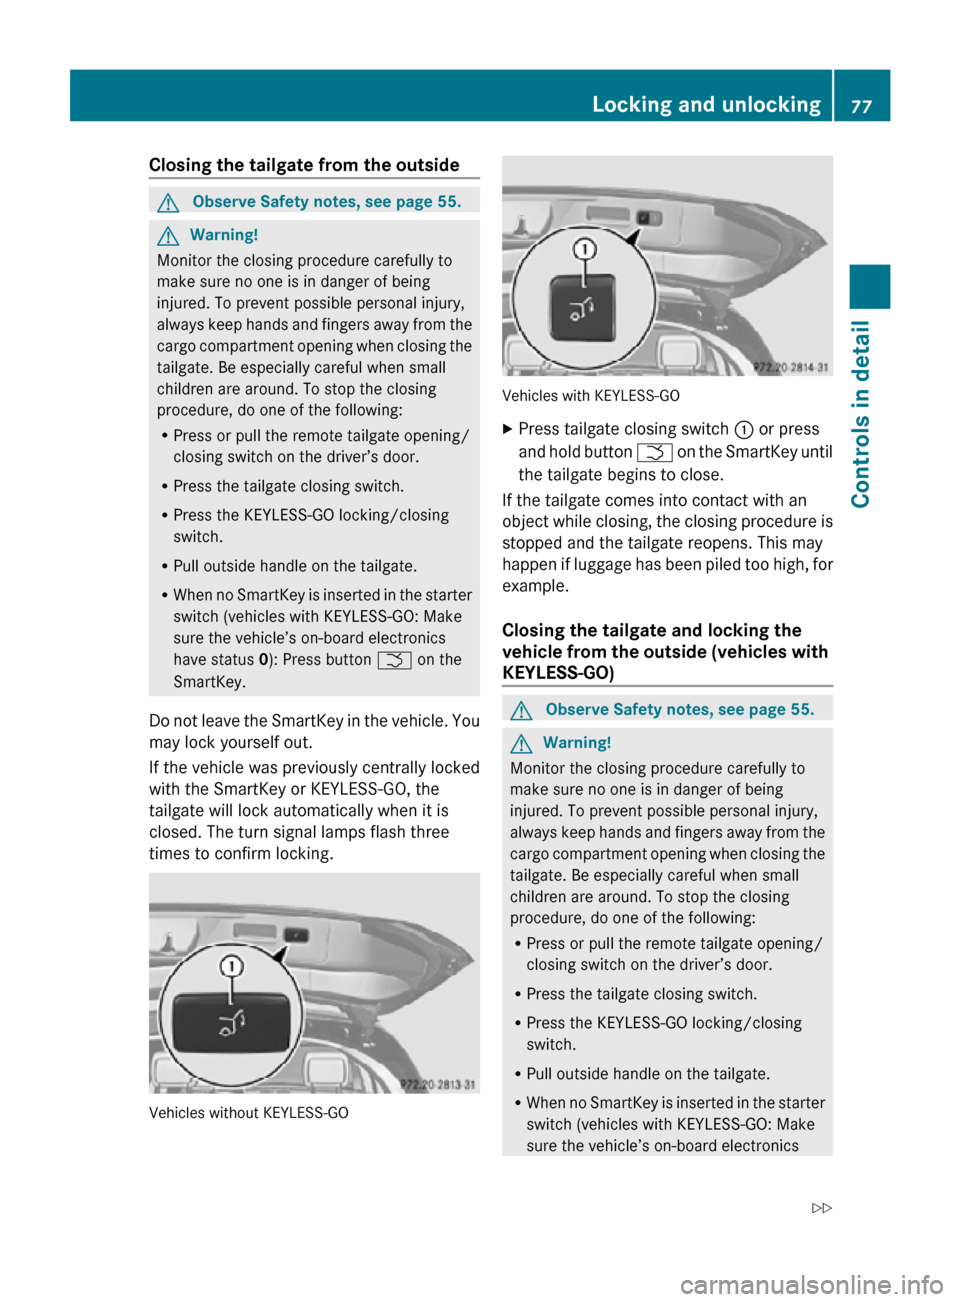
X
Press tailgate closing switch : or press
and hold button F on the SmartKey until
the tailgate begins to close.
If the tailgate comes into contact with an
object while closing, the closing procedure is
stopped and the tailgate reopens. This may
happen if luggage has been piled too high, for
example.
Closing the tailgate and locking the
vehicle from the outside (vehicles with
KEYLESS-GO) G
Observe Safety notes, see page 55. G
Warning!
Monitor the closing procedure carefully to
make sure no one is in danger of being
injured. To prevent possible personal injury,
always keep hands and fingers away from the
cargo compartment opening when closing the
tailgate. Be especially careful when small
children are around. To stop the closing
procedure, do one of the following:
R Press or pull the remote tailgate opening/
closing switch on the driver’s door.
R Press the tailgate closing switch.
R Press the KEYLESS-GO locking/closing
switch.
R Pull outside handle on the tailgate.
R When no SmartKey is inserted in the starter
switch (vehicles with KEYLESS-GO: Make
sure the vehicle’s on-board electronics Locking and unlocking
77Controls in detail
251_AKB; 4; 52, en-US
d2ureepe, Version: 2.11.8.1 2009-03-23T09:22:52+01:00 - Seite 77 Z
Page 84 of 364
R
Adjust the head restraint so that it is as
close
to the head as possible. The center of
the head restraint must support the back of
the head at eye level.
R Never place hands under the seat or near
any moving parts while a seat is being
adjusted.
Failure to do so could result in an accident
and/or serious personal injury. G
Warning!
The power seats can be operated at any time.
Therefore, do not leave children unattended
in the vehicle, or with access to an unlocked
vehicle. A child’s unsupervised access to a
vehicle could result in an accident and/or
serious personal injury. G
Warning!
According to accident statistics, children are
safer when properly restrained in the rear
seating positions than in the front seating
position. Thus, we strongly recommend that
children
be placed in the rear seats whenever
possible. Regardless of seating position,
children 12 years old and under must be
seated and properly secured in an
appropriately sized infant restraint, toddler
restraint, or booster seat recommended for
the size and weight of the child. For additional
information, see “Children in the vehicle”.
A child’s risk of serious or fatal injuries is
significantly increased if the child restraints
are not properly secured in the vehicle and/
or the child is not properly secured in the child
restraint. G
Warning!
For your protection, drive only with properly
positioned head restraints.
Adjust
the head restraint so that it is as close
to the head as possible and the center of the
head restraint supports the back of the head
at eye level. This will reduce the potential for
injury to the head and neck in the event of an
accident or similar situation. Do not drive the vehicle without the seat head
restraints. Head restraints are intended to
help reduce injuries during an accident.
Seat adjustment
! When moving the seats, make sure there
are no items in the footwell or behind the
seats. Otherwise, you could damage the
seats and/or the items.
Power seats !
When the second-row seats are folded
forward, e.g. for cargo volume expansion,
the front seats may not be moved to the
rearmost position. Otherwise you could
damage the front and second-row seats.
! When
adjusting the seat backrest tilt and
head restraint height, make sure the sun
visor is folded up. If the head restraint is in
the uppermost position, it could hit and
damage the sun visor.
i Vehicles without memory function:
The seats can be adjusted within 5 minutes
after either front door has been opened.
The counter resets each time
R you open or close a front door
R you insert the SmartKey into the starter
switch
R you remove the SmartKey from the
starter switch
R you switch the ignition on or off
Just like in vehicles with memory function,
the power seats can be operated at any
time when the ignition is switched on.
i The memory function (Y page 96) lets
you store the settings for the seat position
together with the settings for the steering
wheel (electrical) and exterior rear view
mirrors. 82
Seats
Controls in detail
251_AKB; 4; 52, en-US
d2ureepe,
Version: 2.11.8.1 2009-03-23T09:22:52+01:00 - Seite 82