2010 MERCEDES-BENZ R320 display
[x] Cancel search: displayPage 179 of 364
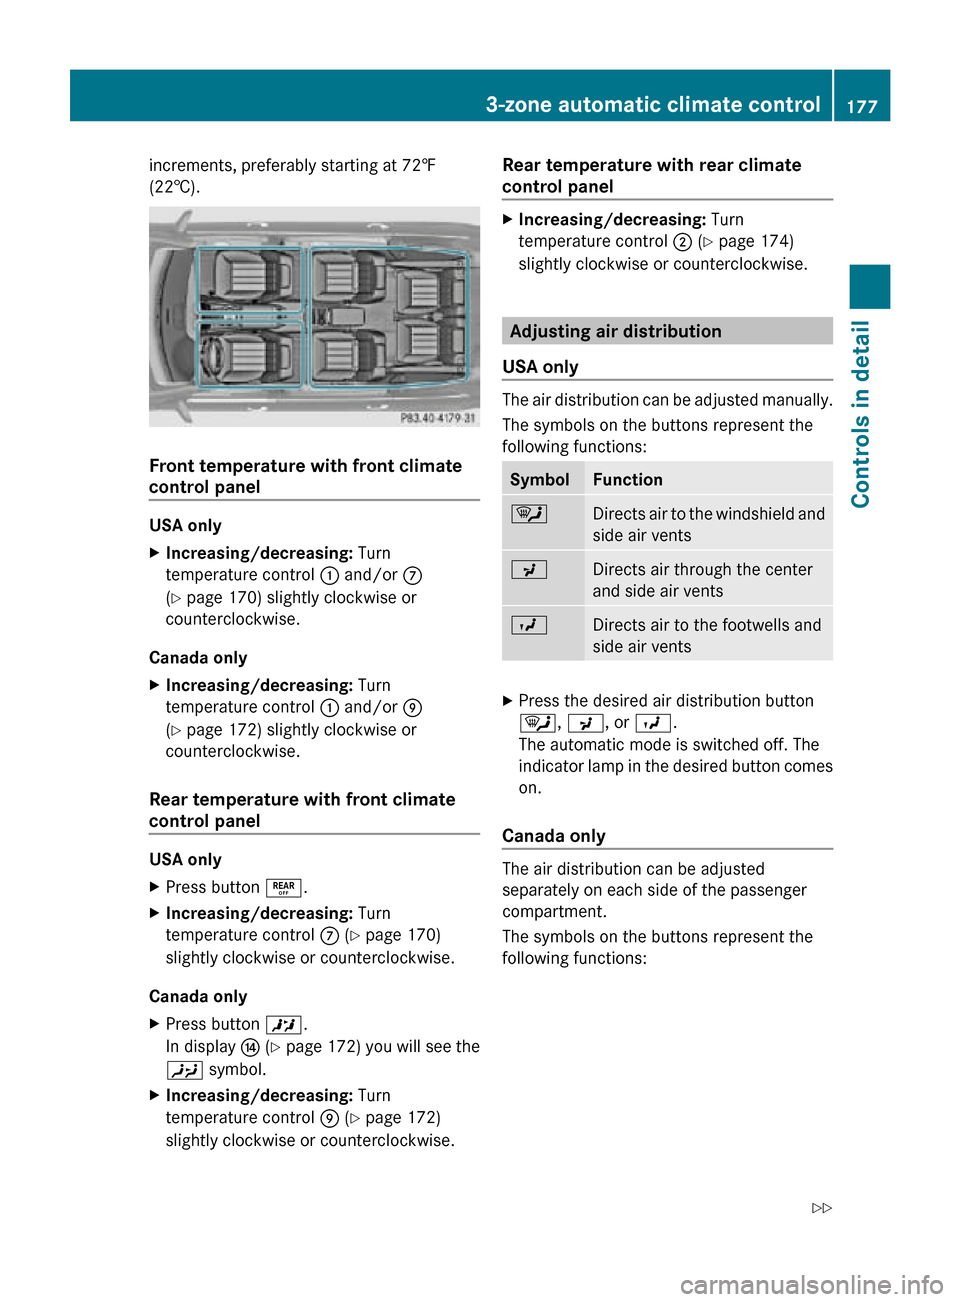
increments, preferably starting at 72‡
(22†).
Front temperature with front climate
control panel
USA only
X
Increasing/decreasing: Turn
temperature control : and/or C
(Y page 170) slightly clockwise or
counterclockwise.
Canada only
X Increasing/decreasing: Turn
temperature control : and/or E
(Y page 172) slightly clockwise or
counterclockwise.
Rear temperature with front climate
control panel USA only
X
Press button ±.
X Increasing/decreasing: Turn
temperature control C (Y page 170)
slightly clockwise or counterclockwise.
Canada only
X Press button X.
In display J (Y page 172) you will see the
Y symbol.
X Increasing/decreasing: Turn
temperature control E (Y page 172)
slightly clockwise or counterclockwise. Rear temperature with rear climate
control panel X
Increasing/decreasing: Turn
temperature control ; (Y page 174)
slightly clockwise or counterclockwise. Adjusting air distribution
USA only The air distribution can be adjusted manually.
The symbols on the buttons represent the
following functions:
Symbol Function
¯
Directs air to the windshield and
side air vents
P
Directs air through the center
and side air vents
O
Directs air to the footwells and
side air vents
X
Press the desired air distribution button
¯, P, or O.
The automatic mode is switched off. The
indicator lamp in the desired button comes
on.
Canada only The air distribution can be adjusted
separately on each side of the passenger
compartment.
The symbols on the buttons represent the
following functions:3-zone automatic climate control
177Controls in detail
251_AKB; 4; 52, en-US
d2ureepe, Version: 2.11.8.1 2009-03-23T09:22:52+01:00 - Seite 177 Z
Page 180 of 364
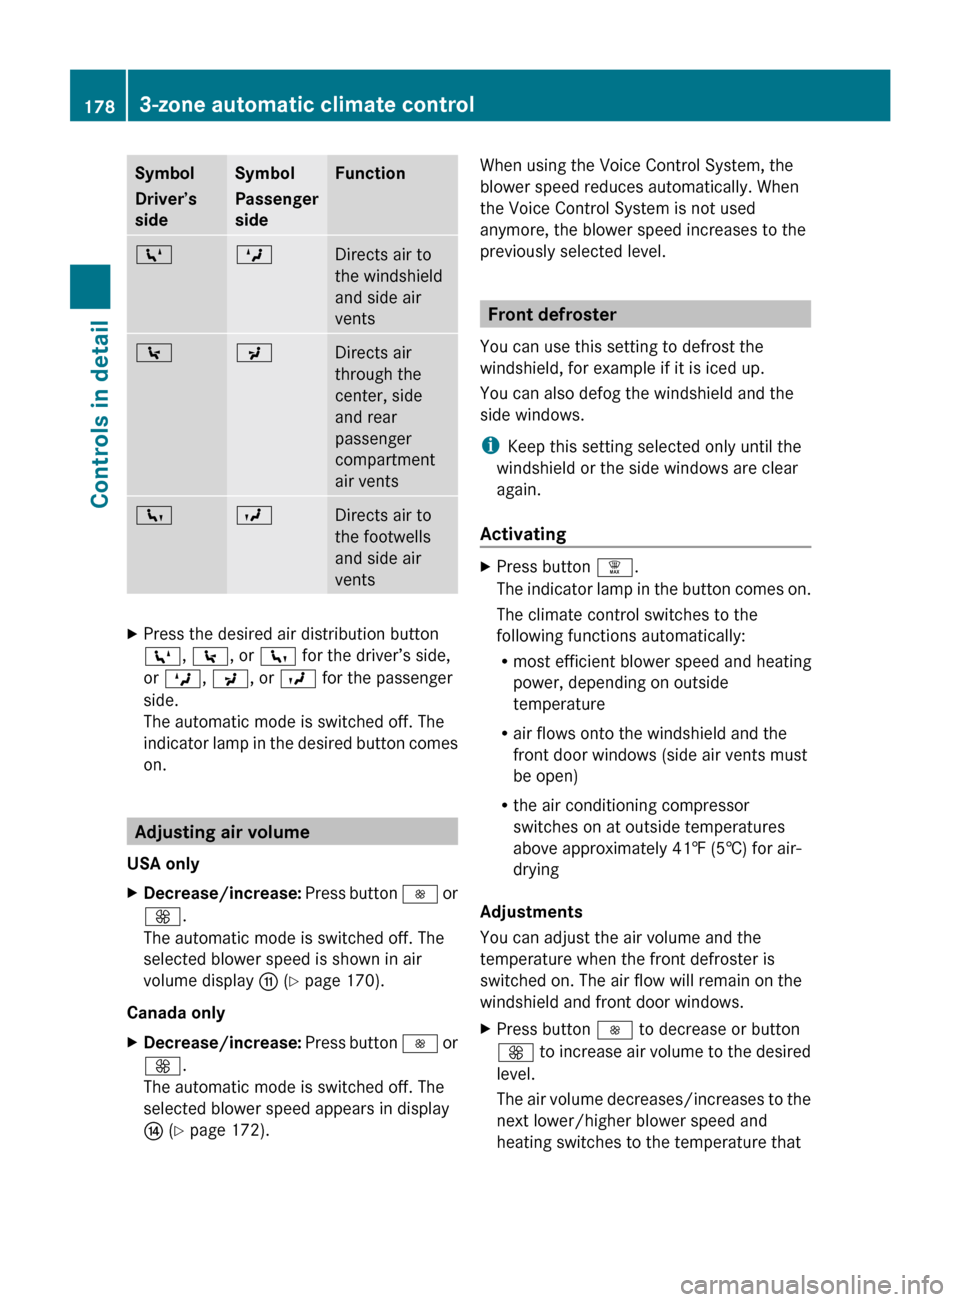
Symbol
Driver’s
side Symbol
Passenger
side Function
Z M
Directs air to
the windshield
and side air
vents
\ P
Directs air
through the
center, side
and rear
passenger
compartment
air vents
c O
Directs air to
the footwells
and side air
vents
X
Press the desired air distribution button
Z, \, or c for the driver’s side,
or M, P, or O for the passenger
side.
The automatic mode is switched off. The
indicator
lamp in the desired button comes
on. Adjusting air volume
USA only
X Decrease/increase:
Press button I or
K.
The automatic mode is switched off. The
selected blower speed is shown in air
volume display G (Y page 170).
Canada only
X Decrease/increase:
Press button I or
K.
The automatic mode is switched off. The
selected blower speed appears in display
J (Y page 172). When using the Voice Control System, the
blower speed reduces automatically. When
the Voice Control System is not used
anymore, the blower speed increases to the
previously selected level. Front defroster
You can use this setting to defrost the
windshield, for example if it is iced up.
You can also defog the windshield and the
side windows.
i Keep this setting selected only until the
windshield or the side windows are clear
again.
Activating X
Press button ¦.
The
indicator lamp in the button comes on.
The climate control switches to the
following functions automatically:
R most efficient blower speed and heating
power, depending on outside
temperature
R air flows onto the windshield and the
front door windows (side air vents must
be open)
R the air conditioning compressor
switches on at outside temperatures
above approximately 41‡ (5†) for air-
drying
Adjustments
You can adjust the air volume and the
temperature when the front defroster is
switched on. The air flow will remain on the
windshield and front door windows.
X Press button I to decrease or button
K
to increase air volume to the desired
level.
The air volume decreases/increases to the
next lower/higher blower speed and
heating switches to the temperature that 178
3-zone automatic climate control
Controls in detail
251_AKB; 4; 52, en-US
d2ureepe,
Version: 2.11.8.1 2009-03-23T09:22:52+01:00 - Seite 178
Page 210 of 364

monitoring services, connection and
cellular air time.
R vehicle battery power is available.
R the relevant cellular phone network and
GPS signals are available and pass the
information on to the Response Center.
i Location of the vehicle on a map is only
possible if the vehicle is able to receive
signals
from the GPS satellite network and
pass the information on to the Response
Center.
The Tele Aid system ( Telematic Alarm Identification on Demand)
The Tele Aid system consists of three types
of response:
R Automatic and manual emergency
R Roadside Assistance
R Information
The Tele Aid system is operational providing
that
the vehicle’s battery is charged, properly
connected, not damaged, and cellular and
GPS coverage is available. The Tele Aid
system utilizes the cellular network for
communication and the GPS ( Global
Positioning System) satellites for vehicle
location. If either of these signals are
unavailable, the Tele Aid system may not
function and if this occurs, assistance must
be summoned by other means.
i A Tele Aid call cannot be canceled. Even
if the Tele Aid system is not activated or
operational, the system will attempt to
connect the respective call. This may take
as
long as five minutes or more. As long as
the Tele Aid system attempts to connect a
call, you cannot operate the COMAND
system. Also, most functions in the control
system, such as the telephone function, are
suspended. Therefore, it is not advisable to
initiate any Tele Aid call unless the Tele Aid
system is activated and operational. To adjust the speaker volume during a Tele
Aid call do the following:
X
Press button W or X on the
multifunction steering wheel.
or
X Use the adjustment button on your
COMAND system.
System self-test The system performs a self-test after you
have switched on the ignition.
G
Warning!
A malfunction in the system has been
detected if any or all of the following
conditions occur:
R The indicator lamp in the SOS button does
not come on during the system self-test.
R The indicator lamp in Roadside Assistance
button º does not come on during the
system self-test.
R The indicator lamp in Information button
E does not come on during the system
self-test.
R The indicator lamp in the SOS button,
Roadside Assistance button º, or
Information button E remains
illuminated constantly in red after the
system self-test.
R The message Tele Aid Inoperative or
Tele Aid Not Activated appears in the
multifunction
display after the system self-
test
If a malfunction is indicated as outlined above,
the system may not operate as expected. In
case of an emergency, help will have to be
summoned by other means.
Have the system checked at the nearest
Mercedes-Benz Center or contact the
Response Center at 1-800-756-9018 (in the
USA) or 1-888-923-8367 (in Canada) as soon
as possible. 208
Useful features
Controls in detail
251_AKB; 4; 52, en-US
d2ureepe,
Version: 2.11.8.1 2009-03-23T09:22:52+01:00 - Seite 208
Page 211 of 364
Emergency calls
!
In order to activate the Tele Aid system, a
subscriber agreement must be completed.
To ensure your system is activated and
operational, please press Information
button E to perform the acquaintance
call. Failure to complete either of these
steps may result in a system that is not
activated.
If you have any questions regarding
activation, please call the Response Center
at 1-800-756-9018 (in the USA) or
1-888-923-8367 (in Canada).
An emergency call is initiated automatically
following an accident in which the Emergency
Tensioning Devices (ETDs) or air bags have
deployed.
An emergency call can also be initiated
manually ( Y page 209).
Once the emergency call is in progress, the
indicator lamp in the SOS button will begin to
flash. The message Connecting Call
appears in the multifunction display and the
COMAND system is muted. When the
connection is established, the message
Call Connected appears in the
multifunction display.
All information relevant to the emergency,
such as the location of the vehicle
(determined by the GPS satellite location
system), vehicle model, identification number
and color are generated.
A voice connection between the Response
Center and the occupants of the vehicle will
be established automatically soon after the
emergency call has been initiated. The
Response Center will attempt to determine
the nature of the emergency more precisely,
provided they can speak to an occupant of
the vehicle.
i If no vehicle occupant responds, an
ambulance will be sent to the vehicle
immediately. G
Warning!
If the indicator lamp in the SOS button is
flashing continuously and there was no voice
connection to the Response Center
established, then the Tele Aid system could
not initiate an emergency call (e.g. the
relevant cellular phone network is not
available).
The message Call Failed appears in the
multifunction display for approximately
10 seconds.
Should this occur, assistance must be
summoned by other means.
i The “911” emergency call system is a
public service. Using it without due cause
is a criminal offense.
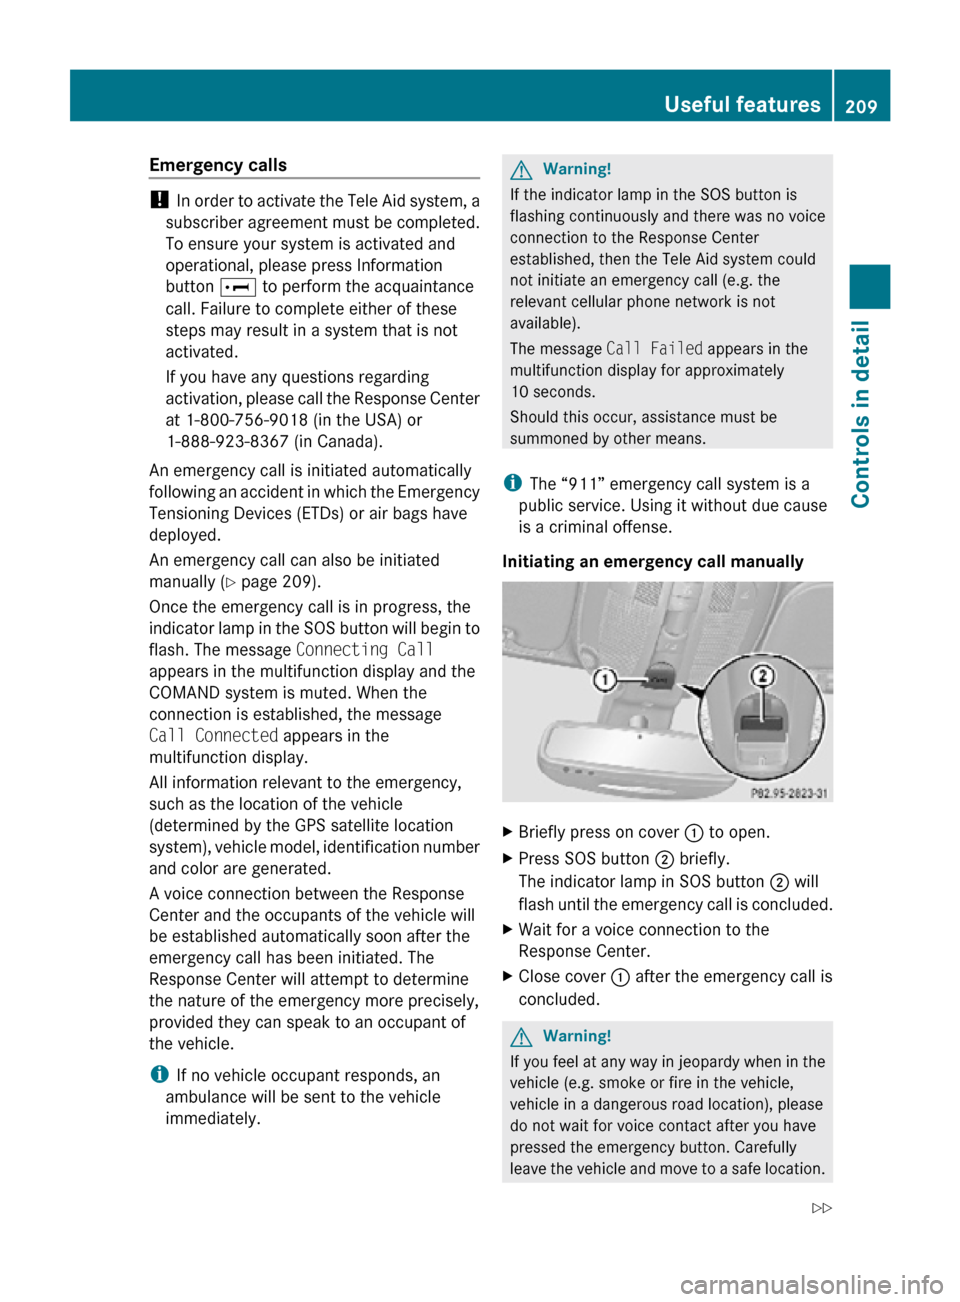
Initiating an emergency call manually X
Briefly press on cover : to open.
X Press SOS button ; briefly.
The indicator lamp in SOS button ; will
flash until the emergency call is concluded.
X Wait for a voice connection to the
Response Center.
X Close cover : after the emergency call is
concluded. G
Warning!
If you feel at any way in jeopardy when in the
vehicle (e.g. smoke or fire in the vehicle,
vehicle in a dangerous road location), please
do not wait for voice contact after you have
pressed the emergency button. Carefully
leave the vehicle and move to a safe location. Useful features
209Controls in detail
251_AKB; 4; 52, en-US
d2ureepe, Version: 2.11.8.1 2009-03-23T09:22:52+01:00 - Seite 209 Z
Page 212 of 364

The Response Center will automatically
contact local emergency officials with the
vehicle’s approximate location if they receive
an automatic SOS signal and cannot make
voice contact with the vehicle occupants.
Roadside Assistance button X
Open the telephone tray ( Y page 198).X
Press and hold Roadside Assistance
button : for longer than 2 seconds.
A call to a Mercedes-Benz Roadside
Assistance dispatcher will be initiated. The
indicator lamp in Roadside Assistance
button : will flash while the call is in
progress. The message Connecting
Call will appear in the multifunction
display and the COMAND system is muted.
When the connection is established, the
message Call Connected appears in the
multifunction display. The Tele Aid system will
transmit data generating the vehicle
identification number, model, color and
location (subject to availability of cellular and
GPS signals).
i The COMAND system display indicates
that a Tele Aid call is in progress. While the
call is connected you can change to the
navigation menu by pressing the NAVI
button on the COMAND system. Spoken
commands are not available.
A voice connection between the Roadside
Assistance dispatcher and the occupants of
the vehicle will be established. X
Describe the nature of the need for
assistance.
The Mercedes-Benz Roadside Assistance
dispatcher will either dispatch a qualified
Mercedes-Benz technician or arrange to tow
your vehicle to the nearest authorized
Mercedes-Benz Center. For services such as
labor and/or towing, charges may apply.
Refer to the Roadside Assistance manual for
more information.
Sign and Drive services (USA only):
Services such as a jump start, a few gallons
of fuel or the replacement of a flat tire with
the vehicle spare tire are obtainable at no
charge.
i If the indicator lamp in Roadside
Assistance button : is flashing
continuously and there was no voice
connection to the Response Center
established, then the Tele Aid system could
not initiate a Roadside Assistance call (e.g.
the relevant cellular phone network is not
available). The message Call Failed
appears in the multifunction display.
X Terminating calls: Press button ~ on
the multifunction steering wheel.
or
X Press the respective button for ending a
telephone call on the COMAND system.
Information button X
Open the telephone tray ( Y page 198).210
Useful featuresControls in detail
251_AKB; 4; 52, en-US
d2ureepe,
Version: 2.11.8.1 2009-03-23T09:22:52+01:00 - Seite 210
Page 213 of 364

X
Press and hold Information button : for
longer than 2 seconds.
A call to the Customer Assistance Center
will be initiated. The indicator lamp in
Information button : will flash while the
call is in progress. The message
Connecting Call will appear in the
multifunction display and the COMAND
system is muted.
When the connection is established, the
message Call Connected appears in the
multifunction
display. The Tele Aid system will
transmit data generating the vehicle
identification number, model, color and
location (subject to availability of cellular and
GPS signals).
i The COMAND system display indicates
that a Tele Aid call is in progress. While the
call is connected you can change to the
navigation menu by pressing the NAVI
button on the COMAND system. Spoken
commands are not available.
A voice connection between the Customer
Assistance Center representative and the
occupants of the vehicle will be established.
Information regarding the operation of your
vehicle, the nearest authorized Mercedes-
Benz Center or Mercedes-Benz USA products
and services is available to you.
For more details concerning the Tele Aid
system, please visit www.mbusa.com (USA
only), log in to “Owner’s Online” and visit the
“My Tele Aid” section to learn more.
i If the indicator lamp in Information
button : is flashing continuously and
there was no voice connection to the
Response Center established, then the Tele
Aid system could not initiate an Information
call (e.g. the relevant cellular phone
network is not available). The message
Call Failed appears in the multifunction
display. X
Terminating calls: Press button ~ on
the multifunction steering wheel.
or
X Press the respective button for ending a
telephone call on the COMAND system.
Call priority If other service calls such as a Roadside
Assistance
call or Information call are active,
an emergency call is still possible. In this
case, the emergency call will take priority and
override all other active calls.
The indicator lamp in the respective button
flashes until the call is concluded. Emergency
calls can only be terminated by a Response
Center or Customer Assistance Center
representative. All other calls can be
terminated by pressing button ~ on the
multifunction steering wheel or the
respective button for ending a telephone call
on the COMAND system.
Destination Download to the COMAND
system i
The
components and operating principles
of the COMAND system can be found in the
separate COMAND system operating
instructions.
Destination Download allows you access to a
database of over 10 million points of interest
(POIs) that can be downloaded to your
vehicle’s navigation system. If you know the
destination, the address can be downloaded,
or can be provided with points of interests
near your location.
The Response Center can transmit
destination data to the COMAND system
during the connection with the Roadside
Assistance or Customer Assistance Center.
The transmitted data can contain address
details for a Mercedes-Benz Center or POIs. Useful features
211
Controls in detail
251_AKB; 4; 52, en-US
d2ureepe, Version: 2.11.8.1 2009-03-23T09:22:52+01:00 - Seite 211 Z
Page 214 of 364
Route guidance
You will be prompted to confirm that route
guidance to the entered address is to be
started.
X
Select Yes using button = or ; on
the COMAND system.
X Press button 9 on the COMAND system
to confirm.
The system calculates the route and
subsequently starts the route guidance to the
defined address.
i If you select No, you can save the address
to your address book.
i The Destination Download feature is
available if the relevant mobile phone
network is available and data connection is
possible.
Search & Send “Search & Send” is a navigation destination
address entry service. For more information
on “Search & Send”, refer to separate
COMAND system operating instructions.
Remote door unlock
In case you have locked your vehicle
unintentionally
(e.g. SmartKey inside vehicle),
and the reserve SmartKey is not available:
X Contact the Response Center at
1-800-756-9018
(in the USA) or
1-888-923-8367 (in Canada).
You will be asked to provide your password.
X Then return to your vehicle at the time
arranged with the Response Center and
pull the tailgate recessed handle
(Y page 75) for a minimum of 20 seconds
until the indicator lamp in the SOS button
is flashing.
The
message Connecting Call appears in
the multifunction display.
As an alternative, you may unlock the vehicle
via Internet in the “My Tele Aid” section of “Owner’s Online”, using your ID and password
(USA only).
The Response Center will then unlock your
vehicle with the remote door unlocking
feature.
i
The remote door unlock feature is
available if the relevant cellular phone
network is available.
The
SOS button will flash and the message
Call Connected will appear in the
multifunction display to indicate receipt of
the door unlock command.
Once the vehicle is unlocked, a Response
Center specialist will attempt to establish
voice contact with the vehicle occupants.
If the tailgate recessed handle was pulled
for more than 20 seconds before door
unlock authorization was received by the
Response Center, you must wait
15 minutes before pulling the tailgate
recessed handle again.
Stolen Vehicle Recovery Services In the event your vehicle was stolen:
X
Report the incident to the police.
The police will issue a numbered incident
report.
X Pass this number on to the Response
Center along with your password.
The Response Center will then attempt to
covertly contact the vehicle’s Tele Aid
system. Once the vehicle is located, the
Response
Center will contact the local law
enforcement and you. The vehicle’s
location will only be provided to law
enforcement.
i If the anti-theft alarm stays on for more
than 30 seconds, the Tele Aid system
initiates a call to the Response Center
automatically The Tele Aid system will
initiate the call provided that 212
Useful features
Controls in detail
251_AKB; 4; 52, en-US
d2ureepe,
Version: 2.11.8.1 2009-03-23T09:22:52+01:00 - Seite 212
Page 218 of 364
control is compatible with radio-frequency
devices operating between 280-390 MHz
.
R Put a new battery in hand-held remote
control A. This will increase the likelihood
of the hand-held remote control sending a
stronger and more accurate signal to the
integrated remote control.
R While performing step 3, hold hand-held
remote control A at different lengths and
angles from the signal transmitter button
(;, = or ?) you are programming.
Attempt varying angles at the distance of 2
to 12 inches (5 to 30 cm) away or the same
angle at varying distances.
R If another hand-held remote control is
available for the same device, try the
programming steps again using that other
hand-held remote control. Make sure new
batteries are in the hand-held remote
control before beginning the procedure.
R Straighten the antenna wire from the
garage door opener assembly. This may
help improve transmitting and/or receiving
signals.
i Certain types of garage door openers are
incompatible with the integrated remote
control. If you should experience further
difficulties with programming the
integrated remote control, contact an
authorized Mercedes-Benz Center, or call
the Mercedes-Benz Customer Assistance
Center (in the USA) at
1-800-FOR-MERCedes, or the HomeLink ®
Hotline (in the USA) at 1-800-355-3515, or
the Customer Service (in Canada) at
1-800-387-0100,. i
USA only:
This device complies with Part 15 of the
FCC Rules
. Operation is subject to the
following two conditions:
1. This device may not cause harmful interference, and
2. this device must accept any interference received, including
interference that may cause undesired
operation.
Any unauthorized modification to this
device could void the user’s authority to
operate the equipment.
i Canada only:
This device complies with RSS-210 of
Industry Canada. Operation is subject to
the following two conditions:
1. This device may not cause interference, and
2. this device must accept any interference received, including
interference that may cause undesired
operation of the device.
Any unauthorized modification to this
device could void the user’s authority to
operate the equipment. Compass
X Calling up the compass: Press button
V
or U on the multifunction steering
wheel repeatedly until the AIRMATIC/
Compass menu appears in the
multifunction display.
The compass displays the direction into
which the vehicle is currently traveling: N,
NE, E, SE, S, SW, W, or NW. 216
Useful features
Controls in detail
251_AKB; 4; 52, en-US
d2ureepe,
Version: 2.11.8.1 2009-03-23T09:22:52+01:00 - Seite 216