2010 MERCEDES-BENZ GLK350 4MATIC wiper blades
[x] Cancel search: wiper bladesPage 20 of 344
Load limit ....................................... 228
Roof rack ....................................... 188
Split rear seat bench .....................189
Terminology ................................... 239
Vehicle maximum load on the tire ... 241
Vehicle specification
GLK 350 ........................................ 330
GLK 350 4MATIC ........................... 330
Vehicle status message memory .... 118
Vehicle tool kit .................................. 260
Vehicle washing see Vehicle care
Vehicle weights
see Vehicle specification
W
Warning sounds
Driver’s or passenger’s seat belt .....50
Parking brake ................................ 272
Parktronic system ..........................174
Seat belt telltale ............................ 292
Warranty coverage ............................ 328
Washer and headlamp cleaning
system ................................................ 339
Washer fluid
Mixing ratio .................................... 339
Refilling .......................................... 217
Washing the vehicle .......................... 251
Wear pattern (tires) .......................... 234
Weights (vehicle) see Vehicle specification
Wheel
Changing ....................................... 312
Removing ....................................... 314
Spare ............................................. 312
Tightening torque ........................... 317
Wheels, sizes ..................................... 331
Wheels, Tires and .............................. 218
Window curtain air bags ..................... 41
Windows see Power windows
Windows, cleaning ............................ 255
Windshield
Cleaning wiper blades .................... 255
Defogging ...................................... 182
Washer fluid ................................... 339
Wipers ............................................. 93
Windshield wipers
Replacing wiper blades ..................310
Winter driving
Instructions .................................... 243
Snow chains .................................. 242
Tires ............................................... 241
Winter tires ................................ 241, 331
Wood trims, cleaning ........................ 25718IndexX204_AKB; 3; 23, en-USd2ureepe,Version: 2.11.8.12009-07-16T19:16:58+02:00 - Seite 18
Page 28 of 344
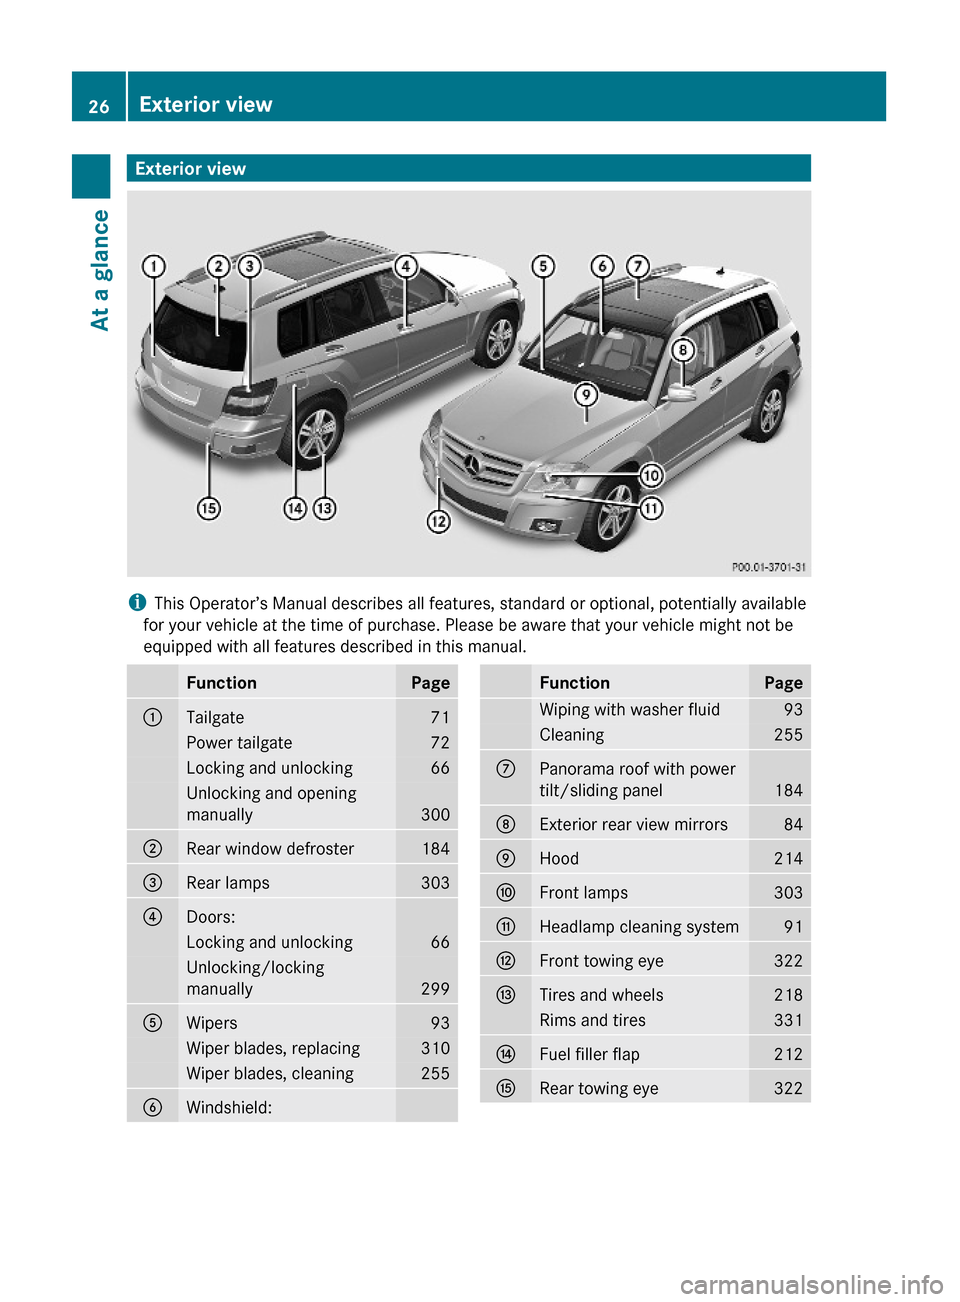
Exterior view
iThis Operator’s Manual describes all features, standard or optional, potentially available
for your vehicle at the time of purchase. Please be aware that your vehicle might not be
equipped with all features described in this manual.
FunctionPage:Tailgate71Power tailgate72Locking and unlocking66Unlocking and opening
manually300
;Rear window defroster184=Rear lamps303?Doors:Locking and unlocking66Unlocking/locking
manually299
AWipers93Wiper blades, replacing310Wiper blades, cleaning255BWindshield:FunctionPageWiping with washer fluid93Cleaning255CPanorama roof with power
tilt/sliding panel184
DExterior rear view mirrors84EHood214FFront lamps303GHeadlamp cleaning system91HFront towing eye322ITires and wheels218Rims and tires331JFuel filler flap212KRear towing eye32226Exterior viewAt a glance
X204_AKB; 3; 23, en-USd2ureepe,Version: 2.11.8.12009-07-16T19:16:58+02:00 - Seite 26
Page 95 of 344
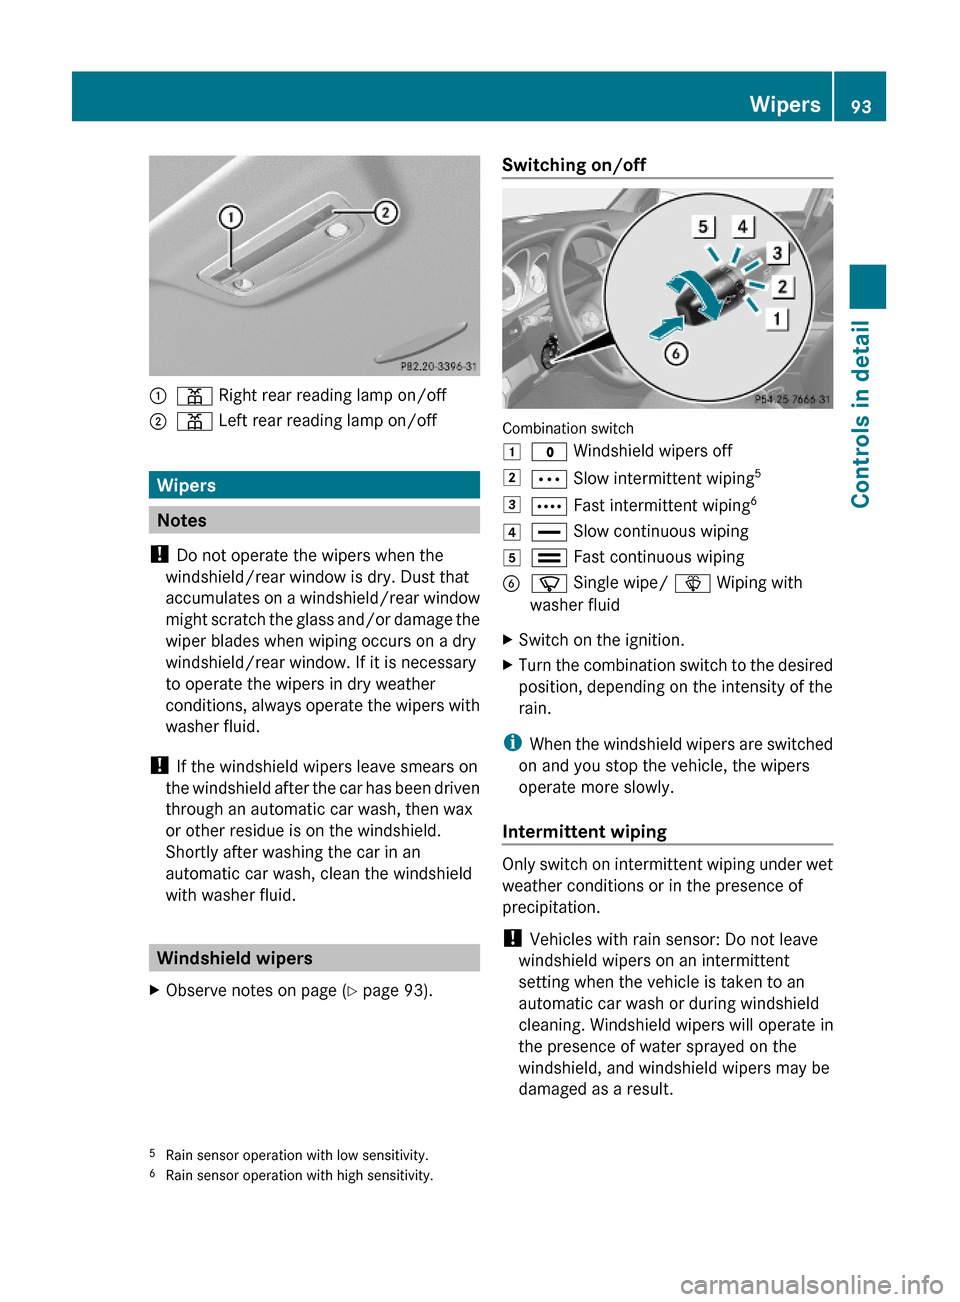
:p Right rear reading lamp on/off;p Left rear reading lamp on/off
Wipers
Notes
! Do not operate the wipers when the
windshield/rear window is dry. Dust that
accumulates on a windshield/rear window
might scratch the glass and/or damage the
wiper blades when wiping occurs on a dry
windshield/rear window. If it is necessary
to operate the wipers in dry weather
conditions, always operate the wipers with
washer fluid.
! If the windshield wipers leave smears on
the windshield after the car has been driven
through an automatic car wash, then wax
or other residue is on the windshield.
Shortly after washing the car in an
automatic car wash, clean the windshield
with washer fluid.
Windshield wipers
XObserve notes on page (Y page 93).Switching on/off
Combination switch
1$ Windshield wipers off2Ä Slow intermittent wiping53Å Fast intermittent wiping64° Slow continuous wiping5¯ Fast continuous wipingBí Single wipe/ î Wiping with
washer fluid
XSwitch on the ignition.XTurn the combination switch to the desired
position, depending on the intensity of the
rain.
iWhen the windshield wipers are switched
on and you stop the vehicle, the wipers
operate more slowly.
Intermittent wiping
Only switch on intermittent wiping under wet
weather conditions or in the presence of
precipitation.
! Vehicles with rain sensor: Do not leave
windshield wipers on an intermittent
setting when the vehicle is taken to an
automatic car wash or during windshield
cleaning. Windshield wipers will operate in
the presence of water sprayed on the
windshield, and windshield wipers may be
damaged as a result.
5Rain sensor operation with low sensitivity.6Rain sensor operation with high sensitivity.
Wipers93Controls in detailX204_AKB; 3; 23, en-USd2ureepe,Version: 2.11.8.12009-07-16T19:16:58+02:00 - Seite 93Z
Page 96 of 344
! Vehicles with rain sensor: If you have set
intermittent wiping, dirt on the surface of
the rain sensor or optical effects may cause
the windshield wipers to wipe in an
undesired fashion. This could then damage
the windshield wiper blades or scratch the
windshield. You should therefore switch off
the windshield wipers when weather
conditions are dry.
Vehicles with rain sensor: Intermittent wiping
interval is dependent on the wetness of the
windshield. After the initial wipe, pauses
between wipes are controlled by the rain
sensor automatically.
XTurn the combination switch to position
Ä or Å.
Intermittent wiping starts with selected
wiping interval.
Intermittent wiping is interrupted when the
vehicle is at a standstill and a front door is
opened. This protects persons getting into or
out of the vehicle from being sprayed.
Intermittent wiping will be continued when all
doors are closed andRthe automatic transmission is in drive
position D or reverse gear R
or
Rthe wiper setting is changed using the
combination switch
Single wipe
XPress the combination switch briefly in
direction of arrow B to the resistance
point.
The windshield wipers wipe one time
without washer fluid.
Wiping with washer fluid
XPress the combination switch in direction
of arrow B past the resistance point.
The windshield wipers operate with washer
fluid.
iTo prevent smears on the windshield or
noisy/chattering wiper blades, wipe with
washer fluid every now and then even when
it is raining.
For information on filling up the washer
reservoir, see “Washer system and headlamp
cleaning system” (Y page 217).
For information on cleaning the headlamps
with washer fluid, see “Headlamp cleaning
system” (Y page 91).
Rear window wiper/washer
XObserve notes on page (Y page 93).
The rear window wiper engages automatically
when the automatic transmission is shifted
into reverse gear R with the windshield wipers
switched on.
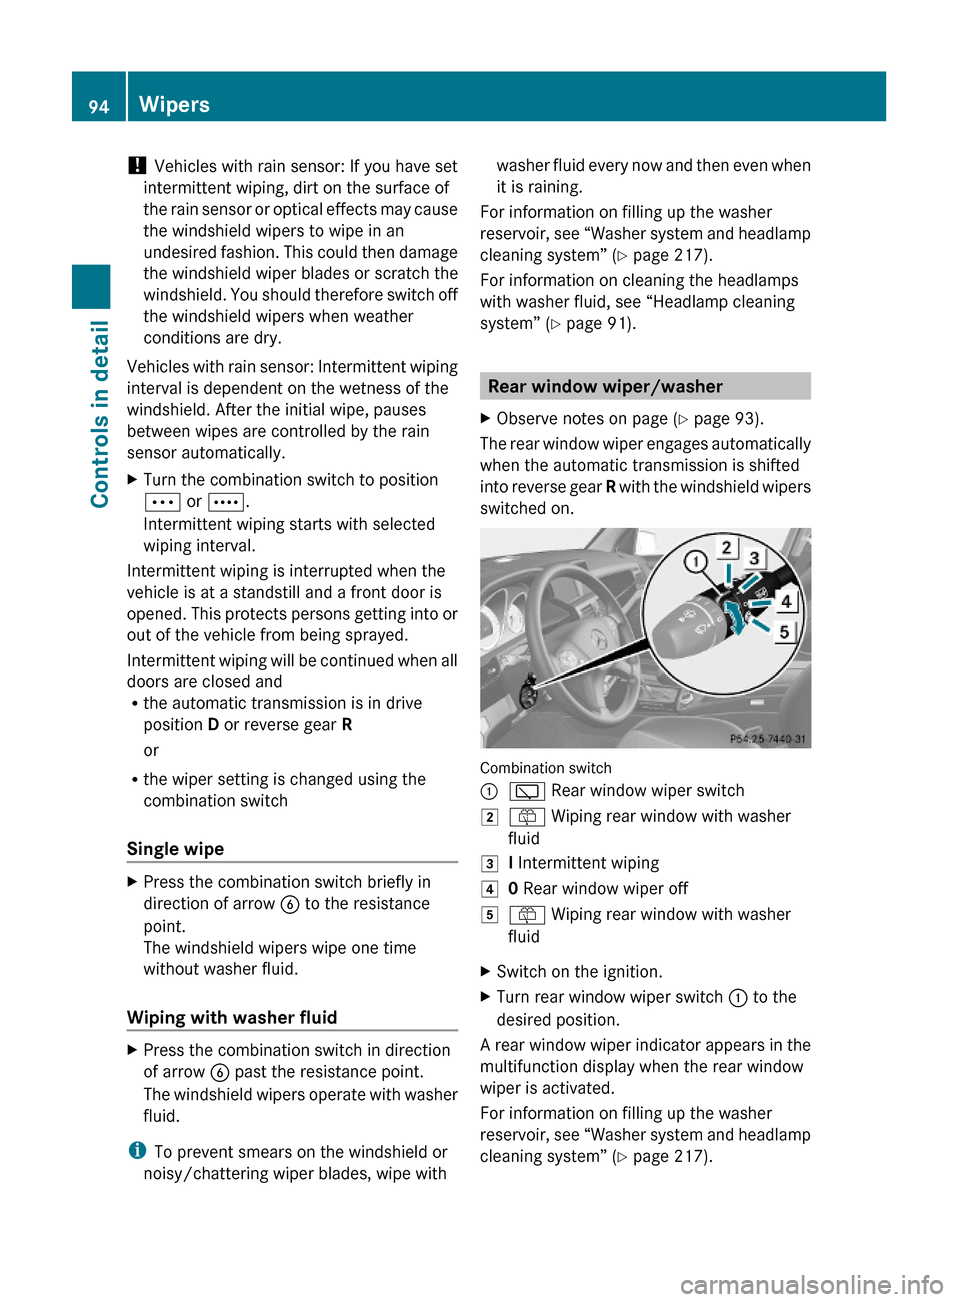
Combination switch
:è Rear window wiper switch2ô Wiping rear window with washer
fluid
3I Intermittent wiping40 Rear window wiper off5ô Wiping rear window with washer
fluid
XSwitch on the ignition.XTurn rear window wiper switch : to the
desired position.
A rear window wiper indicator appears in the
multifunction display when the rear window
wiper is activated.
For information on filling up the washer
reservoir, see “Washer system and headlamp
cleaning system” (Y page 217).
94WipersControls in detail
X204_AKB; 3; 23, en-USd2ureepe,Version: 2.11.8.12009-07-16T19:16:58+02:00 - Seite 94
Page 216 of 344
Engine compartment
Hood
GWarning!
Do not pull the release lever while the vehicle
is in motion. Otherwise the hood could be
forced open by passing air flow.
This could cause the hood to come loose and
injure you and/or others.
Opening
GWarning!
Do not open the hood when the engine is
overheated. You could be seriously injured.
Observe the coolant temperature gauge to
determine whether the engine may be
overheated. If you see flames or smoke
coming from the engine compartment, move
away from the vehicle. Wait until the engine
has cooled. If necessary, call the fire
department.
GWarning!
You could be injured when the hood is open –
even when the engine is turned off.
Parts of the engine can become very hot. To
prevent burns, let the engine cool completely
before touching any components on the
vehicle. Comply with all relevant safety
precautions.
GWarning!
To help prevent personal injury, stay clear of
moving parts when the hood is open and the
engine is running.
The radiator fan may continue to run for
approximately 30 seconds or may even
restart after the engine has been turned off.
Stay clear of fan blades.
GWarning!
The engine is equipped with a transistorized
ignition system. Because of the high voltage
it is dangerous to touch any components
(ignition coils, spark plug sockets, diagnostic
socket) of the ignition system
Rwith the engine running
Rwhile starting the engine
Rwhen the ignition is switched on and the
engine is turned manually
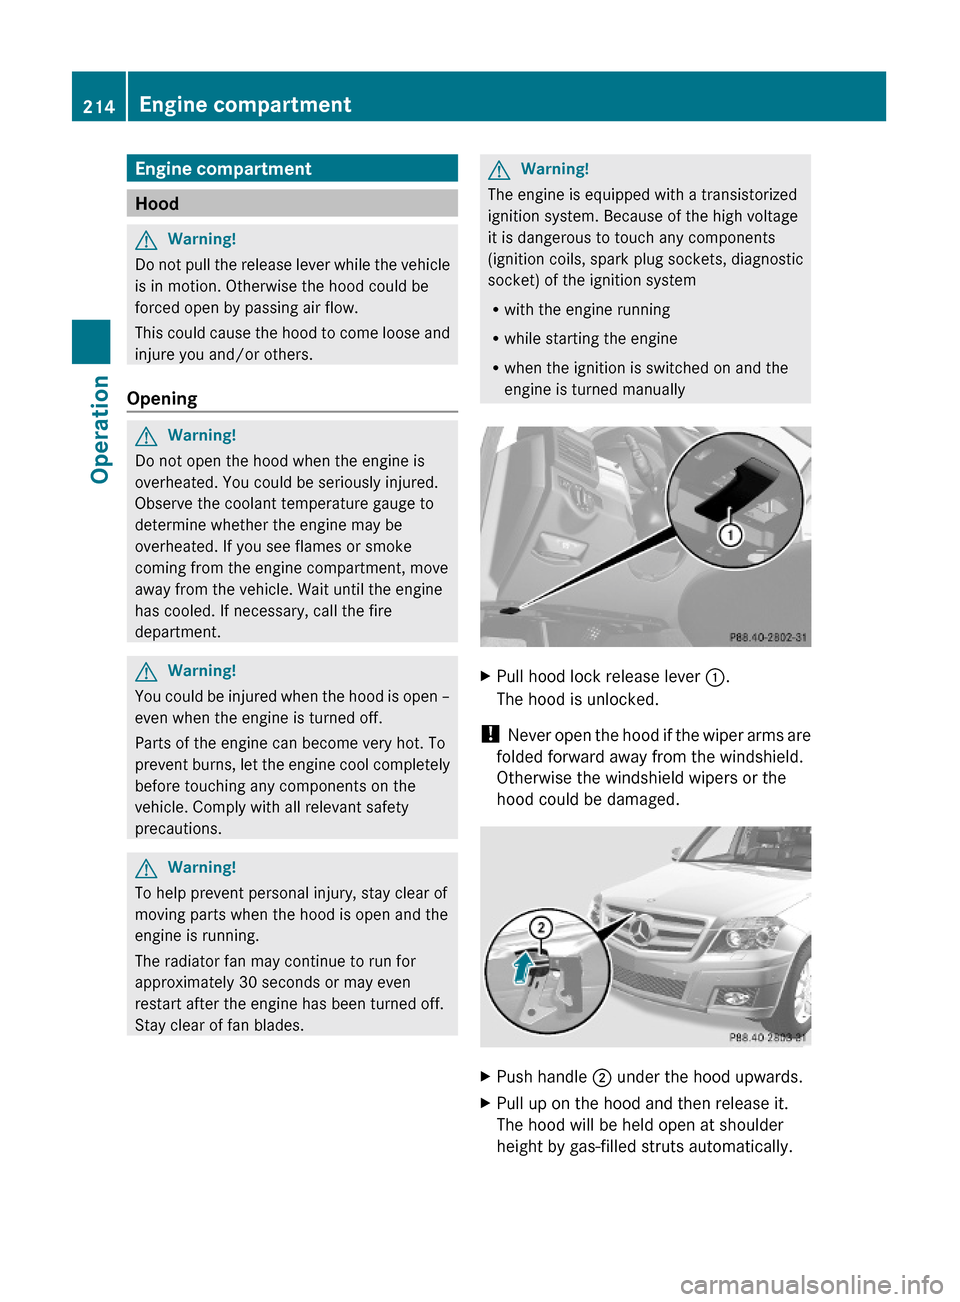
XPull hood lock release lever :.
The hood is unlocked.
! Never open the hood if the wiper arms are
folded forward away from the windshield.
Otherwise the windshield wipers or the
hood could be damaged.
XPush handle ; under the hood upwards.XPull up on the hood and then release it.
The hood will be held open at shoulder
height by gas-filled struts automatically.
214Engine compartmentOperation
X204_AKB; 3; 23, en-USd2ureepe,Version: 2.11.8.12009-07-16T19:16:58+02:00 - Seite 214
Page 257 of 344
XOnly use clean water and a soft, non-
scratching cloth to clean rear view camera
lens :.
Be careful not to apply wax to rear view
camera lens : when waxing the vehicle. If
necessary, remove the wax using the
Mercedes-Benz approved Car Shampoo with
plenty of water.
! Do not clean the camera and the area
around the camera
R with a high-pressure cleaner
R with a dry cloth and strong pressure
R with aggressive cleaning agents
You could otherwise damage the camera.
Cleaning the windows and the wiper
blades
! The windshield wipers must be in a
vertical position before folding them away
from the windshield. They could otherwise
damage the hood.
Never open the hood when the wiper arms
are folded forward.
XMake sure the hood is fully closed.XSwitch on the ignition.XWith wiper arms in vertical position, switch
off the ignition.GWarning!
For safety reasons, switch off wipers and
remove SmartKey from starter switch before
cleaning the windshield and/or the wiper
blades. Otherwise, the wiper motor could
suddenly turn on and cause injury.
! Do not pull on the wiper blade inserts.
They could tear.
XFold the wiper arms forward until they snap
into place.XClean the windshield and the wiper blade
inserts with a clean cloth and mild
detergent solution.XUse a soft, clean cloth and a mild window
cleaning solution on all outside and inside
glass surfaces.
An automotive glass cleaner is
recommended.
! Fold the windshield wiper arms back onto
the windshield before turning the SmartKey
in the starter switch.
Hold on to the wiper when folding the wiper
arm back. If released, the force of the
impact from the tensioning spring could
crack the windshield.
! To clean the window interior, do not use
a dry cloth, abrasives, solvents or cleaners
containing solvents. Do not touch the
inside of the windows with hard objects
such as an ice scraper or ring. Doing so may
damage the windows.
Cleaning the panorama roof
The rear part of the tilt/sliding panel has a
protective layer on the inside.
XUse a soft, clean cloth and a mild window
cleaning solution.
An automotive glass cleaner is
recommended.
! Do not use a dry cloth, abrasives, solvents
or cleaners containing solvents. Do not
touch the protective layer with hard objects
such as an ice scraper or ring. Never apply
strong force and only use a soft, non-
scratching cloth when cleaning the rear
part of the tilt/sliding panel.
Otherwise you may scratch or damage the
protective layer.
Vehicle care255OperationX204_AKB; 3; 23, en-USd2ureepe,Version: 2.11.8.12009-07-16T19:16:58+02:00 - Seite 255Z
Page 261 of 344
Vehicle equipment ............................260
Where will I find ...? ..........................260
Vehicle status messages in the
multifunction display .......................262
What to do if … ..................................288
Unlocking/locking manually ...........299
Resetting activated NECK-PRO
active front head restraints .............301
Replacing SmartKey batteries .........302
Replacing bulbs .................................303
Replacing wiper blades ....................310
Flat tire ..............................................312
Battery ...............................................317
Jump starting ....................................319
Towing the vehicle ............................321
Fuses ..................................................325
259Practical hintsX204_AKB; 3; 23, en-USd2ureepe,Version: 2.11.8.12009-07-16T19:16:58+02:00 - Seite 259
Page 312 of 344
XInsert the new bulb into the bulb carrier and
turn the bulb clockwise.
XInsert the bulb carrier and press it in.
The bulb carrier retainers ; engage
audibly.
XReconnect the plug.XClose the side trim panel (Y page 309).
License plate lamps
XPress tab ; of license plate lamp : in
direction of the arrow and loosen the lens
of license plate lamp :.
XRemove the lens of license plate lamp :.XReplace the bulb.XInsert the lens of license plate lamp : and
press it in until engages audibly.
Replacing wiper blades
Safety notes
GWarning!
For safety reasons, switch off the wipers and
remove the SmartKey from the starter switch
(vehicles with KEYLESS-GO: Make sure the
vehicle’s on-board electronics have status 0)
before replacing a wiper blade. Otherwise, the
wiper motor could suddenly turn on and cause
injury.
GWarning!
Wiper blades are components that are subject
to wear and tear. Replace the wiper blades
twice a year, preferably in the spring and fall.
Otherwise the windows will not be wiped
properly. As a result, you may not be able to
observe surrounding traffic conditions and
could cause an accident.
! To avoid damage to the hood, the front
wiper arms should only be folded forward
when in the vertical position.
! Never open the hood when a front wiper
arm is folded forward.
Hold on to the wiper when folding a wiper
arm back. If released, the force of the
impact from the tensioning spring could
crack the windshield or the rear window.
Do not allow a wiper arm to contact the
windshield glass or the rear window
without a wiper blade inserted.
Mercedes-Benz recommends that you have
this work carried out at an authorized
Mercedes-Benz Center.
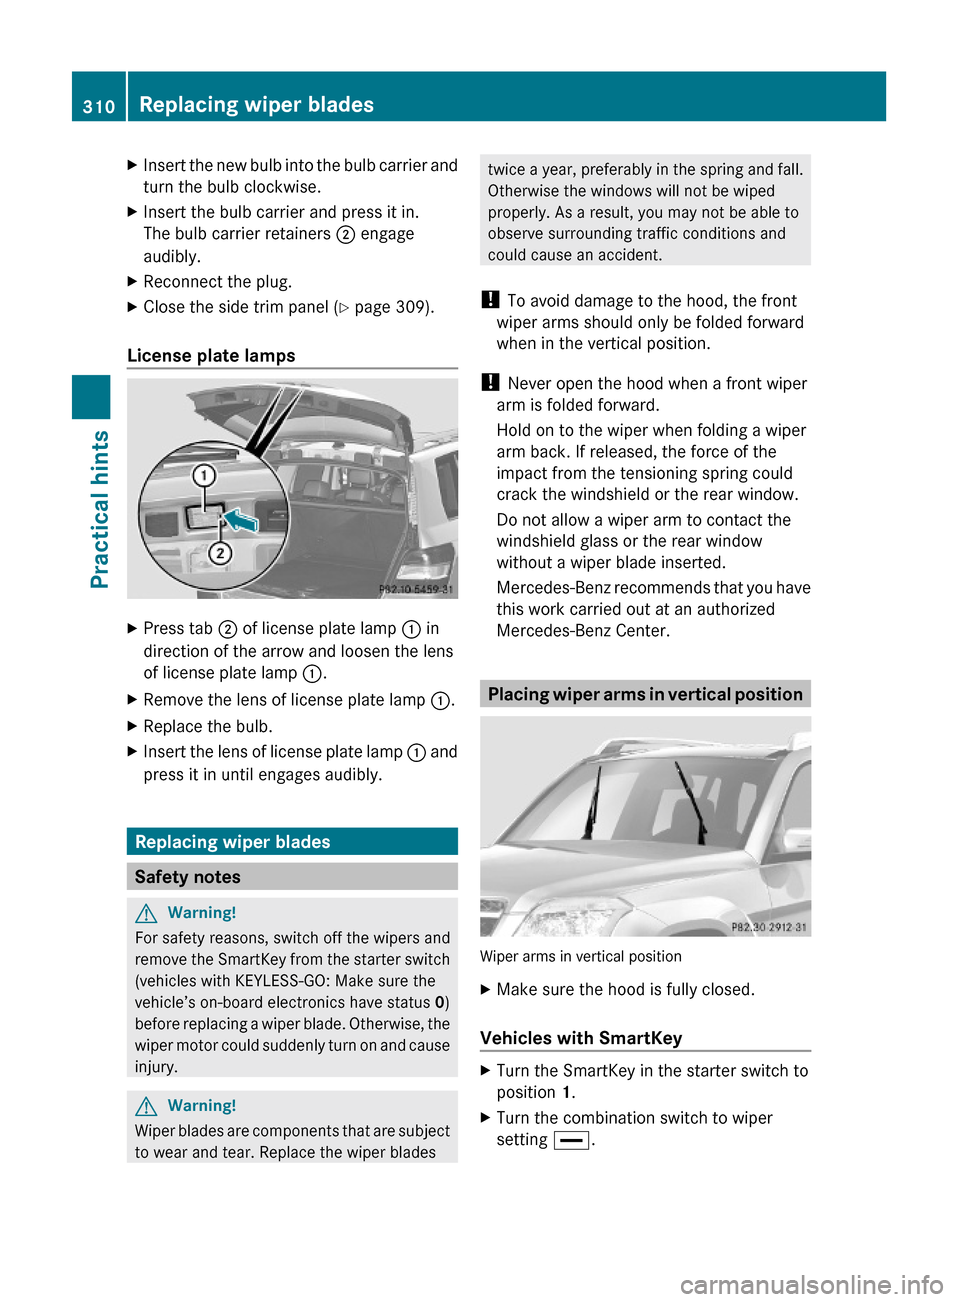
Placing wiper arms in vertical position
Wiper arms in vertical position
XMake sure the hood is fully closed.
Vehicles with SmartKey
XTurn the SmartKey in the starter switch to
position 1.
XTurn the combination switch to wiper
setting °.
310Replacing wiper bladesPractical hints
X204_AKB; 3; 23, en-USd2ureepe,Version: 2.11.8.12009-07-16T19:16:58+02:00 - Seite 310