2010 MERCEDES-BENZ GLK350 4MATIC fuse
[x] Cancel search: fusePage 7 of 344
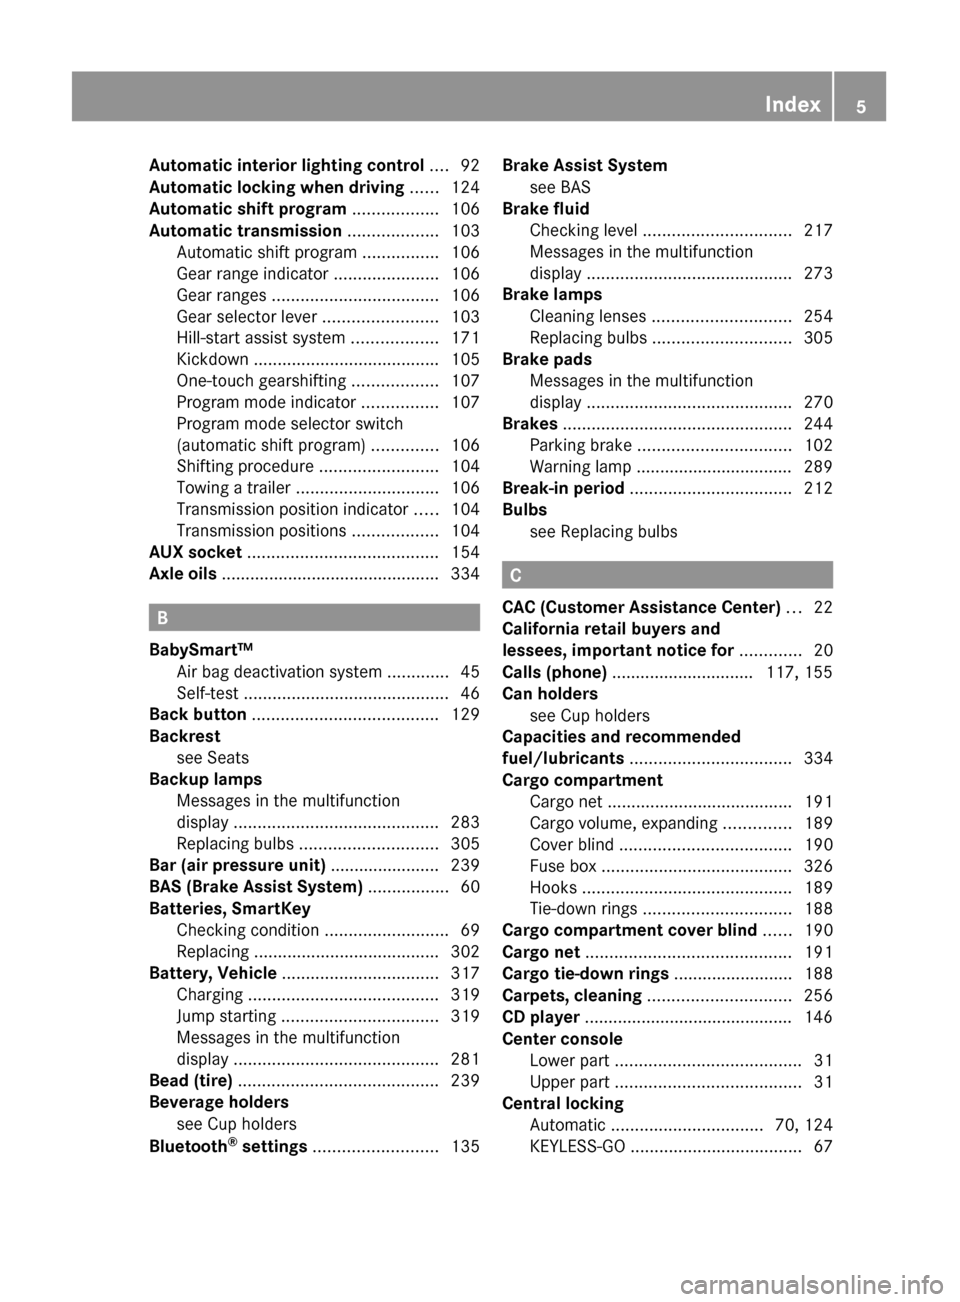
Automatic interior lighting control .... 92
Automatic locking when driving ...... 124
Automatic shift program .................. 106
Automatic transmission ................... 103
Automatic shift program ................106
Gear range indicator ......................106
Gear ranges ................................... 106
Gear selector lever ........................103
Hill-start assist system ..................171
Kickdown ....................................... 105
One-touch gearshifting ..................107
Program mode indicator ................107
Program mode selector switch
(automatic shift program) ..............106
Shifting procedure .........................104
Towing a trailer .............................. 106
Transmission position indicator .....104
Transmission positions ..................104
AUX socket ........................................ 154
Axle oils .............................................. 334
B
BabySmart™
Air bag deactivation system .............45
Self-test ........................................... 46
Back button ....................................... 129
Backrest see Seats
Backup lamps
Messages in the multifunction
display ........................................... 283
Replacing bulbs ............................. 305
Bar (air pressure unit) ....................... 239
BAS (Brake Assist System) ................. 60
Batteries, SmartKey
Checking condition ..........................69
Replacing ....................................... 302
Battery, Vehicle ................................. 317
Charging ........................................ 319
Jump starting ................................. 319
Messages in the multifunction
display ........................................... 281
Bead (tire) .......................................... 239
Beverage holders see Cup holders
Bluetooth ®
settings .......................... 135
Brake Assist System
see BAS
Brake fluid
Checking level ............................... 217
Messages in the multifunction
display ........................................... 273
Brake lamps
Cleaning lenses ............................. 254
Replacing bulbs ............................. 305
Brake pads
Messages in the multifunction
display ........................................... 270
Brakes ................................................ 244
Parking brake ................................ 102
Warning lamp ................................. 289
Break-in period .................................. 212
Bulbs see Replacing bulbs
C
CAC (Customer Assistance Center) ... 22
California retail buyers and
lessees, important notice for ............. 20
Calls (phone) .............................. 117, 155
Can holders see Cup holders
Capacities and recommended
fuel/lubricants .................................. 334
Cargo compartment
Cargo net ....................................... 191
Cargo volume, expanding ..............189
Cover blind .................................... 190
Fuse box ........................................ 326
Hooks ............................................ 189
Tie-down rings ............................... 188
Cargo compartment cover blind ...... 190
Cargo net ........................................... 191
Cargo tie-down rings ......................... 188
Carpets, cleaning .............................. 256
CD player ............................................ 146
Center console
Lower part ....................................... 31
Upper part ....................................... 31
Central locking
Automatic ................................ 70, 124
KEYLESS-GO .................................... 67
Index5X204_AKB; 3; 23, en-USd2ureepe,Version: 2.11.8.12009-07-16T19:16:58+02:00 - Seite 5
Page 11 of 344
Front air bagssee Air bags
Front axle oil ...................................... 334
Front lamps see Headlamps
Front passenger front air bag ............ 40
Messages in the multifunction
display ........................................... 264
Front passenger front air bag off
indicator lamp (Canada only) ..... 45, 297
Front passenger front air bag off
indicator lamp (USA only) .......... 42, 298
Front seat head restraints see Head restraints
Fuel ..................................................... 212
Additives ........................................ 337
Capacity, fuel tank .........................335
Drive sensibly–safe fuel .................243
Fuel consumption statistics ...........114
Fuel filler flap and cap ...................213
Fuel tank reserve warning lamp .....294
Premium unleaded gasoline ...........336
Refueling ........................................ 212
Requirements ................................ 337
Fuel filler flap ..................................... 213
Opening manually ..........................301
Fuel gauge ................................... 28, 110
Fuels, coolants, lubricants etc. ........ 334
Fuel tank
Capacity ........................................ 335
Fuel filler flap and cap ...................213
Refueling ........................................ 212
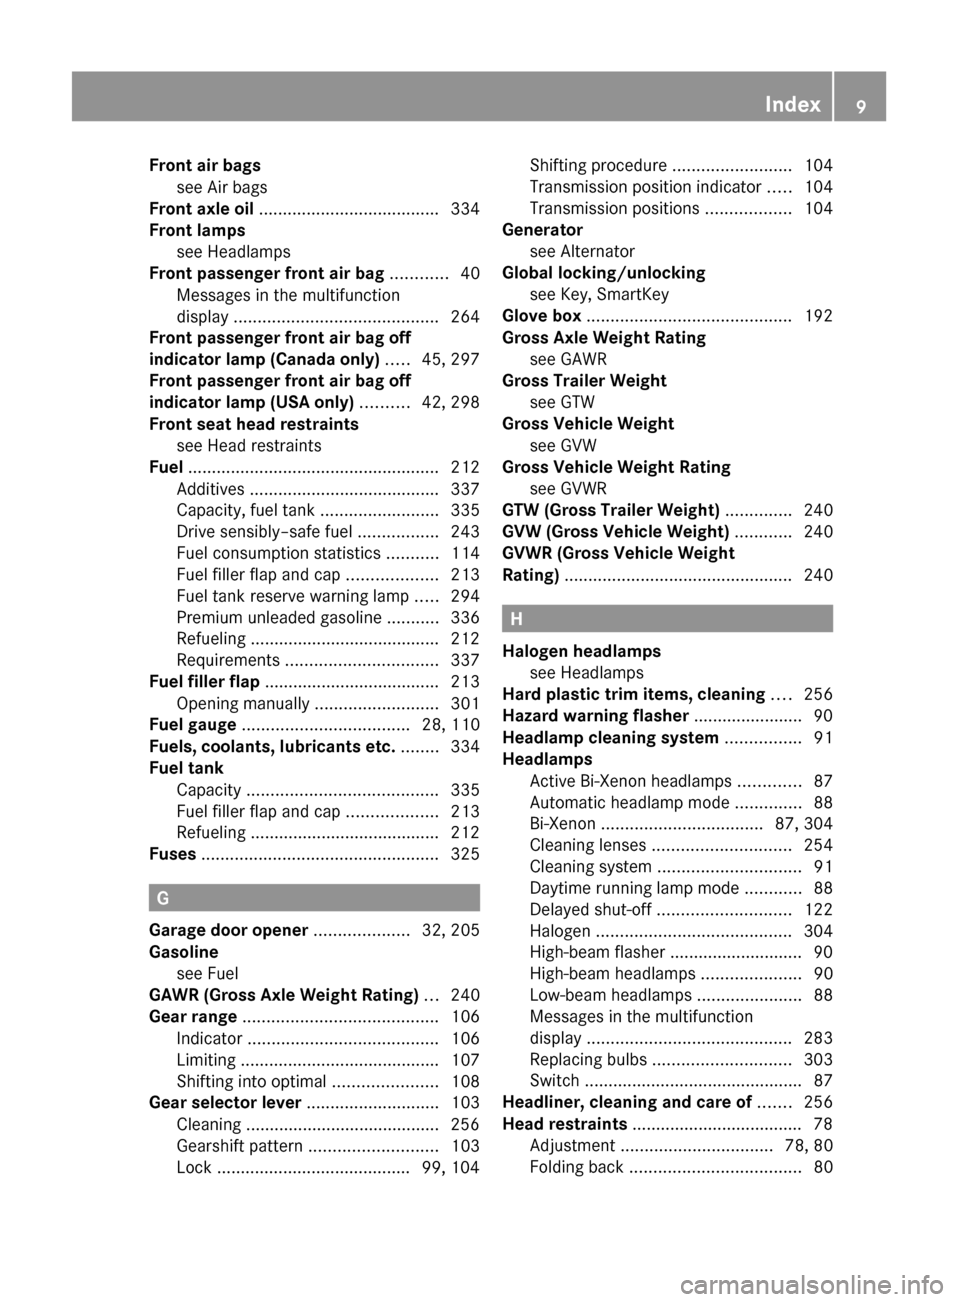
Fuses .................................................. 325
G
Garage door opener .................... 32, 205
Gasoline see Fuel
GAWR (Gross Axle Weight Rating) ... 240
Gear range ......................................... 106
Indicator ........................................ 106
Limiting .......................................... 107
Shifting into optimal ......................108
Gear selector lever ............................ 103
Cleaning ......................................... 256
Gearshift pattern ........................... 103
Lock ......................................... 99, 104
Shifting procedure .........................104
Transmission position indicator .....104
Transmission positions ..................104
Generator
see Alternator
Global locking/unlocking
see Key, SmartKey
Glove box ........................................... 192
Gross Axle Weight Rating see GAWR
Gross Trailer Weight
see GTW
Gross Vehicle Weight
see GVW
Gross Vehicle Weight Rating
see GVWR
GTW (Gross Trailer Weight) .............. 240
GVW (Gross Vehicle Weight) ............ 240
GVWR (Gross Vehicle Weight
Rating) ................................................ 240
H
Halogen headlamps see Headlamps
Hard plastic trim items, cleaning .... 256
Hazard warning flasher ....................... 90
Headlamp cleaning system ................ 91
Headlamps
Active Bi-Xenon headlamps .............87
Automatic headlamp mode ..............88
Bi-Xenon .................................. 87, 304
Cleaning lenses ............................. 254
Cleaning system .............................. 91
Daytime running lamp mode ............88
Delayed shut-off ............................ 122
Halogen ......................................... 304
High-beam flasher ............................ 90
High-beam headlamps .....................90
Low-beam headlamps ......................88
Messages in the multifunction
display ........................................... 283
Replacing bulbs ............................. 303
Switch .............................................. 87
Headliner, cleaning and care of ....... 256
Head restraints .................................... 78
Adjustment ................................ 78, 80
Folding back .................................... 80
Index9X204_AKB; 3; 23, en-USd2ureepe,Version: 2.11.8.12009-07-16T19:16:58+02:00 - Seite 9
Page 255 of 344
Mercedes-Benz approved Paint Care should
be applied when water drops on the paint
surface do not “bead up”. This should
normally be done every 3 to 5 months,
depending on the climate and washing
detergent used.
Mercedes-Benz approved Paint Cleaner
should be applied if the paint surface shows
signs of embedded dirt (i.e. loss of gloss).
Do not apply any of these products or wax if
your vehicle is parked in the sun or if the hood
is still hot.XUse the appropriate MB-Touch-Up Stick for
quick and provisional repairs of minor paint
damage (i.e. chips from stones, vehicle
doors, etc.).
Engine cleaning
Prior to cleaning the engine compartment,
make sure to protect electrical components
and connectors from contact with water and
cleaning agents.
Corrosion protection, such as MB
Anticorrosion Wax should be applied to the
engine compartment after every engine
cleaning. Before applying, all control linkage
bushings and joints should be lubricated. The
poly-V-belt and all pulleys should be
protected from any wax.
Vehicle washing
In the winter, thoroughly remove all traces of
road salt as soon as possible.
When washing the vehicle underbody, do not
forget to clean the inner sides of the wheels.
Hand-wash
XDo not use hot water or wash your vehicle
in direct sunlight.XOnly use a soft, wet cloth or sponge to
clean the vehicle.XOnly use a mild vehicle wash detergent,
such as Mercedes-Benz approved Car
Shampoo.XThoroughly spray the vehicle with a
diffused jet of water.XDo not spray directly towards the
ventilation intake.XUse plenty of water and rinse the sponge
and chamois frequently.XRinse with clean water and dry with a
chamois thoroughly.
Do not allow cleaning agents to dry on the
finish.
Automatic car wash
You can have your vehicle washed in an
automatic car wash from the start. Brushless
car washes are preferable.
XTo protect the filter system, activate the air
recirculation mode using button g on
the climate control panel.
! Do not clean your vehicle in an automatic
touchless car wash which uses caustic
spray. Caustic spray will damage the paint
or ornamental moldings.
If the vehicle is very dirty, prewash it before
running it through the automatic car wash.
! Make sure the combination switch is set
to wiper setting $. Otherwise, the rain
sensor could activate and cause the wipers
to move unintentionally. This may lead to
vehicle damage.
Due to the width of the vehicle, fold in
exterior rear view mirrors prior to running
the vehicle through an automatic car wash
to prevent damage to the mirrors.
XWhen taking the vehicle through an
automatic conveyor-type car wash:
Make sure the automatic transmission
remains in neutral position N.
When leaving the automatic car wash, make
sure the mirrors are folded out.
After running the vehicle through an
automatic car wash, wipe any wax off of the
windshield and the wiper blade inserts. This
will prevent smears and reduce wiping noise
Vehicle care253OperationX204_AKB; 3; 23, en-USd2ureepe,Version: 2.11.8.12009-07-16T19:16:58+02:00 - Seite 253Z
Page 261 of 344
Vehicle equipment ............................260
Where will I find ...? ..........................260
Vehicle status messages in the
multifunction display .......................262
What to do if … ..................................288
Unlocking/locking manually ...........299
Resetting activated NECK-PRO
active front head restraints .............301
Replacing SmartKey batteries .........302
Replacing bulbs .................................303
Replacing wiper blades ....................310
Flat tire ..............................................312
Battery ...............................................317
Jump starting ....................................319
Towing the vehicle ............................321
Fuses ..................................................325
259Practical hintsX204_AKB; 3; 23, en-USd2ureepe,Version: 2.11.8.12009-07-16T19:16:58+02:00 - Seite 259
Page 262 of 344
Vehicle equipment
iThis Operator’s Manual describes all
features, standard or optional, potentially
available for your vehicle at the time of
purchase. Please be aware that your
vehicle might not be equipped with all
features described in this manual.
Where will I find ...?
First aid kit
iCheck expiration dates and contents for
completeness at least once a year and
replace missing/expired items.
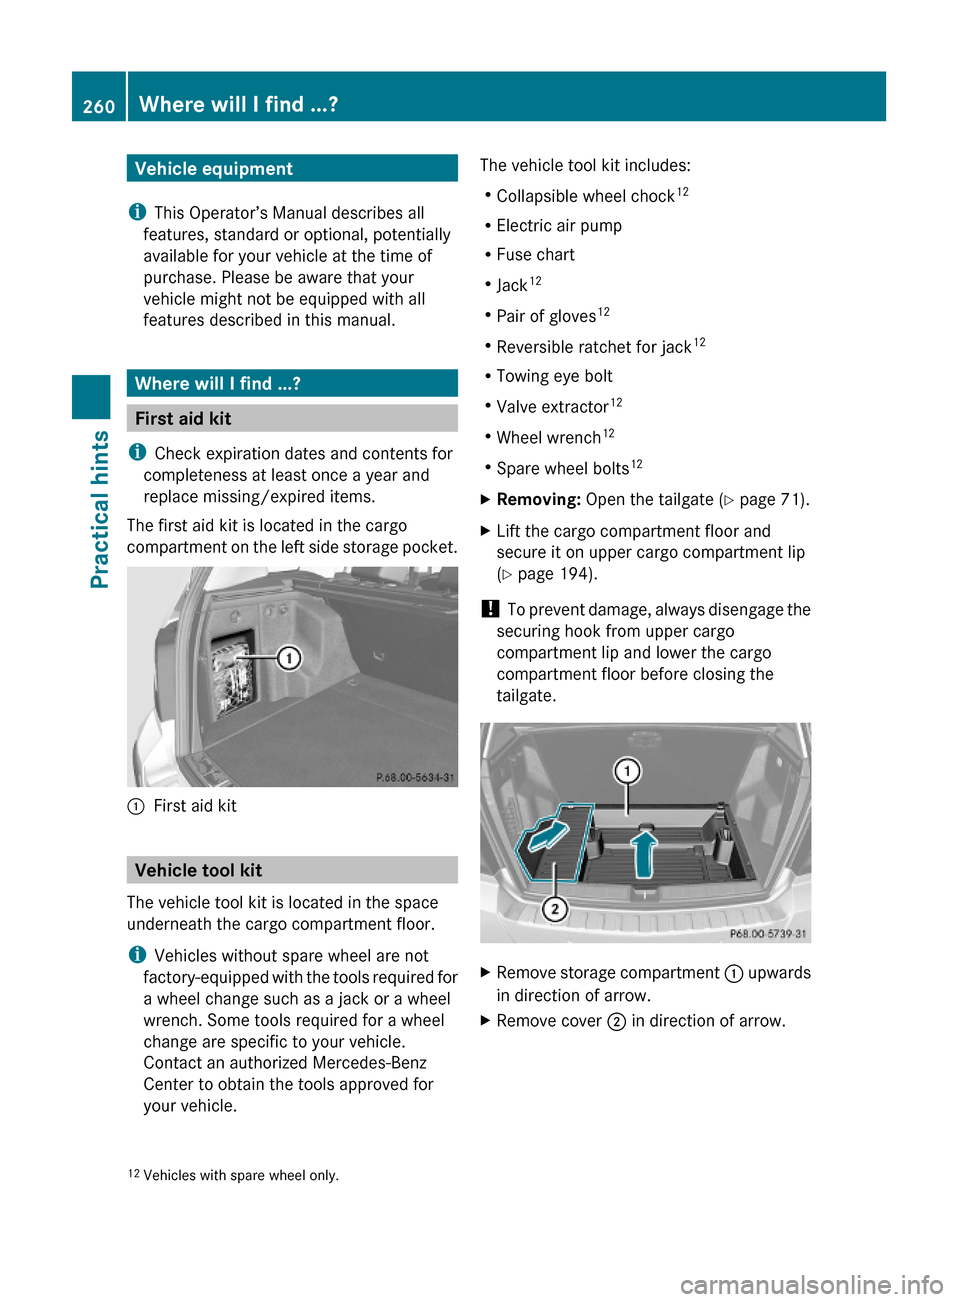
The first aid kit is located in the cargo
compartment on the left side storage pocket.
:First aid kit
Vehicle tool kit
The vehicle tool kit is located in the space
underneath the cargo compartment floor.
iVehicles without spare wheel are not
factory-equipped with the tools required for
a wheel change such as a jack or a wheel
wrench. Some tools required for a wheel
change are specific to your vehicle.
Contact an authorized Mercedes-Benz
Center to obtain the tools approved for
your vehicle.
The vehicle tool kit includes:
RCollapsible wheel chock12
RElectric air pump
RFuse chart
RJack12
RPair of gloves12
RReversible ratchet for jack12
RTowing eye bolt
RValve extractor12
RWheel wrench12
RSpare wheel bolts12
XRemoving: Open the tailgate (Y page 71).XLift the cargo compartment floor and
secure it on upper cargo compartment lip
(Y page 194).
! To prevent damage, always disengage the
securing hook from upper cargo
compartment lip and lower the cargo
compartment floor before closing the
tailgate.
XRemove storage compartment : upwards
in direction of arrow.
XRemove cover ; in direction of arrow.12Vehicles with spare wheel only.260Where will I find ...?Practical hints
X204_AKB; 3; 23, en-USd2ureepe,Version: 2.11.8.12009-07-16T19:16:58+02:00 - Seite 260
Page 263 of 344
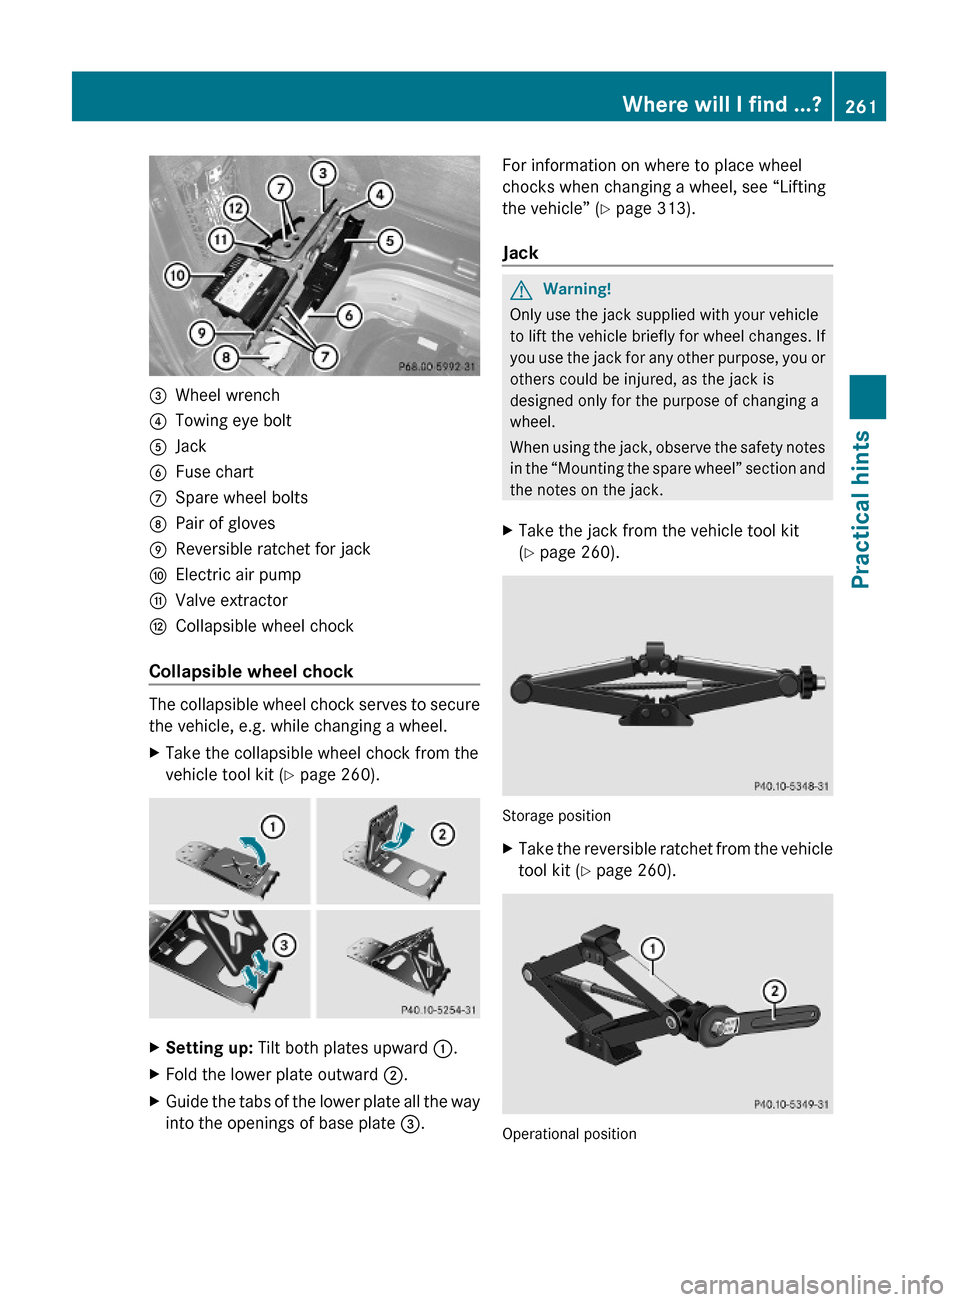
=Wheel wrench?Towing eye boltAJackBFuse chartCSpare wheel boltsDPair of glovesEReversible ratchet for jackFElectric air pumpGValve extractorHCollapsible wheel chock
Collapsible wheel chock
The collapsible wheel chock serves to secure
the vehicle, e.g. while changing a wheel.
XTake the collapsible wheel chock from the
vehicle tool kit (Y page 260).
XSetting up: Tilt both plates upward :.XFold the lower plate outward ;.XGuide the tabs of the lower plate all the way
into the openings of base plate =.
For information on where to place wheel
chocks when changing a wheel, see “Lifting
the vehicle” (Y page 313).
Jack
GWarning!
Only use the jack supplied with your vehicle
to lift the vehicle briefly for wheel changes. If
you use the jack for any other purpose, you or
others could be injured, as the jack is
designed only for the purpose of changing a
wheel.
When using the jack, observe the safety notes
in the “Mounting the spare wheel” section and
the notes on the jack.
XTake the jack from the vehicle tool kit
(Y page 260).
Storage position
XTake the reversible ratchet from the vehicle
tool kit (Y page 260).
Operational position
Where will I find ...?261Practical hintsX204_AKB; 3; 23, en-USd2ureepe,Version: 2.11.8.12009-07-16T19:16:58+02:00 - Seite 261Z
Page 327 of 344

Note the following when freeing a stranded
vehicle:
RAvoid pulling the vehicle abruptly or
diagonally, since it could result in damage
to the chassis alignment.
RNever try to free a vehicle that is still
coupled to a trailer.
RIf possible, a vehicle equipped with a trailer
hitch receiver should be pulled backward in
its own previously made tracks.
Fuses
Introduction
The electrical fuses in your vehicle serve to
switch off malfunctioning power circuits.
If a fuse is blown, the components and
systems secured by that fuse will stop
operating.
GWarning!
Only use fuses approved by Mercedes-Benz
with the specified amperage for the system in
question and do not attempt to repair or
bridge a blown fuse. Using other than
approved fuses or using repaired or bridged
fuses may cause an overload leading to a fire,
and/or cause damage to electrical
components and/or systems. Have the cause
determined and remedied by an authorized
Mercedes-Benz Center.
A blown fuse must be replaced by an
appropriate spare fuse (recognizable by its
color or the fuse rating given on the fuse) of
the amperage recommended in the fuse
chart. Any Mercedes-Benz Center will be glad
to advise you on this subject.
iIn case of a blown fuse contact Roadside
Assistance or an authorized Mercedes-
Benz Center.
If a newly inserted fuse blows again, have the
cause determined and rectified by an
authorized Mercedes-Benz Center.
The fuse chart is located in the cargo
compartment with the vehicle tool kit
(Y page 260). The fuse chart explains the fuse
allocation and fuse amperages.
Before replacing fuses
XEngage the parking brake.XMake sure the automatic transmission is in
park position P.
XSwitch off all electrical consumers.XTurn off the engine.XRemove the SmartKey from the starter
switch.
Fuse box in passenger compartment
! Do not use sharp objects such as a
screwdriver to open the fuse box cover in
the dashboard. You could damage the fuse
box cover or the dashboard.
XOpen the driver’s door.XOpening: Using your hands, pull fuse box
cover : in direction of arrow = and
remove in direction of arrow ;.
XClosing: Hook fuse box cover : into the
opening at the front.
XPress fuse box cover : back on until it
engages.
! The fuse box cover must be properly
positioned as described. Otherwise,
Fuses325Practical hintsX204_AKB; 3; 23, en-USd2ureepe,Version: 2.11.8.12009-07-16T19:16:58+02:00 - Seite 325Z
Page 328 of 344
moisture or dirt could enter the fuse box
and possibly impair fuse operation.
Fuse box in engine compartment
XOpen the hood.XWith a dry cloth, remove any moisture from
fuse box cover.
XOpening: Release wire ; from fuse box
cover.
XRelease clamps :.XRemove fuse box cover.XClosing: Make sure the sealing rubber is
positioned properly.
XPress fuse box cover down and secure with
clamps :.
XFasten wire ; on fuse box cover.
! The fuse box cover must be properly
positioned as described. Otherwise,
moisture or dirt could enter the fuse box
and possibly impair fuse operation.
XClose the hood after checking or replacing
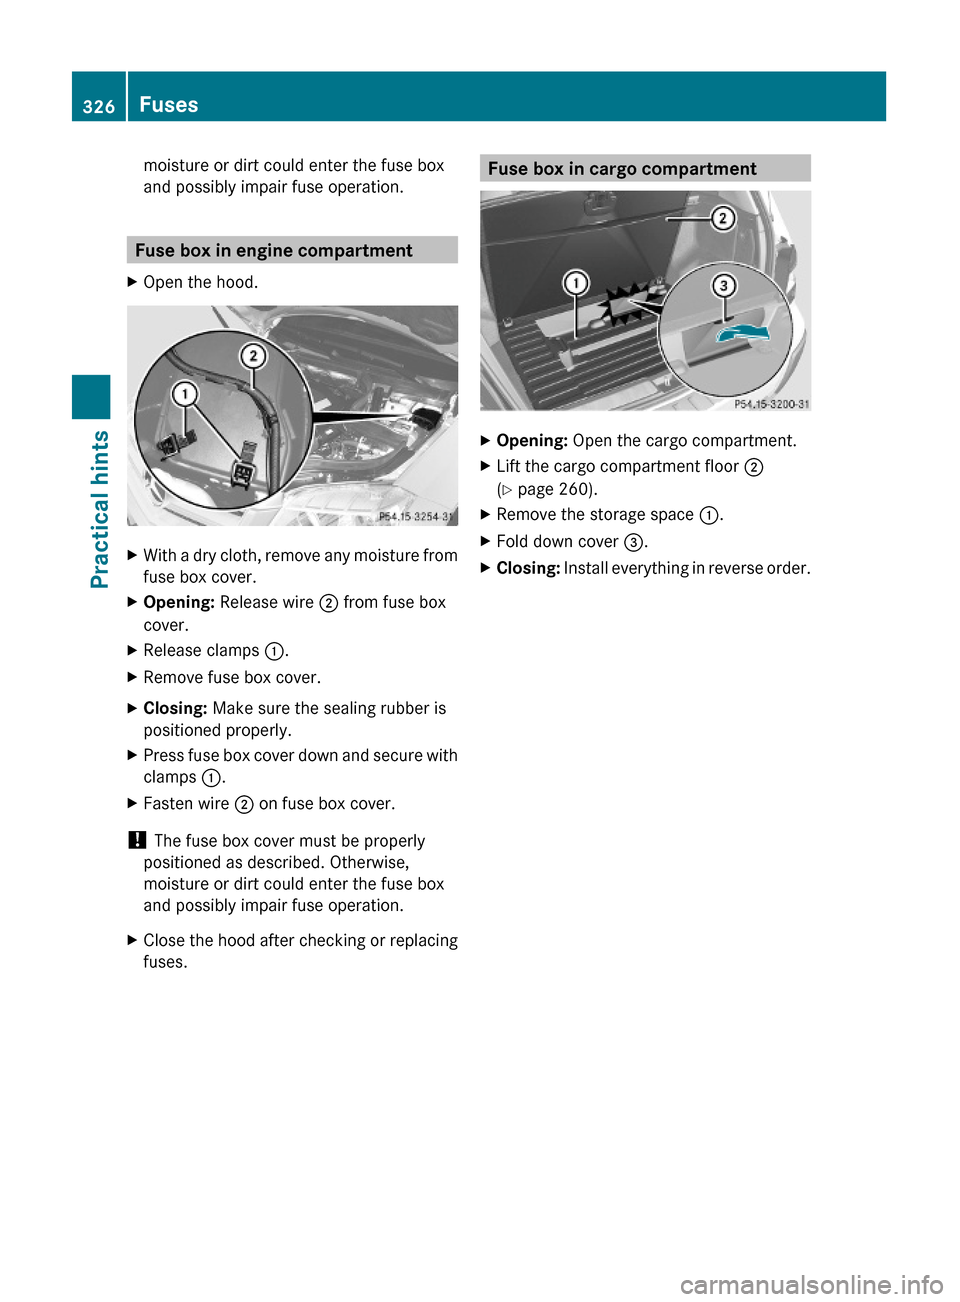
fuses.Fuse box in cargo compartmentXOpening: Open the cargo compartment.XLift the cargo compartment floor ;
(Y page 260).
XRemove the storage space :.XFold down cover =.XClosing: Install everything in reverse order.326FusesPractical hints
X204_AKB; 3; 23, en-USd2ureepe,Version: 2.11.8.12009-07-16T19:16:58+02:00 - Seite 326