2010 MERCEDES-BENZ GL550 wheel
[x] Cancel search: wheelPage 116 of 380
Automatic transmission
Introduction
For information on driving with an automatic
transmission, see “Driving and parking”
(Y page 108).
GWarning!
Make sure absolutely no objects are
obstructing the pedals’ range of movement.
Keep the driver’s footwell clear of all
obstacles. If there are any floormats or
carpets in the footwell, make sure the pedals
still have sufficient clearance.
During sudden driving or braking maneuvers
the objects could get caught between the
pedals. You could then no longer brake or
accelerate. This could lead to accidents and
injury.
! Allow the engine to warm up under low
load use. Do not place full load on the
engine until the operating temperature has
been reached.
Avoid spinning of a drive wheel for an
extended period when driving off on
slippery road surfaces.
This may cause serious damage to the
engine and the drivetrain which is not
covered by the Mercedes-Benz Limited
Warranty.
iDuring the brief warm-up, transmission
upshifting is delayed. This allows the
catalytic converter (gasoline engine) or
oxidation catalyst (diesel engine) to heat up
more quickly to operating temperature.
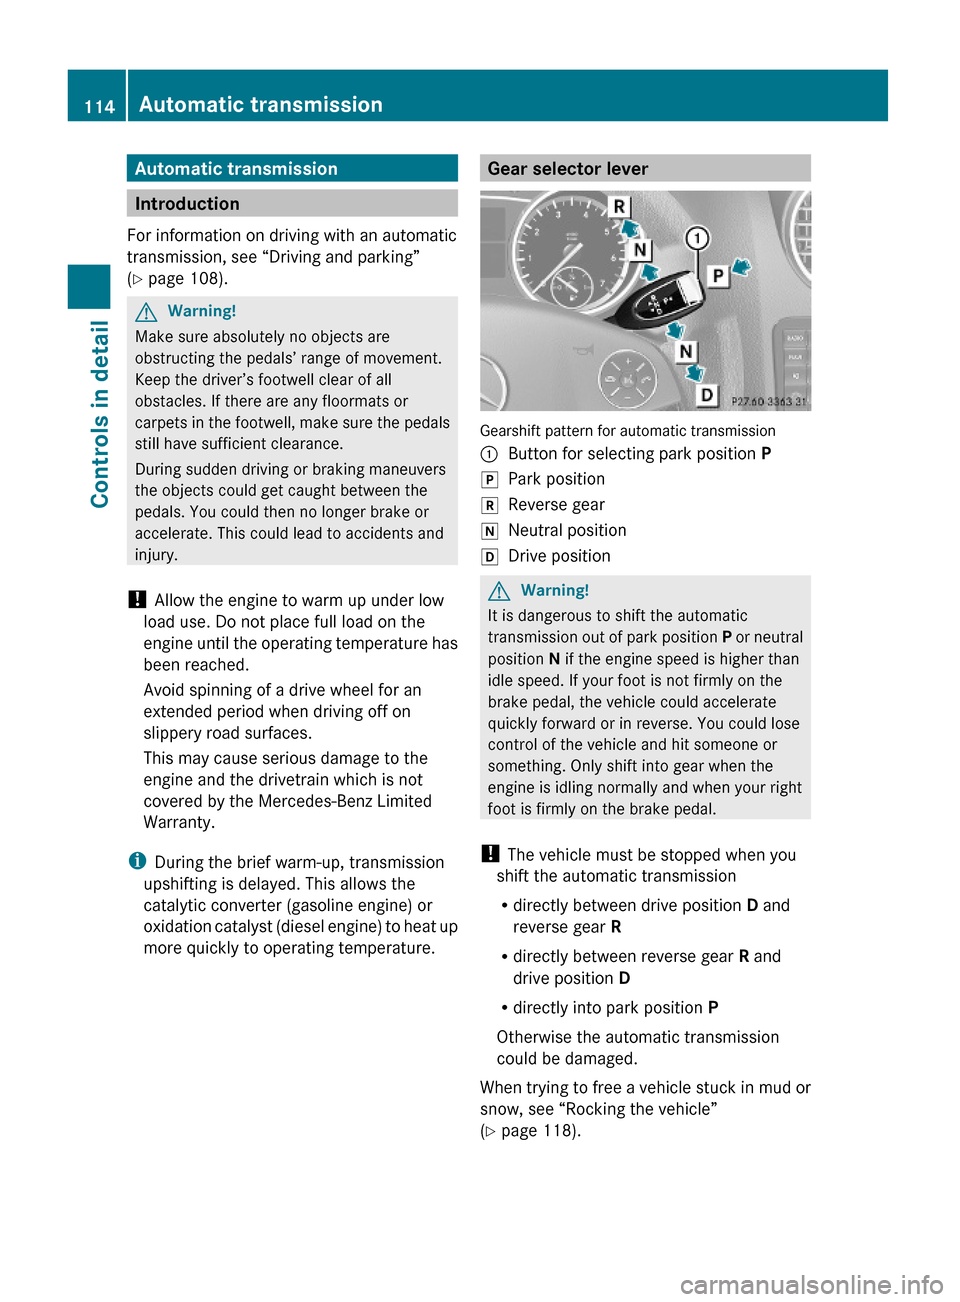
Gear selector lever
Gearshift pattern for automatic transmission
:Button for selecting park position PjPark positionkReverse geariNeutral positionhDrive positionGWarning!
It is dangerous to shift the automatic
transmission out of park position P or neutral
position N if the engine speed is higher than
idle speed. If your foot is not firmly on the
brake pedal, the vehicle could accelerate
quickly forward or in reverse. You could lose
control of the vehicle and hit someone or
something. Only shift into gear when the
engine is idling normally and when your right
foot is firmly on the brake pedal.
! The vehicle must be stopped when you
shift the automatic transmission
Rdirectly between drive position D and
reverse gear R
Rdirectly between reverse gear R and
drive position D
Rdirectly into park position P
Otherwise the automatic transmission
could be damaged.
When trying to free a vehicle stuck in mud or
snow, see “Rocking the vehicle”
(Y page 118).
114Automatic transmissionControls in detail
X164_AKB; 5; 31, en-USd2ureepe,Version: 2.11.8.12009-09-11T12:30:16+02:00 - Seite 114
Page 120 of 380

Rocking the vehicle
Rocking the vehicle by shifting the automatic
transmission directly between drive position
D and reverse gear R can help free a vehicle
stuck in mud or snow. The engine control
system of this vehicle electronically limits
directly shifting the automatic transmission
between drive position D and reverse gear R
to very low speeds, i.e. approximately 5 mph
(9 km/h). To shift the automatic transmission
directly between drive position D and reverse
gear R, move the gear selector lever up or
down past the resistance point.
Working on the vehicle
GWarning!
When working on the vehicle, engage the
parking brake and shift the automatic
transmission into park position P. Otherwise
the vehicle could roll away which could result
in an accident and/or serious personal injury.
Towing a trailer
XWhen you tow a trailer, shift into a lower
gear range manually if the automatic
transmission hunts between gears on
inclines.
A lower gear range and reduction of speed
reduces the potential to overload or to
overheat the engine.
For more information on trailer towing, see
“Trailer towing” (Y page 269).
Gear ranges
With the automatic transmission in drive
position D, you can limit or extend the gear
range, see “One-touch gearshifting”
(Y page 118).
The current gear range appears in the
multifunction display.:Gear range indicator Effect=With this selection you can use the
braking effect of the engine.
5Allows the use of the engine’s
braking effect when driving
Ron steep downgrades
Rin mountainous regions
Runder extreme operating
conditions
4For maximum use of the engine’s
braking effect on very steep or
lengthy downgrades.
One-touch gearshifting
With the automatic transmission in drive
position D, you can limit or extend the gear
range using the steering wheel gearshift
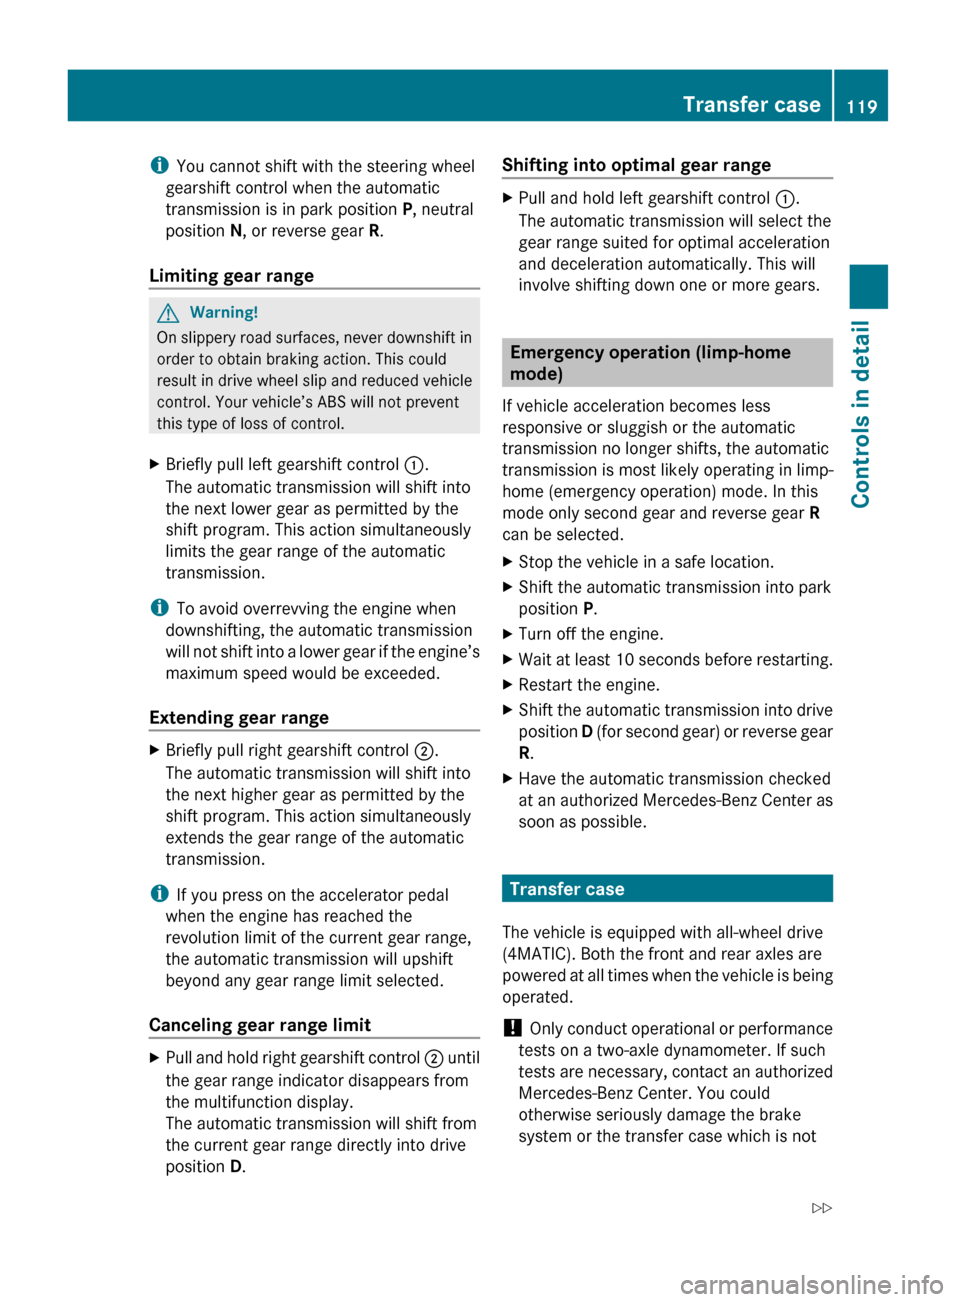
control.
Steering wheel gearshift control
118Automatic transmissionControls in detail
X164_AKB; 5; 31, en-USd2ureepe,Version: 2.11.8.12009-09-11T12:30:16+02:00 - Seite 118
Page 121 of 380
iYou cannot shift with the steering wheel
gearshift control when the automatic
transmission is in park position P, neutral
position N, or reverse gear R.
Limiting gear range GWarning!
On slippery road surfaces, never downshift in
order to obtain braking action. This could
result in drive wheel slip and reduced vehicle
control. Your vehicle’s ABS will not prevent
this type of loss of control.
XBriefly pull left gearshift control :.
The automatic transmission will shift into
the next lower gear as permitted by the
shift program. This action simultaneously
limits the gear range of the automatic
transmission.
i To avoid overrevving the engine when
downshifting, the automatic transmission
will not shift into a lower gear if the engine’s
maximum speed would be exceeded.
Extending gear range
XBriefly pull right gearshift control ;.
The automatic transmission will shift into
the next higher gear as permitted by the
shift program. This action simultaneously
extends the gear range of the automatic
transmission.
i If you press on the accelerator pedal
when the engine has reached the
revolution limit of the current gear range,
the automatic transmission will upshift
beyond any gear range limit selected.
Canceling gear range limit
XPull and hold right gearshift control ; until
the gear range indicator disappears from
the multifunction display.
The automatic transmission will shift from
the current gear range directly into drive
position D.Shifting into optimal gear range XPull and hold left gearshift control :.
The automatic transmission will select the
gear range suited for optimal acceleration
and deceleration automatically. This will
involve shifting down one or more gears.
Emergency operation (limp-home
mode)
If vehicle acceleration becomes less
responsive or sluggish or the automatic
transmission no longer shifts, the automatic
transmission is most likely operating in limp-
home (emergency operation) mode. In this
mode only second gear and reverse gear R
can be selected.
XStop the vehicle in a safe location.XShift the automatic transmission into park
position P.XTurn off the engine.XWait at least 10 seconds before restarting.XRestart the engine.XShift the automatic transmission into drive
position D (for second gear) or reverse gear
R .XHave the automatic transmission checked
at an authorized Mercedes-Benz Center as
soon as possible.
Transfer case
The vehicle is equipped with all-wheel drive
(4MATIC). Both the front and rear axles are
powered at all times when the vehicle is being
operated.
! Only conduct operational or performance
tests on a two-axle dynamometer. If such
tests are necessary, contact an authorized
Mercedes-Benz Center. You could
otherwise seriously damage the brake
system or the transfer case which is not
Transfer case119Controls in detailX164_AKB; 5; 31, en-USd2ureepe,Version: 2.11.8.12009-09-11T12:30:16+02:00 - Seite 119Z
Page 124 of 380
and rear axle differential to improve vehicle
traction.
The center differential compensates for
differences in wheel rotation between the
front and rear axle.
The rear axle differential compensates
differences between the rear wheels.
i At the front axles, the 4-ETS system
compensates for any traction problems.
For more information on off-road driving, see
“Off-road driving” ( Y page 262).
A few words about differentials and
differential locks
When a vehicle negotiates a turn, wheels on
the outside of the curve must travel farther
and rotate faster than the inside wheels. The
differential, the operation of a set of gears
that allows the powered wheels in a vehicle
to turn at different speeds, makes this
essential function possible.
The drawback is that the differential also
sends most of the engine’s power to the
wheel with the least load or strain on it. For
example, if one of a vehicle’s powered wheels
sits on a patch of snow and spins because
there is no traction, all of the engine’s power
will go to that wheel because the power will
take the path of least resistance. Meanwhile,
the opposite wheel, sitting on dry pavement
where it could get enough grip to start the
vehicle moving, sits idle because it receives
no power.
The 4-ETS addresses this problem and
provides for good control and steering ability
by automatically slowing the slipping wheel
and thus increasing the power to the other
non-slipping drive wheels to get the vehicle
moving. The ESP ®
and the 4-ETS in this
vehicle feature such intelligent limited-slip
differential technology, ideally suited for on-
road and light off-road driving. Transfer case
position LOW (Y page 120) also enhances off-
road driving capabilities.
More extreme off-road conditions may call for
another solution, engaging a differential lock
or preventing the differential from operating
altogether. This vehicle comes with two
differential locks: transfer case (center) and
rear. Each can be engaged simply by
operating the rotary switch located on the
center console ( Y page 123). When the
transfer case (center) differential is locked,
the combined (or average) speed of the front
wheels is identical to the combined rear
wheel speed. When the rear differential is
locked, both rear wheels turn at the same
speed, independent of the individual torque.
Please be aware that engaging the differential
locks will significantly reduce the steering
ability of the vehicle.
For your safety and the safety of others and
to prevent damage to the vehicle, the
differential locks must not be engaged when
driving on paved roads. It is important to
understand that during on-road/paved
driving, differentials are absolutely necessary
for providing the essential control and
steering ability of the vehicle. The differential
locks, therefore, must not be engaged when
driving on paved roads and should only be
used to the extent necessary to negotiate off-
road conditions which cannot be handled by
the systems (the 4-ETS, the ESP ®
, and the
transfer case in LOW RANGE mode) this
vehicle comes equipped with.
Switching differential locks
! If the differential locks are engaged,
accelerate gently when setting the vehicle
in motion.
Only operate the vehicle on a single axle
dynamometer if the axle not being driven is
jacked up or the associated propeller shaft
is disconnected.
Otherwise the transmission could be
damaged.
122Differential locksControls in detail
X164_AKB; 5; 31, en-USd2ureepe,Version: 2.11.8.12009-09-11T12:30:16+02:00 - Seite 122
Page 125 of 380
You can select between three locking modes.
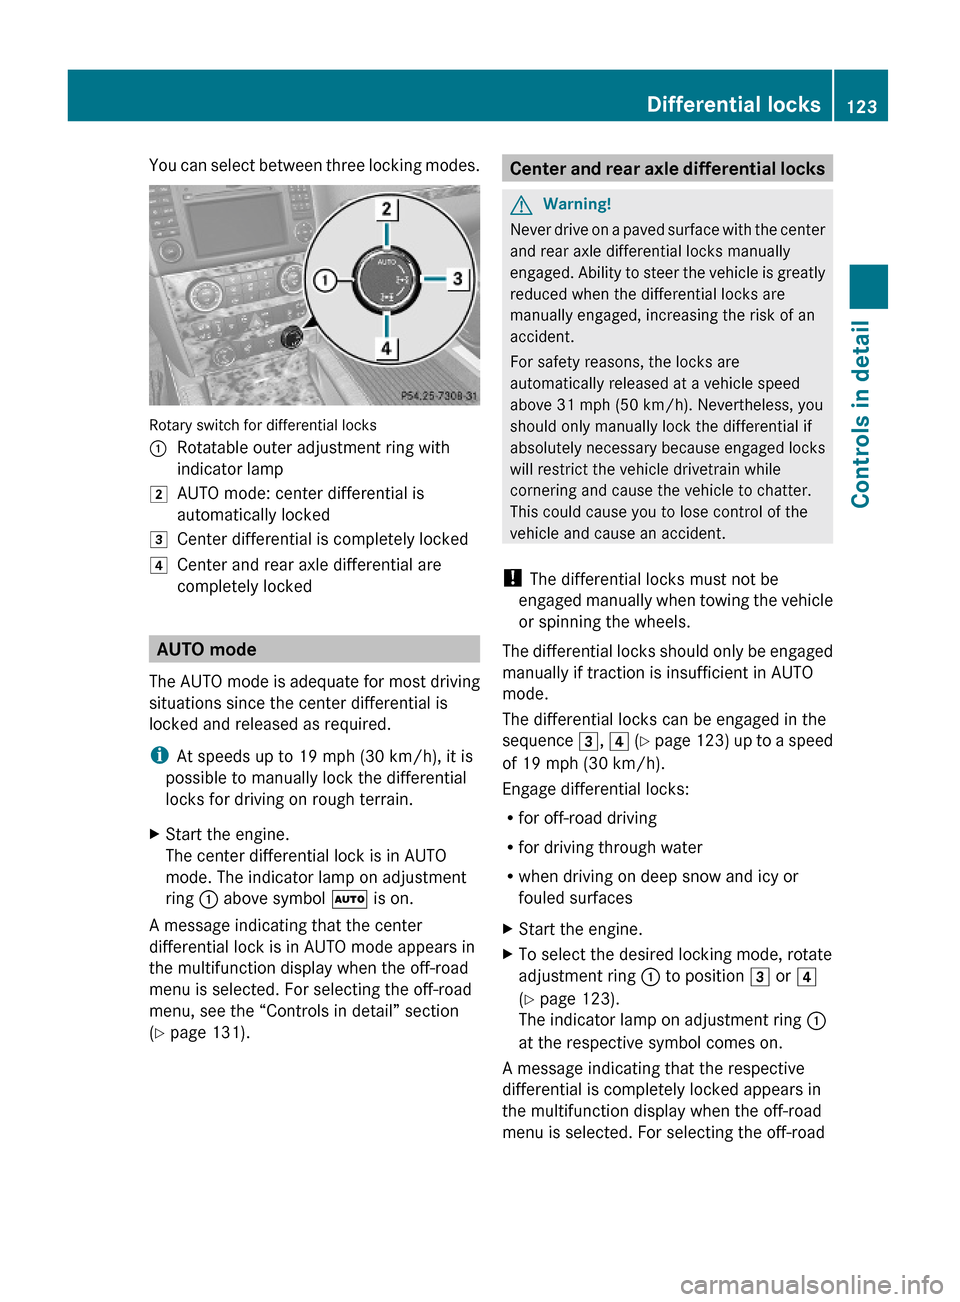
Rotary switch for differential locks
:Rotatable outer adjustment ring with
indicator lamp
2AUTO mode: center differential is
automatically locked
3Center differential is completely locked4Center and rear axle differential are
completely locked
AUTO mode
The AUTO mode is adequate for most driving
situations since the center differential is
locked and released as required.
iAt speeds up to 19 mph (30 km/h), it is
possible to manually lock the differential
locks for driving on rough terrain.
XStart the engine.
The center differential lock is in AUTO
mode. The indicator lamp on adjustment
ring : above symbol à is on.
A message indicating that the center
differential lock is in AUTO mode appears in
the multifunction display when the off-road
menu is selected. For selecting the off-road
menu, see the “Controls in detail” section
(Y page 131).
Center and rear axle differential locksGWarning!
Never drive on a paved surface with the center
and rear axle differential locks manually
engaged. Ability to steer the vehicle is greatly
reduced when the differential locks are
manually engaged, increasing the risk of an
accident.
For safety reasons, the locks are
automatically released at a vehicle speed
above 31 mph (50 km/h). Nevertheless, you
should only manually lock the differential if
absolutely necessary because engaged locks
will restrict the vehicle drivetrain while
cornering and cause the vehicle to chatter.
This could cause you to lose control of the
vehicle and cause an accident.
! The differential locks must not be
engaged manually when towing the vehicle
or spinning the wheels.
The differential locks should only be engaged
manually if traction is insufficient in AUTO
mode.
The differential locks can be engaged in the
sequence 3, 4 (Y page 123) up to a speed
of 19 mph (30 km/h).
Engage differential locks:
Rfor off-road driving
Rfor driving through water
Rwhen driving on deep snow and icy or
fouled surfaces
XStart the engine.XTo select the desired locking mode, rotate
adjustment ring : to position 3 or 4
(Y page 123).
The indicator lamp on adjustment ring :
at the respective symbol comes on.
A message indicating that the respective
differential is completely locked appears in
the multifunction display when the off-road
menu is selected. For selecting the off-road
Differential locks123Controls in detailX164_AKB; 5; 31, en-USd2ureepe,Version: 2.11.8.12009-09-11T12:30:16+02:00 - Seite 123Z
Page 126 of 380
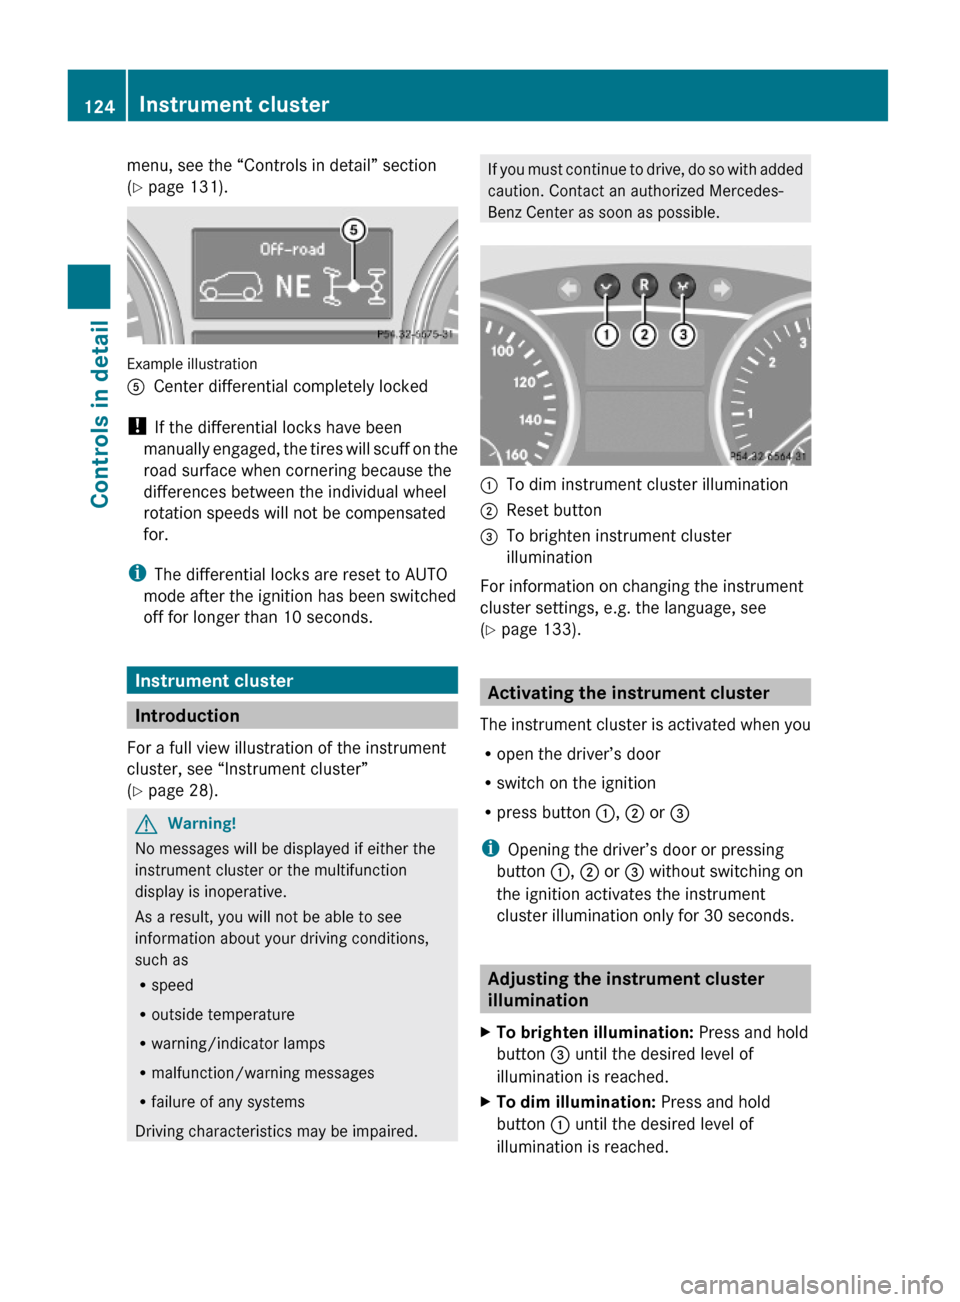
menu, see the “Controls in detail” section
(Y page 131).
Example illustration
ACenter differential completely locked
! If the differential locks have been
manually engaged, the tires will scuff on the
road surface when cornering because the
differences between the individual wheel
rotation speeds will not be compensated
for.
iThe differential locks are reset to AUTO
mode after the ignition has been switched
off for longer than 10 seconds.
Instrument cluster
Introduction
For a full view illustration of the instrument
cluster, see “Instrument cluster”
(Y page 28).
GWarning!
No messages will be displayed if either the
instrument cluster or the multifunction
display is inoperative.
As a result, you will not be able to see
information about your driving conditions,
such as
Rspeed
Routside temperature
Rwarning/indicator lamps
Rmalfunction/warning messages
Rfailure of any systems
Driving characteristics may be impaired.
If you must continue to drive, do so with added
caution. Contact an authorized Mercedes-
Benz Center as soon as possible.
:To dim instrument cluster illumination;Reset button =To brighten instrument cluster
illumination
For information on changing the instrument
cluster settings, e.g. the language, see
(Y page 133).
Activating the instrument cluster
The instrument cluster is activated when you
Ropen the driver’s door
Rswitch on the ignition
Rpress button :, ; or =
iOpening the driver’s door or pressing
button :, ; or = without switching on
the ignition activates the instrument
cluster illumination only for 30 seconds.
Adjusting the instrument cluster
illumination
XTo brighten illumination: Press and hold
button = until the desired level of
illumination is reached.
XTo dim illumination: Press and hold
button : until the desired level of
illumination is reached.
124Instrument clusterControls in detail
X164_AKB; 5; 31, en-USd2ureepe,Version: 2.11.8.12009-09-11T12:30:16+02:00 - Seite 124
Page 127 of 380

iThe instrument cluster illumination is
dimmed or brightened automatically to suit
ambient light conditions.
The instrument cluster illumination will also
be adjusted automatically when you switch
on the vehicle’s exterior lamps.
iWith the exterior lighting switched on, the
brightness of the switches in the center
console will also be adjusted when using
button : or =.
Resetting trip odometer
XMake sure you are viewing the standard
display (Y page 128) in the multifunction
display.
XPress and hold the reset button in the
instrument cluster (Y page 124) until the
trip odometer is reset.
Tachometer
The red marking on the tachometer
(Y page 29) denotes excessive engine speed.
! Avoid driving at excessive engine speeds,
as it may result in serious engine damage
that is not covered by the Mercedes-Benz
Limited Warranty.
To help protect the engine, the fuel supply is
interrupted if the engine is operated within
the red marking.
Control system
Introduction
The control system is activated as soon as the
starter switch is in position 1 (Y page 80).
The control system enables you to call up
information about your vehicle and to change
vehicle settings.
For example, you can use the control system
to find out when your vehicle is next due for
maintenance service, to set the language for
messages in the instrument cluster display,
and much more.
GWarning!
A driver’s attention to the road and traffic
conditions must always be his/her primary
focus when driving.
For your safety and the safety of others,
selecting features through the multifunction
steering wheel should only be done by the
driver when traffic and road conditions permit
it to be done safely.
Bear in mind that at a speed of just 30 mph
(approximately 50 km/h), your vehicle is
covering a distance of 44 feet (approximately
14 m) every second.
The control system relays information to the
multifunction display.
Multifunction steering wheel
The displays in the multifunction display and
the settings in the control system are
controlled by using the buttons on the
multifunction steering wheel.
Control system125Controls in detailX164_AKB; 5; 31, en-USd2ureepe,Version: 2.11.8.12009-09-11T12:30:16+02:00 - Seite 125Z
Page 128 of 380
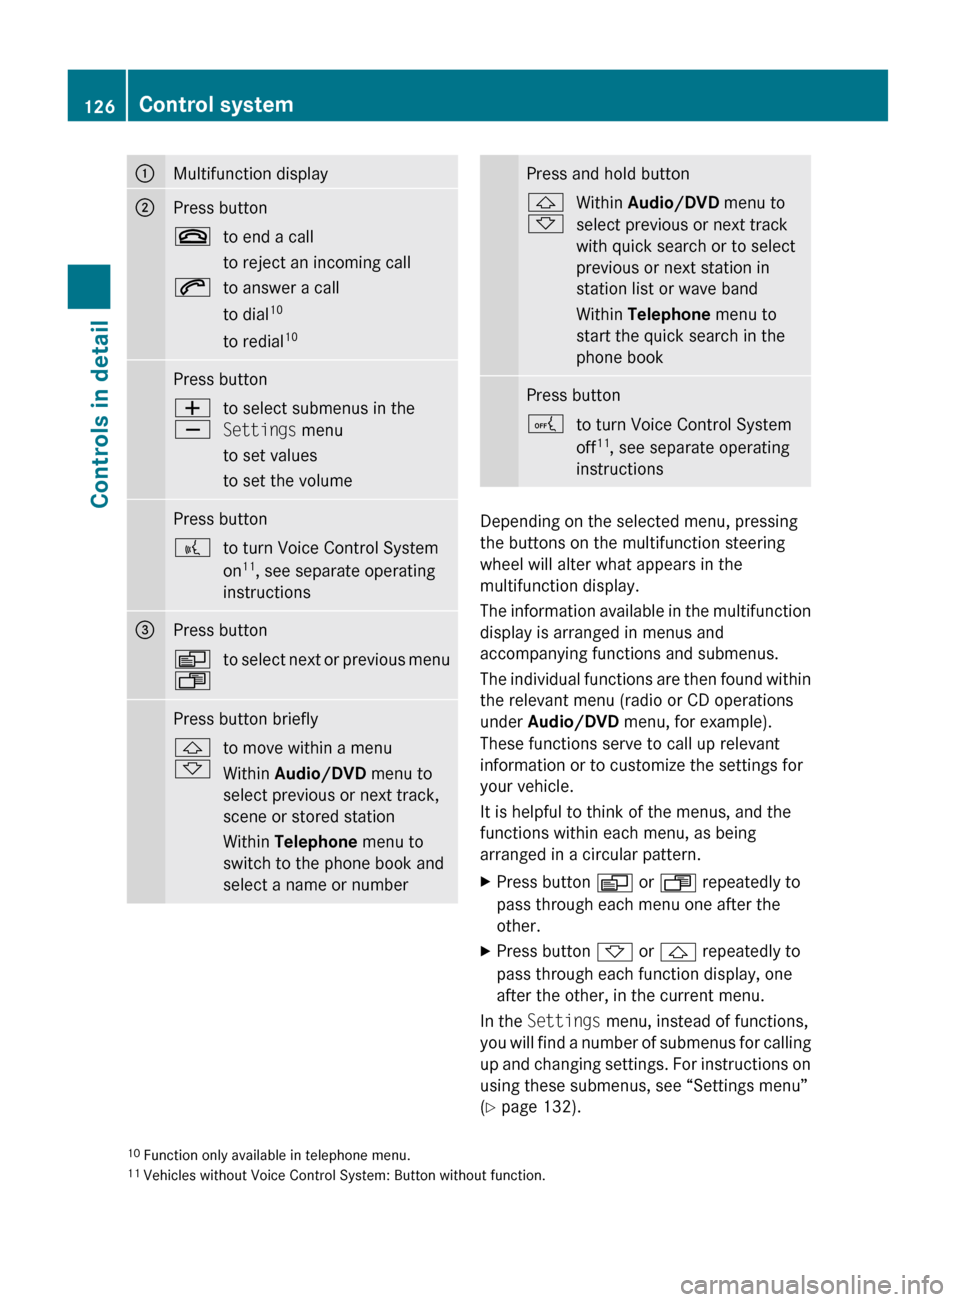
:Multifunction display;Press button~to end a call
to reject an incoming call6to answer a call
to dial 10
to redial 10Press buttonW
Xto select submenus in the
Settings menu
to set values
to set the volumePress button?to turn Voice Control System
on 11
, see separate operating
instructions=Press buttonV
Uto select next or previous menuPress button briefly&
*to move within a menu
Within Audio/DVD menu to
select previous or next track,
scene or stored station
Within Telephone menu to
switch to the phone book and
select a name or numberPress and hold button&
*Within Audio/DVD menu to
select previous or next track
with quick search or to select
previous or next station in
station list or wave band
Within Telephone menu to
start the quick search in the
phone bookPress buttonAto turn Voice Control System
off 11
, see separate operating
instructions
Depending on the selected menu, pressing
the buttons on the multifunction steering
wheel will alter what appears in the
multifunction display.
The information available in the multifunction
display is arranged in menus and
accompanying functions and submenus.
The individual functions are then found within
the relevant menu (radio or CD operations
under Audio/DVD menu, for example).
These functions serve to call up relevant
information or to customize the settings for
your vehicle.
It is helpful to think of the menus, and the
functions within each menu, as being
arranged in a circular pattern.
XPress button V or U repeatedly to
pass through each menu one after the
other.XPress button * or & repeatedly to
pass through each function display, one
after the other, in the current menu.
In the Settings menu, instead of functions,
you will find a number of submenus for calling
up and changing settings. For instructions on
using these submenus, see “Settings menu”
( Y page 132).
10
Function only available in telephone menu.
11 Vehicles without Voice Control System: Button without function.126Control systemControls in detail
X164_AKB; 5; 31, en-USd2ureepe,Version: 2.11.8.12009-09-11T12:30:16+02:00 - Seite 126