2010 MERCEDES-BENZ GL450 differential
[x] Cancel search: differentialPage 126 of 380
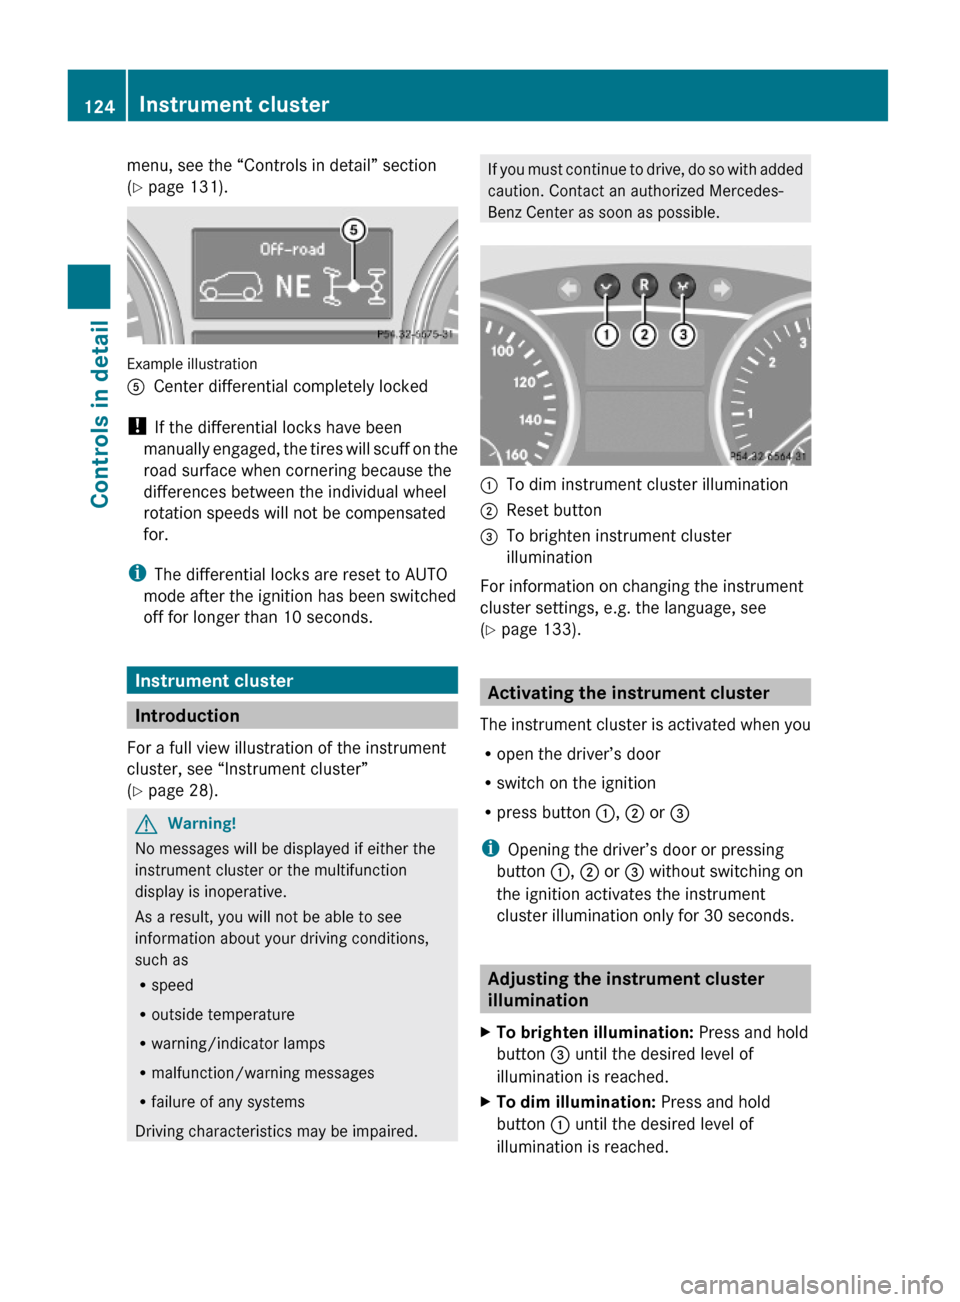
menu, see the “Controls in detail” section
(Y page 131).
Example illustration
ACenter differential completely locked
! If the differential locks have been
manually engaged, the tires will scuff on the
road surface when cornering because the
differences between the individual wheel
rotation speeds will not be compensated
for.
iThe differential locks are reset to AUTO
mode after the ignition has been switched
off for longer than 10 seconds.
Instrument cluster
Introduction
For a full view illustration of the instrument
cluster, see “Instrument cluster”
(Y page 28).
GWarning!
No messages will be displayed if either the
instrument cluster or the multifunction
display is inoperative.
As a result, you will not be able to see
information about your driving conditions,
such as
Rspeed
Routside temperature
Rwarning/indicator lamps
Rmalfunction/warning messages
Rfailure of any systems
Driving characteristics may be impaired.
If you must continue to drive, do so with added
caution. Contact an authorized Mercedes-
Benz Center as soon as possible.
:To dim instrument cluster illumination;Reset button =To brighten instrument cluster
illumination
For information on changing the instrument
cluster settings, e.g. the language, see
(Y page 133).
Activating the instrument cluster
The instrument cluster is activated when you
Ropen the driver’s door
Rswitch on the ignition
Rpress button :, ; or =
iOpening the driver’s door or pressing
button :, ; or = without switching on
the ignition activates the instrument
cluster illumination only for 30 seconds.
Adjusting the instrument cluster
illumination
XTo brighten illumination: Press and hold
button = until the desired level of
illumination is reached.
XTo dim illumination: Press and hold
button : until the desired level of
illumination is reached.
124Instrument clusterControls in detail
X164_AKB; 5; 31, en-USd2ureepe,Version: 2.11.8.12009-09-11T12:30:16+02:00 - Seite 124
Page 133 of 380
Please refer to separate COMAND system
operating instructions for instructions on how
to activate the route guidance system.
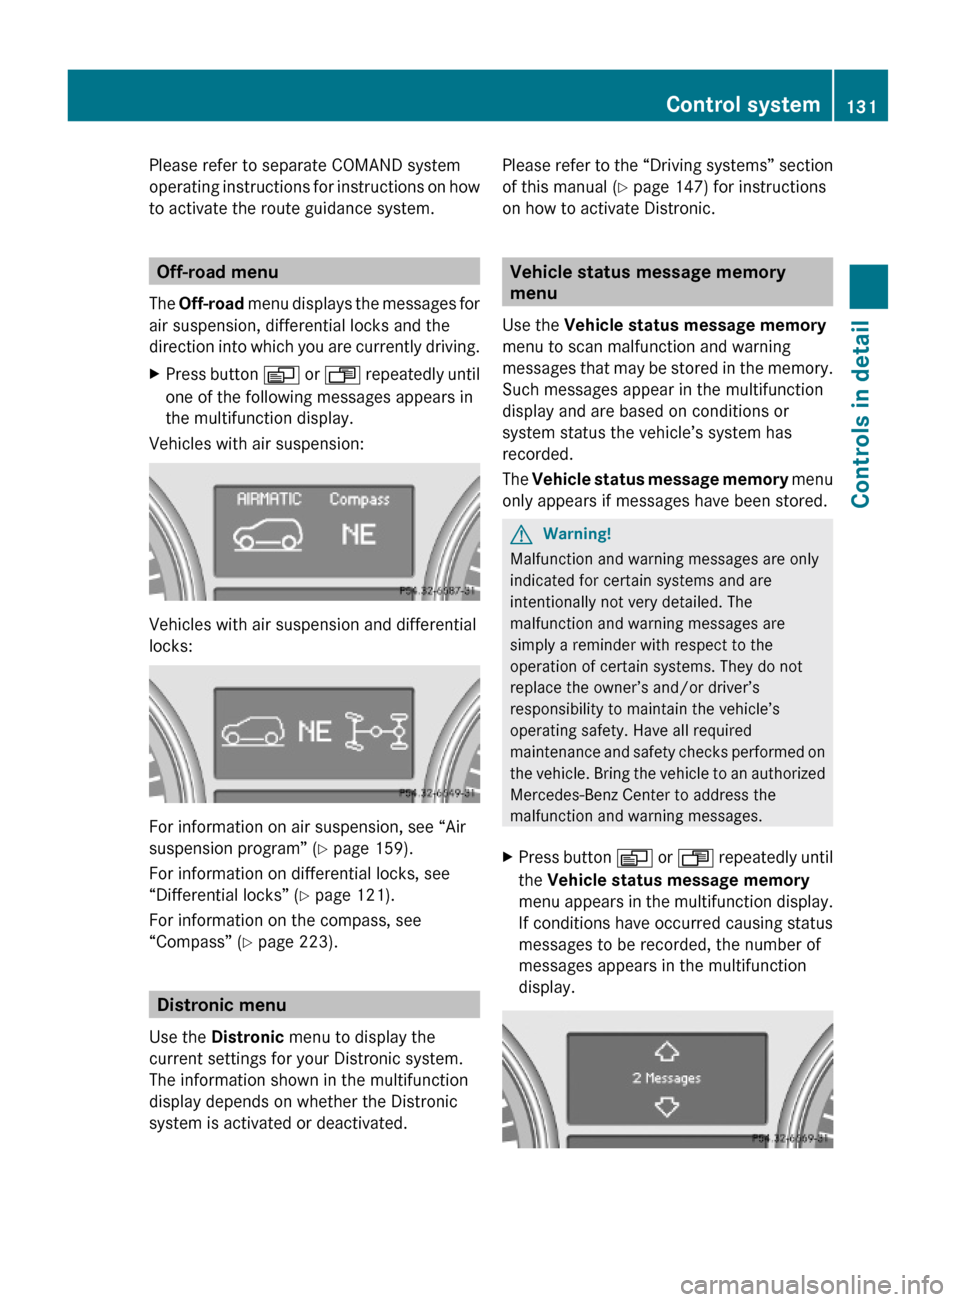
Off-road menu
The Off-road menu displays the messages for
air suspension, differential locks and the
direction into which you are currently driving.
XPress button V or U repeatedly until
one of the following messages appears in
the multifunction display.
Vehicles with air suspension:
Vehicles with air suspension and differential
locks:
For information on air suspension, see “Air
suspension program” (Y page 159).
For information on differential locks, see
“Differential locks” (Y page 121).
For information on the compass, see
“Compass” (Y page 223).
Distronic menu
Use the Distronic menu to display the
current settings for your Distronic system.
The information shown in the multifunction
display depends on whether the Distronic
system is activated or deactivated.
Please refer to the “Driving systems” section
of this manual (Y page 147) for instructions
on how to activate Distronic.
Vehicle status message memory
menu
Use the Vehicle status message memory
menu to scan malfunction and warning
messages that may be stored in the memory.
Such messages appear in the multifunction
display and are based on conditions or
system status the vehicle’s system has
recorded.
The Vehicle status message memory menu
only appears if messages have been stored.
GWarning!
Malfunction and warning messages are only
indicated for certain systems and are
intentionally not very detailed. The
malfunction and warning messages are
simply a reminder with respect to the
operation of certain systems. They do not
replace the owner’s and/or driver’s
responsibility to maintain the vehicle’s
operating safety. Have all required
maintenance and safety checks performed on
the vehicle. Bring the vehicle to an authorized
Mercedes-Benz Center to address the
malfunction and warning messages.
XPress button V or U repeatedly until
the Vehicle status message memory
menu appears in the multifunction display.
If conditions have occurred causing status
messages to be recorded, the number of
messages appears in the multifunction
display.
Control system131Controls in detailX164_AKB; 5; 31, en-USd2ureepe,Version: 2.11.8.12009-09-11T12:30:16+02:00 - Seite 131Z
Page 146 of 380
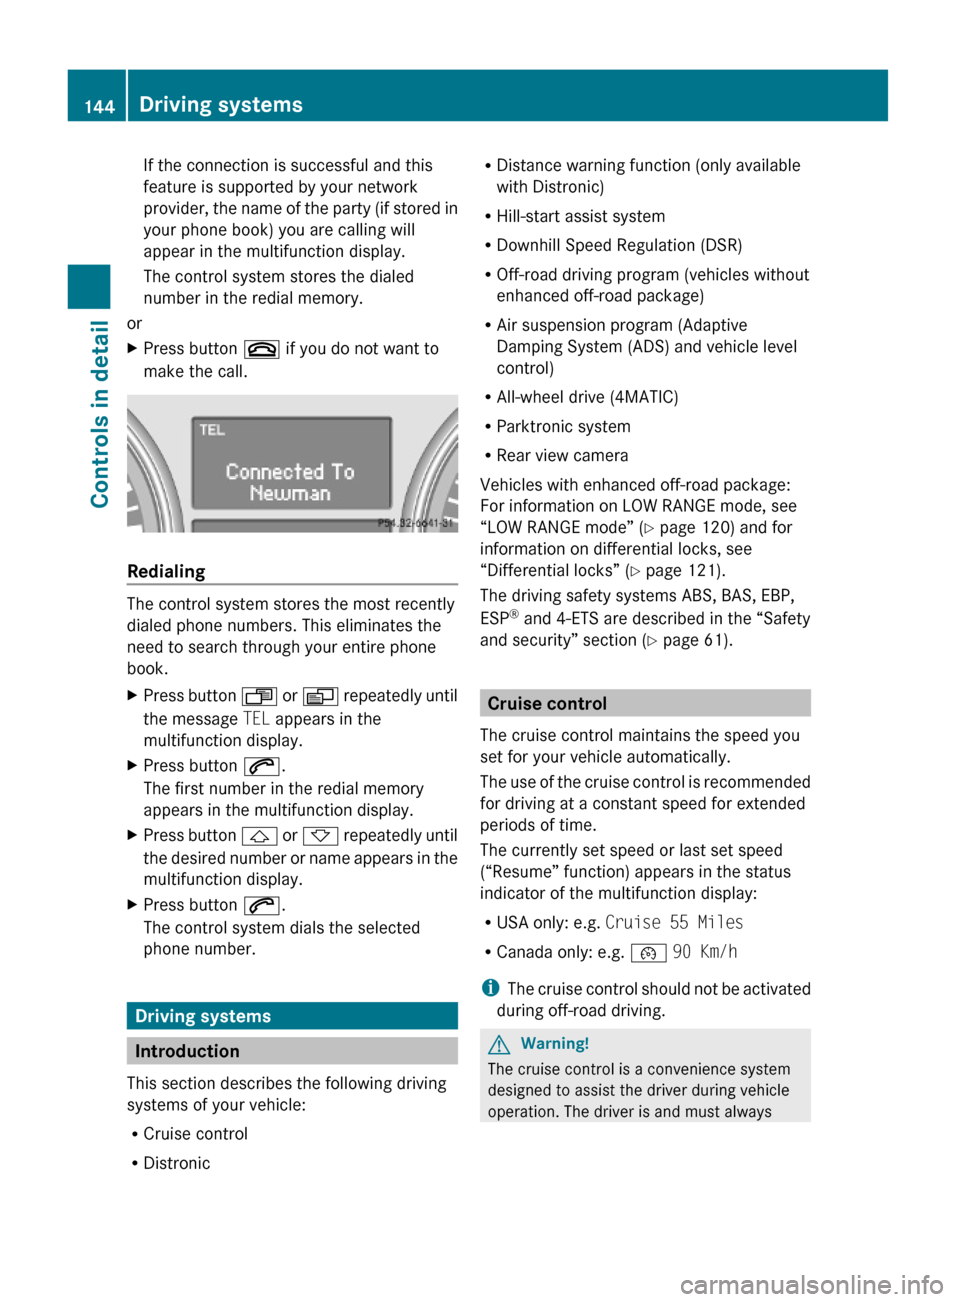
If the connection is successful and this
feature is supported by your network
provider, the name of the party (if stored in
your phone book) you are calling will
appear in the multifunction display.
The control system stores the dialed
number in the redial memory.
or
XPress button ~ if you do not want to
make the call.
Redialing
The control system stores the most recently
dialed phone numbers. This eliminates the
need to search through your entire phone
book.
XPress button U or V repeatedly until
the message TEL appears in the
multifunction display.
XPress button 6.
The first number in the redial memory
appears in the multifunction display.
XPress button & or * repeatedly until
the desired number or name appears in the
multifunction display.
XPress button 6.
The control system dials the selected
phone number.
Driving systems
Introduction
This section describes the following driving
systems of your vehicle:
RCruise control
RDistronic
RDistance warning function (only available
with Distronic)
RHill-start assist system
RDownhill Speed Regulation (DSR)
ROff-road driving program (vehicles without
enhanced off-road package)
RAir suspension program (Adaptive
Damping System (ADS) and vehicle level
control)
RAll-wheel drive (4MATIC)
RParktronic system
RRear view camera
Vehicles with enhanced off-road package:
For information on LOW RANGE mode, see
“LOW RANGE mode” (Y page 120) and for
information on differential locks, see
“Differential locks” (Y page 121).
The driving safety systems ABS, BAS, EBP,
ESP® and 4-ETS are described in the “Safety
and security” section (Y page 61).
Cruise control
The cruise control maintains the speed you
set for your vehicle automatically.
The use of the cruise control is recommended
for driving at a constant speed for extended
periods of time.
The currently set speed or last set speed
(“Resume” function) appears in the status
indicator of the multifunction display:
RUSA only: e.g. Cruise 55 Miles
RCanada only: e.g. ¯ 90 Km/h
iThe cruise control should not be activated
during off-road driving.
GWarning!
The cruise control is a convenience system
designed to assist the driver during vehicle
operation. The driver is and must always
144Driving systemsControls in detail
X164_AKB; 5; 31, en-USd2ureepe,Version: 2.11.8.12009-09-11T12:30:16+02:00 - Seite 144
Page 228 of 380
Vehicle equipment
i This Operator’s Manual describes all
features, standard or optional, potentially
available for your vehicle at the time of
purchase. Please be aware that your
vehicle might not be equipped with all
features described in this manual.
The first 1000 miles (1500 km)
The more cautiously you treat your vehicle
during the break-in period, the more satisfied
you will be with its performance later on.
R Drive your vehicle during the first
1 000 miles (1 500 km) at varying but
moderate vehicle and engine speeds.
R During this period, avoid heavy loads (full
throttle driving) and excessive engine
speeds (no more than 2
/ 3 of maximum rpm
in each gear).
R Avoid accelerating by kickdown.
R Do not attempt to slow the vehicle down by
shifting to a lower gear using the gear
selector lever.
R Select gear ranges 3, 2 or 1 (Y page 118)
only when driving at moderate speeds (for
hill driving).
After 1 000 miles (1 500 km) you may
gradually increase vehicle and engine speeds
to the permissible maximum.
All of the above instructions, as may apply to
your vehicle type, also apply when driving the
first 1 000 miles (1 500 km) after the engine,
the transfer case, the center differential or
the rear differential have been replaced.
i Always obey applicable speed limits.
At the gas station
Refueling
GWarning!
Gasoline and diesel fuels are highly flammable
and poisonous. They burn violently and can
cause serious injury.
Never allow sparks, flames or smoking
materials near gasoline or diesel fuel!
Turn off the engine before refueling.
Whenever you are around gasoline or diesel
fuel, avoid inhaling fumes and any skin or
clothing contact. Extinguish all smoking
materials.
Direct skin contact with fuels and the
inhalation of fuel vapors are damaging your
health.
GWarning!
Overfilling of the fuel tank may create
pressure in the system which could cause a
gas discharge. This could cause the gas to
spray back out when removing the fuel pump
nozzle, which could cause personal injury.
GWarning!
Do not fill diesel tanks with gasoline. Do not
mix diesel fuel with gasoline. Otherwise the
fuel system and engine could be damaged. In
addition, the vehicle could catch fire.
! Never refuel vehicles with gasoline engine
with diesel fuel. Never refuel vehicles with
diesel engine with gasoline. Even small
amounts of incorrect fuel will damage the
fuel system and engine. Damage resulting
from the use of non-approved fuels or fuel
additives or resulting from mixing gasoline
with diesel fuel or vice versa is not covered
by the Mercedes-Benz Limited Warranty.
! If you have accidentally filled the tank
with incorrect or non-approved fuel, do not
switch on the ignition. Otherwise the
incorrect or non-approved fuel will get into
the fuel lines. The fuel system must be
226At the gas stationOperation
X164_AKB; 5; 31, en-USd2ureepe,Version: 2.11.8.12009-09-11T12:30:16+02:00 - Seite 226
Page 265 of 380
We recommend that you start out with easy
off-road travel.
Special driving features for off-road
driving
The following driving features are available for
specific kind of operation:
R Off-road ABS ( Y page 63)
R Off-road ESP ®
(Y page 65)
R Off-road 4-ETS ( Y page 64)
R Hill-start assist system ( Y page 117)
R LOW RANGE mode ( Y page 120)
R Differential locks ( Y page 121)
R Downhill Speed Regulation (DSR)
( Y page 155)
R Off-road driving program (Vehicles without
enhanced off-road package) ( Y page 158)
R Air suspension program ( Y page 159)
Off-road driving rules
R Engage the off-road driving program
( Y page 158) or LOW RANGE mode
( Y page 120) before driving under off-road
conditions.
R If necessary, activate differential locks
( Y page 121).
R Make sure you select a vehicle level
( Y page 159) appropriate to the
topographical conditions. Always make
sure the vehicle has enough ground
clearance.
R Fasten items being carried as securely as
possible ( Y page 194).
R Always navigate gradients with the engine
on and with the transmission engaged in a
gear. Switch on the DSR ( Y page 155) to
help maintain a preset speed.
! Observe the following during off-road
driving:
R Keep doors, tailgate, windows, and tilt/
sliding sunroof closed whenever driving
off-road.
R Adjust vehicle speed to condition of
terrain. The more uneven, rutty and
steeper the terrain, the lower the speed
should be. Drive through water slowly at
an even speed, avoiding a bow wave.
R Be especially careful when driving in
unknown territory. It may be necessary
to get out of the vehicle and scout the
path you intend to take.
R Watch out for obstacles, such as rocks,
holes, tree stumps and ruts.
R Before driving through water, determine
its depth.
R Do not stop vehicle while immersed in
water, and do not shut off the engine.
R In sandy soil, drive at a steady speed as
allowed by conditions. This helps
overcome the vehicle rolling resistance
and reduces the likelihood of the vehicle
sinking into the ground.
R Do not initiate jumps with the vehicle. It
interrupts the forward momentum of the
vehicle.
R Always drive onto slopes with the engine
running and the vehicle in gear.
R Do not shift automatic transmission into
neutral position N.GWarning!
Do not reduce the tire inflation pressure
before driving through sand. However, if you
do so, remember to correct the tire inflation
pressure before continuing your trip. Driving
with reduced tire inflation pressure increases
the risk of losing control of the vehicle and
rolling over.
Driving instructions263OperationX164_AKB; 5; 31, en-USd2ureepe,Version: 2.11.8.12009-09-11T12:30:16+02:00 - Seite 263Z
Page 267 of 380
100% grade which is equivalent to a slope
angle of 45°. Keep in mind that the
climbing ability of the vehicle depends on
terrain conditions.
R Shift automatic transmission into gear
range 1 (Y page 118).
R Drive slowly.
R Avoid excessive engine speeds – drive with
moderate engine speeds (max. 3 000 rpm).
R Utilize the engine’s braking power when
descending a slope, observe the engine
speed (do not overrev the engine). Apply
the service brake as needed.
i For maximum engine speed, see
“Tachometer” (Y page 125) and see vehicle
specification for your vehicle
( Y page 362).
R Check the brakes after a lengthy
downgrade drive.GWarning!
Never turn the vehicle around on steep
inclines. The vehicle might roll over. If the
vehicle cannot complete the attempted climb,
back it down in reverse gear.
i The hill-start assist system supports you
when driving uphill.
For more information, see “Hill-start assist
system” ( Y page 155).
Traction in steep terrain
The maximum vehicle climbing ability is a
100% grade which is equivalent to a slope
angle of 45°. Keep in mind that the climbing
ability of the vehicle depends on terrain
conditions.
Be easy on the accelerator and watch for
continuous wheel traction when driving in
steep terrain.
i The 4-ETS helps greatly when starting out
on a steep incline when the front wheels
have then the tendency to slip due to the
weight shifting towards the rear axle.
The 4-ETS recognizes the situation and
limits the torque for the front wheels by
braking them.
Simultaneously the torque for the rear
wheels is increased.
i Vehicles with enhanced off-road package
are equipped with automatic locks for the
center and rear axle differential to improve
vehicle traction.
Driving across a hilltop
Decelerate just ahead of a hilltop (do not shift
automatic transmission into neutral position
N ), to prevent the vehicle from speeding up
too much after climbing a hill.
Use the momentum of the vehicle to drive
across the hilltop.
After climbing a hill, driving in this manner
prevents the vehicle from:
R losing ground contact when cresting hills
R losing its forward momentum
R speeding up too much after climbing the hill
Driving downhill
R Drive slowly.
R Do not drive at an angle to the incline. Steer
into the line of gravity and drive with the
front wheels pointing straight downhill.
Otherwise, the vehicle may slide sideways
off the path and roll over.
R Shift automatic transmission into gear
range 1 (Y page 118).
R On steep inclines, use the Downhill Speed
Regulation ( Y page 155).
R Utilize the engine’s braking power to
reduce vehicle speed.
If this is insufficient, apply the brakes
gently. Make sure the vehicle is moving in
the line of gravity.
R Check the brakes after a lengthy
downgrade drive.
Driving instructions265OperationX164_AKB; 5; 31, en-USd2ureepe,Version: 2.11.8.12009-09-11T12:30:16+02:00 - Seite 265Z
Page 270 of 380
LOW RANGE mode (Y page 120) is
switched on.
R Set the raised level ( Y page 159).
! Check that the ruts are not too deep and
your vehicle’s clearance is sufficient.
Otherwise:
R your vehicle may be damaged
R the underbody of the vehicle may come
in contact with the ground and you may
get stuck
R Avoid high engine speeds.
R Shift automatic transmission into gear
range 1 (Y page 118).
R Drive next to the ruts rather than through
them if at all possible.
R If the ruts are too deep to drive in, drive with
one side of the vehicle on the grassy center
strip if the route permits.
Returning from off-road driving GWarning!
If you feel a sudden significant vibration or
ride disturbance, or you suspect that possible
damage to your vehicle has occurred, you
should turn on the hazard warning flashers,
carefully slow down, and drive with caution to
an area which is a safe distance from the road.
Inspect the tires and the vehicle underbody
for possible damage. If the vehicle or tires
appear unsafe, have the vehicle towed to the
nearest authorized Mercedes-Benz Center or
tire dealer for repairs.
Off-road driving increases strain on the
vehicle.
We recommend that you inspect the vehicle
for possible damage after each off-road trip.
Recognizing any damage and a subsequent
timely repair reduces the chance of a possible
breakdown or accident later on.
Proceed as follows:
R Switch off the off-road driving program
( Y page 158) or the LOW RANGE mode
( Y page 120).
R Switch off the DSR ( Y page 156).
R Set the differential locks to AUTO
( Y page 122).
R Lower the vehicle back to a level suitable
for road conditions, e.g. highway/high-
speed level ( Y page 159).
R Clean all exterior lamps and check for
possible damage.
R Clean the front and rear license plate.
R Remove excessive dirt from tires, wheels,
wheel housings, and underbody.
For instance, after driving in mud, clean the
radiator, chassis, engine, brakes, and
wheels from extreme dirt using a strong jet
of water.
R Check tires for possible damage.
R Inspect vehicle underbody, oil pan, brake
hoses, etc., as well as vehicle underbody
for possible damage.
R Check for brush or branches caught in the
underbody.
! Brush or branches could increase the
possibility of a fire, as well as cut fuel and/
or brake lines, puncture rubber bellows of
the axles or drive shafts.
R After continued operation in mud, sand,
water or other dirty conditions clean the
brake discs, wheels, brake pads and check
and clean axle joints.
R Conduct a brake test.268Driving instructionsOperation
X164_AKB; 5; 31, en-USd2ureepe,Version: 2.11.8.12009-09-11T12:30:16+02:00 - Seite 268
Page 304 of 380

Display messagesPossible causes/consequences and M SolutionsÁCompressor
Cooling
DownYou have selected a higher vehicle level. Due to frequent level
changes within a short period, the compressor must cool
down first.
! When the message Compressor Cooling Down appears
in the multifunction display, driving is still possible. Keep in
mind that the ride height of the vehicle is not yet reached,
so you can damage the underbody of the vehicle.XLet the compressor cool down until the message
disappears.
The selected level will be set once the compressor has
cooled down.ÁRising
Max. 12
MPHThe vehicle is adjusting to off-road level 3.XDo not drive faster than 12 mph (20 km/h).ÁMax. 12
MPHYou are driving while using off-road level 3. The message
reminds you of the maximum speed at which you may drive
with off-road level 3.XDo not drive faster than 12 mph (20 km/h).ÆBeing
lowered
Max. 12
MPHThe vehicle is being lowered from off-road level 3 to off-road
level 2.XDo not drive faster than 12 mph
(20 km/h) until the off-road level 2 is reached.ÆReduce
speed to
under
12 MPHYou are driving too fast for the set vehicle level.GWarning!
Adapt your driving style to the modified driving conditions.
Avoid extreme, quick steering maneuvers. Please keep in
mind that the driving characteristics of the vehicle have been
modified. You should therefore drive in off-road level 3 with
particular caution as it could otherwise lead to an accident
and/or serious injury to you or others.
XDo not drive faster than 12 mph
(20 km/h) until the off-road level 2 is reached.8Locking
System
Inoperativ
e Service
RequiredThe differential locks are malfunctioning.XDo not drive faster than 50 mph (80 km/h).XHave the vehicle checked at an authorized Mercedes-Benz
Center.302Vehicle status messages in the multifunction displayPractical hints
X164_AKB; 5; 31, en-USd2ureepe,Version: 2.11.8.12009-09-11T12:30:16+02:00 - Seite 302