2010 MERCEDES-BENZ GL450 off button
[x] Cancel search: off buttonPage 15 of 380
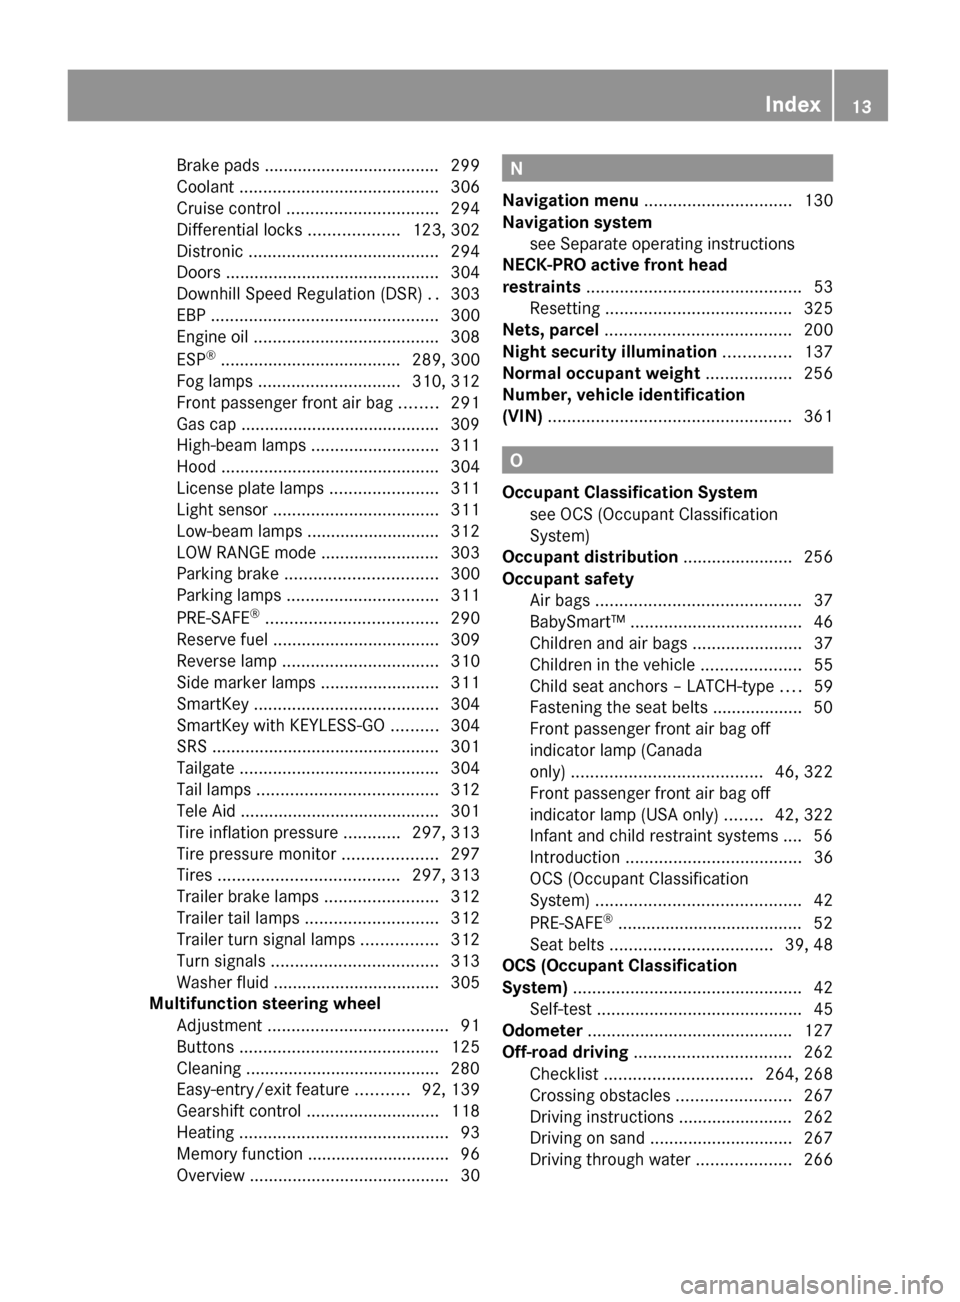
Brake pads ..................................... 299
Coolant .......................................... 306
Cruise control ................................ 294
Differential locks ...................123, 302
Distronic ........................................ 294
Doors ............................................. 304
Downhill Speed Regulation (DSR) ..303
EBP ................................................ 300
Engine oil ....................................... 308
ESP ®
...................................... 289, 300
Fog lamps .............................. 310, 312
Front passenger front air bag ........291
Gas cap .......................................... 309
High-beam lamps ........................... 311
Hood .............................................. 304
License plate lamps .......................311
Light sensor ................................... 311
Low-beam lamps ............................ 312
LOW RANGE mode ......................... 303
Parking brake ................................ 300
Parking lamps ................................ 311
PRE-SAFE ®
.................................... 290
Reserve fuel ................................... 309
Reverse lamp ................................. 310
Side marker lamps .........................311
SmartKey ....................................... 304
SmartKey with KEYLESS-GO ..........304
SRS ................................................ 301
Tailgate .......................................... 304
Tail lamps ...................................... 312
Tele Aid .......................................... 301
Tire inflation pressure ............297, 313
Tire pressure monitor ....................297
Tires ...................................... 297, 313
Trailer brake lamps ........................312
Trailer tail lamps ............................ 312
Trailer turn signal lamps ................312
Turn signals ................................... 313
Washer fluid ................................... 305
Multifunction steering wheel
Adjustment ...................................... 91
Buttons .......................................... 125
Cleaning ......................................... 280
Easy-entry/exit feature ...........92, 139
Gearshift control ............................ 118
Heating ............................................ 93
Memory function .............................. 96
Overview .......................................... 30N
Navigation menu ............................... 130
Navigation system see Separate operating instructions
NECK-PRO active front head
restraints ............................................. 53
Resetting ....................................... 325
Nets, parcel ....................................... 200
Night security illumination .............. 137
Normal occupant weight .................. 256
Number, vehicle identification
(VIN) ................................................... 361
O
Occupant Classification System see OCS (Occupant Classification
System)
Occupant distribution ....................... 256
Occupant safety
Air bags ........................................... 37
BabySmart™ .................................... 46
Children and air bags .......................37
Children in the vehicle .....................55
Child seat anchors – LATCH-type ....59
Fastening the seat belts ................... 50
Front passenger front air bag off
indicator lamp (Canada
only) ........................................ 46, 322
Front passenger front air bag off
indicator lamp (USA only) ........42, 322
Infant and child restraint systems .... 56
Introduction ..................................... 36
OCS (Occupant Classification
System) ........................................... 42
PRE-SAFE ®
....................................... 52
Seat belts .................................. 39, 48
OCS (Occupant Classification
System) ................................................ 42
Self-test ........................................... 45
Odometer ........................................... 127
Off-road driving ................................. 262
Checklist ............................... 264, 268
Crossing obstacles ........................267
Driving instructions ........................ 262
Driving on sand .............................. 267
Driving through water ....................266
Index13X164_AKB; 5; 31, en-USd2ureepe,Version: 2.11.8.12009-09-11T12:30:16+02:00 - Seite 13
Page 32 of 380
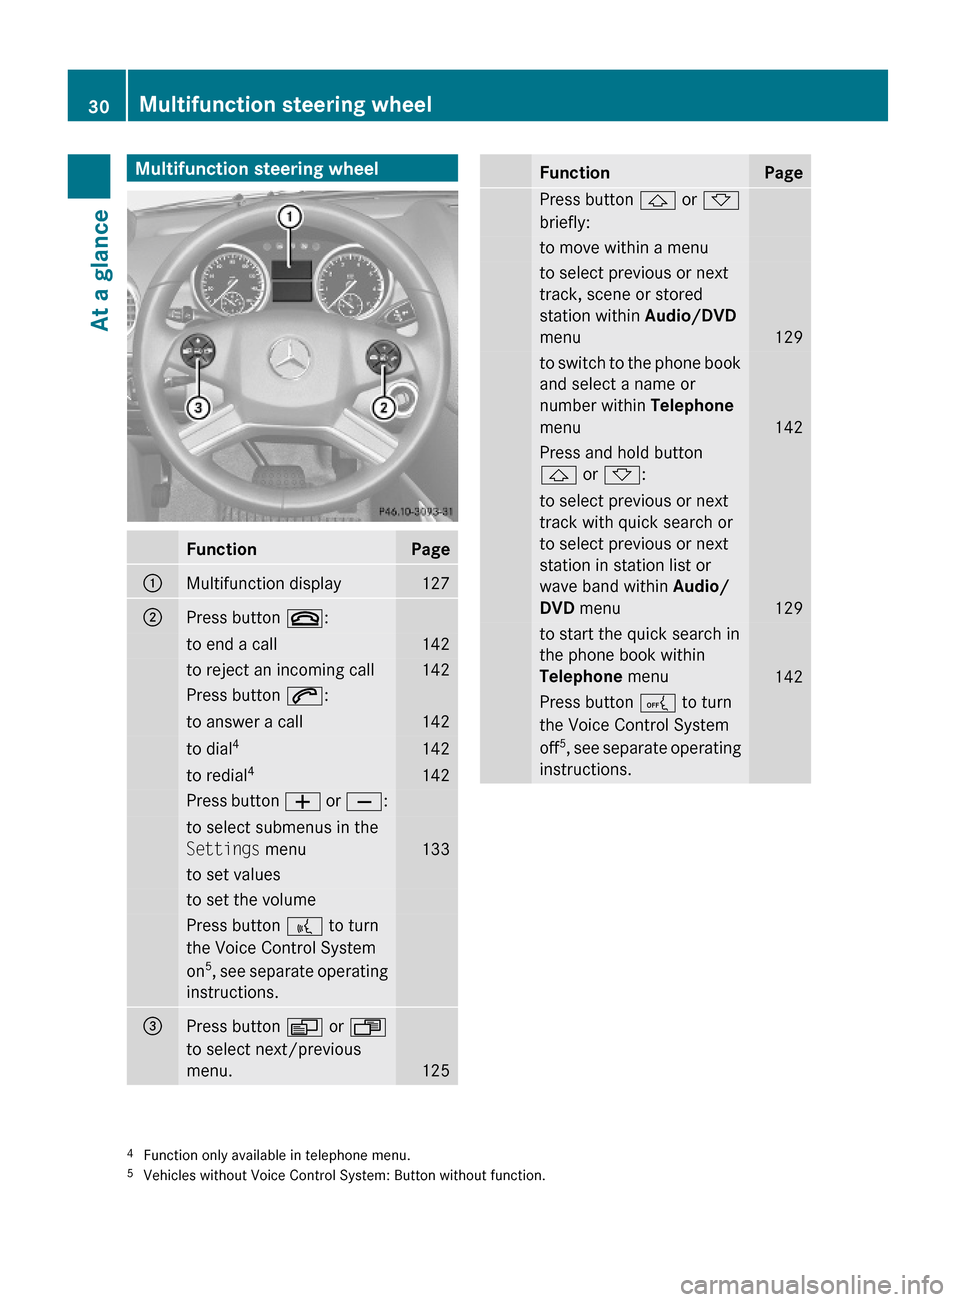
Multifunction steering wheelFunctionPage:Multifunction display127;Press button ~:to end a call142to reject an incoming call142Press button 6:to answer a call142to dial4142to redial4142Press button W or X:to select submenus in the
Settings menu133
to set valuesto set the volumePress button ? to turn
the Voice Control System
on5, see separate operating
instructions.
=Press button V or U
to select next/previous
menu.125
FunctionPagePress button & or *
briefly:
to move within a menuto select previous or next
track, scene or stored
station within Audio/DVD
menu129
to switch to the phone book
and select a name or
number within Telephone
menu142
Press and hold button
& or *:
to select previous or next
track with quick search or
to select previous or next
station in station list or
wave band within Audio/
DVD menu129
to start the quick search in
the phone book within
Telephone menu142
Press button A to turn
the Voice Control System
off5, see separate operating
instructions.
4Function only available in telephone menu.5Vehicles without Voice Control System: Button without function.
30Multifunction steering wheelAt a glance
X164_AKB; 5; 31, en-USd2ureepe,Version: 2.11.8.12009-09-11T12:30:16+02:00 - Seite 30
Page 35 of 380
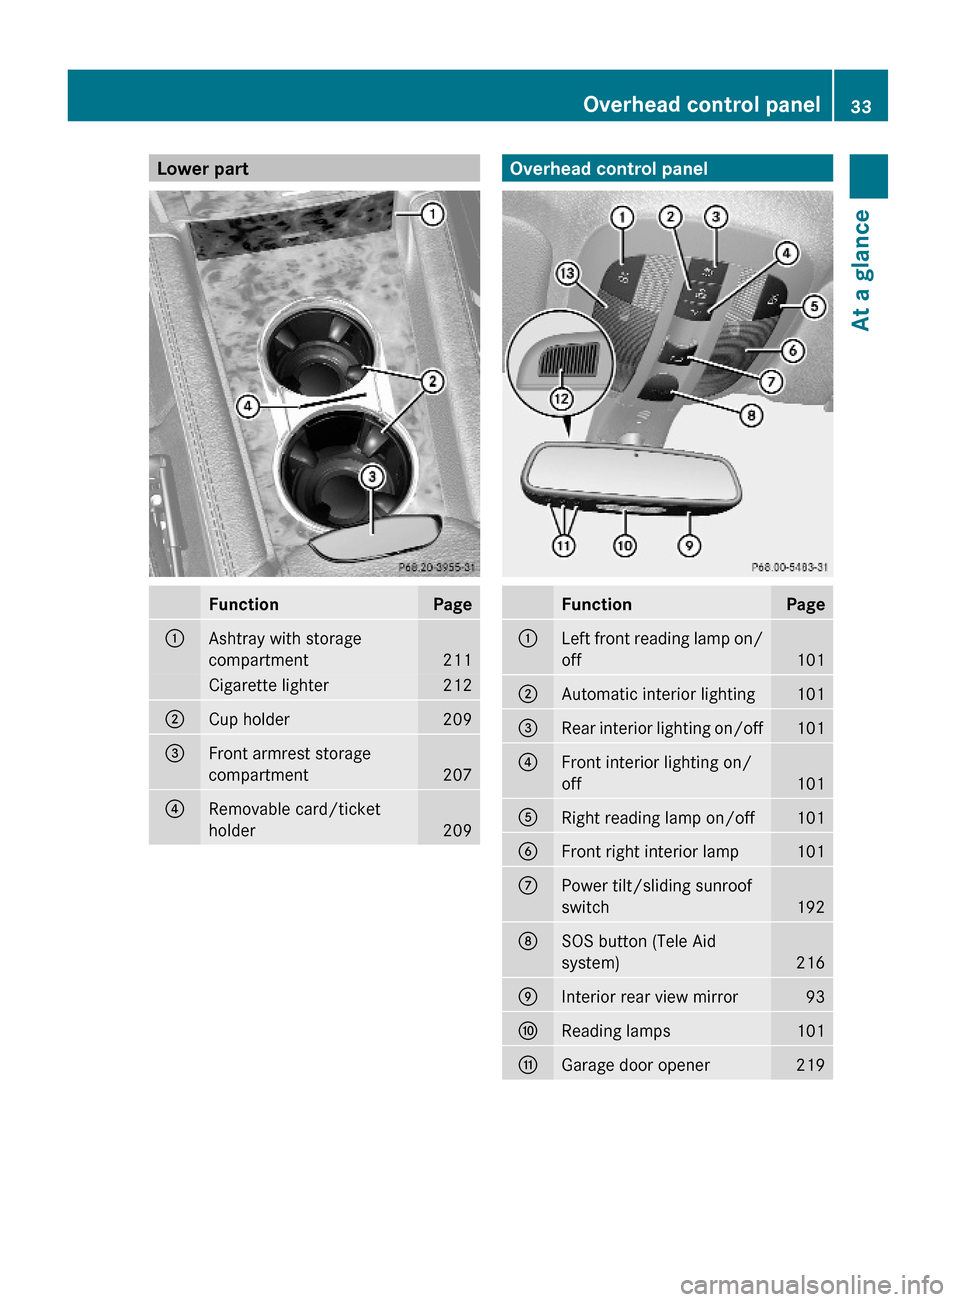
Lower part FunctionPage:Ashtray with storage
compartment211
Cigarette lighter212;Cup holder209=Front armrest storage
compartment207
?Removable card/ticket
holder209Overhead control panelFunctionPage:Left front reading lamp on/
off101
;Automatic interior lighting101=Rear interior lighting on/off101?Front interior lighting on/
off101
ARight reading lamp on/off101BFront right interior lamp101CPower tilt/sliding sunroof
switch192
DSOS button (Tele Aid
system)216
EInterior rear view mirror93FReading lamps101GGarage door opener 219Overhead control panel33At a glanceX164_AKB; 5; 31, en-USd2ureepe,Version: 2.11.8.12009-09-11T12:30:16+02:00 - Seite 33Z
Page 66 of 380
GWarning!
Never switch off the ESP®
when you see the
ESP ®
warning lamp d flashing in the
instrument cluster. In this case proceed as
follows:
R When driving off, apply as little throttle as
possible.
R While driving, ease up on the accelerator
pedal.
R Adapt your speed and driving style to the
prevailing road conditions.
Failure to observe these guidelines could
cause the vehicle to skid. The ESP ®
cannot
prevent accidents resulting from excessive
speed.
! Only conduct operational or performance
tests on a two-axle dynamometer. If such
tests are necessary, contact an authorized
Mercedes-Benz Center. You could
otherwise seriously damage the brake
system or the transfer case which is not
covered by the Mercedes-Benz Limited
Warranty.
! Because the ESP ®
operates
automatically, the engine and ignition must
be shut off (SmartKey in starter switch
position 0 or 1 or KEYLESS-GO start/stop
button in position 0 or 1) when the parking
brake is being tested on a brake test
dynamometer. Such testing should be no
longer than 10 seconds.
Active braking action through the ESP ®
may otherwise seriously damage the brake
system which is not covered by the
Mercedes-Benz Limited Warranty.
! The ESP ®
will only function properly if you
use wheels of the recommended tire size
as specified in the “Technical data” section
of this Operator’s Manual.
i The Distronic system and cruise control
switch off automatically when the ESP ®
engages.
Electronic Traction System (4-ETS) GObserve Safety notes, see page 62.
The 4-ETS (four-wheel Electronic Traction
System) is a component of the ESP ®
. The
4-ETS improves the vehicle’s ability to utilize
available traction, especially under slippery
road conditions by applying the brakes to a
spinning wheel. In addition, more power is
transferred to the wheel(s) with traction.
When you switch off the ESP ®
, the 4-ETS is
still enabled.
XIf conditions require, switch on the off-road
driving program ( Y page 158) or the LOW
RANGE mode ( Y page 119).
Off-road 4-ETS
With the off-road driving program switched on
( Y page 158), or the transmission in LOW
RANGE mode ( Y page 120), the 4-ETS
designed for off-road use is activated
automatically.
Switching off the ESP ®
GWarning!
The ESP
®
should not be switched off during
normal driving other than in the
circumstances described below. Disabling
the system will reduce vehicle stability in
driving maneuvers.
Do not switch off the ESP ®
when a spare
wheel is mounted.
To improve the vehicle’s traction, switch off
the ESP ®
. This allows the drive wheels to spin
and thus cut into surfaces for better grip, for
example
R when driving with snow chains
R in deep snow
R in sand or gravel
64Driving safety systemsSafety and security
X164_AKB; 5; 31, en-USd2ureepe,Version: 2.11.8.12009-09-11T12:30:16+02:00 - Seite 64
Page 73 of 380
iCanada only:
This device complies with RSS-210 of
Industry Canada. Operation is subject to
the following two conditions:
1. This device may not cause interference,
and
2. this device must accept any interference received, including
interference that may cause undesired
operation of the device.
Any unauthorized modification to this
device could void the user’s authority to
operate the equipment.
Factory setting XGlobal unlocking: Press button %.
Unless you open a door or the tailgate within
approximately 40 seconds after unlocking
the vehicle:
R The vehicle will be locked again.
R The antitheft alarm system will be rearmed.
XGlobal locking: Press button &.
Selective setting
If you frequently travel alone, you may wish
to reprogramm the SmartKey. Pressing
button % will then only unlock the driver’s
door and the fuel filler flap.
XSwitching on/off: Press and hold buttons
% and & simultaneously for
approximately 6 seconds until the battery
check lamp ( Y page 73) flashes twice.
The SmartKey will then function as follows:
XUnlocking driver’s door and fuel filler
flap: Press button % once.XGlobal unlocking: Press button %
twice.XGlobal locking: Press button &.KEYLESS-GO
Vehicles equipped with KEYLESS-GO come
with two SmartKeys with KEYLESS-GO, each
with remote control and a removable
mechanical key.
The KEYLESS-GO function is integrated into
the SmartKey. The validity of the SmartKey is
checked every time you grasp an outside door
handle.
When the SmartKey is valid, your vehicle
unlocks
R the doors
R the fuel filler flap
R the tailgate
i USA only:
This device complies with Part 15 of the
FCC Rules. Operation is subject to the
following two conditions:
1. This device may not cause harmful interference, and
2. this device must accept any interference received, including
interference that may cause undesired
operation.
Any unauthorized modification to this
device could void the user’s authority to
operate the equipment.
i Canada only:
This device complies with RSS-210 of
Industry Canada. Operation is subject to
the following two conditions:
1. This device may not cause interference,
and
2. this device must accept any interference received, including
interference that may cause undesired
operation of the device.
Any unauthorized modification to this
device could void the user’s authority to
operate the equipment.Locking and unlocking71Controls in detailX164_AKB; 5; 31, en-USd2ureepe,Version: 2.11.8.12009-09-11T12:30:16+02:00 - Seite 71Z
Page 74 of 380
Important notes on using KEYLESS-GO
RYou can also use the SmartKey with
KEYLESS-GO like a normal SmartKey
( Y page 70).
R You can combine KEYLESS-GO functions
with normal SmartKey functions (e.g.
unlocking with KEYLESS-GO and locking
with button &).
R Always carry the SmartKey with you.
R Never store the SmartKey together with:
- Electronic items such as a mobile phone
or another SmartKey
- Metallic objects such as coins or metal
foil
Doing so could impair the function of the
KEYLESS-GO system.
R To lock or unlock the vehicle, the SmartKey
must be located outside the vehicle within
approximately 3 ft (1 m) of a door or the
tailgate.
R When the vehicle has been parked for more
than 72 hours, the KEYLESS-GO function is
deactivated. Pull an outside door handle
and switch on the ignition once to activate
the KEYLESS-GO function.
R If the SmartKey is positioned farther away
from the vehicle, the system may no longer
recognize the SmartKey. The vehicle
cannot be locked or the engine started via
the KEYLESS-GO system.
R If the SmartKey is removed from the vehicle
(e.g. if a passenger exits the vehicle with
the SmartKey)
- when pressing the KEYLESS-GO start/
stop button or trying to lock the vehicle
with the lock button on an outside door
handle the message Key Not
Detected appears in the multifunction
display
- with the engine running, the red message
Key Not Detected appears in the
multifunction display while driving off
Find the SmartKey or change its present
location immediately (e.g. place it on the
front passenger seat or insert it in shirt
pocket).
R If you have started the engine with the
KEYLESS-GO start/stop button, you can
turn it off again by
- pressing the KEYLESS-GO start/stop
button
- inserting the SmartKey into the starter
switch when the vehicle is at a standstill
and the automatic transmission is in park
position P
R The vehicle could be inadvertently
unlocked if the SmartKey is within 3 ft (1 m)
of the vehicle and
- an outside door handle is splashed with
water
or
- you attempt to clean an outside door
handle
R Remember that the engine can be started
by anyone with a SmartKey that is left
inside the vehicle.
Possibility 1 (One SmartKey in the vehicle,
one SmartKey outside the vehicle):
If you leave the SmartKey behind when
exiting and locking the vehicle, no message
appears in the multifunction display.
Possibility 2 (One SmartKey in the vehicle,
no SmartKey outside the vehicle):
When exiting and trying to lock the vehicle,
the message Key Detected In Vehicle
appears in the multifunction display. The
vehicle will not be locked.
Factory setting XGlobal unlocking: Grasp an outside door
handle.72Locking and unlockingControls in detail
X164_AKB; 5; 31, en-USd2ureepe,Version: 2.11.8.12009-09-11T12:30:16+02:00 - Seite 72
Page 75 of 380
Unless you open a door or the tailgate within
approximately 40 seconds after unlocking
the vehicle:
RThe vehicle will be locked again.
RThe antitheft alarm system will be rearmed.
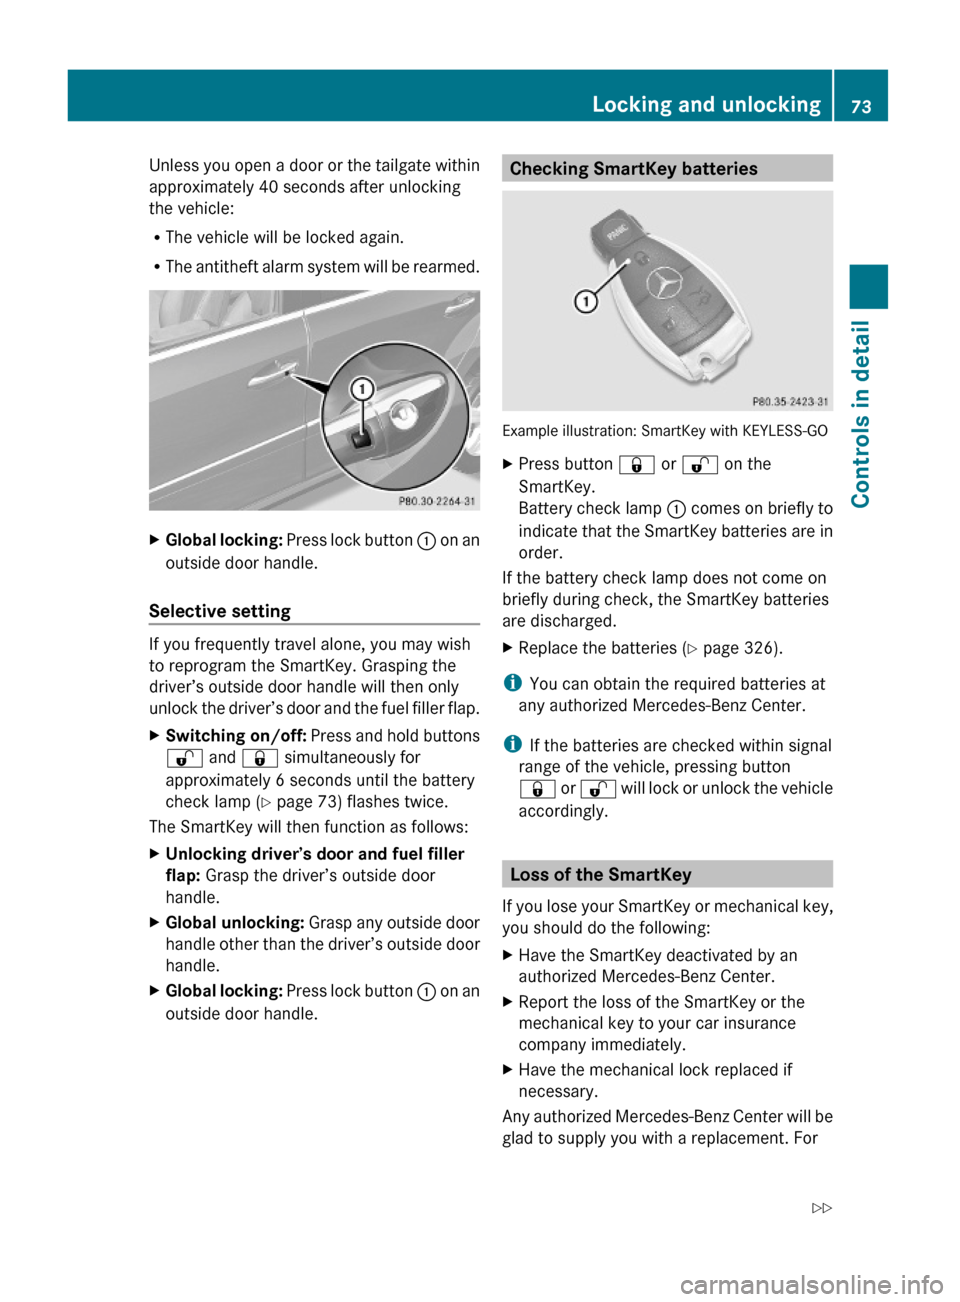
XGlobal locking: Press lock button : on an
outside door handle.
Selective setting
If you frequently travel alone, you may wish
to reprogram the SmartKey. Grasping the
driver’s outside door handle will then only
unlock the driver’s door and the fuel filler flap.
XSwitching on/off: Press and hold buttons
% and & simultaneously for
approximately 6 seconds until the battery
check lamp (Y page 73) flashes twice.
The SmartKey will then function as follows:
XUnlocking driver’s door and fuel filler
flap: Grasp the driver’s outside door
handle.
XGlobal unlocking: Grasp any outside door
handle other than the driver’s outside door
handle.
XGlobal locking: Press lock button : on an
outside door handle.Checking SmartKey batteries
Example illustration: SmartKey with KEYLESS-GO
XPress button & or % on the
SmartKey.
Battery check lamp : comes on briefly to
indicate that the SmartKey batteries are in
order.
If the battery check lamp does not come on
briefly during check, the SmartKey batteries
are discharged.
XReplace the batteries (Y page 326).
iYou can obtain the required batteries at
any authorized Mercedes-Benz Center.
iIf the batteries are checked within signal
range of the vehicle, pressing button
& or % will lock or unlock the vehicle
accordingly.
Loss of the SmartKey
If you lose your SmartKey or mechanical key,
you should do the following:
XHave the SmartKey deactivated by an
authorized Mercedes-Benz Center.
XReport the loss of the SmartKey or the
mechanical key to your car insurance
company immediately.
XHave the mechanical lock replaced if
necessary.
Any authorized Mercedes-Benz Center will be
glad to supply you with a replacement. For
Locking and unlocking73Controls in detailX164_AKB; 5; 31, en-USd2ureepe,Version: 2.11.8.12009-09-11T12:30:16+02:00 - Seite 73Z
Page 83 of 380
the SmartKey is in the vehicle, the vehicle’s
electrical systems can be switched on or
the engine can be started using the
KEYLESS-GO start/stop button.
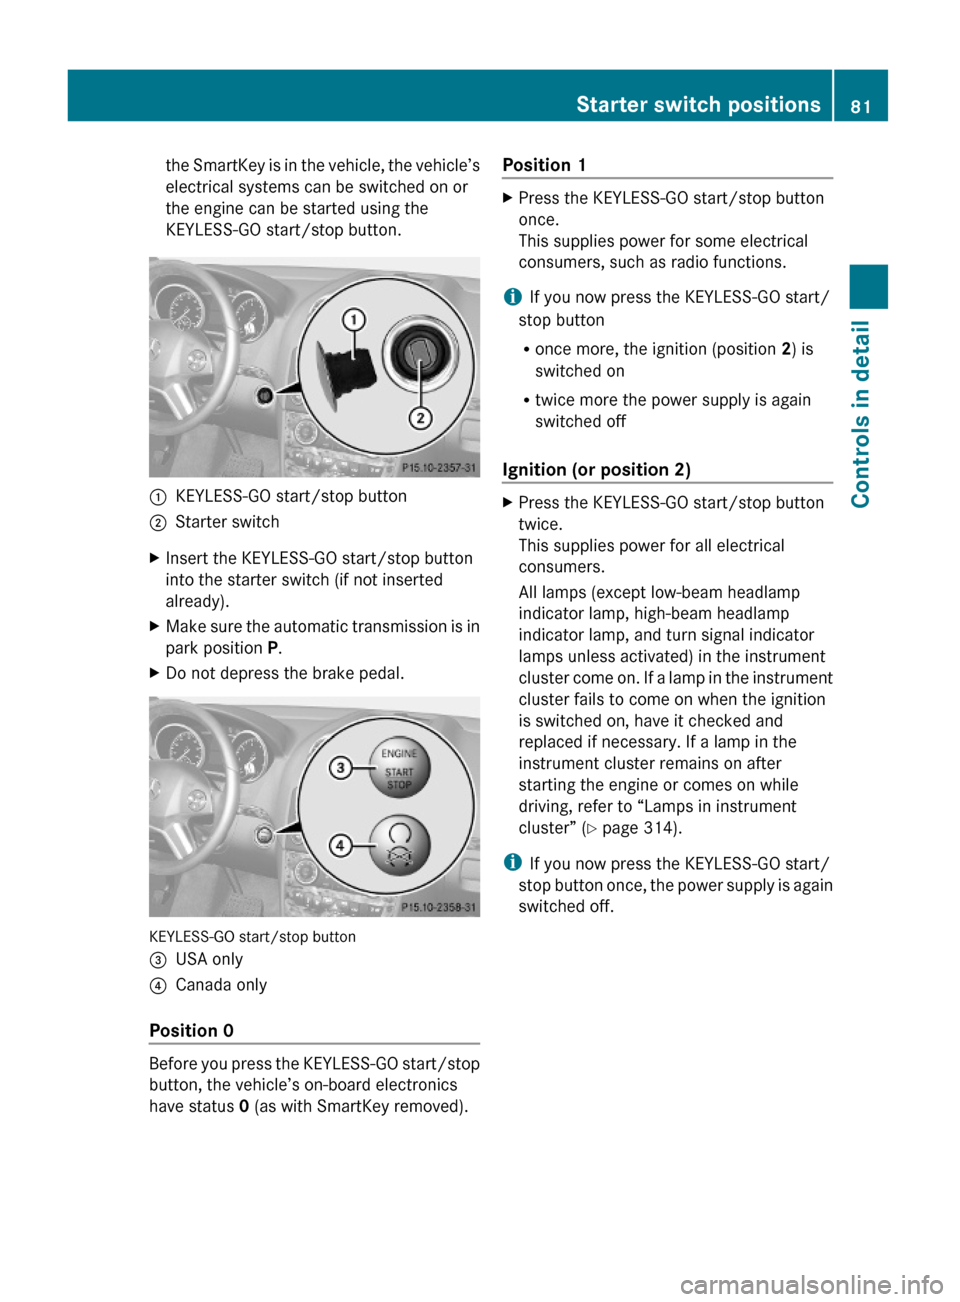
:KEYLESS-GO start/stop button;Starter switchXInsert the KEYLESS-GO start/stop button
into the starter switch (if not inserted
already).
XMake sure the automatic transmission is in
park position P.
XDo not depress the brake pedal.
KEYLESS-GO start/stop button
=USA only?Canada only
Position 0
Before you press the KEYLESS-GO start/stop
button, the vehicle’s on-board electronics
have status 0 (as with SmartKey removed).
Position 1XPress the KEYLESS-GO start/stop button
once.
This supplies power for some electrical
consumers, such as radio functions.
iIf you now press the KEYLESS-GO start/
stop button
Ronce more, the ignition (position 2) is
switched on
Rtwice more the power supply is again
switched off
Ignition (or position 2)
XPress the KEYLESS-GO start/stop button
twice.
This supplies power for all electrical
consumers.
All lamps (except low-beam headlamp
indicator lamp, high-beam headlamp
indicator lamp, and turn signal indicator
lamps unless activated) in the instrument
cluster come on. If a lamp in the instrument
cluster fails to come on when the ignition
is switched on, have it checked and
replaced if necessary. If a lamp in the
instrument cluster remains on after
starting the engine or comes on while
driving, refer to “Lamps in instrument
cluster” (Y page 314).
iIf you now press the KEYLESS-GO start/
stop button once, the power supply is again
switched off.
Starter switch positions81Controls in detailX164_AKB; 5; 31, en-USd2ureepe,Version: 2.11.8.12009-09-11T12:30:16+02:00 - Seite 81Z