2010 MERCEDES-BENZ E350 turn signal
[x] Cancel search: turn signalPage 159 of 372
Ryou shift the automatic transmission into
park position P, reverse gear R, or neutral
position N while driving
Rthe radar sensors are switched off
Ryou pull the DISTRONIC PLUS lever in
direction of arrow ? (Y page 153) for
driving off and the passenger door is open
The segments indicating the set speed in the
multifunction display go out, an acoustic
signal sounds, and the message DISTRONIC
PLUS Off appears in the multifunction
display for approximately 5 seconds.
GWarning!
The DISTRONIC PLUS switches off and
releases the brakes when the vehicle
decelerates below the minimum speed of
20 mph (30 km/h) by operation of the system
unless the DISTRONIC PLUS detects a vehicle
directly ahead of you. At that time the driver
must apply the brakes in order to reduce
vehicle speed further or bring it to a stop.
Depressing the accelerator pedal does not
deactivate the DISTRONIC PLUS. After a brief
acceleration (e.g. for passing), the
DISTRONIC PLUS will resume the last set
speed.
Setting the following distance in
DISTRONIC PLUS
You can set the specified following distance
for the DISTRONIC PLUS by varying the time
setting between 1.0 and 2.0 seconds. Using
this time setting and the current speed of
your vehicle, the DISTRONIC PLUS calculates
and sets the required following distance to
the preceding vehicle.
The set distance will be shown in the
multifunction display.
GWarning!
It is up to the driver to exercise discretion to
select the appropriate setting given road
conditions, traffic, driver’s preferred driving
style and applicable laws and driving
recommendations for safe following distance.
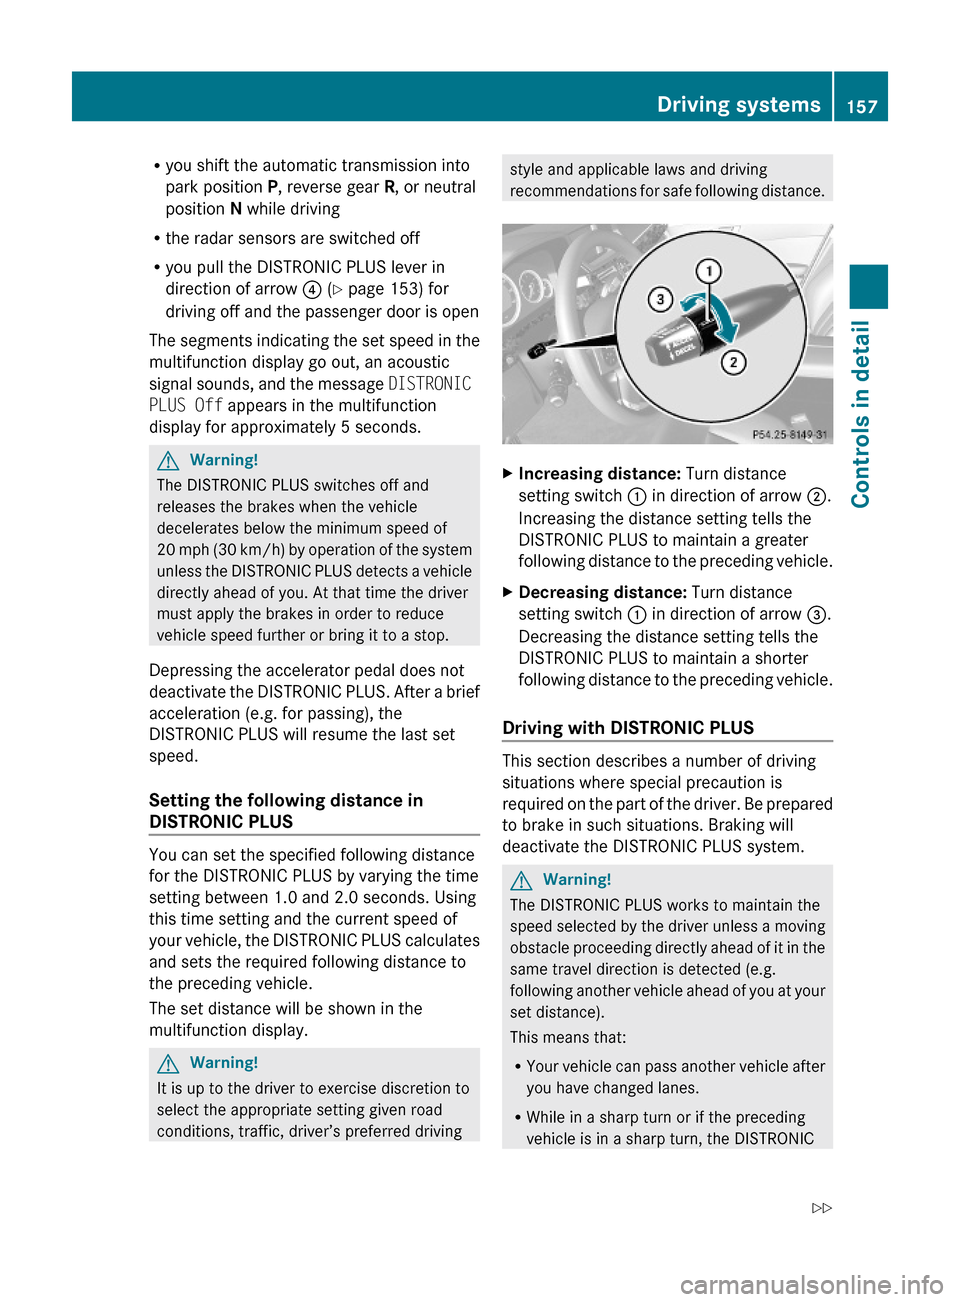
XIncreasing distance: Turn distance
setting switch : in direction of arrow ;.
Increasing the distance setting tells the
DISTRONIC PLUS to maintain a greater
following distance to the preceding vehicle.
XDecreasing distance: Turn distance
setting switch : in direction of arrow =.
Decreasing the distance setting tells the
DISTRONIC PLUS to maintain a shorter
following distance to the preceding vehicle.
Driving with DISTRONIC PLUS
This section describes a number of driving
situations where special precaution is
required on the part of the driver. Be prepared
to brake in such situations. Braking will
deactivate the DISTRONIC PLUS system.
GWarning!
The DISTRONIC PLUS works to maintain the
speed selected by the driver unless a moving
obstacle proceeding directly ahead of it in the
same travel direction is detected (e.g.
following another vehicle ahead of you at your
set distance).
This means that:
RYour vehicle can pass another vehicle after
you have changed lanes.
RWhile in a sharp turn or if the preceding
vehicle is in a sharp turn, the DISTRONIC
Driving systems157Controls in detail212_AKB; 2; 41, en-USd2ureepe,Version: 2.11.8.12009-07-17T09:14:21+02:00 - Seite 157Z
Page 172 of 372
speed of up to 22 mph (35 km/h). It scans
automatically for and measures potential
parking spaces on both sides of the vehicle.
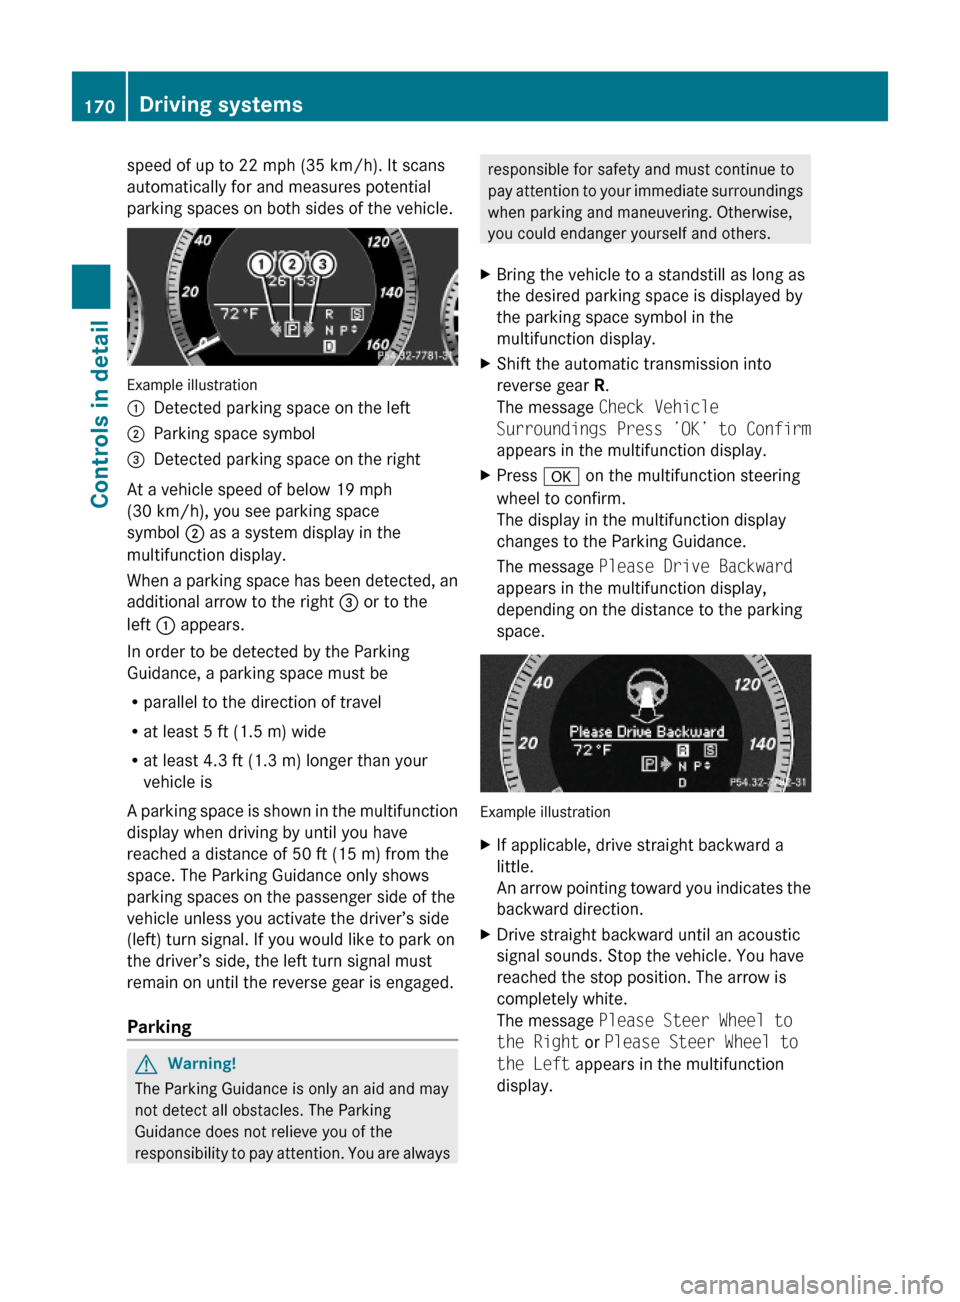
Example illustration
:Detected parking space on the left;Parking space symbol=Detected parking space on the right
At a vehicle speed of below 19 mph
(30 km/h), you see parking space
symbol ; as a system display in the
multifunction display.
When a parking space has been detected, an
additional arrow to the right = or to the
left : appears.
In order to be detected by the Parking
Guidance, a parking space must be
Rparallel to the direction of travel
Rat least 5 ft (1.5 m) wide
Rat least 4.3 ft (1.3 m) longer than your
vehicle is
A parking space is shown in the multifunction
display when driving by until you have
reached a distance of 50 ft (15 m) from the
space. The Parking Guidance only shows
parking spaces on the passenger side of the
vehicle unless you activate the driver’s side
(left) turn signal. If you would like to park on
the driver’s side, the left turn signal must
remain on until the reverse gear is engaged.
Parking
GWarning!
The Parking Guidance is only an aid and may
not detect all obstacles. The Parking
Guidance does not relieve you of the
responsibility to pay attention. You are always
responsible for safety and must continue to
pay attention to your immediate surroundings
when parking and maneuvering. Otherwise,
you could endanger yourself and others.
XBring the vehicle to a standstill as long as
the desired parking space is displayed by
the parking space symbol in the
multifunction display.
XShift the automatic transmission into
reverse gear R.
The message Check Vehicle
Surroundings Press ’OK’ to Confirm
appears in the multifunction display.
XPress a on the multifunction steering
wheel to confirm.
The display in the multifunction display
changes to the Parking Guidance.
The message Please Drive Backward
appears in the multifunction display,
depending on the distance to the parking
space.
Example illustration
XIf applicable, drive straight backward a
little.
An arrow pointing toward you indicates the
backward direction.
XDrive straight backward until an acoustic
signal sounds. Stop the vehicle. You have
reached the stop position. The arrow is
completely white.
The message Please Steer Wheel to
the Right or Please Steer Wheel to
the Left appears in the multifunction
display.
170Driving systemsControls in detail
212_AKB; 2; 41, en-USd2ureepe,Version: 2.11.8.12009-07-17T09:14:21+02:00 - Seite 170
Page 173 of 372
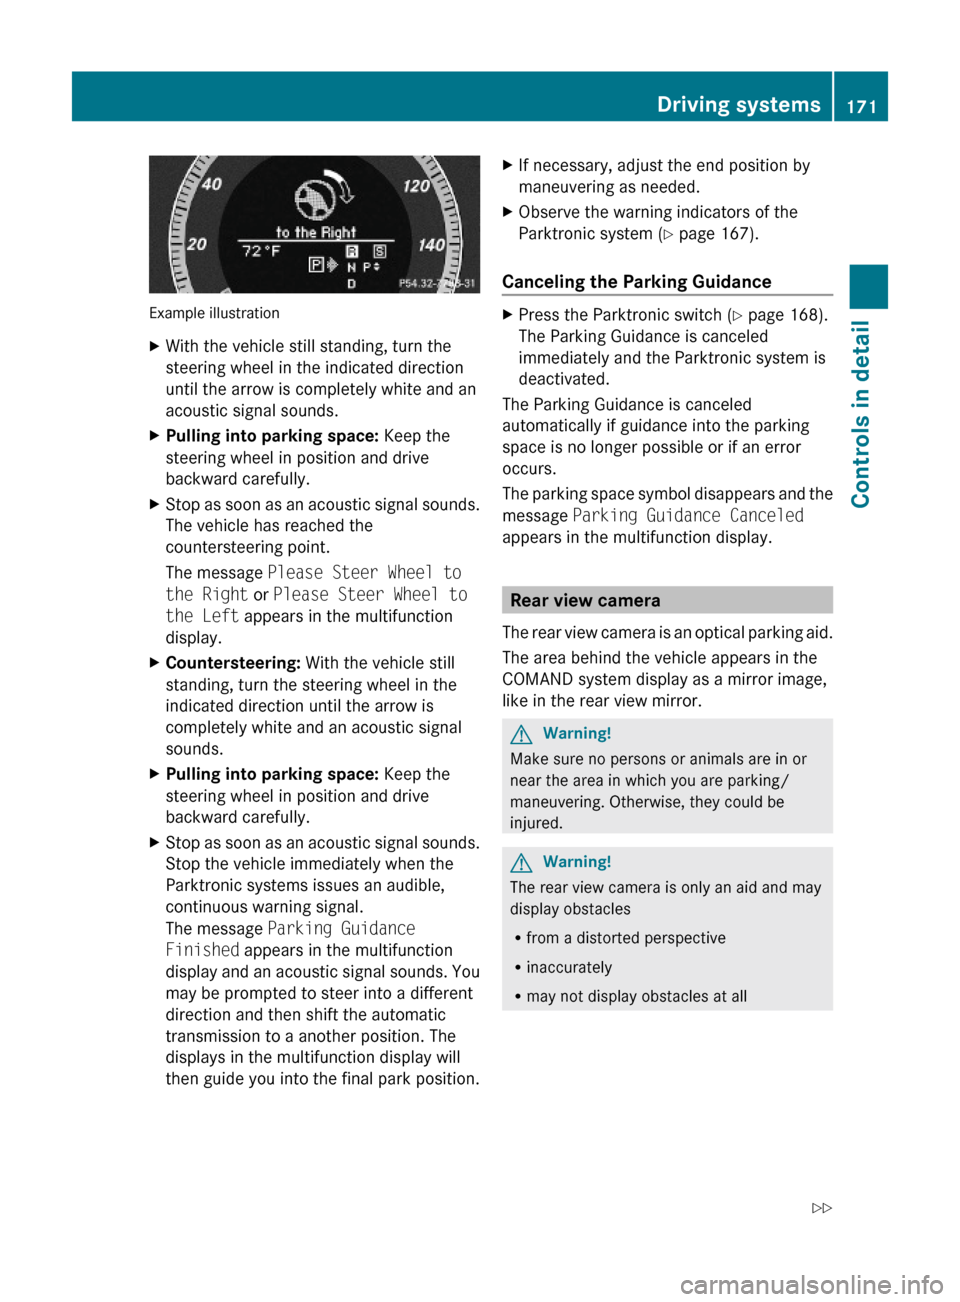
Example illustration
XWith the vehicle still standing, turn the
steering wheel in the indicated direction
until the arrow is completely white and an
acoustic signal sounds.
XPulling into parking space: Keep the
steering wheel in position and drive
backward carefully.
XStop as soon as an acoustic signal sounds.
The vehicle has reached the
countersteering point.
The message Please Steer Wheel to
the Right or Please Steer Wheel to
the Left appears in the multifunction
display.
XCountersteering: With the vehicle still
standing, turn the steering wheel in the
indicated direction until the arrow is
completely white and an acoustic signal
sounds.
XPulling into parking space: Keep the
steering wheel in position and drive
backward carefully.
XStop as soon as an acoustic signal sounds.
Stop the vehicle immediately when the
Parktronic systems issues an audible,
continuous warning signal.
The message Parking Guidance
Finished appears in the multifunction
display and an acoustic signal sounds. You
may be prompted to steer into a different
direction and then shift the automatic
transmission to a another position. The
displays in the multifunction display will
then guide you into the final park position.
XIf necessary, adjust the end position by
maneuvering as needed.
XObserve the warning indicators of the
Parktronic system (Y page 167).
Canceling the Parking Guidance
XPress the Parktronic switch (Y page 168).
The Parking Guidance is canceled
immediately and the Parktronic system is
deactivated.
The Parking Guidance is canceled
automatically if guidance into the parking
space is no longer possible or if an error
occurs.
The parking space symbol disappears and the
message Parking Guidance Canceled
appears in the multifunction display.
Rear view camera
The rear view camera is an optical parking aid.
The area behind the vehicle appears in the
COMAND system display as a mirror image,
like in the rear view mirror.
GWarning!
Make sure no persons or animals are in or
near the area in which you are parking/
maneuvering. Otherwise, they could be
injured.
GWarning!
The rear view camera is only an aid and may
display obstacles
Rfrom a distorted perspective
Rinaccurately
Rmay not display obstacles at all
Driving systems171Controls in detail212_AKB; 2; 41, en-USd2ureepe,Version: 2.11.8.12009-07-17T09:14:21+02:00 - Seite 171Z
Page 177 of 372
XCleaning inside of windshield: Use a soft,
non-scratching cloth ( Y page 263).
Blind Spot Assist
The Blind Spot Assist uses radar sensors to
monitor the area on both sides of your
vehicle. It will assist you when you change
lanes driving at speeds of above 20 mph
(30 km/h). A red warning lamp will come on
in the exterior rear view mirror as soon as
another vehicle is detected. If you then
activate the corresponding turn signals to
change lanes, the red warning lamp flashes
and warning sounds (collision warning). The
Blind Spot Assist operates using sensors in
the rear bumper.
GWarning!
The Blind Spot Assist is only a driving aid and
may not detect all vehicles.
The Blind Spot Assist may not be able to
detect narrow vehicles such as motorcycles
or bicycles, or it may not detect them until it
is too late.
The monitoring function may be impaired if
your sensors are dirty, subject to heavy spray,
or if visibility is poor due to e.g. snow, rain, or
fog. This can result in vehicles not being
detected or being detected too late.
The Blind Spot Assist cannot detect road,
traffic and weather conditions.
It is the driver’s responsibility at all times to
be attentive to road, weather and traffic
conditions and to provide the steering,
braking and other driving inputs necessary to
retain control of the vehicle. Failure to do so
could result in recognizing dangers too late,
possibly resulting in an accident and serious
injury to yourself and others.
In order for the Blind Spot Assist to function,
the radar sensors must be switched on and
operational.
When traveling in Canada in a vehicle not
registered in Canada, you must switch off the
radar sensor system ( Y page 144). Canadian
law does not permit the use of the radar
sensor system for vehicles from outside of
Canada. When you switch off the radar sensor
system, the following functions are
deactivated:
R Blind Spot Assist
R BAS PLUS ( Y page 63)
R PRE-SAFE ®
Brake ( Y page 69)
R DISTRONIC PLUS ( Y page 149)
i USA only:
This device has been approved by the FCC
as a “Vehicular Radar System”. The radar
sensor is intended for use in an automotive
radar system only. Removal, tampering, or
altering of the device will void any
warranties, and is not permitted by the
FCC. Do not tamper with, alter, or use in
any non-approved way.
Any unauthorized modification to this
device could void the user’s authority to
operate the equipment.
i Canada only:
This device complies with RSS-210 of
Industry Canada. Operation is subject to
the following two conditions:
1. This device may not cause interference,
and
2. this device must accept any interference received, including
interference that may cause undesired
operation of the device.
Removal, tampering, or altering of the
device will void any warranties, and is not
permitted. Do not tamper with, alter, or use
in any non-approved way.
Any unauthorized modification to this
device could void the user’s authority to
operate the equipment.
Sensor monitoring range
The Blind Spot Assist is able to monitor a
range up to 10 ft (3 m) to the rear and both
sides of the vehicle.
Driving systems175Controls in detail212_AKB; 2; 41, en-USd2ureepe,Version: 2.11.8.12009-07-17T09:14:21+02:00 - Seite 175Z
Page 179 of 372

When you shift the automatic transmission in
reverse gear R, yellow indicator lamps : in
the exterior rear view mirrors goes out after
approximately 3 seconds. The Blind Spot
Assist is then not active.
The brightness of indicator lamps/warning
lamps : is controlled automatically
depending on the brightness of the ambient
light.
GWarning!
The Blind Spot Assist is not active at speeds
below approximately 20 mph (30 km/h). The
yellow indicator lamps in the exterior rear
view mirrors are illuminated. You will not be
alerted to the presence of vehicles in the
monitored area at these speeds.
It is the driver’s responsibility at all times to
be attentive to road, weather and traffic
conditions and to provide the steering,
braking and other driving inputs necessary to
retain control of the vehicle. Failure to do so
could result in recognizing dangers too late,
possibly resulting in an accident and serious
injury to yourself and others.
Collision warning
If a vehicle is detected in the Blind Spot Assist
range and you activate the turn signal, a two-
tone warning will sound once. Red warning
lamp : on the corresponding side of the
vehicle will flash.
GWarning!
Do not change lanes or make turns, while red
warning lamp : is flashing. Doing so could
result in an accident and serious injury to
yourself and others.
XRemain on the lane that you are currently
on until traffic conditions permit to change.
If the turn signal remains on, red warning
lamp : will flash to indicate that vehicles
have been detected. No further audible
warnings will sound.
Lane Keeping Assist
The Lane Keeping Assist supports you at a
vehicle speed of above 40 mph when you
have set the display unit to miles in the
Display Unit Speed-/Odometer: menu in
the control system (Y page 141). When you
have set the display unit to km, the system
supports you at a vehicle speed of above
60 km/h. When the Lane Keeping Assist
detects lane markings, the system is
designed to alert you in case you leave your
lane unintentionally. A warning is usually
issued when a front wheel is on the lane
marking. An interval vibration in the steering
wheel that lasts for up to 1.5 seconds will
then alert you.
The Lane Keeping Assist monitors the area in
front of your vehicle via camera :.
The system can distinguish various
conditions in order to alert you early enough
and to avoid unnecessary warnings when
crossing lane markings.
The warning is issued sooner when
Rcutting a curve on the outside of the turn
Rdriving on very wide lanes such as highway
lanes
Rthe system recognizes dividing lines
because crossing them is often crucial due
to soft shoulders or guardrails behind for
example
The warning is issued later however when
Rdriving on narrow lanes
Rcutting a curve on the inside of the turn
Driving systems177Controls in detail212_AKB; 2; 41, en-USd2ureepe,Version: 2.11.8.12009-07-17T09:14:21+02:00 - Seite 177Z
Page 180 of 372
The system does not issue a warning when
Rsteering, braking, or accelerating in a
clearly active manner, e.g. when changing
lanes, passing, exiting a highway
Rcutting a narrow curve
Rmaking a very sharp turn
Ra driving safety system such as the ABS,
the BAS, or the ESC has been activated
When setting the turn signal in either
direction, the warning will be suppressed. The
system will issue a warning if a turn signal has
been on for an extended period of time.
GWarning!
The Lane Keeping Assist does not keep the
vehicle in the lane. The Lane Keeping Assist
is only an aid to the driver and may not always
recognize lane markings properly or fail to
recognize them at all.
The system may be impaired or unavailable
when
Rvisibility is poor, e.g. due to snow, rain, fog,
or heavy spray
Roncoming traffic, sun glare or reflection
from other vehicles
Rthe camera area of the windshield is dirty,
foggy, or otherwise obstructed
Rlane markings are not present
Rlane markings are worn, dark, or covered
e.g. by snow or dirt
Rthe distance to the preceding vehicle is too
short
Rwhen lane markings are ambiguous, for
example in road work sections
Rlane markings change rapidly, e.g. on
highway exits or turn-off lanes
Rlanes are narrow and winding
The Lane Keeping Assist cannot take road and
traffic conditions into account. It is the
driver’s responsibility at all times to be
attentive to road, weather and traffic
conditions and to provide the steering,
braking and other driving inputs necessary to
retain control of the vehicle. Failure to do so
could result in recognizing dangers too late,
possibly resulting in an accident and serious
injury to yourself and others.
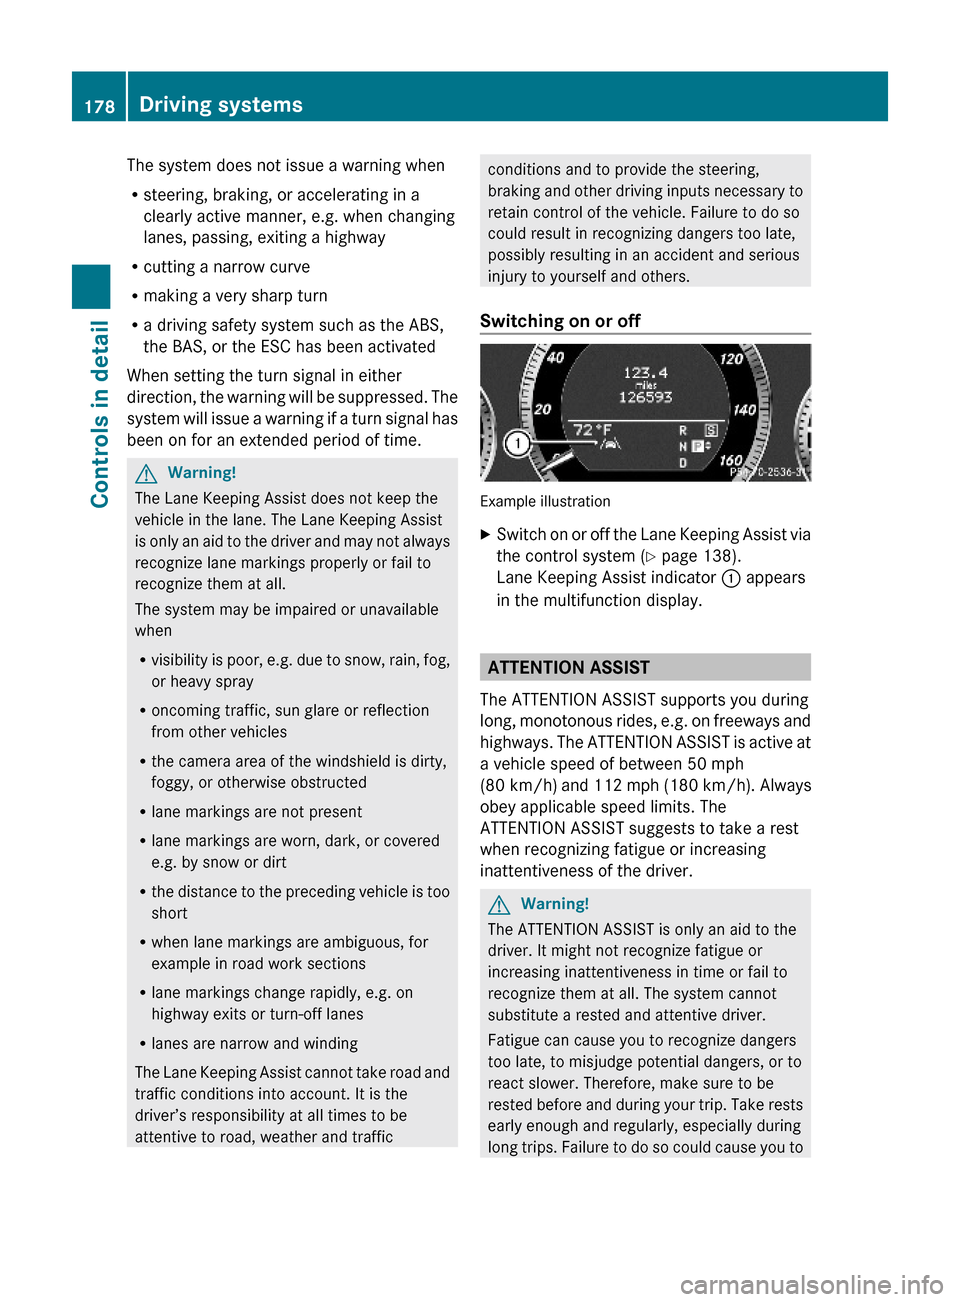
Switching on or off
Example illustration
XSwitch on or off the Lane Keeping Assist via
the control system (Y page 138).
Lane Keeping Assist indicator : appears
in the multifunction display.
ATTENTION ASSIST
The ATTENTION ASSIST supports you during
long, monotonous rides, e.g. on freeways and
highways. The ATTENTION ASSIST is active at
a vehicle speed of between 50 mph
(80 km/h) and 112 mph (180 km/h). Always
obey applicable speed limits. The
ATTENTION ASSIST suggests to take a rest
when recognizing fatigue or increasing
inattentiveness of the driver.
GWarning!
The ATTENTION ASSIST is only an aid to the
driver. It might not recognize fatigue or
increasing inattentiveness in time or fail to
recognize them at all. The system cannot
substitute a rested and attentive driver.
Fatigue can cause you to recognize dangers
too late, to misjudge potential dangers, or to
react slower. Therefore, make sure to be
rested before and during your trip. Take rests
early enough and regularly, especially during
long trips. Failure to do so could cause you to
178Driving systemsControls in detail
212_AKB; 2; 41, en-USd2ureepe,Version: 2.11.8.12009-07-17T09:14:21+02:00 - Seite 178
Page 213 of 372

When the connection is established, the
message Call Connected appears in the
multifunction display. The Tele Aid system will
transmit data generating the vehicle
identification number, model, color and
location (subject to availability of cellular and
GPS signals).
i The COMAND system display indicates
that a Tele Aid call is in progress. While the
call is connected you can change to the
navigation menu by pressing the NAVI
button on the COMAND system. Spoken
commands are not available.
A voice connection between the Customer
Assistance Center representative and the
occupants of the vehicle will be established.
Information regarding the operation of your
vehicle, the nearest authorized Mercedes-
Benz Center or Mercedes-Benz USA products
and services is available to you.
For more details concerning the Tele Aid
system, please visit www.mbusa.com (USA
only), log in to “Owner’s Online” and visit the
“My Tele Aid” section to learn more.
i If the indicator lamp in Information
button : is flashing continuously and
there was no voice connection to the
Customer Assistance Center established,
then the Tele Aid system could not initiate
an Information call (e.g. the relevant
cellular phone network is not available).
The message Call Failed appears in the
multifunction display.XTerminating calls: Press button ~ on
the multifunction steering wheel.
or
XPress the respective button for ending a
telephone call on the COMAND system.
Call priority
If other service calls such as a Roadside
Assistance call or Information call are active,
an emergency call is still possible. In this
case, the emergency call will take priority and
override all other active calls.
The indicator lamp in the respective button
flashes until the call is concluded. Automatic
initiated emergency calls can only be
terminated by a Customer Assistance Center
representative. All other calls can be
terminated by pressing button ~ on the
multifunction steering wheel or the
respective button for ending a telephone call
on the COMAND system.
i When a Tele Aid call has been initiated,
the COMAND system audio is muted. The
mobile phone is no longer connected to the
COMAND system. If you must use this
phone, we recommend that you use it only
with the vehicle at a standstill in a safe
location.
Search & Send
“Search & Send” is a navigation destination
address entry service. For more information
on “Search & Send”, refer to separate
COMAND system operating instructions.
Remote door unlock
In case you have locked your vehicle
unintentionally (e.g. SmartKey inside vehicle),
and the reserve SmartKey is not available:
XContact the Customer Assistance Center
at 1-800-FOR-MERCedes
(1-800-367-6372) (USA only) or
1-888-923-8367 (Canada only).
You will be asked to provide your password.XThen return to your vehicle at the time
arranged with the Customer Assistance
Center and pull the trunk lid handle for a
minimum of 20 seconds until the indicator
lamp in the SOS button is flashing.
The message Connecting Call appears in
the multifunction display.
As an alternative, you may unlock the vehicle
via Internet in the “My Tele Aid” section of
“Owner’s Online”, using your ID and password
(USA only).
Useful features211Controls in detail212_AKB; 2; 41, en-USd2ureepe,Version: 2.11.8.12009-07-17T09:14:21+02:00 - Seite 211Z
Page 215 of 372
When programming a garage door opener,
park vehicle outside the garage.
Do not run the engine while programming the
integrated remote control. Inhalation of
exhaust gas is hazardous to your health. All
exhaust gas contains carbon monoxide (CO),
and inhaling it can cause unconsciousness
and possible death.
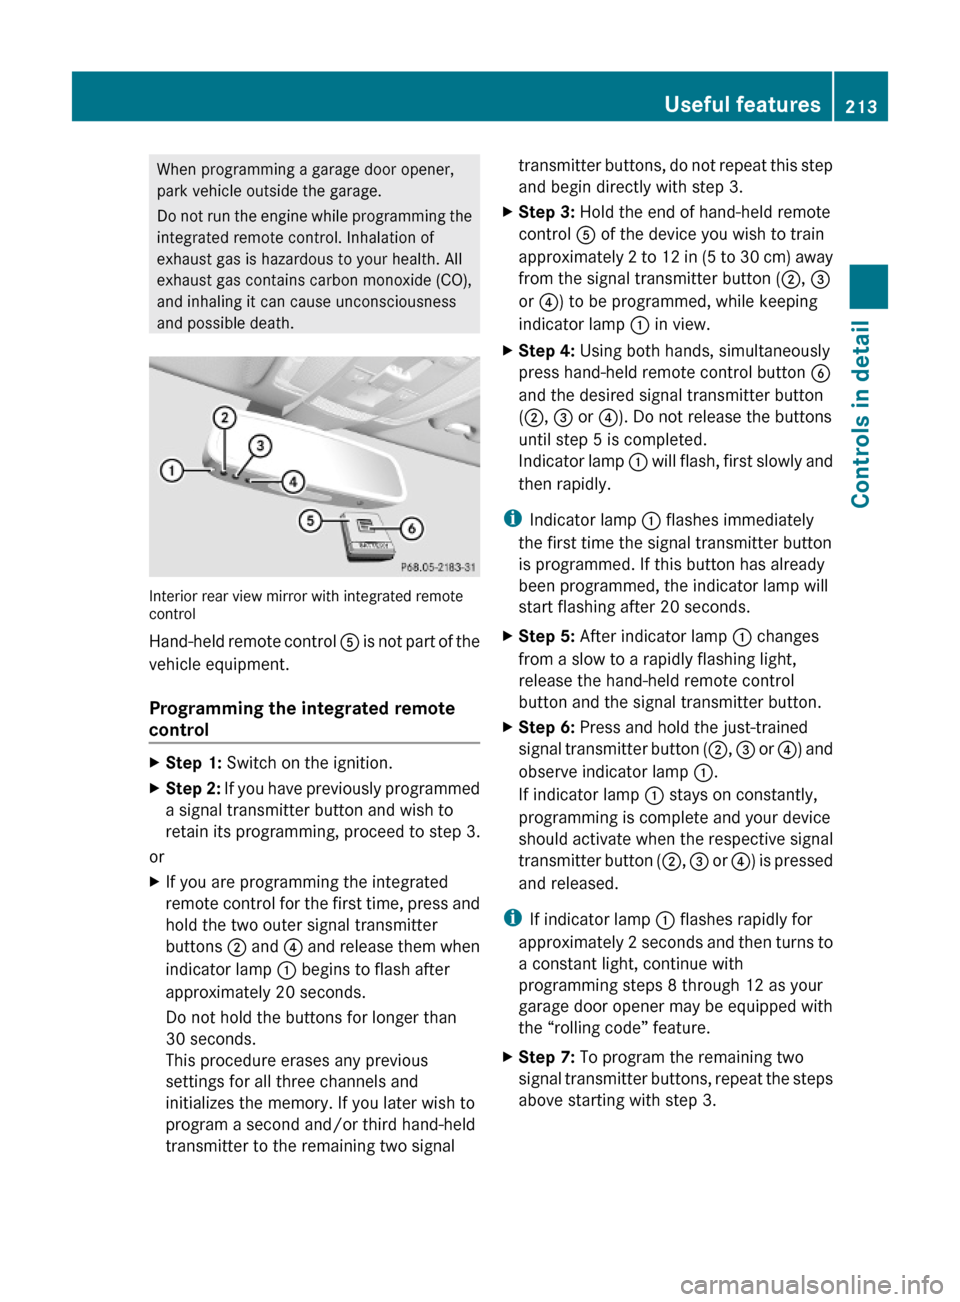
Interior rear view mirror with integrated remotecontrol
Hand-held remote control A is not part of the
vehicle equipment.
Programming the integrated remote
control
XStep 1: Switch on the ignition.XStep 2: If you have previously programmed
a signal transmitter button and wish to
retain its programming, proceed to step 3.
or
XIf you are programming the integrated
remote control for the first time, press and
hold the two outer signal transmitter
buttons ; and ? and release them when
indicator lamp : begins to flash after
approximately 20 seconds.
Do not hold the buttons for longer than
30 seconds.
This procedure erases any previous
settings for all three channels and
initializes the memory. If you later wish to
program a second and/or third hand-held
transmitter to the remaining two signal
transmitter buttons, do not repeat this step
and begin directly with step 3.
XStep 3: Hold the end of hand-held remote
control A of the device you wish to train
approximately 2 to 12 in (5 to 30 cm) away
from the signal transmitter button (;, =
or ?) to be programmed, while keeping
indicator lamp : in view.
XStep 4: Using both hands, simultaneously
press hand-held remote control button B
and the desired signal transmitter button
(;, = or ?). Do not release the buttons
until step 5 is completed.
Indicator lamp : will flash, first slowly and
then rapidly.
iIndicator lamp : flashes immediately
the first time the signal transmitter button
is programmed. If this button has already
been programmed, the indicator lamp will
start flashing after 20 seconds.
XStep 5: After indicator lamp : changes
from a slow to a rapidly flashing light,
release the hand-held remote control
button and the signal transmitter button.
XStep 6: Press and hold the just-trained
signal transmitter button (;, = or ?) and
observe indicator lamp :.
If indicator lamp : stays on constantly,
programming is complete and your device
should activate when the respective signal
transmitter button (;, = or ?) is pressed
and released.
iIf indicator lamp : flashes rapidly for
approximately 2 seconds and then turns to
a constant light, continue with
programming steps 8 through 12 as your
garage door opener may be equipped with
the “rolling code” feature.
XStep 7: To program the remaining two
signal transmitter buttons, repeat the steps
above starting with step 3.
Useful features213Controls in detail212_AKB; 2; 41, en-USd2ureepe,Version: 2.11.8.12009-07-17T09:14:21+02:00 - Seite 213Z