Page 202 of 372

The two sections can be folded down
separately.
GWarning!
When expanding the cargo volume, always
fold the seat backrests fully forward.
Unless you are transporting cargo, the seat
backrests must remain properly locked in the
upright position.
In an accident, during hard braking or sudden
maneuvers, loose items will be thrown around
inside the vehicle. This can cause injury to
vehicle occupants unless the items are
securely fastened in the vehicle.
Always use the cargo tie-down rings.
Folding seat backrest forward
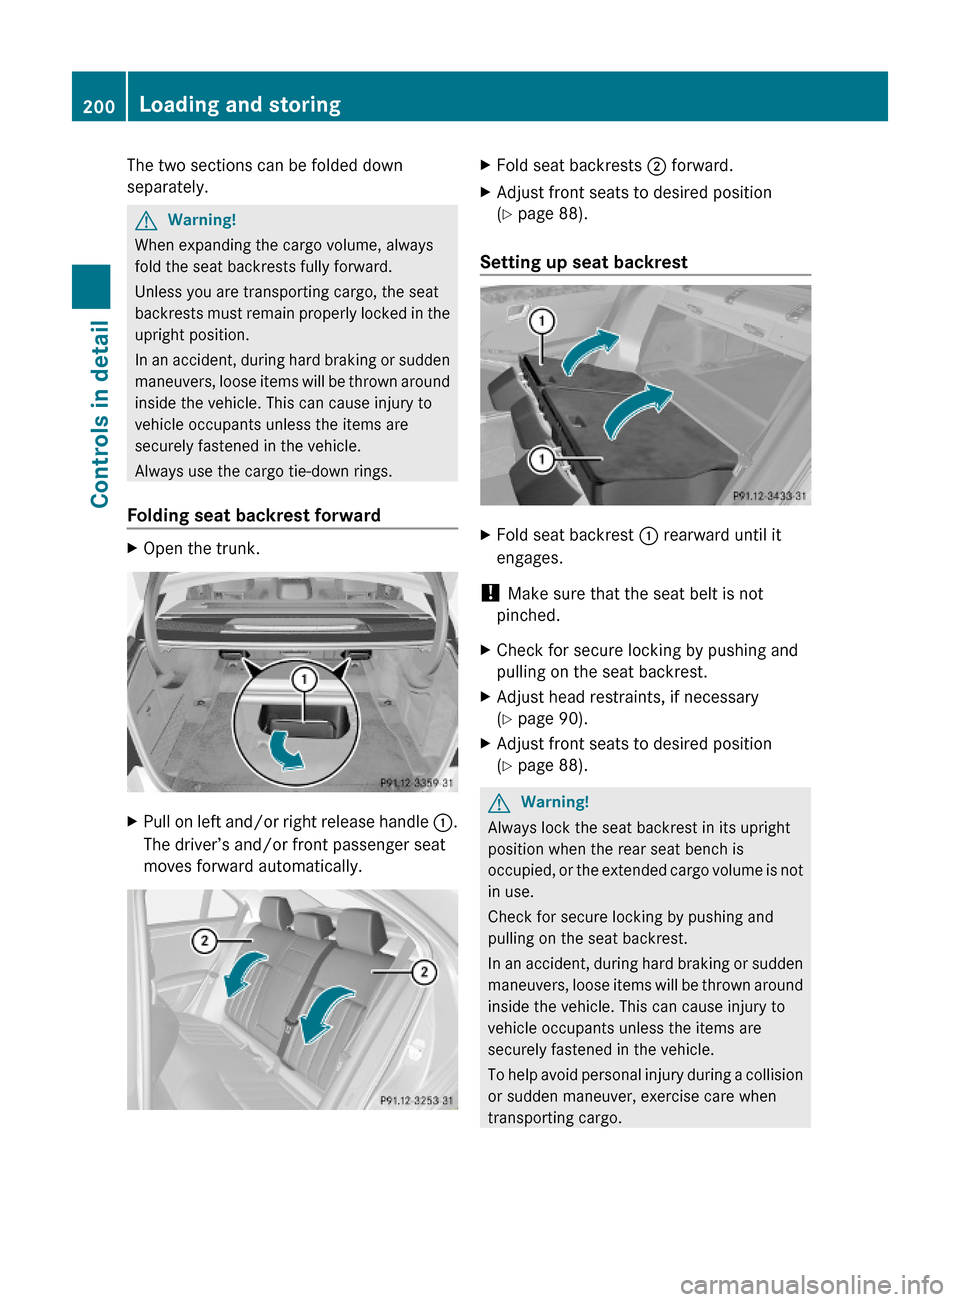
XOpen the trunk.XPull on left and/or right release handle :.
The driver’s and/or front passenger seat
moves forward automatically.
XFold seat backrests ; forward.XAdjust front seats to desired position
(Y page 88).
Setting up seat backrest
XFold seat backrest : rearward until it
engages.
! Make sure that the seat belt is not
pinched.
XCheck for secure locking by pushing and
pulling on the seat backrest.
XAdjust head restraints, if necessary
(Y page 90).
XAdjust front seats to desired position
(Y page 88).
GWarning!
Always lock the seat backrest in its upright
position when the rear seat bench is
occupied, or the extended cargo volume is not
in use.
Check for secure locking by pushing and
pulling on the seat backrest.
In an accident, during hard braking or sudden
maneuvers, loose items will be thrown around
inside the vehicle. This can cause injury to
vehicle occupants unless the items are
securely fastened in the vehicle.
To help avoid personal injury during a collision
or sudden maneuver, exercise care when
transporting cargo.
200Loading and storingControls in detail
212_AKB; 2; 41, en-USd2ureepe,Version: 2.11.8.12009-07-17T09:14:21+02:00 - Seite 200
Page 203 of 372

iTo prevent unauthorized persons from
access to the trunk, always lock the seat
backrests in its upright position.
Front storage compartments
GWarning!
To help avoid personal injury during a collision
or sudden maneuver, exercise care when
storing objects in the vehicle. Put luggage or
cargo in the trunk if possible.
Do not pile luggage or cargo higher than the
seat backrests.
Keep compartment lids closed. This will help
to prevent stored objects from being thrown
about and injuring vehicle occupants during
Rbraking
Rvehicle maneuvers
Ran accident
Glove box
Depending on vehicle equipment, an AUX
socket or a media interface is located in the
glove box. For information on Audio AUX
mode or on media interface, see separate
COMAND system operating instructions.
The glove box can be ventilated
(Y page 188).
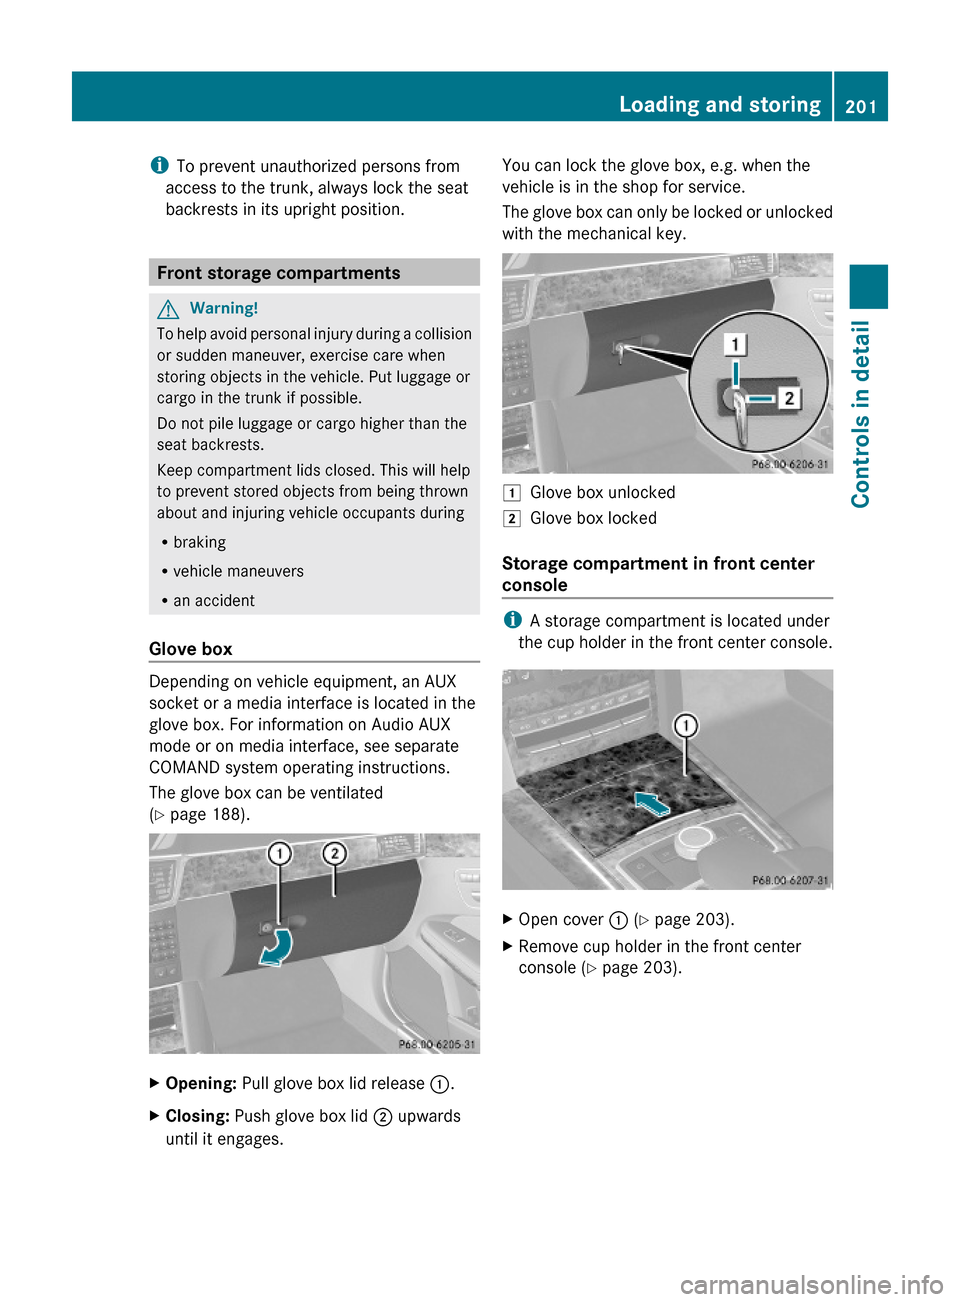
XOpening: Pull glove box lid release :.XClosing: Push glove box lid ; upwards
until it engages.
You can lock the glove box, e.g. when the
vehicle is in the shop for service.
The glove box can only be locked or unlocked
with the mechanical key.
1Glove box unlocked2Glove box locked
Storage compartment in front center
console
iA storage compartment is located under
the cup holder in the front center console.
XOpen cover : (Y page 203).XRemove cup holder in the front center
console (Y page 203).
Loading and storing201Controls in detail212_AKB; 2; 41, en-USd2ureepe,Version: 2.11.8.12009-07-17T09:14:21+02:00 - Seite 201Z
Page 318 of 372

the front passenger door and the rear
doors.
XExit the vehicle.XClose the driver’s door.XRemove mechanical key ; from the
SmartKey (Y page 315).
XInsert mechanical key ; into the driver’s
door lock.
XTurn mechanical key ; clockwise to
position 1.
The vehicle is locked.
XTurn mechanical key ; back and remove
it from the driver’s door lock.
XCheck whether the doors and the trunk are
locked.
XIf necessary, lock the trunk with the
mechanical key (Y page 85).
iThis procedure does not arm the anti-
theft alarm system, nor does it lock the fuel
filler flap.
Fuel filler flap
GWarning!
Avoid contact with the vehicle walls as they
may contain sharp edges. Otherwise, you
could injure yourself while releasing the fuel
filler flap.
In case the central locking system does not
release the fuel filler flap, you can open it
manually.
The fuel filler flap release is located on the
passenger side in the trunk behind the cover.
XOpen the trunk (Y page 81).XPush the parcel net down.XOpen the cover (Y page 268).XRemove fuel filler flap release ; from
holder :.
XPull fuel filler flap release ; in direction of
the arrow.
XOpen the fuel filler flap (Y page 220).XClose the cover.XClose the trunk.
Resetting activated NECK-PRO active
front head restraints
If the NECK-PRO active front head restraints
have been triggered in a rear-end collision,
they must be reset.
You can tell that the NECK-PRO active front
head restraints have been triggered when
they have been moved forward and cannot be
adjusted.
GWarning!
For safety reasons, have the NECK-PRO active
front head restraints checked at an
authorized Mercedes-Benz Center after a
rear-end collision.
316Resetting activated NECK-PRO active front head restraintsPractical hints
212_AKB; 2; 41, en-USd2ureepe,Version: 2.11.8.12009-07-17T09:14:21+02:00 - Seite 316
Page 337 of 372

For more information on AdBlue®, see
(Y page 364).
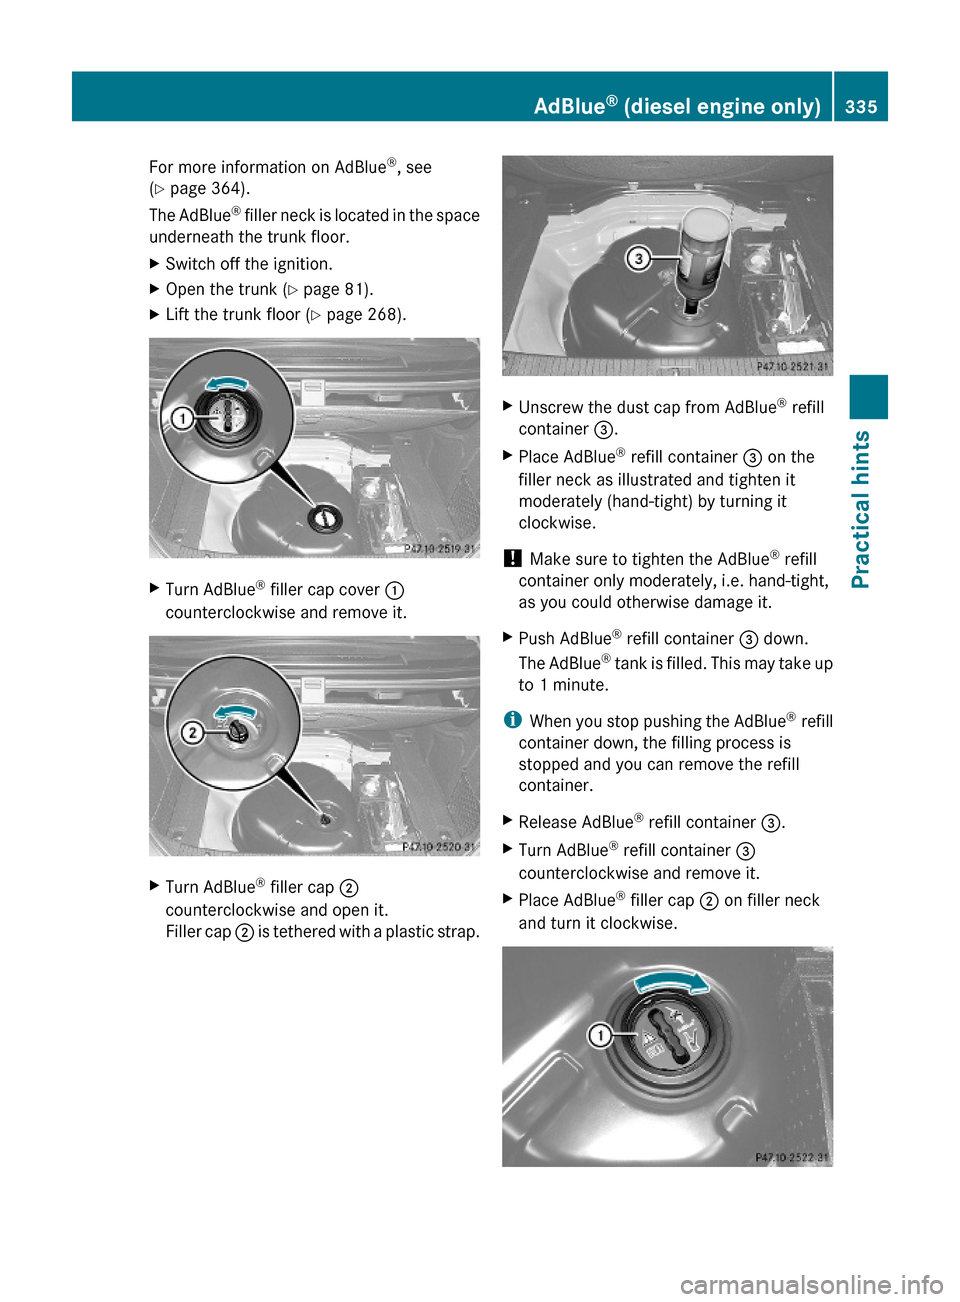
The AdBlue® filler neck is located in the space
underneath the trunk floor.
XSwitch off the ignition.XOpen the trunk (Y page 81).XLift the trunk floor (Y page 268).XTurn AdBlue® filler cap cover :
counterclockwise and remove it.
XTurn AdBlue® filler cap ;
counterclockwise and open it.
Filler cap ; is tethered with a plastic strap.
XUnscrew the dust cap from AdBlue® refill
container =.
XPlace AdBlue® refill container = on the
filler neck as illustrated and tighten it
moderately (hand-tight) by turning it
clockwise.
! Make sure to tighten the AdBlue® refill
container only moderately, i.e. hand-tight,
as you could otherwise damage it.
XPush AdBlue® refill container = down.
The AdBlue® tank is filled. This may take up
to 1 minute.
iWhen you stop pushing the AdBlue® refill
container down, the filling process is
stopped and you can remove the refill
container.
XRelease AdBlue® refill container =.XTurn AdBlue® refill container =
counterclockwise and remove it.
XPlace AdBlue® filler cap ; on filler neck
and turn it clockwise.
AdBlue® (diesel engine only)335Practical hints212_AKB; 2; 41, en-USd2ureepe,Version: 2.11.8.12009-07-17T09:14:21+02:00 - Seite 335Z