2010 MERCEDES-BENZ E350 side marker
[x] Cancel search: side markerPage 15 of 372

Brake pads ..................................... 287
Child seat ...................................... 279
Coolant .......................................... 295
Corner-illuminating lamps ..............303
Cruise control ................................ 279
DISTRONIC PLUS ........................... 280
Doors ............................................. 293
EBP ................................................ 289
Engine oil ....................................... 298
ESC ............................... 288, 289, 290
Fog lamps .............................. 300, 302
Front passenger front air bag ........276
Gas cap .......................................... 298
High-beam lamps ........................... 301
Hood .............................................. 293
Lane Keeping Assist ......................283
License plate lamps .......................301
Light sensor ................................... 302
Low-beam lamps ............................ 302
Parking brake ................................ 289
Parking lamps ................................ 301
Power steering ............................... 295
PRE-SAFE ®
.................................... 274
Radar sensors ................................ 282
Reserve fuel ................................... 298
Reverse lamp ................................. 300
Side marker lamps .........................300
SmartKey ....................................... 293
SRS ................................................ 290
Tele Aid .......................................... 290
Tire inflation pressure ............284, 304
Tire pressure monitor ....................285
Tires ...................................... 284, 304
Trunk ............................................. 293
Turn signals ................................... 303
Washer fluid ................................... 294
Multifunction steering wheel
Adjustment ...................................... 93
Buttons .......................................... 126
Cleaning ......................................... 265
Easy-entry/exit feature ...........93, 145
Gearshift control ............................ 122
Heating ............................................ 94
Memory function .............................. 96
Overview .......................................... 30N
Navigation system see Separate operating instructions
Navi menu .......................................... 134
NECK-PRO active front head
restraints ............................................. 54
Resetting ....................................... 316
Nets, parcel ....................................... 199
Night View Assist Plus ...................... 172
Cleaning the windshield in front of
the camera .................................... 263
Normal occupant weight .................. 251
Number, vehicle identification
(VIN) ................................................... 346
O
Occupant Classification System see OCS (Occupant Classification
System)
Occupant distribution ....................... 251
Occupant safety
Air bags ........................................... 37
BabySmart™ .................................... 46
Children and air bags .......................37
Children in the vehicle .....................56
Child seat anchors – LATCH-type
(ISOFIX) ........................................... 59
Fastening the seat belts ................... 50
Front passenger front air bag off
indicator lamp (Canada
only) ........................................ 46, 313
Front passenger front air bag off
indicator lamp (USA only) ........43, 314
Infant and child restraint systems .... 56
Introduction ..................................... 36
ISOFIX (Child seat anchors –
LATCH-type) ..................................... 59
OCS (Occupant Classification
System) ........................................... 43
PRE-SAFE ®
....................................... 53
Seat belts .................................. 39, 48
OCS (Occupant Classification
System) ................................................ 43
Self-test ........................................... 46
Odometer ........................................... 129
Index13212_AKB; 2; 41, en-USd2ureepe,Version: 2.11.8.12009-07-17T09:14:21+02:00 - Seite 13
Page 18 of 372

Safety notes ..................................... 48
Telltale ............................... 29, 52, 307
Seat heating ......................................... 92
Seating capacity ................................ 238
Seats ..................................................... 87
Adjustment ...................................... 87
Drive-dynamic multicontour seat .....91
Easy-entry/exit feature ....................93
Heating ............................................ 92
Memory function .............................. 96
Messages in the multifunction
display ........................................... 293
Split rear seat bench .....................199
Ventilation ....................................... 92
Securing cargo
Cargo tie-down rings ...................... 199
Selective setting
see Key, SmartKey
Selector lever
see Gear selector lever
Self-test
BabySmart™ .................................... 47
OCS (Occupant Classification
System) ........................................... 46
Tele Aid .......................................... 208
Service
see Maintenance
Service, parts .................................... 346
Service and warranty information ..... 20
Service intervals see Maintenance System, Service
indicator message
Service life (tires) .............................. 242
Service menu ..................................... 138
Settings
Factory setting (KEYLESS-GO) .........79
Factory setting (SmartKey) ..............77
Memory function .............................. 96
Menu ............................................. 139
Selective setting (KEYLESS-GO) .......79
Selective setting (SmartKey) ............77
Shelf below rear window, cleaning .. 266
Side impact air bags ........................... 41
Side marker lamps
Cleaning lenses ............................. 262
Messages in the multifunction
display ........................................... 300Sidewall (tires) .................................. 251
SmartKey see Key, SmartKey
SmartKey with KEYLESS-GO
see Key, SmartKey
Snow chains ...................................... 252
Snow tires see Winter tires
Spare wheel ....................................... 353
Mounting ....................................... 323
Storage location ............................ 271
Speedometer ....................................... 28
Speed settings
Cruise control ................................ 147
DISTRONIC PLUS ........................... 155
Resume function ...................148, 156
SRS
Indicator lamp .................................. 29
SRS (Supplemental Restraint System)
Indicator lamp ......................... 36, 308
Messages in the multifunction
display ........................................... 290
Standing water, driving through ...... 257
Starter switch positions
KEYLESS-GO .................................... 86
SmartKey ......................................... 85
Starting difficulties (engine) ............ 110
Starting the engine ........................... 109
Steering column see Multifunction steering wheel,
Adjustment
Steering wheel
see Multifunction steering wheel
Steering wheel gearshift control ..... 122
Stolen Vehicle Recovery Services ... 212
Storage compartments ..................... 201
Storing tires ....................................... 243
Sunroof see Power tilt/sliding sunroof
Sunshade
Rear window .................................. 205
Sun visors .................................. 204, 205
Suspension tuning see AIRMATIC 16Index212_AKB; 2; 41, en-USd2ureepe,Version: 2.11.8.12009-07-17T09:14:21+02:00 - Seite 16
Page 99 of 372
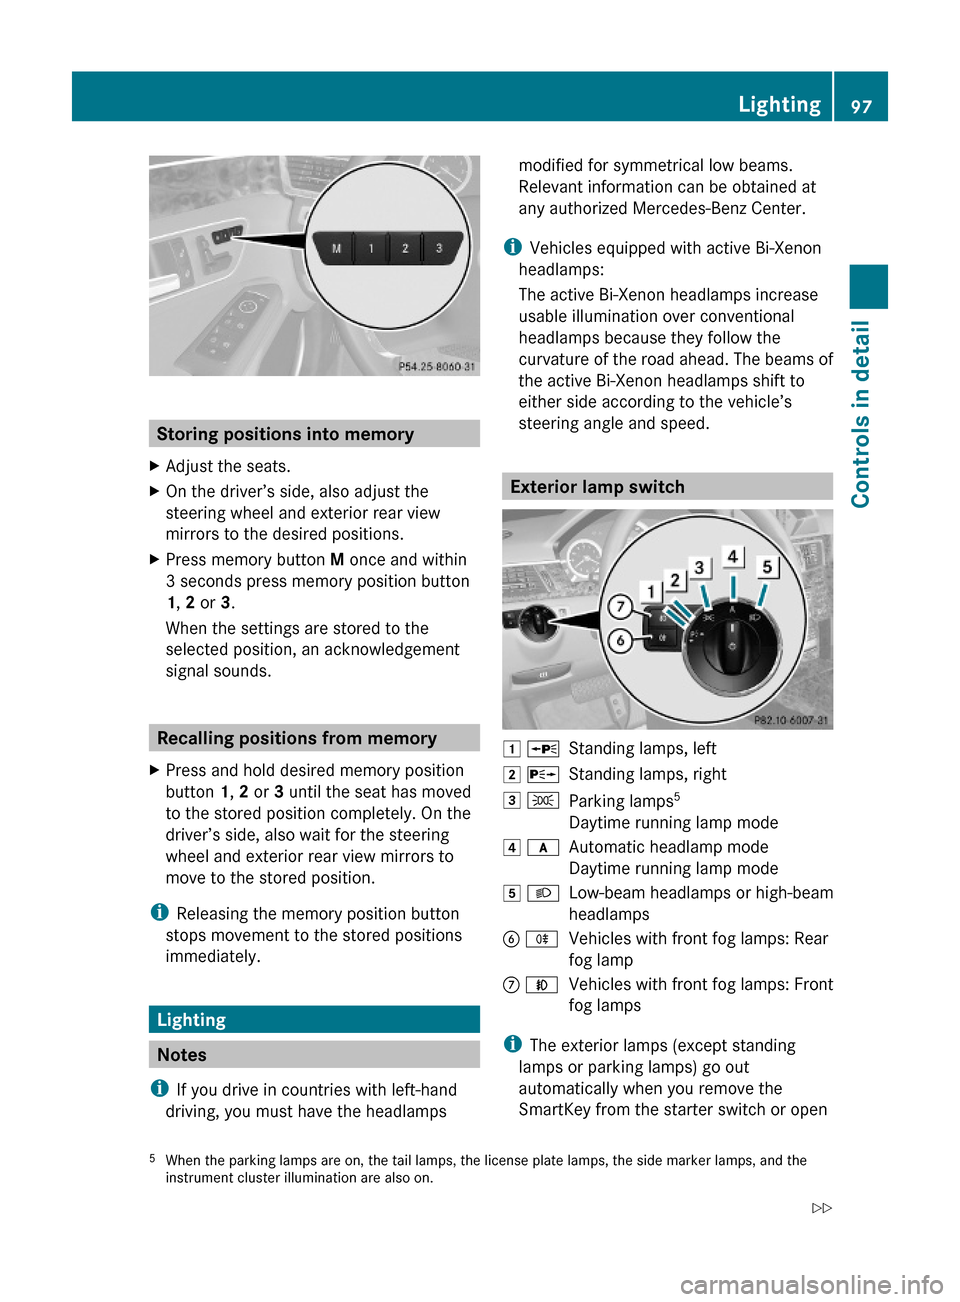
Storing positions into memory
XAdjust the seats.XOn the driver’s side, also adjust the
steering wheel and exterior rear view
mirrors to the desired positions.
XPress memory button M once and within
3 seconds press memory position button
1, 2 or 3.
When the settings are stored to the
selected position, an acknowledgement
signal sounds.
Recalling positions from memory
XPress and hold desired memory position
button 1, 2 or 3 until the seat has moved
to the stored position completely. On the
driver’s side, also wait for the steering
wheel and exterior rear view mirrors to
move to the stored position.
iReleasing the memory position button
stops movement to the stored positions
immediately.
Lighting
Notes
iIf you drive in countries with left-hand
driving, you must have the headlamps
modified for symmetrical low beams.
Relevant information can be obtained at
any authorized Mercedes-Benz Center.
iVehicles equipped with active Bi-Xenon
headlamps:
The active Bi-Xenon headlamps increase
usable illumination over conventional
headlamps because they follow the
curvature of the road ahead. The beams of
the active Bi-Xenon headlamps shift to
either side according to the vehicle’s
steering angle and speed.
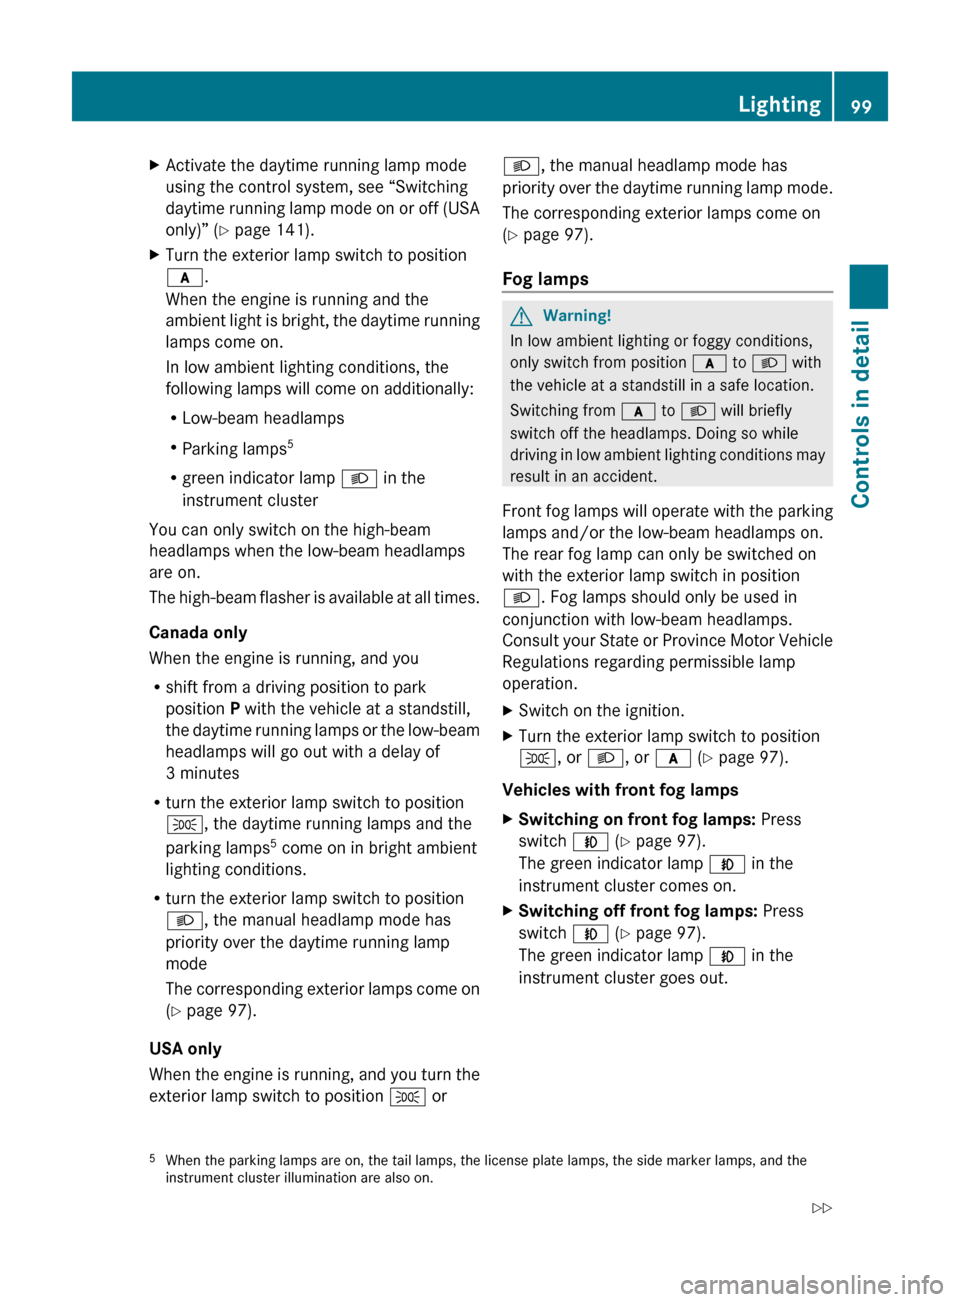
Exterior lamp switch
1 WStanding lamps, left2 XStanding lamps, right3 TParking lamps5
Daytime running lamp mode
4 cAutomatic headlamp mode
Daytime running lamp mode
5 LLow-beam headlamps or high-beam
headlamps
B RVehicles with front fog lamps: Rear
fog lamp
C NVehicles with front fog lamps: Front
fog lamps
iThe exterior lamps (except standing
lamps or parking lamps) go out
automatically when you remove the
SmartKey from the starter switch or open
5When the parking lamps are on, the tail lamps, the license plate lamps, the side marker lamps, and theinstrument cluster illumination are also on.
Lighting97Controls in detail212_AKB; 2; 41, en-USd2ureepe,Version: 2.11.8.12009-07-17T09:14:21+02:00 - Seite 97Z
Page 100 of 372

the driver’s door with the ignition switched
off.
When the parking lamps or the rear fog
lamp are switched on and you remove the
SmartKey from the starter switch and open
the driver’s door, an acoustic signal
sounds.
In addition the message Switch Off
Lights appears in the multifunction
display.
Switch off the parking lamps or the rear fog
lamp manually.
! Failure to switch off the parking lamps
when leaving the vehicle may result in a
discharged battery.
i Vehicles without front fog lamps: For
better detection of the vehicle, the LED
daytime running lamps are dimmed to
parking lamp level when the low-beam
headlamps are switched on.
Low-beam headlamps
The low-beam headlamps can be switched on
and off with the exterior lamp switch.
XSwitch on the ignition.XSwitching on: Turn the exterior lamp
switch to position L.
The following lamps come on:
R Low-beam headlamps
R Parking lamps 5
R Green indicator lamp L in the
instrument cluster
Automatic headlamp mode
GWarning!
If the exterior lamp switch is set to c, the
headlamps will not automatically come on
under foggy conditions.
To minimize risk to you and to others, activate
headlamps by turning exterior lamp switch to
L when driving or when traffic and/or
ambient lighting conditions require you to do
so.
In low ambient lighting conditions, only switch
from position c to L with the vehicle
at a standstill in a safe location. Switching
from c to L will briefly switch off the
headlamps. Doing so while driving in low
ambient lighting conditions may result in an
accident.
The automatic headlamp feature is only an aid
to the driver. The driver is responsible for the
operation of the vehicle’s lights at all times.XSwitching on: Turn the exterior lamp
switch to position c.
When ambient light is low: When the
SmartKey is in starter switch position 1 or
when the KEYLESS-GO start/stop button has
been pressed once, the parking lamps 5
come
on automatically.
When the engine is running, the low-beam
headlamps come on additionally.
When ambient light is bright: When the
SmartKey is in starter switch position 1 or
when the KEYLESS-GO start/stop button has
been pressed once, all lamps are off.
When the engine is running, the daytime
running lamps 6
come on automatically.
When the low-beam headlamps are switched
on, the green indicator lamp L in the
instrument cluster comes on.
Once the low-beam headlamps are on, the
high-beam headlamps are also available.
Daytime running lamp mode
In Canada, the daytime running lamp mode is
mandatory and therefore in a constant mode.
In the USA, the daytime running lamp mode
is deactivated by default.
5 When the parking lamps are on, the tail lamps, the license plate lamps, the side marker lamps, and the
instrument cluster illumination are also on.
6 USA only: The daytime running lamp mode must be activated via the control system.98LightingControls in detail
212_AKB; 2; 41, en-USd2ureepe,Version: 2.11.8.12009-07-17T09:14:21+02:00 - Seite 98
Page 101 of 372
XActivate the daytime running lamp mode
using the control system, see “Switching
daytime running lamp mode on or off (USA
only)” ( Y page 141).XTurn the exterior lamp switch to position
c .
When the engine is running and the
ambient light is bright, the daytime running
lamps come on.
In low ambient lighting conditions, the
following lamps will come on additionally:
R Low-beam headlamps
R Parking lamps 5
R green indicator lamp L in the
instrument cluster
You can only switch on the high-beam
headlamps when the low-beam headlamps
are on.
The high-beam flasher is available at all times.
Canada only
When the engine is running, and you
R shift from a driving position to park
position P with the vehicle at a standstill,
the daytime running lamps or the low-beam
headlamps will go out with a delay of
3 minutes
R turn the exterior lamp switch to position
T , the daytime running lamps and the
parking lamps 5
come on in bright ambient
lighting conditions.
R turn the exterior lamp switch to position
L , the manual headlamp mode has
priority over the daytime running lamp
mode
The corresponding exterior lamps come on
( Y page 97).
USA only
When the engine is running, and you turn the
exterior lamp switch to position T or
L, the manual headlamp mode has
priority over the daytime running lamp mode.
The corresponding exterior lamps come on
( Y page 97).
Fog lamps GWarning!
In low ambient lighting or foggy conditions,
only switch from position c to L with
the vehicle at a standstill in a safe location.
Switching from c to L will briefly
switch off the headlamps. Doing so while
driving in low ambient lighting conditions may
result in an accident.
Front fog lamps will operate with the parking
lamps and/or the low-beam headlamps on.
The rear fog lamp can only be switched on
with the exterior lamp switch in position
L . Fog lamps should only be used in
conjunction with low-beam headlamps.
Consult your State or Province Motor Vehicle
Regulations regarding permissible lamp
operation.
XSwitch on the ignition.XTurn the exterior lamp switch to position
T , or L , or c (Y page 97).
Vehicles with front fog lamps
XSwitching on front fog lamps: Press
switch N (Y page 97).
The green indicator lamp N in the
instrument cluster comes on.XSwitching off front fog lamps: Press
switch N (Y page 97).
The green indicator lamp N in the
instrument cluster goes out.5 When the parking lamps are on, the tail lamps, the license plate lamps, the side marker lamps, and the
instrument cluster illumination are also on.Lighting99Controls in detail212_AKB; 2; 41, en-USd2ureepe,Version: 2.11.8.12009-07-17T09:14:21+02:00 - Seite 99Z
Page 142 of 372

XPress button : or 9 to select the
Factory Setting function.
XPress button a.
The function Reset All Settings?
appears in the multifunction display.
XPress button : or 9 to select Yes or
No. Select Yes if you want to reset to
factory settings.
XPress button a to confirm.
The confirmation message appears in the
multifunction display.
Submenus in the Settings menu
XPress button = or ; to select the
Sett. menu.
XPress button : or 9 to select a
submenu.
Scroll down with button :, scroll up with
button 9.
With the selection marker on the desired
submenu, use the button a to access the
individual functions within that submenu.
Once within the submenu, you can use button
9 to move to the next function or
button : to move to the previous function
within that submenu.
The following lists show what settings can be
changed within the various menus. Detailed
instructions on making individual settings can
be found on the following pages.
Instrument cluster submenu
RSelecting speedometer display mode
(Y page 141)
RPermanent display (speed display or
outside temperature) (Y page 141)
Lights submenu
RSwitching daytime running lamp mode on
or off (USA only) (Y page 141)
RSwitching Adaptive Highbeam Assist on or
off (Y page 142)
RSwitching locator lighting on or off
(Y page 142)
RSetting ambient lighting (Y page 143)
RSwitching interior lighting delayed shut-off
on or off (Y page 143)
Vehicle submenu
RSwitching automatic central locking on or
off (Y page 144)
RSwitching the radar sensors on or off
(Y page 144)
Convenience submenu
RActivating easy-entry/exit feature
(Y page 145)
RActivating/deactivating seat belt
adjustment function (Y page 145)
Instrument cluster submenu
Access the Instr. Cluster submenu via
the Sett. menu. Use the Instr. Cluster
submenu to change the instrument cluster
display settings.
The following functions are available:
RSelecting speedometer display mode
(Y page 141)
RPermanent display (speed display or
outside temperature) (Y page 141)
140Control systemControls in detail
212_AKB; 2; 41, en-USd2ureepe,Version: 2.11.8.12009-07-17T09:14:21+02:00 - Seite 140
Page 144 of 372

XPress button a to change the current
status.
Depending on the previous status, the
Daytime Running Lamps: mode will be
Enabled or Disabled.
With Daytime Running Lamps mode
enabled and the exterior lamp switch at
position $ or c, the daytime running
lamps are switched on when the engine is
running.
In low ambient light conditions the following
lamps will come on additionally:
RLow-beam headlamps
RParking lamps
RTail lamps
RLicense plate lamps
RSide marker lamps
For more information on the daytime running
lamp mode, see (Y page 98).
iMake sure the exterior lamp switch is set
to M or c when you switch off the
daytime running lamps while driving at
night.
For safety reasons, resetting all the functions
of all submenus to the factory settings while
driving (Y page 139) will not deactivate the
daytime running lamp mode.
The following message appears in the
multifunction display:
Cannot Be Completely Reset to
Factory Settings while Driving..
Switching Adaptive Highbeam Assist on
or off
XPress button = or ; to select the
Sett. menu.
XPress button : or 9 to select the
Lights submenu.
XPress button a.XPress button : or 9 to select the
Adaptive Highbeam Assist: function.
The current setting Enabled or Disabled
is shown.
XPress button a to change the current
status.
Depending on the previous status, the
Adaptive Highbeam Assist: function
will be Enabled or Disabled.
For more information on the Adaptive
Highbeam Assist, see (Y page 100).
Switching locator lighting on or off
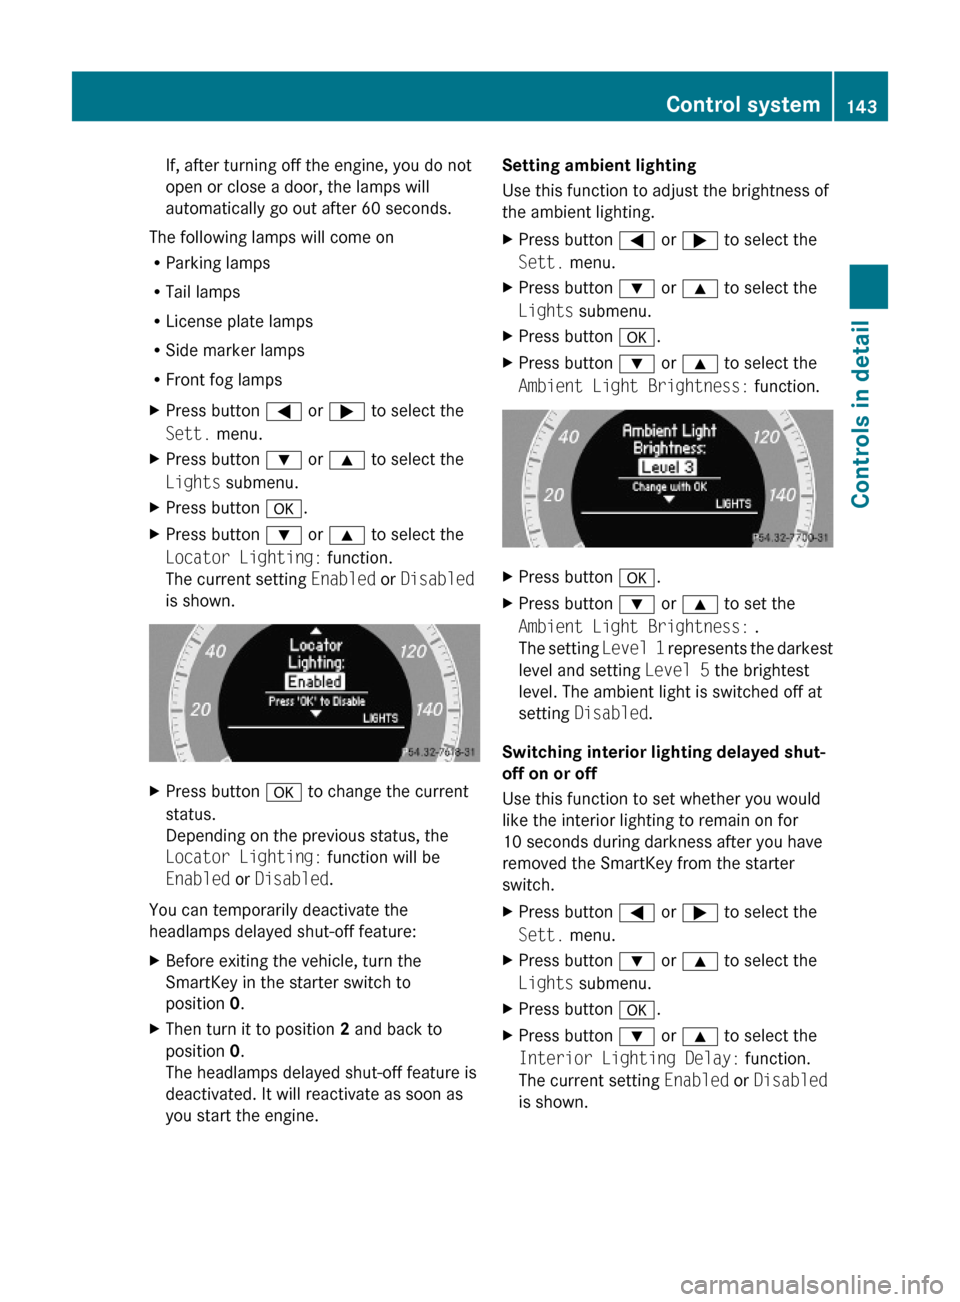
With the Locator Lighting: function
activated and the exterior lamp switch in
position c
Rthe exterior lamps will come on during
darkness when the vehicle is unlocked with
the SmartKey.
The lamps will go out when the driver’s door
is opened.
If you do not open the driver’s door after
unlocking the vehicle with the SmartKey,
the lamps will go out automatically after
approximately 40 seconds.
Rthe exterior lamps will remain on for
15 seconds during darkness after exiting
the vehicle and closing all doors.
142Control systemControls in detail
212_AKB; 2; 41, en-USd2ureepe,Version: 2.11.8.12009-07-17T09:14:21+02:00 - Seite 142
Page 145 of 372
If, after turning off the engine, you do not
open or close a door, the lamps will
automatically go out after 60 seconds.
The following lamps will come on
RParking lamps
RTail lamps
RLicense plate lamps
RSide marker lamps
RFront fog lamps
XPress button = or ; to select the
Sett. menu.
XPress button : or 9 to select the
Lights submenu.
XPress button a.XPress button : or 9 to select the
Locator Lighting: function.
The current setting Enabled or Disabled
is shown.
XPress button a to change the current
status.
Depending on the previous status, the
Locator Lighting: function will be
Enabled or Disabled.
You can temporarily deactivate the
headlamps delayed shut-off feature:
XBefore exiting the vehicle, turn the
SmartKey in the starter switch to
position 0.
XThen turn it to position 2 and back to
position 0.
The headlamps delayed shut-off feature is
deactivated. It will reactivate as soon as
you start the engine.
Setting ambient lighting
Use this function to adjust the brightness of
the ambient lighting.
XPress button = or ; to select the
Sett. menu.
XPress button : or 9 to select the
Lights submenu.
XPress button a.XPress button : or 9 to select the
Ambient Light Brightness: function.
XPress button a.XPress button : or 9 to set the
Ambient Light Brightness: .
The setting Level 1 represents the darkest
level and setting Level 5 the brightest
level. The ambient light is switched off at
setting Disabled.
Switching interior lighting delayed shut-
off on or off
Use this function to set whether you would
like the interior lighting to remain on for
10 seconds during darkness after you have
removed the SmartKey from the starter
switch.
XPress button = or ; to select the
Sett. menu.
XPress button : or 9 to select the
Lights submenu.
XPress button a.XPress button : or 9 to select the
Interior Lighting Delay: function.
The current setting Enabled or Disabled
is shown.
Control system143Controls in detail212_AKB; 2; 41, en-USd2ureepe,Version: 2.11.8.12009-07-17T09:14:21+02:00 - Seite 143Z