2010 MERCEDES-BENZ E350 wiper fluid
[x] Cancel search: wiper fluidPage 21 of 372

V
Valet locking ........................................ 85
Vehicle
Battery ........................................... 336
Care ............................................... 260
Control system .............................. 126
Identification Number (VIN) ...........346
Locking/unlocking ........................... 76
Lowering (wheel change) ...............328
Modifications and alterations,
Operating safety .............................. 22
Towing ........................................... 340
Unlocking/locking manually ..........314
Vehicle dimensions
see Vehicle specification
Vehicle Identification Number
(VIN) ................................................... 346
Vehicle jack see Jack
Vehicle level control
see AIRMATIC
Vehicle lighting .................................... 97
Vehicle loading
Cargo tie-down rings ...................... 199
Instructions .................................... 197
Load limit ....................................... 238
Roof rack ....................................... 198
Split rear seat bench .....................199
Terminology ................................... 249
Vehicle maximum load on the tire ... 252
Vehicle specification
E 350 ............................................. 348
E 350 4MATIC ................................ 349
E 350 BlueTEC ............................... 348
E 550 ............................................. 350
E 550 4MATIC ................................ 351
E 63 AMG ...................................... 352
Vehicle status message memory .... 139
Vehicle tool kit .................................. 268
Vehicle washing see Vehicle care
Vehicle weights
see Vehicle specification W
Warning sounds
DISTRONIC PLUS ........................... 151
Driver’s or passenger’s seat belt .....52
Parking brake ................................ 289
Parking Guidance ........................... 170
Parktronic system ..........................168
Seat belt telltale ............................ 307
Warranty coverage ............................ 346
Washer and headlamp cleaning
system ................................................ 367
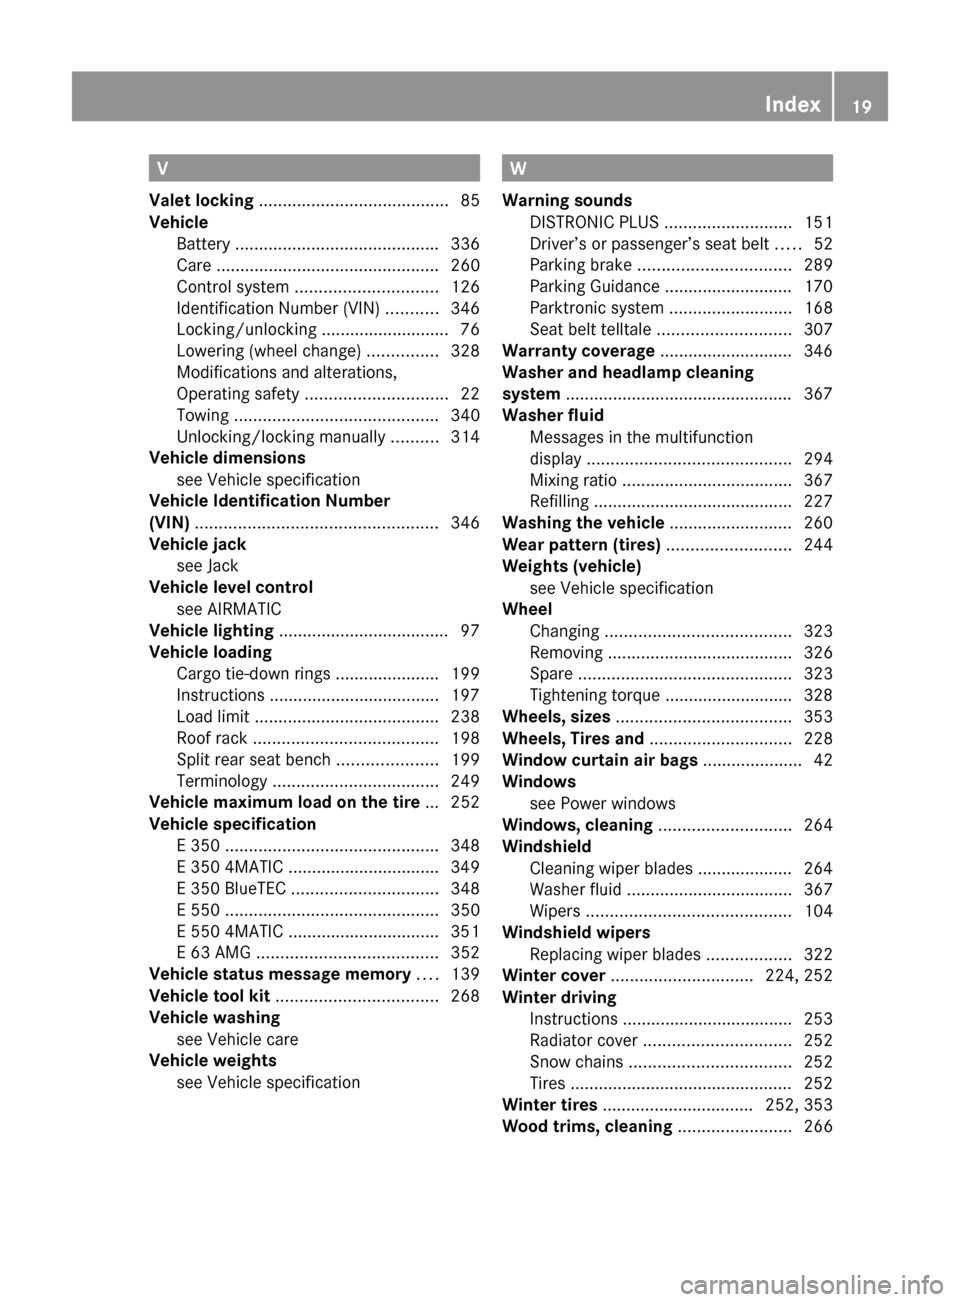
Washer fluid
Messages in the multifunction
display ........................................... 294
Mixing ratio .................................... 367
Refilling .......................................... 227
Washing the vehicle .......................... 260
Wear pattern (tires) .......................... 244
Weights (vehicle) see Vehicle specification
Wheel
Changing ....................................... 323
Removing ....................................... 326
Spare ............................................. 323
Tightening torque ........................... 328
Wheels, sizes ..................................... 353
Wheels, Tires and .............................. 228
Window curtain air bags ..................... 42
Windows see Power windows
Windows, cleaning ............................ 264
Windshield
Cleaning wiper blades .................... 264
Washer fluid ................................... 367
Wipers ........................................... 104
Windshield wipers
Replacing wiper blades ..................322
Winter cover .............................. 224, 252
Winter driving
Instructions .................................... 253
Radiator cover ............................... 252
Snow chains .................................. 252
Tires ............................................... 252
Winter tires ................................ 252, 353
Wood trims, cleaning ........................ 266Index19212_AKB; 2; 41, en-USd2ureepe,Version: 2.11.8.12009-07-17T09:14:21+02:00 - Seite 19
Page 28 of 372

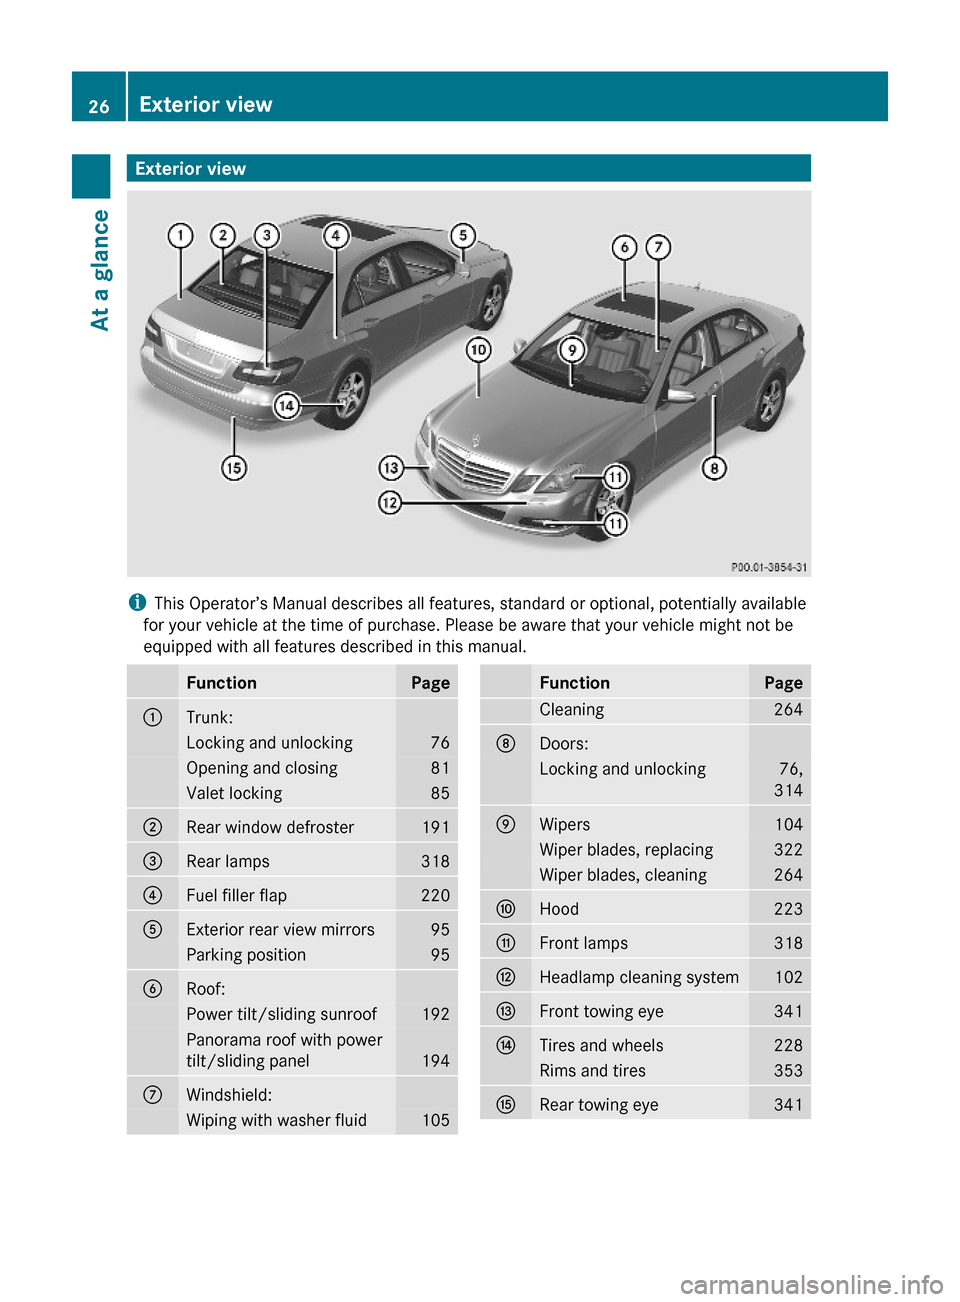
Exterior view
iThis Operator’s Manual describes all features, standard or optional, potentially available
for your vehicle at the time of purchase. Please be aware that your vehicle might not be
equipped with all features described in this manual.
FunctionPage:Trunk:Locking and unlocking76Opening and closing81Valet locking85;Rear window defroster191=Rear lamps318?Fuel filler flap220AExterior rear view mirrors95Parking position95BRoof:Power tilt/sliding sunroof192Panorama roof with power
tilt/sliding panel194
CWindshield:Wiping with washer fluid105FunctionPageCleaning264DDoors:Locking and unlocking76,
314
EWipers104Wiper blades, replacing322Wiper blades, cleaning264FHood223GFront lamps318HHeadlamp cleaning system102IFront towing eye341JTires and wheels228Rims and tires353KRear towing eye34126Exterior viewAt a glance
212_AKB; 2; 41, en-USd2ureepe,Version: 2.11.8.12009-07-17T09:14:21+02:00 - Seite 26
Page 104 of 372

XSwitching on: Press hazard warning
flasher switch :.
All turn signal lamps are flashing.
iWith the hazard warning flasher activated
and the combination switch set for either
left or right turn, only the respective left or
right turn signals will operate when the
ignition is switched on.
XSwitching off: Press hazard warning
flasher switch : again.
iIf the hazard warning flasher has been
activated automatically, press hazard
warning flasher switch : to switch it off.
Headlamp cleaning system
The headlamps will be cleaned with a high-
pressure water jet automatically when the
engine is running and you have
Rswitched on the headlamps
and
Rthe windshield wipers have wiped the
windshield with washer fluid for the first
time
The headlamps are cleaned every tenth time
the windshield is washed with washer fluid.
The counter resets when you switch off the
ignition.
For information on filling up the washer
reservoir, see “Washer system and headlamp
cleaning system” (Y page 227).
Corner-illuminating lamps
The corner-illuminating lamps improve
illumination of the area in the direction into
which you are turning.
The corner-illuminating lamps will only
operate in low ambient lighting conditions.
If you are driving faster than 25 mph
(40 km/h) the corner-illuminating function is
not available.
Switching on
XMake sure the engine is running.XTurn the exterior lamp switch to position
L or c (Y page 97).
or
XActivate the daytime running lamp mode
(Y page 98).
XSwitch on the left or right turn signal,
depending on whether you are turning left
or right.
The respective corner-illuminating lamp
comes on. If you have switched on the turn
signal for one side but turn the steering
wheel in the other direction, the corner-
illuminating lamp comes on on the side of
the turn signal.
or
XTurn steering wheel in desired direction.
Driving forward: The corner-illuminating
lamp on the side of your steering direction
comes on.
Driving in reverse: The corner-illuminating
lamp opposite to your steering direction
comes on.
The corner-illuminating lamps will come on
automatically depending on the steering
angle, even if you did not switch on either turn
signal. If the corner-illuminating lamps came
on automatically, they will also go out
automatically depending on the steering
angle and vehicle speed.
The corner-illuminating lamps temporarily
come on on both sides of the vehicle if you
turn the steering wheel in one direction and
102LightingControls in detail
212_AKB; 2; 41, en-USd2ureepe,Version: 2.11.8.12009-07-17T09:14:21+02:00 - Seite 102
Page 106 of 372

Interior lighting in the rear
! An interior lamp switched on manually
does not go out automatically.
Leaving an interior lamp switched on for an
extended period of time with the engine
turned off could result in a discharged
battery.
:p Right rear reading lamp on/off;p Left rear reading lamp on/off
Wipers
Notes
! Do not operate the wipers when the
windshield is dry. Dust that accumulates on
a windshield might scratch the glass and/
or damage the wiper blades when wiping
occurs on a dry windshield. If it is necessary
to operate the wipers in dry weather
conditions, always operate the wipers with
washer fluid.
Windshield wipers
XObserve notes on page (Y page 104).Switching on/off
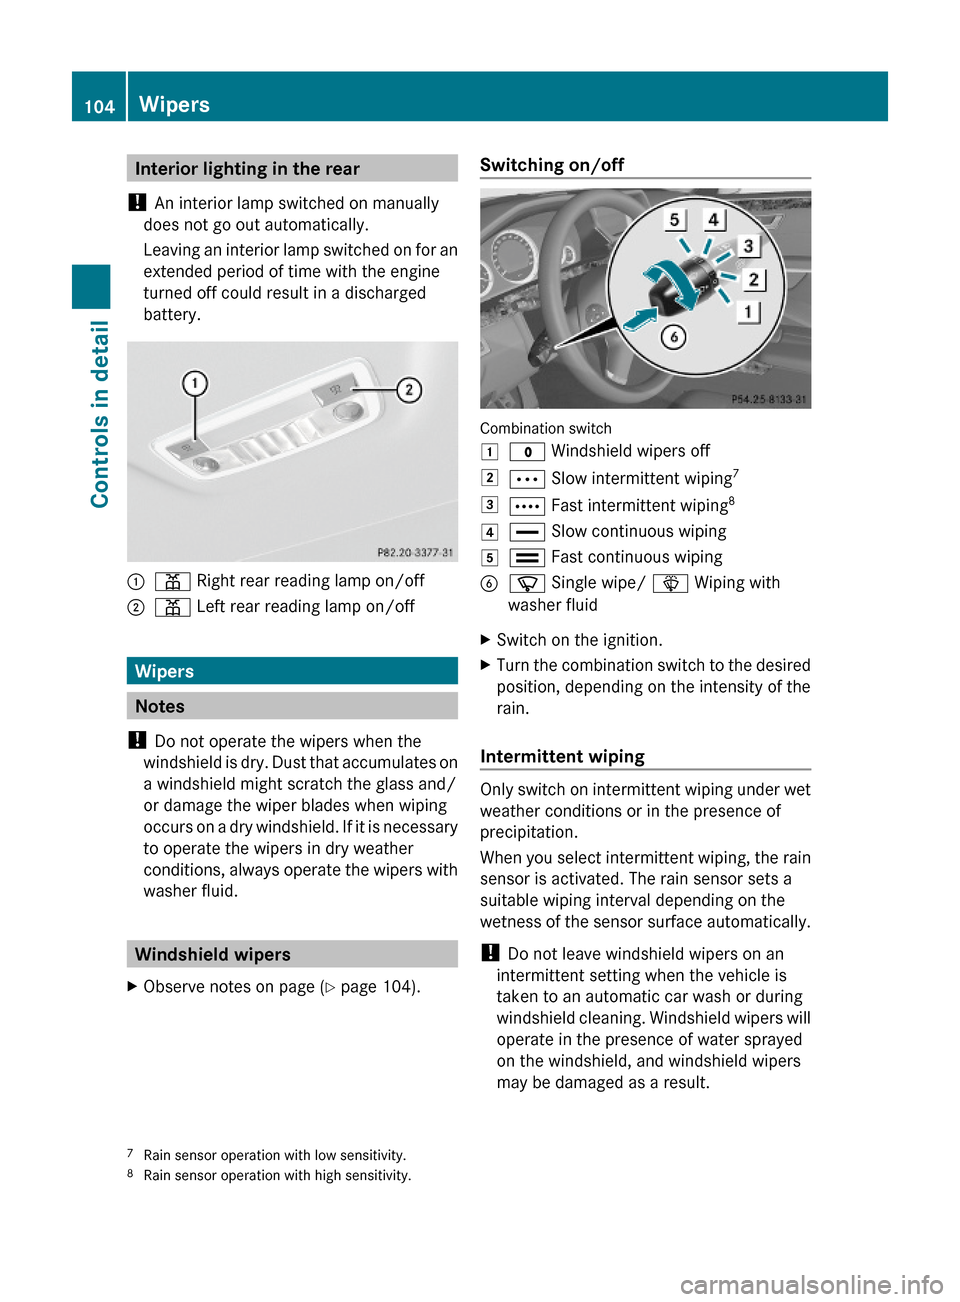
Combination switch
1$ Windshield wipers off2Ä Slow intermittent wiping73Å Fast intermittent wiping84° Slow continuous wiping5¯ Fast continuous wipingBí Single wipe/ î Wiping with
washer fluid
XSwitch on the ignition.XTurn the combination switch to the desired
position, depending on the intensity of the
rain.
Intermittent wiping
Only switch on intermittent wiping under wet
weather conditions or in the presence of
precipitation.
When you select intermittent wiping, the rain
sensor is activated. The rain sensor sets a
suitable wiping interval depending on the
wetness of the sensor surface automatically.
! Do not leave windshield wipers on an
intermittent setting when the vehicle is
taken to an automatic car wash or during
windshield cleaning. Windshield wipers will
operate in the presence of water sprayed
on the windshield, and windshield wipers
may be damaged as a result.
7Rain sensor operation with low sensitivity.8Rain sensor operation with high sensitivity.
104WipersControls in detail
212_AKB; 2; 41, en-USd2ureepe,Version: 2.11.8.12009-07-17T09:14:21+02:00 - Seite 104
Page 107 of 372

! If you have set intermittent wiping, dirt on
the surface of the rain sensor or optical
effects may cause the windshield wipers to
wipe in an undesired fashion. This could
then damage the windshield wiper blades
or scratch the windshield. You should
therefore switch off the windshield wipers
when weather conditions are dry.XTurn the combination switch to position
Ä or Å .
After the initial wipe, pauses between
wipes are controlled by the rain sensor
automatically.
Intermittent wiping is interrupted when the
vehicle is at a standstill and a front door is
opened. This protects persons getting into or
out of the vehicle from being sprayed.
Intermittent wiping will be continued when all
doors are closed and
R the automatic transmission is in drive
position D or reverse gear R
or
R the wiper setting is changed using the
combination switch
Single wipe
XPress the combination switch briefly in
direction of arrow B to the resistance
point.
The windshield wipers wipe one time
without washer fluid.
Wiping with washer fluid
XPress the combination switch in direction
of arrow B past the resistance point.
The windshield wipers operate with washer
fluid.
i To prevent smears on the windshield or
noisy/chattering wiper blades, wipe with
washer fluid every now and then even when
it is raining.
For information on filling up the washer
reservoir, see “Washer system and headlamp
cleaning system” ( Y page 227).
For information on cleaning the headlamps
with washer fluid, see “Headlamp cleaning
system” ( Y page 102).
Problems with wipers
! If anything blocks the windshield wipers
(leaves, snow, etc.), switch them off
immediately.
For safety reasons, do the following before
attempting to remove any blockage:
R Stop the vehicle in a safe location.
R Remove the SmartKey from the starter
switch.
or
R Turn off the engine by pressing the
KEYLESS-GO start/stop button and
open the driver’s door (with the driver’s
door open, starter switch is in position
0 , same as with SmartKey removed from
starter switch).
R Engage the parking brake.
R Remove blockage.
R Turn the windshield wipers on again.
If the windshield wipers fail to function at
all with the combination switch in position
Ä or Å ,
R set the combination switch to the next
higher wiper speed
R have the windshield wipers checked at
the nearest authorized Mercedes-Benz
Center
Power windows
Opening and closing
The door windows are opened and closed
electrically. The switches for all door windows
are located on the driver’s door control panel.
Power windows105Controls in detail212_AKB; 2; 41, en-USd2ureepe,Version: 2.11.8.12009-07-17T09:14:21+02:00 - Seite 105Z
Page 324 of 372

XTurn the bulb counterclockwise with light
pressure and pull it out of bulb socket :.
XInsert the new bulb into bulb socket : and
turn the bulb clockwise.
XInsert bulb socket : into the housing and
turn it clockwise.
XDriver’s side only: Fix the washer fluid
reservoir (Y page 320).
Replacing wiper blades
Safety notes
GWarning!
For safety reasons, switch off the wipers and
remove the SmartKey from the starter switch
(vehicles with KEYLESS-GO: Make sure the
vehicle’s on-board electronics have status 0)
before replacing a wiper blade. Otherwise, the
wiper motor could suddenly turn on and cause
injury.
GWarning!
Wiper blades are components that are subject
to wear and tear. Replace the wiper blades
twice a year, preferably in the spring and fall.
Otherwise the windshield will not be wiped
properly. As a result, you may not be able to
observe surrounding traffic conditions and
could cause an accident.
! Never open the hood when a wiper arm is
folded forward.
Hold on to the wiper when folding a wiper
arm back. If released, the force of the
impact from the tensioning spring could
crack the windshield.
Do not allow a wiper arm to contact the
windshield glass without a wiper blade
inserted.
Mercedes-Benz recommends that you have
this work carried out at an authorized
Mercedes-Benz Center.
XRemove the SmartKey from the starter
switch.
Vehicles with KEYLESS-GO:XMake sure the vehicle’s on-board
electronics have status 0 (Y page 86).
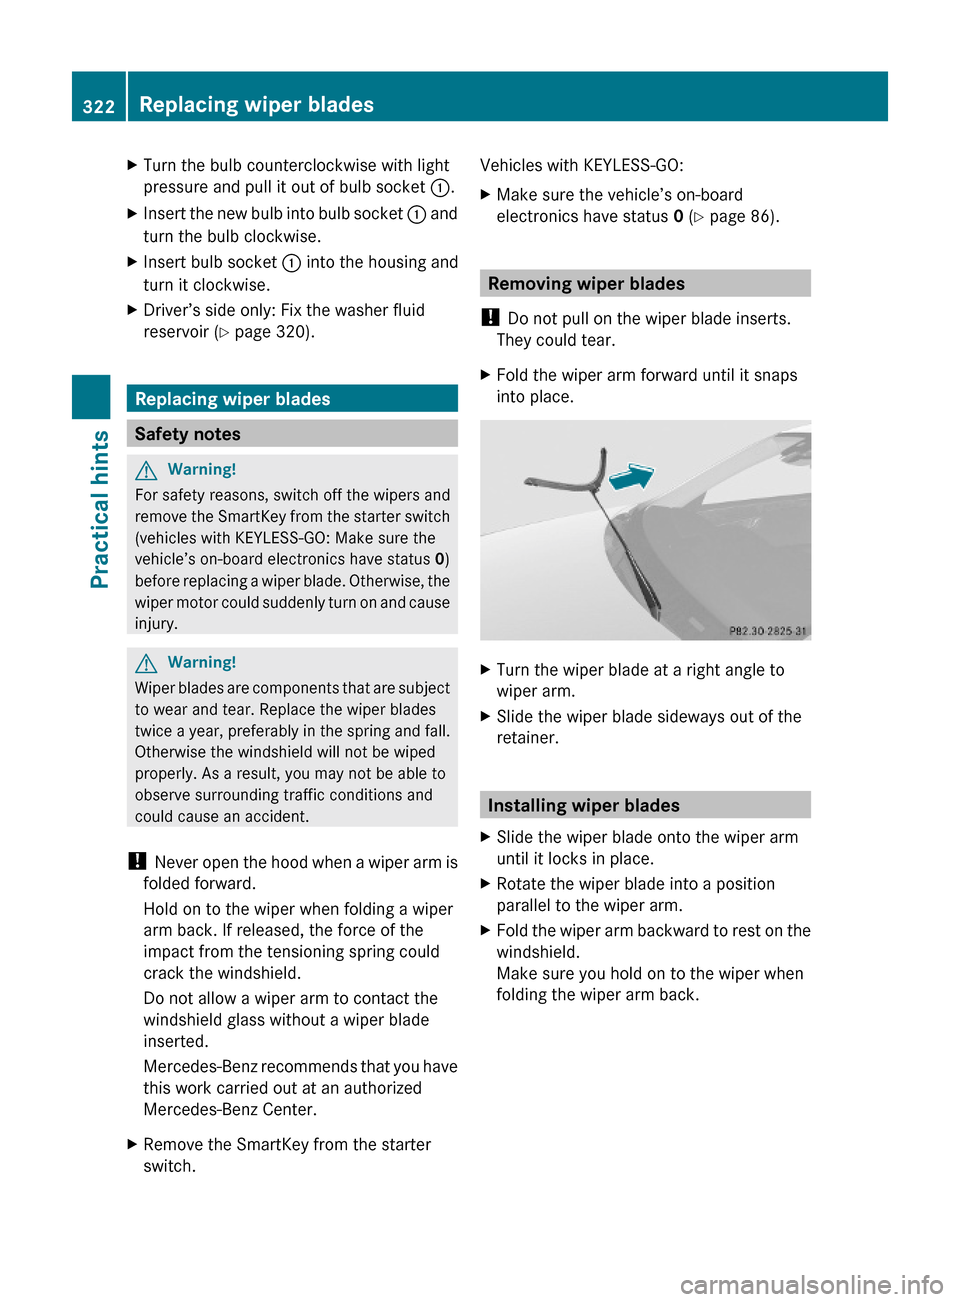
Removing wiper blades
! Do not pull on the wiper blade inserts.
They could tear.
XFold the wiper arm forward until it snaps
into place.
XTurn the wiper blade at a right angle to
wiper arm.
XSlide the wiper blade sideways out of the
retainer.
Installing wiper blades
XSlide the wiper blade onto the wiper arm
until it locks in place.
XRotate the wiper blade into a position
parallel to the wiper arm.
XFold the wiper arm backward to rest on the
windshield.
Make sure you hold on to the wiper when
folding the wiper arm back.
322Replacing wiper bladesPractical hints
212_AKB; 2; 41, en-USd2ureepe,Version: 2.11.8.12009-07-17T09:14:21+02:00 - Seite 322