2010 MERCEDES-BENZ E350 Front
[x] Cancel search: FrontPage 203 of 372
iTo prevent unauthorized persons from
access to the trunk, always lock the seat
backrests in its upright position.
Front storage compartments
GWarning!
To help avoid personal injury during a collision
or sudden maneuver, exercise care when
storing objects in the vehicle. Put luggage or
cargo in the trunk if possible.
Do not pile luggage or cargo higher than the
seat backrests.
Keep compartment lids closed. This will help
to prevent stored objects from being thrown
about and injuring vehicle occupants during
Rbraking
Rvehicle maneuvers
Ran accident
Glove box
Depending on vehicle equipment, an AUX
socket or a media interface is located in the
glove box. For information on Audio AUX
mode or on media interface, see separate
COMAND system operating instructions.
The glove box can be ventilated
(Y page 188).
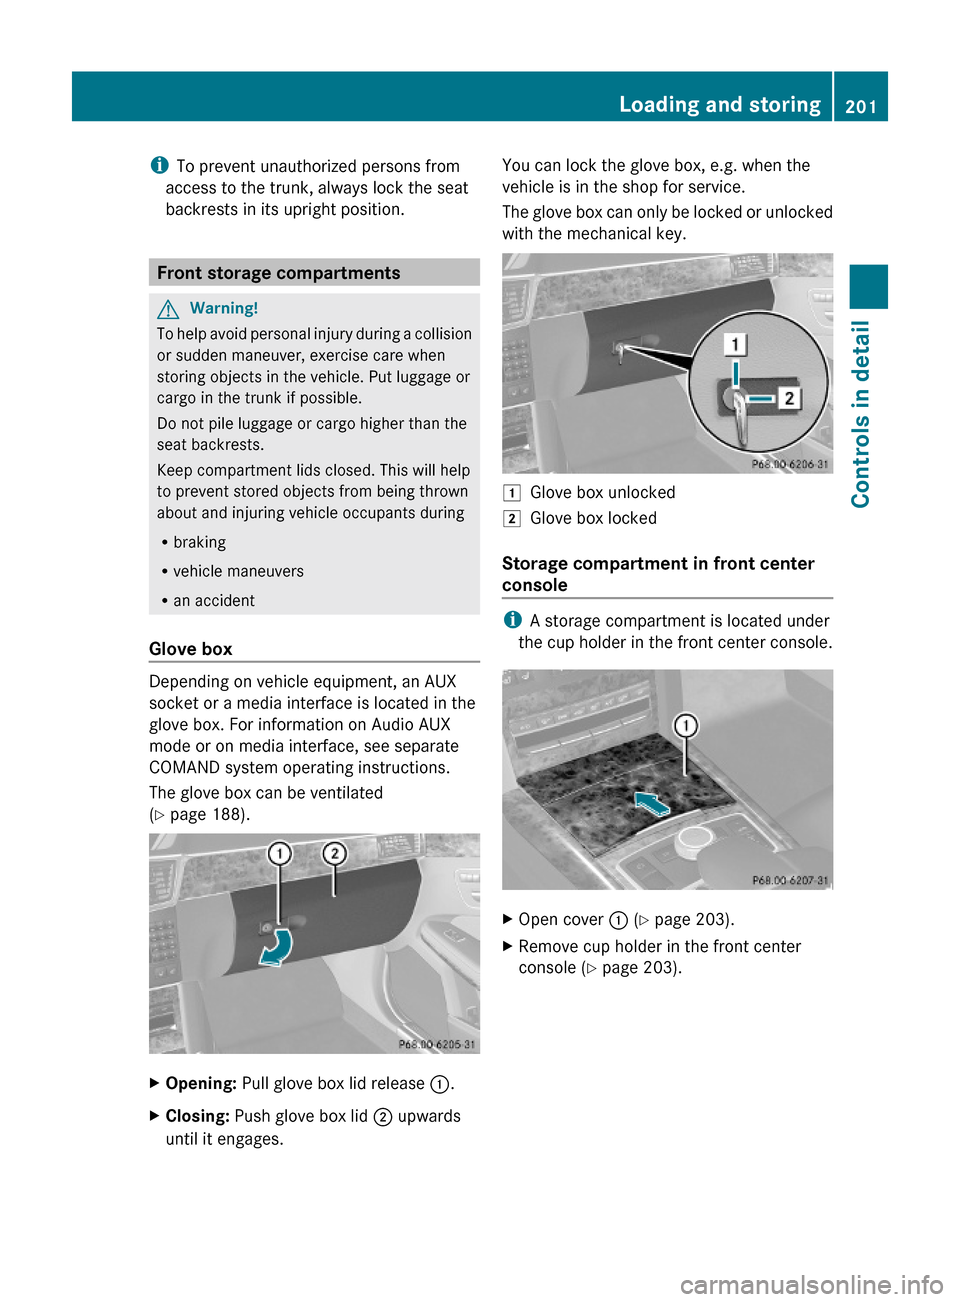
XOpening: Pull glove box lid release :.XClosing: Push glove box lid ; upwards
until it engages.
You can lock the glove box, e.g. when the
vehicle is in the shop for service.
The glove box can only be locked or unlocked
with the mechanical key.
1Glove box unlocked2Glove box locked
Storage compartment in front center
console
iA storage compartment is located under
the cup holder in the front center console.
XOpen cover : (Y page 203).XRemove cup holder in the front center
console (Y page 203).
Loading and storing201Controls in detail212_AKB; 2; 41, en-USd2ureepe,Version: 2.11.8.12009-07-17T09:14:21+02:00 - Seite 201Z
Page 204 of 372
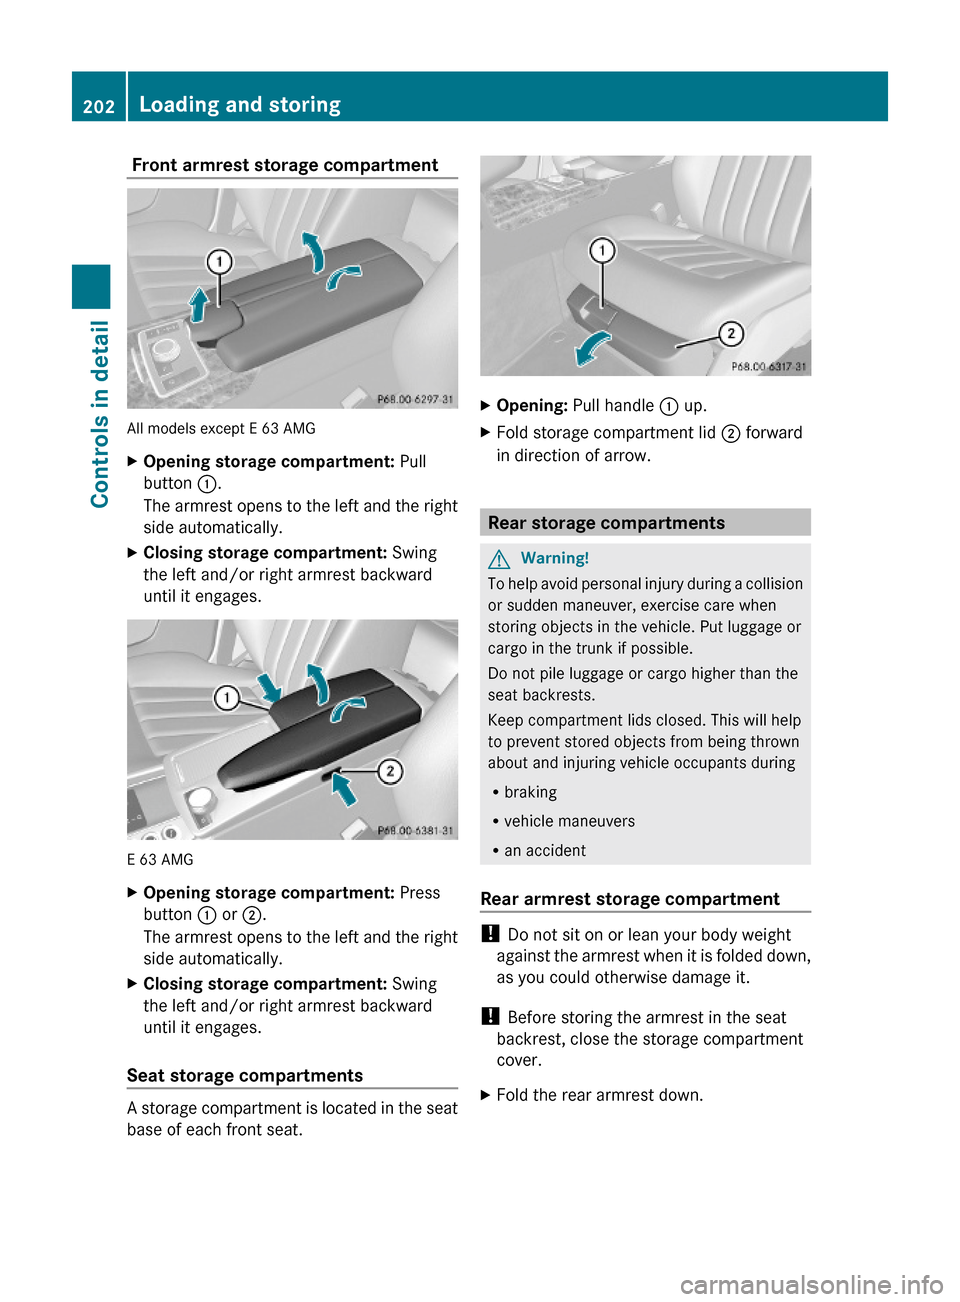
Front armrest storage compartment
All models except E 63 AMG
XOpening storage compartment: Pull
button :.
The armrest opens to the left and the right
side automatically.
XClosing storage compartment: Swing
the left and/or right armrest backward
until it engages.
E 63 AMG
XOpening storage compartment: Press
button : or ;.
The armrest opens to the left and the right
side automatically.
XClosing storage compartment: Swing
the left and/or right armrest backward
until it engages.
Seat storage compartments
A storage compartment is located in the seat
base of each front seat.
XOpening: Pull handle : up.XFold storage compartment lid ; forward
in direction of arrow.
Rear storage compartments
GWarning!
To help avoid personal injury during a collision
or sudden maneuver, exercise care when
storing objects in the vehicle. Put luggage or
cargo in the trunk if possible.
Do not pile luggage or cargo higher than the
seat backrests.
Keep compartment lids closed. This will help
to prevent stored objects from being thrown
about and injuring vehicle occupants during
Rbraking
Rvehicle maneuvers
Ran accident
Rear armrest storage compartment
! Do not sit on or lean your body weight
against the armrest when it is folded down,
as you could otherwise damage it.
! Before storing the armrest in the seat
backrest, close the storage compartment
cover.
XFold the rear armrest down.202Loading and storingControls in detail
212_AKB; 2; 41, en-USd2ureepe,Version: 2.11.8.12009-07-17T09:14:21+02:00 - Seite 202
Page 205 of 372
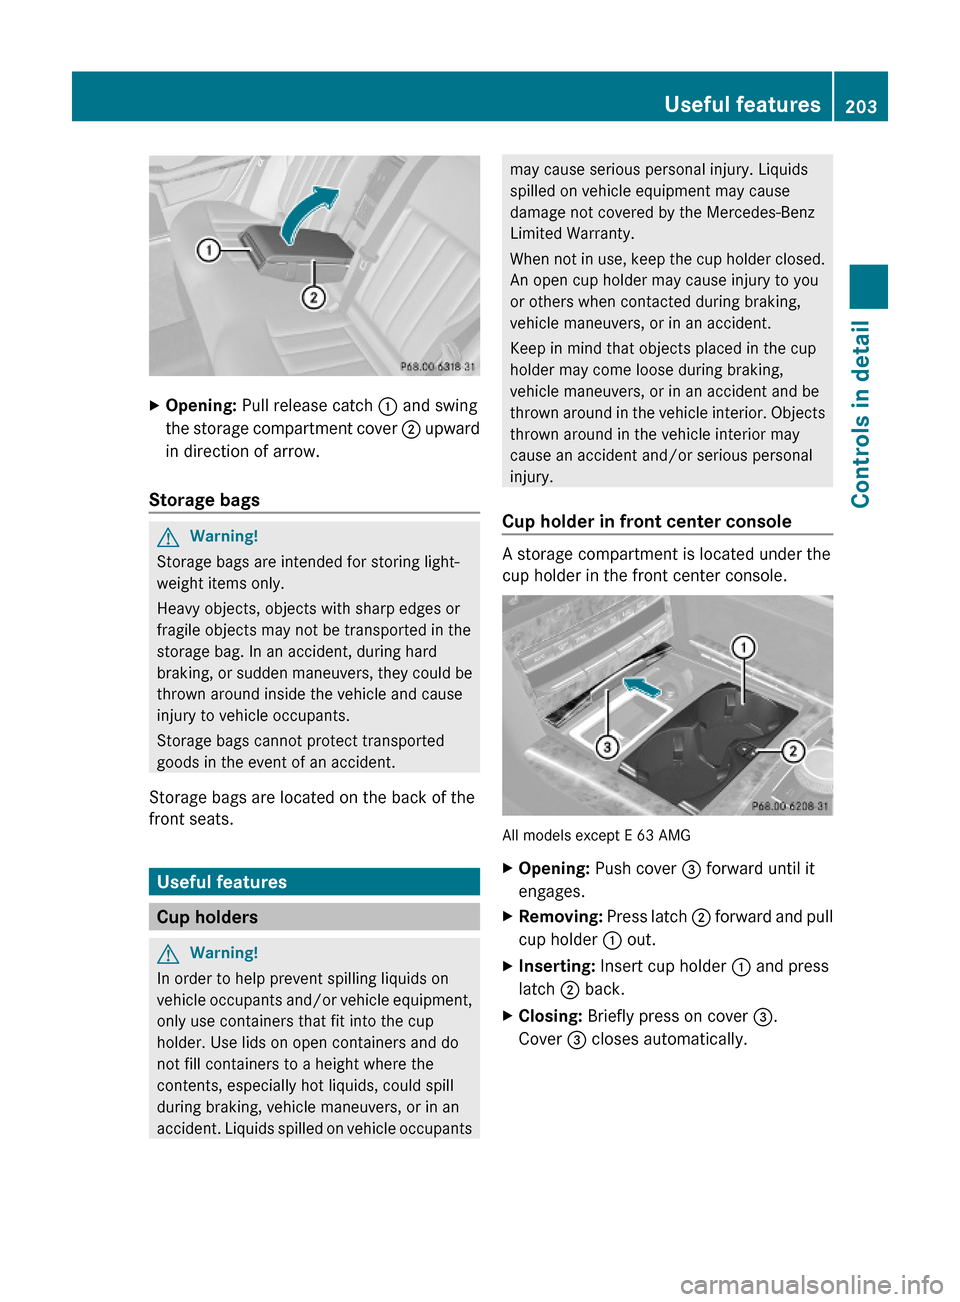
XOpening: Pull release catch : and swing
the storage compartment cover ; upward
in direction of arrow.
Storage bags
GWarning!
Storage bags are intended for storing light-
weight items only.
Heavy objects, objects with sharp edges or
fragile objects may not be transported in the
storage bag. In an accident, during hard
braking, or sudden maneuvers, they could be
thrown around inside the vehicle and cause
injury to vehicle occupants.
Storage bags cannot protect transported
goods in the event of an accident.
Storage bags are located on the back of the
front seats.
Useful features
Cup holders
GWarning!
In order to help prevent spilling liquids on
vehicle occupants and/or vehicle equipment,
only use containers that fit into the cup
holder. Use lids on open containers and do
not fill containers to a height where the
contents, especially hot liquids, could spill
during braking, vehicle maneuvers, or in an
accident. Liquids spilled on vehicle occupants
may cause serious personal injury. Liquids
spilled on vehicle equipment may cause
damage not covered by the Mercedes-Benz
Limited Warranty.
When not in use, keep the cup holder closed.
An open cup holder may cause injury to you
or others when contacted during braking,
vehicle maneuvers, or in an accident.
Keep in mind that objects placed in the cup
holder may come loose during braking,
vehicle maneuvers, or in an accident and be
thrown around in the vehicle interior. Objects
thrown around in the vehicle interior may
cause an accident and/or serious personal
injury.
Cup holder in front center console
A storage compartment is located under the
cup holder in the front center console.
All models except E 63 AMG
XOpening: Push cover = forward until it
engages.
XRemoving: Press latch ; forward and pull
cup holder : out.
XInserting: Insert cup holder : and press
latch ; back.
XClosing: Briefly press on cover =.
Cover = closes automatically.
Useful features203Controls in detail212_AKB; 2; 41, en-USd2ureepe,Version: 2.11.8.12009-07-17T09:14:21+02:00 - Seite 203Z
Page 208 of 372
Ashtrays
Center console ashtray
iA storage compartment is located under
the ashtray insert.
! The storage compartment is not heat-
proof. When smoking always make sure the
ashtray insert is present and properly
inserted.
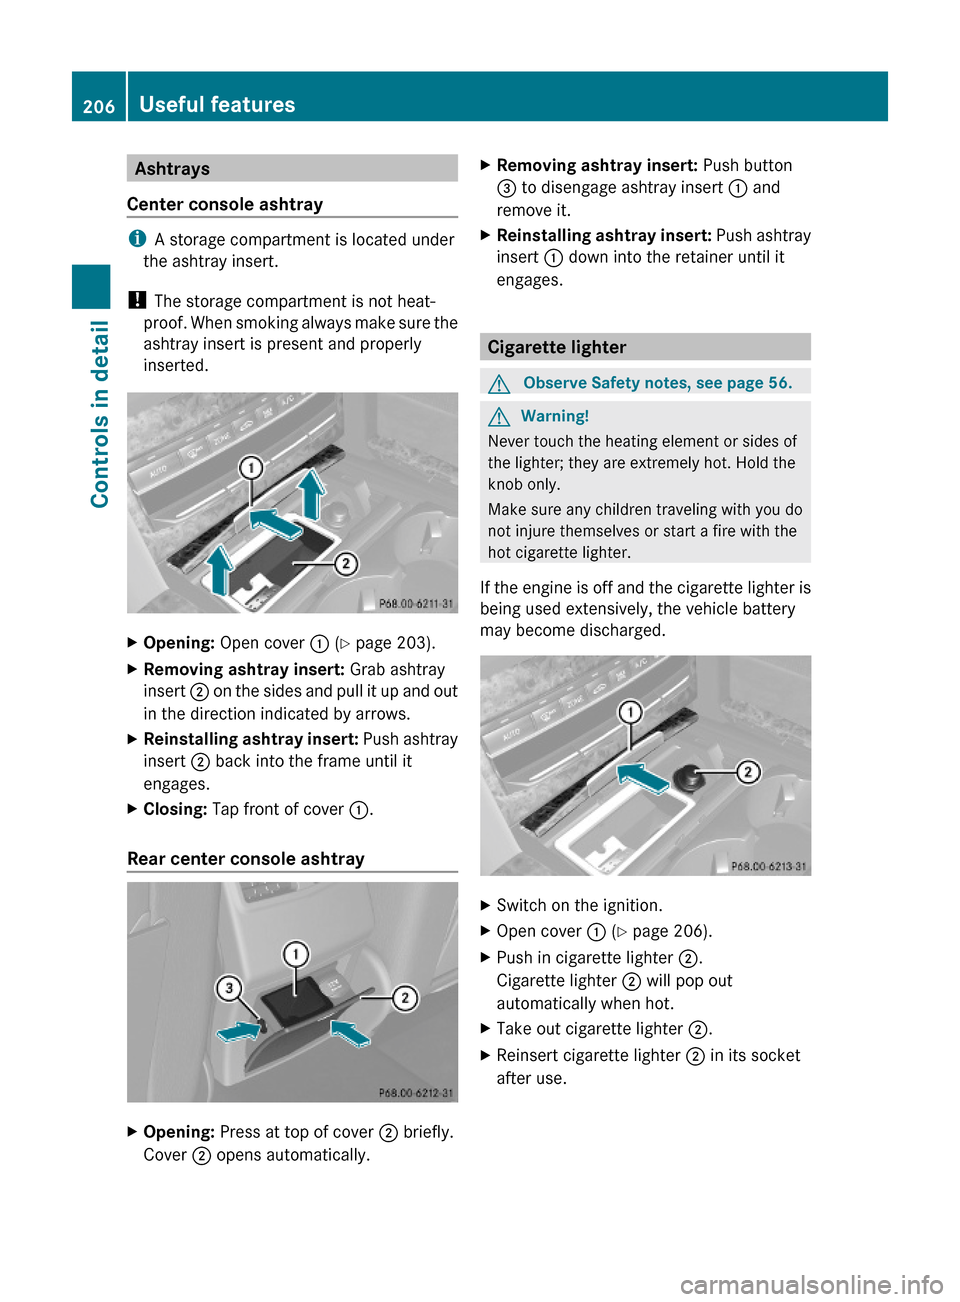
XOpening: Open cover : (Y page 203).XRemoving ashtray insert: Grab ashtray
insert ; on the sides and pull it up and out
in the direction indicated by arrows.
XReinstalling ashtray insert: Push ashtray
insert ; back into the frame until it
engages.
XClosing: Tap front of cover :.
Rear center console ashtray
XOpening: Press at top of cover ; briefly.
Cover ; opens automatically.
XRemoving ashtray insert: Push button
= to disengage ashtray insert : and
remove it.
XReinstalling ashtray insert: Push ashtray
insert : down into the retainer until it
engages.
Cigarette lighter
GObserve Safety notes, see page 56.GWarning!
Never touch the heating element or sides of
the lighter; they are extremely hot. Hold the
knob only.
Make sure any children traveling with you do
not injure themselves or start a fire with the
hot cigarette lighter.
If the engine is off and the cigarette lighter is
being used extensively, the vehicle battery
may become discharged.
XSwitch on the ignition.XOpen cover : (Y page 206).XPush in cigarette lighter ;.
Cigarette lighter ; will pop out
automatically when hot.
XTake out cigarette lighter ;.XReinsert cigarette lighter ; in its socket
after use.
206Useful featuresControls in detail
212_AKB; 2; 41, en-USd2ureepe,Version: 2.11.8.12009-07-17T09:14:21+02:00 - Seite 206
Page 226 of 372

XPush handle ; under the hood upwards.XPull up on the hood and then release it.
The hood will be held open at shoulder
height by gas-filled struts automatically.
Closing
GWarning!
When closing the hood, use extreme caution
not to catch hands or fingers. Be careful that
you do not close the hood on anyone.
Make sure the hood is securely engaged
before driving off. Do not continue driving if
the hood can no longer engage after an
accident, for example. The hood could
otherwise come loose while the vehicle is in
motion and injure you and/or others.
XLet the hood drop from a height of
approximately 8 in (20 cm).
XCheck to make sure the hood is fully
closed.
If you can raise the hood at a point above
the headlamps, then it is not properly
closed. Open it again and let it drop with
somewhat greater force.
Radiator
iVehicles with diesel engine:
Do not cover the radiator, for example with
a winter front or bug cover. Otherwise the
readings of the on-board diagnostic system
may be inaccurate. Some of theses
readings are required by law and must be
accurate at all times.
Engine oil
The amount of oil your engine consumes will
depend on a number of factors, including
driving style. Increased oil consumption can
occur when the vehicle is new or the vehicle
is driven frequently at higher engine speeds.
Engine oil consumption checks should only
be made after the vehicle break-in period.
! Do not use any special lubricant additives,
as these may damage the drive assemblies.
Using special additives not approved by
Mercedes-Benz may cause damage not
covered by the Mercedes-Benz Limited
Warranty.
For further information contact an
authorized Mercedes-Benz Center.
Notes on checking engine oil level
When checking the oil level
Rthe vehicle must be parked on level ground
Rwith the engine at operating temperature,
the vehicle must have been stationary for
at least 5 minutes with the engine turned
off
Rwith the engine not at operating
temperature, the vehicle must have been
stationary for at least 30 minutes with the
engine turned off
Checking engine oil level
XOpen the hood (Y page 223).224Engine compartmentOperation
212_AKB; 2; 41, en-USd2ureepe,Version: 2.11.8.12009-07-17T09:14:21+02:00 - Seite 224
Page 230 of 372
The brake fluid level is correct when it is
between lower mark (MIN) ; and upper
mark (MAX) : of the brake fluid reservoir.
Tires and wheels
Safety notes
Contact an authorized Mercedes-Benz Center
for information on tested and recommended
rims and tires for summer and winter
operation. They can also offer advice
concerning tire service and purchase.
GWarning!
Replace rims or tires with the same
designation, manufacturer and type as shown
on the original part. For further information
contact an authorized Mercedes-Benz Center.
If incorrectly sized rims and tires are
mounted, the wheel brakes or suspension
components can be damaged. Also, the
operating clearance of the wheels and the
tires may no longer be correct.
GWarning!
Worn, old tires can cause accidents. If the tire
tread is worn to minimum tread depth, or if
the tires have sustained damage, replace
them.
When replacing rims, only use genuine
Mercedes-Benz wheel bolts specified for the
particular rim type. Failure to do so can result
in the bolts loosening and possibly an
accident.
Retreaded tires are not tested or
recommended by Mercedes-Benz, since
previous damage cannot always be
recognized on retreads. The operating safety
of the vehicle cannot be assured when such
tires are used.
GWarning!
If you feel a sudden significant vibration or
ride disturbance, or you suspect that possible
damage to your vehicle has occurred, you
should turn on the hazard warning flashers,
carefully slow down, and drive with caution to
an area which is a safe distance from the road.
Inspect the tires and the vehicle underbody
for possible damage. If the vehicle or tires
appear unsafe, have the vehicle towed to the
nearest authorized Mercedes-Benz Center or
tire dealer for repairs.GWarning!
Do not drive with a flat tire. A flat tire affects
the ability to steer or brake the vehicle. You
could lose control of the vehicle. Continued
driving with a flat tire or driving at high speed
with a flat tire will cause excessive heat build-
up and possibly a fire.
Important guidelines
R Only use sets of tires and rims of the same
type and make.
R Tires must be of the correct size for the rim.
R Break in new tires for approximately
60 miles (100 km) at moderate speeds.
R Regularly check the tires and rims for
damage. Dented or bent rims can cause tire
inflation pressure loss and damage to the
tire beads.
R If the vehicle is heavily loaded, check tire
inflation pressure and correct as required.
R Do not allow your tires to wear down too
far. Adhesion properties on wet roads are
sharply reduced at tread depths of less
than 1
/ 8 in (3 mm).
R When replacing individual tires, you should
mount new tires on the front wheels first
(on vehicles with same-sized wheels all
around).
228Tires and wheelsOperation
212_AKB; 2; 41, en-USd2ureepe,Version: 2.11.8.12009-07-17T09:14:21+02:00 - Seite 228
Page 239 of 372
may be displayed for the wrong position
temporarily. After driving for a few minutes,
the inflation pressure will be shown for the
correct position.
Maximum tire inflation pressure
GWarning!
Never exceed the maximum tire inflation
pressure. Follow recommended tire inflation
pressures.
Do not underinflate tires. Underinflated tires
wear excessively and/or unevenly, adversely
affect handling and fuel economy, and are
more likely to fail from being overheated.
Do not overinflate tires. Overinflated tires can
adversely affect handling and ride comfort,
wear unevenly, increase stopping distance,
and result in sudden deflation (blowout)
because they are more likely to become
punctured or damaged by road debris,
potholes etc.
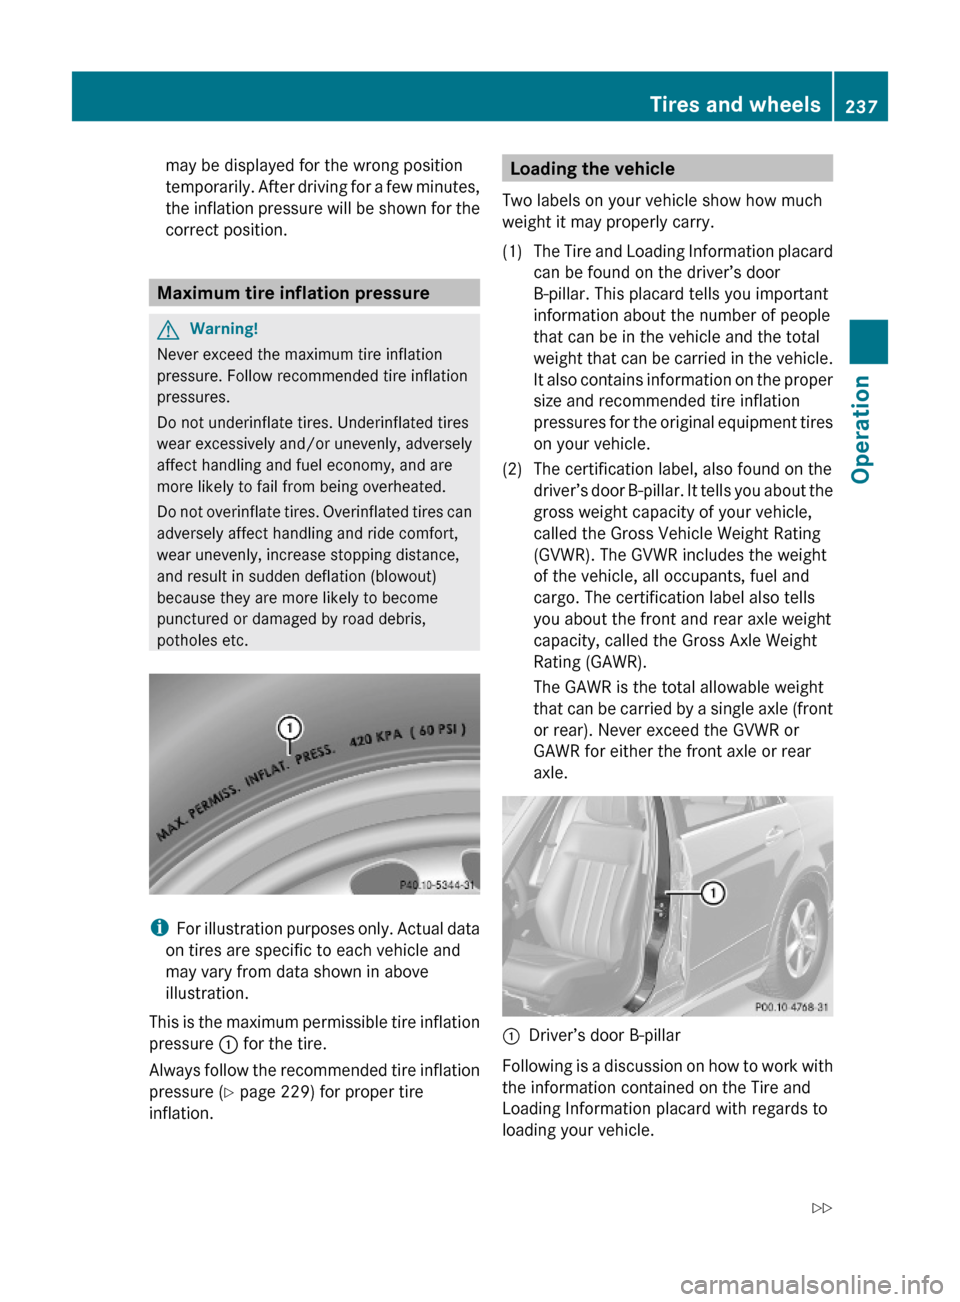
iFor illustration purposes only. Actual data
on tires are specific to each vehicle and
may vary from data shown in above
illustration.
This is the maximum permissible tire inflation
pressure : for the tire.
Always follow the recommended tire inflation
pressure (Y page 229) for proper tire
inflation.
Loading the vehicle
Two labels on your vehicle show how much
weight it may properly carry.
(1)The Tire and Loading Information placard
can be found on the driver’s door
B-pillar. This placard tells you important
information about the number of people
that can be in the vehicle and the total
weight that can be carried in the vehicle.
It also contains information on the proper
size and recommended tire inflation
pressures for the original equipment tires
on your vehicle.
(2)The certification label, also found on the
driver’s door B-pillar. It tells you about the
gross weight capacity of your vehicle,
called the Gross Vehicle Weight Rating
(GVWR). The GVWR includes the weight
of the vehicle, all occupants, fuel and
cargo. The certification label also tells
you about the front and rear axle weight
capacity, called the Gross Axle Weight
Rating (GAWR).
The GAWR is the total allowable weight
that can be carried by a single axle (front
or rear). Never exceed the GVWR or
GAWR for either the front axle or rear
axle.
:Driver’s door B-pillar
Following is a discussion on how to work with
the information contained on the Tire and
Loading Information placard with regards to
loading your vehicle.
Tires and wheels237Operation212_AKB; 2; 41, en-USd2ureepe,Version: 2.11.8.12009-07-17T09:14:21+02:00 - Seite 237Z
Page 240 of 372
Tire and Loading InformationGWarning!
Do not overload the tires by exceeding the
specified load limit as indicated on the Tire
and Loading Information placard on the
driver’s door B-pillar. Overloading the tires
can overheat them, possibly causing a
blowout. Overloading the tires can also result
in handling or steering problems, or brake
failure.
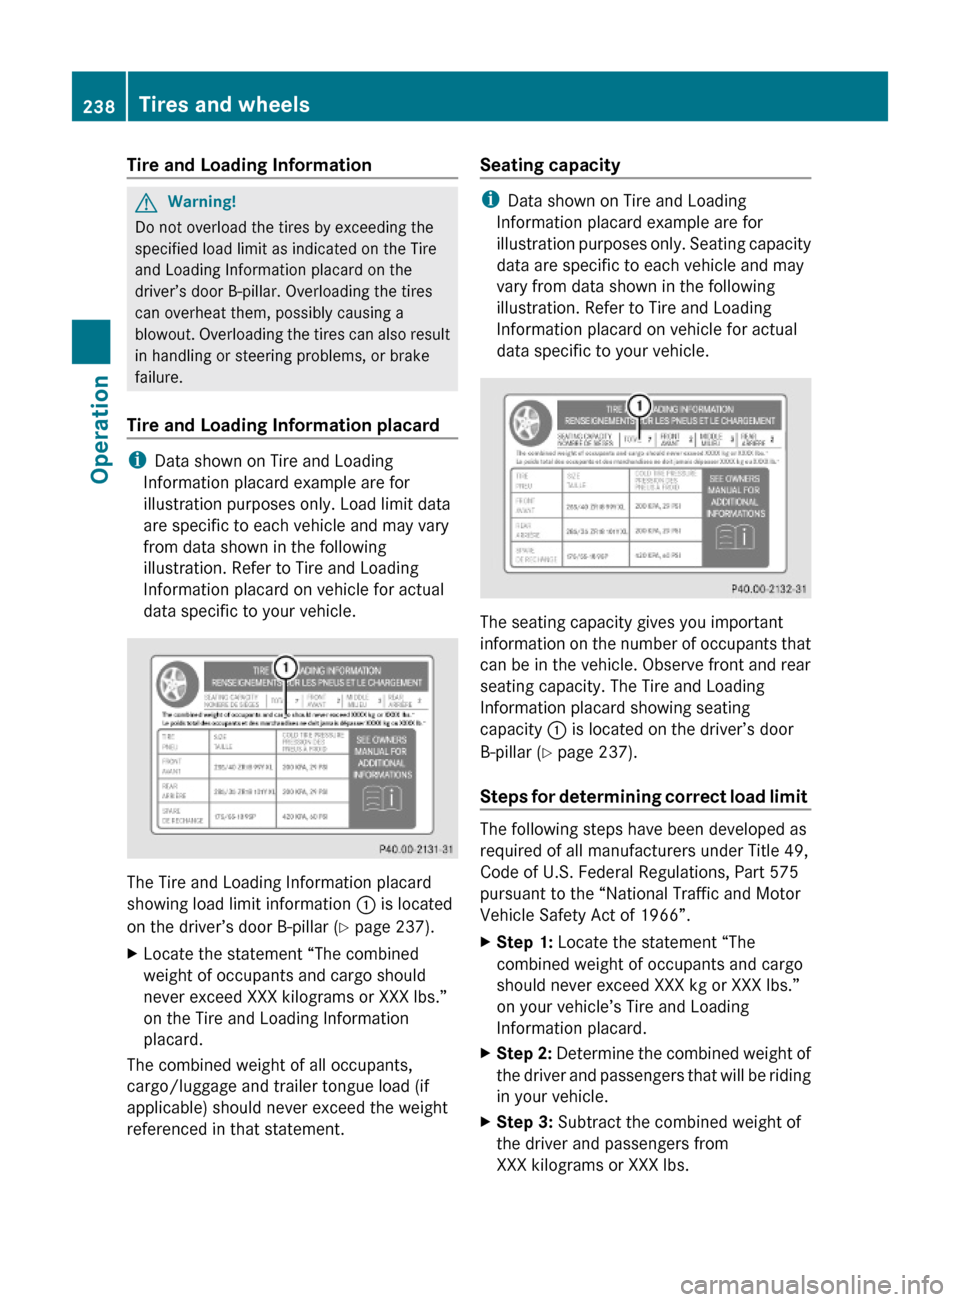
Tire and Loading Information placard
iData shown on Tire and Loading
Information placard example are for
illustration purposes only. Load limit data
are specific to each vehicle and may vary
from data shown in the following
illustration. Refer to Tire and Loading
Information placard on vehicle for actual
data specific to your vehicle.
The Tire and Loading Information placard
showing load limit information : is located
on the driver’s door B-pillar (Y page 237).
XLocate the statement “The combined
weight of occupants and cargo should
never exceed XXX kilograms or XXX lbs.”
on the Tire and Loading Information
placard.
The combined weight of all occupants,
cargo/luggage and trailer tongue load (if
applicable) should never exceed the weight
referenced in that statement.
Seating capacity
iData shown on Tire and Loading
Information placard example are for
illustration purposes only. Seating capacity
data are specific to each vehicle and may
vary from data shown in the following
illustration. Refer to Tire and Loading
Information placard on vehicle for actual
data specific to your vehicle.
The seating capacity gives you important
information on the number of occupants that
can be in the vehicle. Observe front and rear
seating capacity. The Tire and Loading
Information placard showing seating
capacity : is located on the driver’s door
B-pillar (Y page 237).
Steps for determining correct load limit
The following steps have been developed as
required of all manufacturers under Title 49,
Code of U.S. Federal Regulations, Part 575
pursuant to the “National Traffic and Motor
Vehicle Safety Act of 1966”.
XStep 1: Locate the statement “The
combined weight of occupants and cargo
should never exceed XXX kg or XXX lbs.”
on your vehicle’s Tire and Loading
Information placard.
XStep 2: Determine the combined weight of
the driver and passengers that will be riding
in your vehicle.
XStep 3: Subtract the combined weight of
the driver and passengers from
XXX kilograms or XXX lbs.
238Tires and wheelsOperation
212_AKB; 2; 41, en-USd2ureepe,Version: 2.11.8.12009-07-17T09:14:21+02:00 - Seite 238