2010 MERCEDES-BENZ CLS COUPE bonnet
[x] Cancel search: bonnetPage 9 of 337
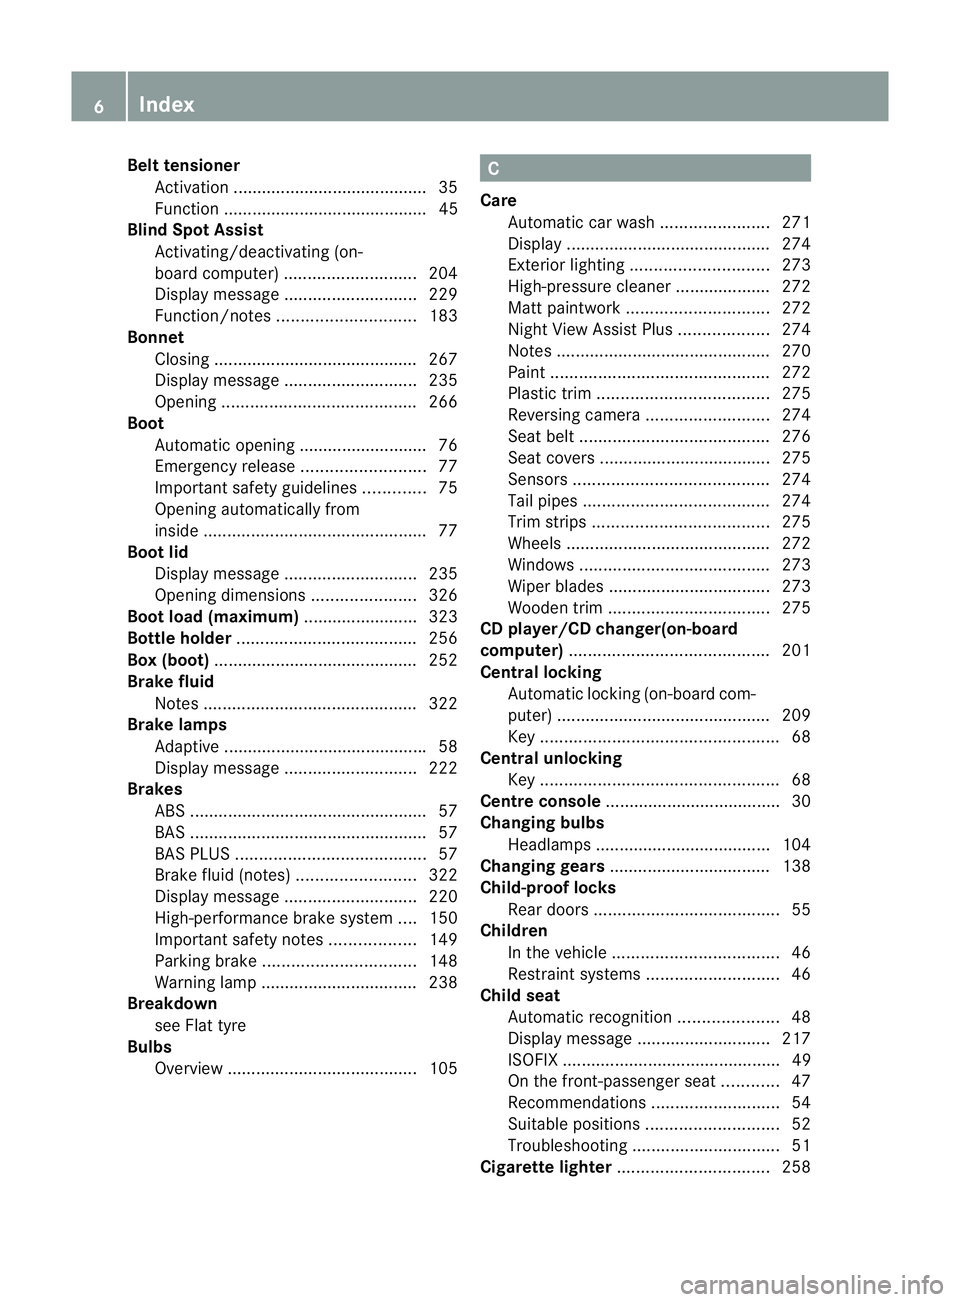
Bel
ttensioner
Activation ........................................ .35
Function ........................................... 45
Blin dSpot Assist
Activating/deactivating (on-
board computer) ............................ 204
Display message ............................ 229
Function/notes ............................. 183
Bonnet
Closing .......................................... .267
Display message ............................ 235
Opening ......................................... 266
Boot
Automatic opening ........................... 76
Emergency release ..........................77
Important safety guidelines .............75
Opening automatically from
insid e............................................... 77
Boot lid
Display message ............................ 235
Opening dimensions ......................326
Boot load (maximum) ........................ 323
Bottle holder ...................................... 256
Box (boot) .......................................... .252
Brake fluid Notes ............................................. 322
Brake lamps
Adaptive .......................................... .58
Display message ............................ 222
Brakes
ABS .................................................. 57
BAS .................................................. 57
BAS PLUS ........................................ 57
Brake fluid (notes) .........................322
Display message ............................ 220
High-performance brake system ....150
Important safety notes ..................149
Parking brake ................................ 148
Warning lamp ................................. 238
Breakdown
see Flat tyre
Bulbs
Overview ........................................ 105 C
Care Automatic car wash .......................271
Display ........................................... 274
Exterior lighting ............................. 273
High-pressure cleaner .................... 272
Matt paintwork .............................. 272
Nigh tView Assist Plus ...................274
Notes ............................................. 270
Paint .............................................. 272
Plastic trim .................................... 275
Reversing camera ..........................274
Seat bel t........................................ 276
Seat covers .................................... 275
Sensors ......................................... 274
Tai lpipes ....................................... 274
Trim strips ..................................... 275
Wheels ........................................... 272
Windows ........................................ 273
Wiper blades .................................. 273
Wooden trim .................................. 275
CD player/CD changer(on-board
computer) .......................................... 201
Central locking Automatic locking (on-board com-
puter) ............................................. 209
Key .................................................. 68
Central unlocking
Key .................................................. 68
Centre console ..................................... 30
Changing bulbs Headlamps ..................................... 104
Changing gears .................................. 138
Child-proof locks Rea rdoors ....................................... 55
Children
In the vehicle ................................... 46
Restraint systems ............................ 46
Child seat
Automatic recognition .....................48
Display message ............................ 217
ISOFIX .............................................. 49
On the front-passenger sea t............ 47
Recommendations ...........................54
Suitable positions ............................ 52
Troubleshooting ............................... 51
Cigarette lighter ................................ 2586
Index
Page 27 of 337
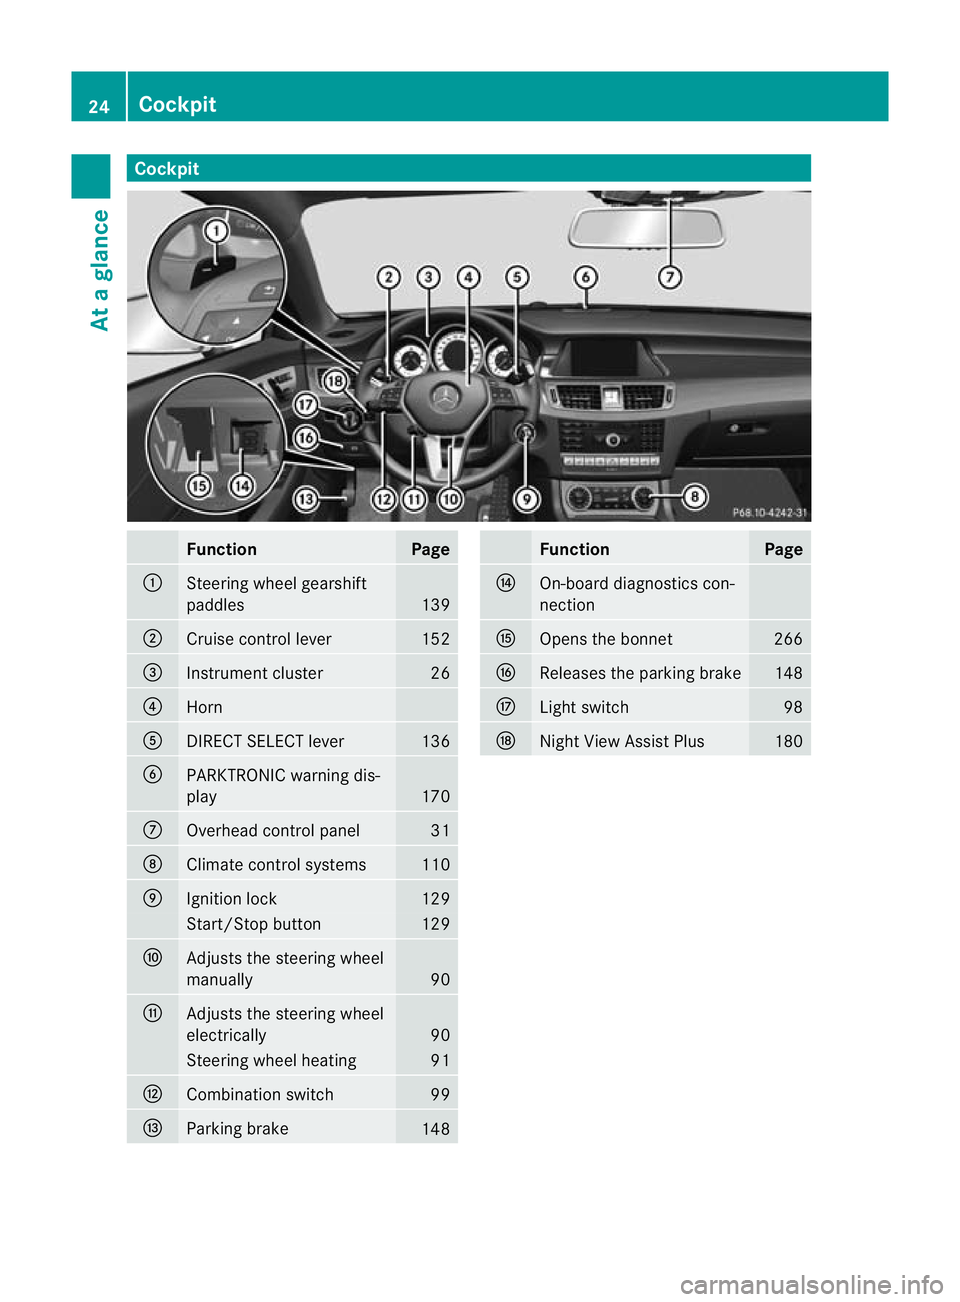
Cockpit
Function Page
:
Steering wheel gearshift
paddles
139
;
Cruise control lever 152
=
Instrument cluster 26
?
Horn
A
DIRECT SELECT lever 136
B
PARKTRONIC warning dis-
play
170
C
Overhead control panel 31
D
Climate control systems 110
E
Ignition lock 129
Start/Stop button 129
F
Adjusts the steering wheel
manually
90
G
Adjusts the steering wheel
electrically
90
Steering wheel heating 91
H
Combination switch 99
I
Parking brake
148 Function Page
J
On-board diagnostics con-
nection K
Opens the bonnet 266
L
Releases the parking brake 148
M
Ligh
tswitch 98
N
Night View Assist Plus 18024
CockpitAt a glance
Page 28 of 337
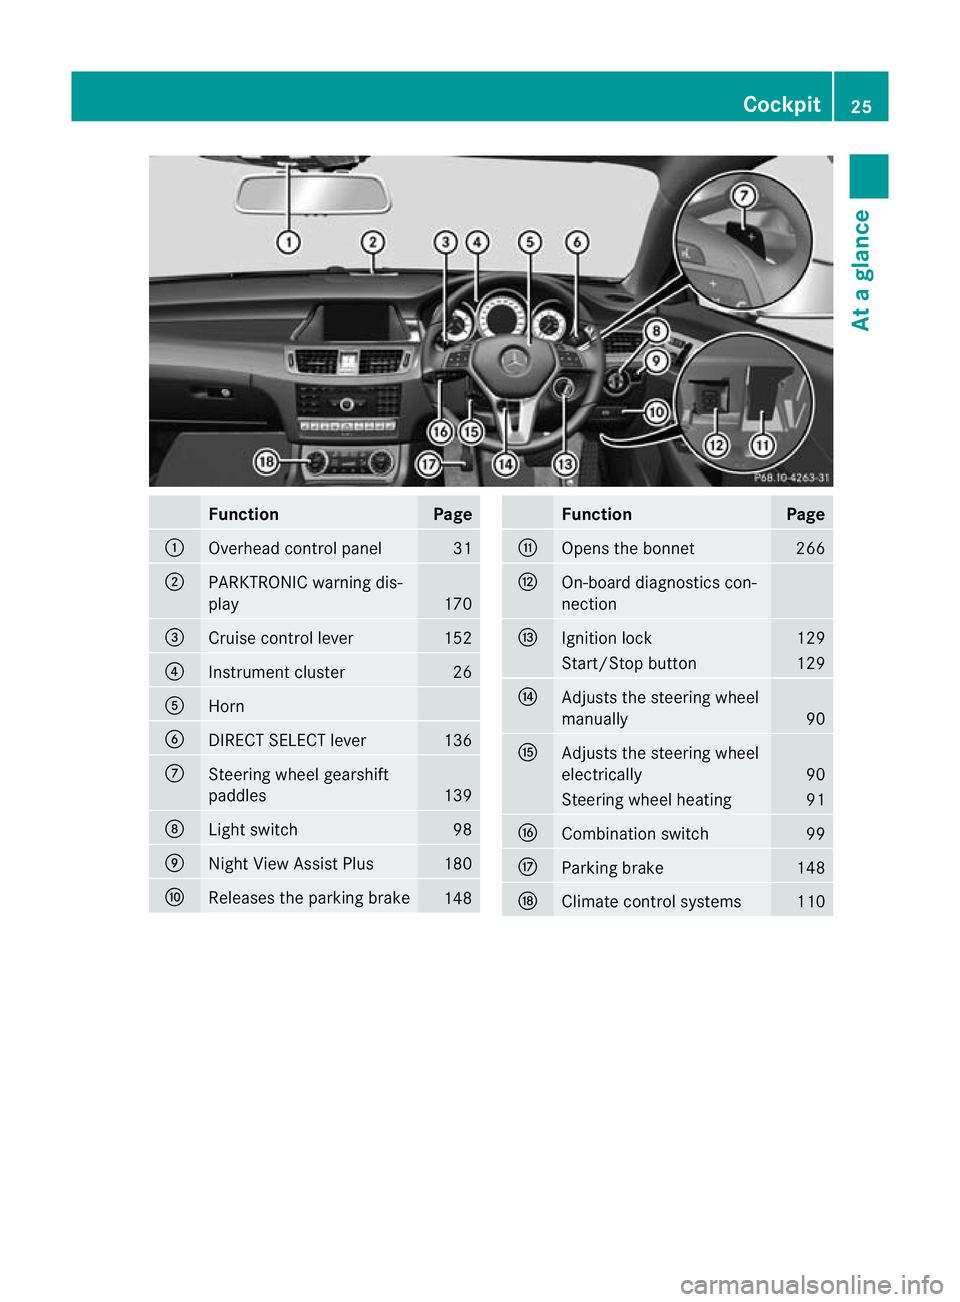
Function Page
:
Overhead control panel 31
;
PARKTRONIC warning dis-
play
170
=
Cruise control lever 152
?
Instrument cluster 26
A
Horn
B
DIRECT SELECT lever 136
C
Steering wheel gearshift
paddles
139
D
Ligh
tswitch 98
E
Nigh
tView Assist Plus 180
F
Releases the parking brake
148 Function Page
G
Opens the bonnet 266
H
On-board diagnostics con-
nection
I
Ignition lock 129
Start/Stop button 129
J
Adjusts the steering wheel
manually
90
K
Adjusts the steering wheel
electrically
90
Steering wheel heating 91
L
Combination switch 99
M
Parking brake 148
N
Climate control systems 110Cockpit
25At a glance
Page 39 of 337
The belt tensioner and airbag triggering
thresholds are variable and are adapted to the
rate of deceleration or acceleration of the
vehicle. This process is pre-emptive in nature.
The triggering process must take place in
good time at the start of the collision.
i Not all airbags are deployed in an acci-
dent. The different airbag systems work
independently of each other.
How the airbag system works is deter-
mined by the severity of the accident detec-
ted, especially the vehicle deceleration or
acceleration, and the apparent type of acci-
dent:
R head-on collision
R side impact
R overturn
The rate of vehicle deceleration or accelera-
tion and the direction of the force are essen-
tially determined by:
R the distribution of forces during the colli-
sion
R the collision angle
R the deformation characteristics of the vehi-
cle
R the characteristics of the object with which
the vehicle has collided
Factors which can only be seen and measured
after a collision has occurred do not play a
decisive role in the deployment of an airbag
nor do they provide an indication of airbag
deployment.
The vehicle may be deformed significantly,
e.g. the bonnet or the wing, without an airbag
being deployed. This is the case if only parts
which are relatively easily deformed are affec-
ted and the deployment threshold is not
reached. Conversely, airbags may be
deployed even though the vehicle suffers only
minor deformation .This is the case if, for
example, very rigid vehicle parts such as lon-
gitudinal body members are hit and sufficient
deceleration occurs as a result. Airbags
Important safety notes Airbag deployment slows down and restricts
the movement of the vehicle occupant.
If the airbags are deployed, you will hear a
bang, and a small amount of powder may also
be released. Only in rare cases will the bang
affect your hearing. The powder that is
released generally does not constitute a
health hazard. The 6SRS warning lamp
lights up.
The airbag installation locations are identified
by the AIRBAG symbol. G
Risk of injury
Airbags provide additional protection; they
are not, however, a substitute for seat belts.
Observe the following notes to reduce the risk
of serious or even fatal injury caused by airbag
deployment:
R All vehicle occupants –inparticular, preg-
nant women – must wear their seat belt
correctly at all times and lean back against
the backrest, which should be positioned
as close to the vertical as possible. The
head restraint must support the back of the
head at about eye level.
R Always secure childre nless than 1.50mt all
and unde r12years of age in suitable child
restraint systems.
R All vehicle occupants must select a seat
position that is as far away from the airbag
as possible. The driver's seat position must
allow the vehicle to be driven safely. The
driver's chest should be as far away from
the centre of the driver's airbag cover as
possible.
R Move the front-passenger seat as far back
as possible. This is especially important if
you have secured a child in a child restraint
system on the front-passenger seat.
R Vehicle occupants –inparticular, children
–m ust no tlean their heads into the area of
the window in which the sidebag/window-
bag is deployed. 36
Occupant safetySafety
Page 66 of 337
At speeds up to approximately 70 km/h,
PRE-SAFE ®
Brake may also detect stationary
obstacles, for example stoppe dorparked
vehicles. G
Ris
kofa ccident
If, in a critical driving situation, you do not
receive a visual and acoustic warning:
R PRE-SAFE ®
Brake did no tdetec tthe risk of
a collision
R PRE-SAFE ®
Brake is switched off
R PRE-SAFE ®
Brake has failed
You must then brake to avoid a collision.
X To activate/deactivate: activate or deac-
tivate PRE-SAFE ®
Brake in the on-board
computer (Y page 204).
After activation, the Äsymbol is dis-
played on the left in the instrumentc luster.
The radar sensor system is switched off auto-
matically in the vicinity of radio telescope
facilities ( Ypage 327).
Vehicles without COMAND and navigation,
and vehicles for Australia: near radio tele-
scope installations, the radar sensor system
must be switched off with the on-board com-
puter (Y page 210).
For PRE-SAFE ®
Brake to assist you when driv-
ing, the radar sensor system must be
switched on (Y page 210) and operational.
PRE-SAFE ®
Brake does not always detect
complex traffic situations properly. You can
terminate the braking action of PRE-SAFE ®
Brake in a non-critical driving situation at any
time if:
R an acoustic and visual warning occurs.
R the vehicle brakes.
To end this, you can either depress the accel-
erator pedal further, activate kickdown or
release the brake pedal. The braking action of PRE-SAFE
®
Brake is
ended automatically if:
R you manoeuvre to avoid the obstacle.
R you drive slower than approximately
15 km/h.
R there is no longer an obstacle detected in
front of your vehicle.
R there is no longer any dange rofacollision.
Following a collisio norcollision-related dam-
age to the front end of the vehicle, have the
configuration and operation of the radar sen-
sors checked. Choose a qualified specialist
workshop which has the necessary specialist
knowledge and tools for the work required.
Mercedes-Benz recommends that you use a
Mercedes-Benz Service Centre for this pur-
pose. Anti-theft systems
Immobiliser
The immobiliser prevents your vehicle from
being started without the correc tkey.
X To activate with the key: remove the key
from the ignition lock.
X To activate with KEYLESS-GO: switch the
ignition off and open the driver's door.
X To deactivate: switch on the ignition.
i The immobiliser is always deactivated
when you start the engine. ATA (Anti-Theft Alarm system)
Av isual and audible alarm is triggered if the
alarm system is primed and you open:
R a door
R the vehicle with the emergency key ele-
ment
R the boot lid
R the bonnet
The alarm is not switched off, even if you
close the open door that has triggered it, for
example. Anti-theft systems
63Safety Z
Page 126 of 337
Problems with auxiliary heating/ventilation
Display messages Possible causes/consequences and
M Solutions
FAIL The starter battery is not charged sufficiently or the system is
faulty.
X
Charge the starter battery.
X Make another attempt to switch on the auxiliary heating using
the remote control.
X Have the auxiliary heating checked at a qualified specialist
workshop. $
FAIL The signal transmission between the transmitter and the vehicle
is faulty.
X Change your position in relation to the vehicle, moving closer if
necessary.
X Make another attempt to switch the auxiliary heating on or off
using the remote control. ©
FAIL There is not enough fuel in the fuel tank, or the auxiliary heating
is faulty.
X
Refuel at the nearest filling station.
X Make another attempt to switch on the auxiliary heating using
the remote control.
X Have the auxiliary heating checked at a qualified specialist
workshop. Adjusting the air vents
Important safety notes
G
Risk of injury
Very hot or very cold air can flow from the air
vents. This could cause burns or frostbite to
bare skin in the immediate vicinity of the
vents. Keep bare skin away from these air
outlets. If necessary, direct the airflow away
to a different area of the vehicle interior. In order to ensure the direct flow of fresh air
through the air vents into the vehicle interior,
please observe the following notes:
R
keep the air inlet between the windscreen
and the bonnet free of blockages, such as
ice, snow or leaves
R never cover the ventsora ir inlet and outlet
grilles in the vehicle interior
i For virtually draught-free ventilation,
adjust the sliders of the air vents to the
centre position. Adjusting the air vents
123Climate control Z
Page 135 of 337
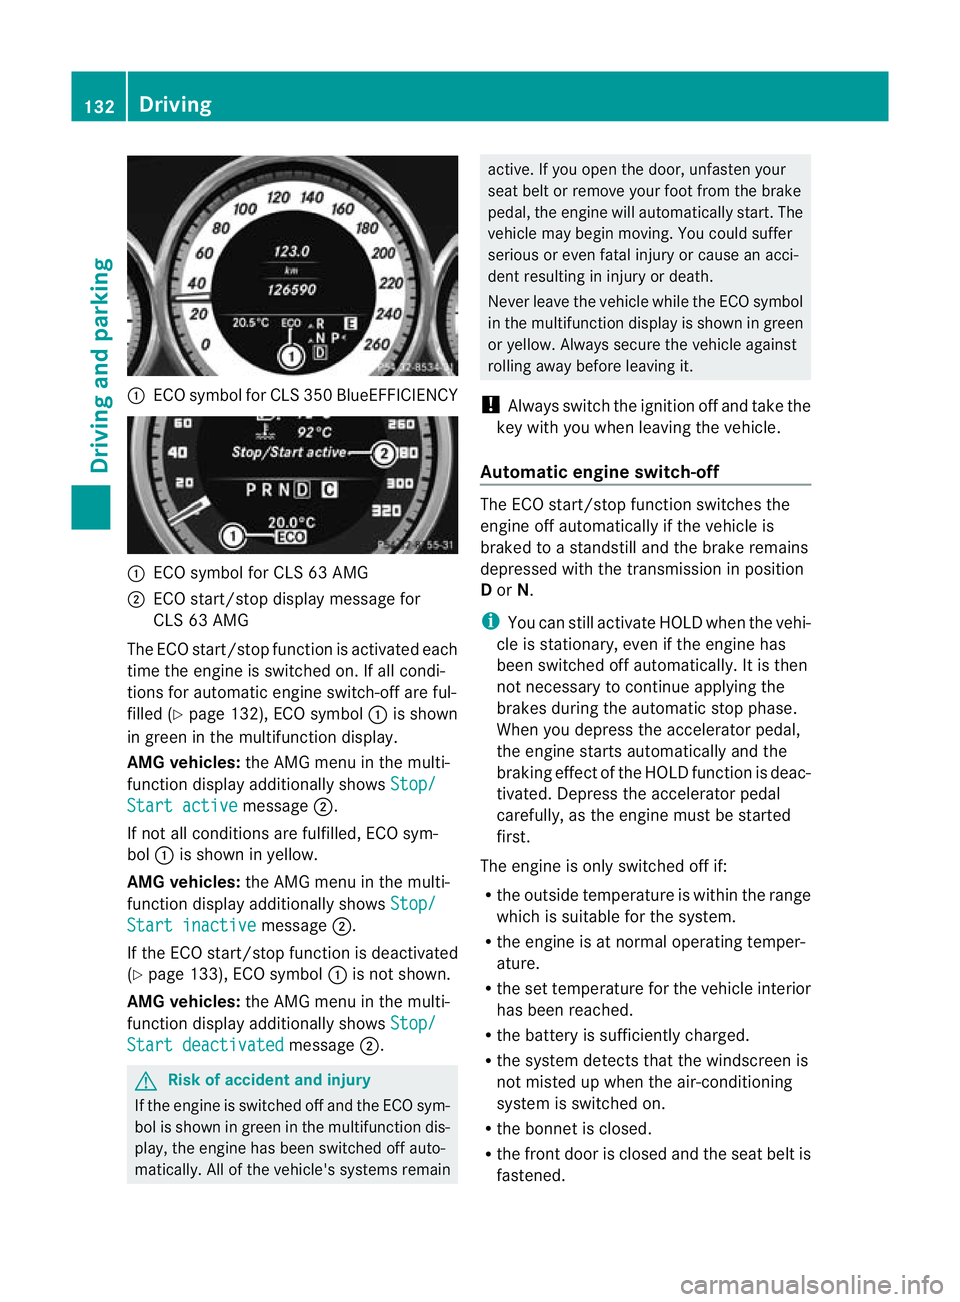
:
ECO symbo lfor CLS 350 BlueEFFICIENCY :
ECO symbol for CLS 63 AMG
; ECO start/stop display message for
CLS 63 AMG
The ECO start/stop function is activated each
time the engine is switched on. If all condi-
tions for automatic engine switch-off are ful-
filled (Y page 132), ECO symbol :is shown
in green in the multifunction display.
AMG vehicles: the AMG menu in the multi-
function display additionally shows Stop/Start active message
;.
If not all conditions are fulfilled, ECO sym-
bol :is shown in yellow.
AMG vehicles: the AMG menu in the multi-
function display additionally shows Stop/Start inactive message
;.
If the ECO start/stop function is deactivated
(Y page 133), ECO symbol :is not shown.
AMG vehicles: the AMG menu in the multi-
function display additionally shows Stop/Start deactivated message
;. G
Risk of accident and injury
If the engine is switched off and the ECO sym-
bol is shown in green in the multifunction dis-
play, the engine has been switched off auto-
matically. All of the vehicle's systems remain active. If you open the door, unfasten your
seat belt or remove your foot from the brake
pedal, the engine will automatically start.T
he
vehicle may begin moving. You could suffer
serious or even fatal injury or cause an acci-
dent resulting in injury or death.
Never leave the vehicle while the ECO symbol
in the multifunction display is shown in green
or yellow. Always secure the vehicle against
rolling away before leaving it.
! Always switch the ignition off and take the
key with you when leaving the vehicle.
Automatic engine switch-off The ECO start/stop function switches the
engine off automatically if the vehicle is
braked to a standstill and the brake remains
depressed with the transmission in position
D or N.
i You can still activate HOLD when the vehi-
cle is stationary, even if the engine has
been switched off automatically .Itis then
not necessary to continue applying the
brakes during the automatic stop phase.
When you depress the accelerator pedal,
the engine starts automatically and the
braking effect of the HOLD function is deac-
tivated. Depress the accelerator pedal
carefully, as the engine must be started
first.
The engine is only switched off if:
R the outside temperature is within the range
which is suitable for the system.
R the engine is at normal operating temper-
ature.
R the set temperature for the vehicle interior
has been reached.
R the battery is sufficiently charged.
R the system detects that the windscreen is
not misted up when the air-conditioning
system is switched on.
R the bonnet is closed.
R the front door is closed and the seat belt is
fastened. 132
DrivingDriving and parking
Page 159 of 337
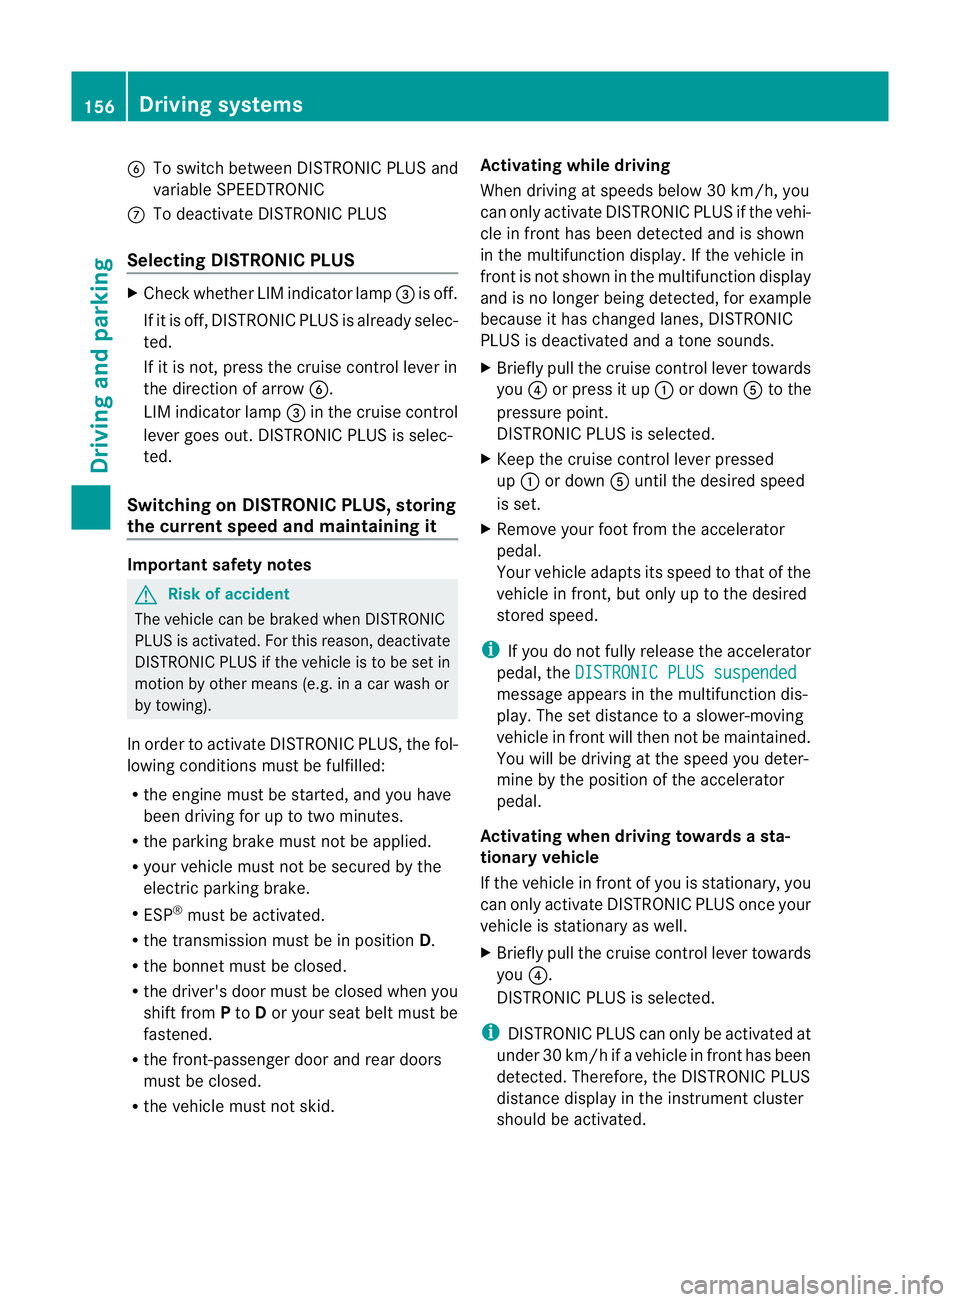
B
To switch between DISTRONIC PLUS and
variable SPEEDTRONIC
C To deactivate DISTRONIC PLUS
Selecting DISTRONIC PLUS X
Check whether LIM indicator lamp =is off.
If it is off, DISTRONIC PLUS is already selec-
ted.
If it is not, press the cruise control lever in
the direction of arrow B.
LIM indicator lamp =in the cruise control
lever goes out. DISTRONIC PLUS is selec-
ted.
Switching on DISTRONIC PLUS, storing
the current speed and maintaining it Important safety notes
G
Risk of accident
The vehicle can be braked when DISTRONIC
PLUS is activated. For this reason, deactivate
DISTRONIC PLUS if the vehicle is to be set in
motion by other means (e.g. in a car wash or
by towing).
In order to activat eDISTRONIC PLUS, the fol-
lowing conditions must be fulfilled:
R the engine must be started, and you have
been driving for up to two minutes.
R the parking brake must not be applied.
R yourv ehicle must not be secured by the
electric parking brake.
R ESP ®
must be activated.
R the transmission must be in position D.
R the bonnet must be closed.
R the driver's door must be closed when you
shift from Pto Dor your seat belt must be
fastened.
R the front-passenger door and rear doors
must be closed.
R the vehicle must not skid. Activating while driving
When driving at speeds below 30 km/h, you
can only activate DISTRONIC PLUS if the vehi-
cle in fron
thas been detected and is shown
in the multifunction display. If the vehicle in
fron tis not shown in the multifunction display
and is no longer being detected, for example
because it has changed lanes, DISTRONIC
PLUS is deactivated and atone sounds.
X Briefly pull the cruise control lever towards
you ?or press it up :or down Ato the
pressure point.
DISTRONIC PLUS is selected.
X Keep the cruise control lever pressed
up : or down Auntil the desired speed
is set.
X Remove your foot from the accelerator
pedal.
Your vehicle adapts its speed to that of the
vehicle in front, but only up to the desired
stored speed.
i If you do not fully release the accelerator
pedal, the DISTRONIC PLUS suspended message appears in the multifunction dis-
play. The set distance to a slower-moving
vehicle in front will then not be maintained.
You will be driving at the speed you deter-
mine by the position of the accelerator
pedal.
Activating when driving towards asta-
tionary vehicle
If the vehicle in front of you is stationary, you
can only activate DISTRONIC PLU Sonce your
vehicle is stationary as well.
X Briefly pull the cruise control lever towards
you ?.
DISTRONIC PLU Sis selected.
i DISTRONIC PLUS can only be activated at
under 30 km/h if a vehicle in front has been
detected. Therefore, the DISTRONIC PLUS
distance display in the instrument cluster
should be activated. 156
Driving systemsDriving and parking