2010 MERCEDES-BENZ CL550 Night
[x] Cancel search: NightPage 211 of 500

The engine oil temperature will be shown in
blue if the engine oil temperature has not yet
reached 176‡ (80†). During this time, avoid
driving at full engine speed.
If the engine reaches the overspeed range in
the manual shift program, you will see
up next
to gear indicator : as a reminder to upshift.
Use buttons : or 9 to select the
following functions in the AMG menu:
R RACETIMER (Y page 209)
R Overall analysis ( Y page 210)
R Lap analysis (Y page 210)
RACETIMER G
Warning!
The RACETIMER feature is only for use on
roads and in conditions where high speed
driving is permitted. Racing on public roads is
prohibited under all circumstances. The driver
is and must always remain responsible for
following posted speed limits.
The RACETIMER allows you to time and save
driving stretches.
X Press button = or ; to select the
AMG menu.
X Press button 9 to select the
RACETIMER. :
Gear indicator
; Second hand
= RACETIMER
? Lap
You can start the RACETIMER when the
engine is running or the starter switch is in
position 2 (Y page 262). While the RACETIMER is being displayed, you
cannot adjust the audio volume using buttons
W or X.
X
Starting: Press button W.
X Displaying intermediate time: Press
button X while the timer is running.
The intermediate time is shown for
5 seconds.
X Stopping: Press button W.
When you stop the vehicle and turn the
SmartKey to position 1 (Y page 262) or, in
vehicles with KEYLESS-GO, turn off the
engine and do not open the driver’s door, the
RACETIMER stops timing. Timing is resumed
when you press button W after switching
the ignition back on or restarting the engine.
When you switch on the Night View Assist
(Y page 333) while the RACETIMER is
operating, the RACETIMER will continue to
run in the background but cannot be operated
with the multifunction steering wheel
buttons.
To stop the RACETIMER, switch off the Night
View Assist first.
Saving lap time and starting a new lap
You can save up to 16 laps.
X Press button X while the timer is
running.
The intermediate time will be shown for
5 seconds.
X Press button X within 5 seconds.
The intermediate time shown will be saved
as a lap time.
The RACETIMER begins timing the new lap.
The new lap begins to be timed as soon as
the intermediate time is called up. Instrument cluster control system
209Control systems
216_AKB; 3; 90, en-US
d2ureepe, Version: 2.11.8.1 2009-05-15T11:47:50+02:00 - Seite 209 Z
Page 217 of 500

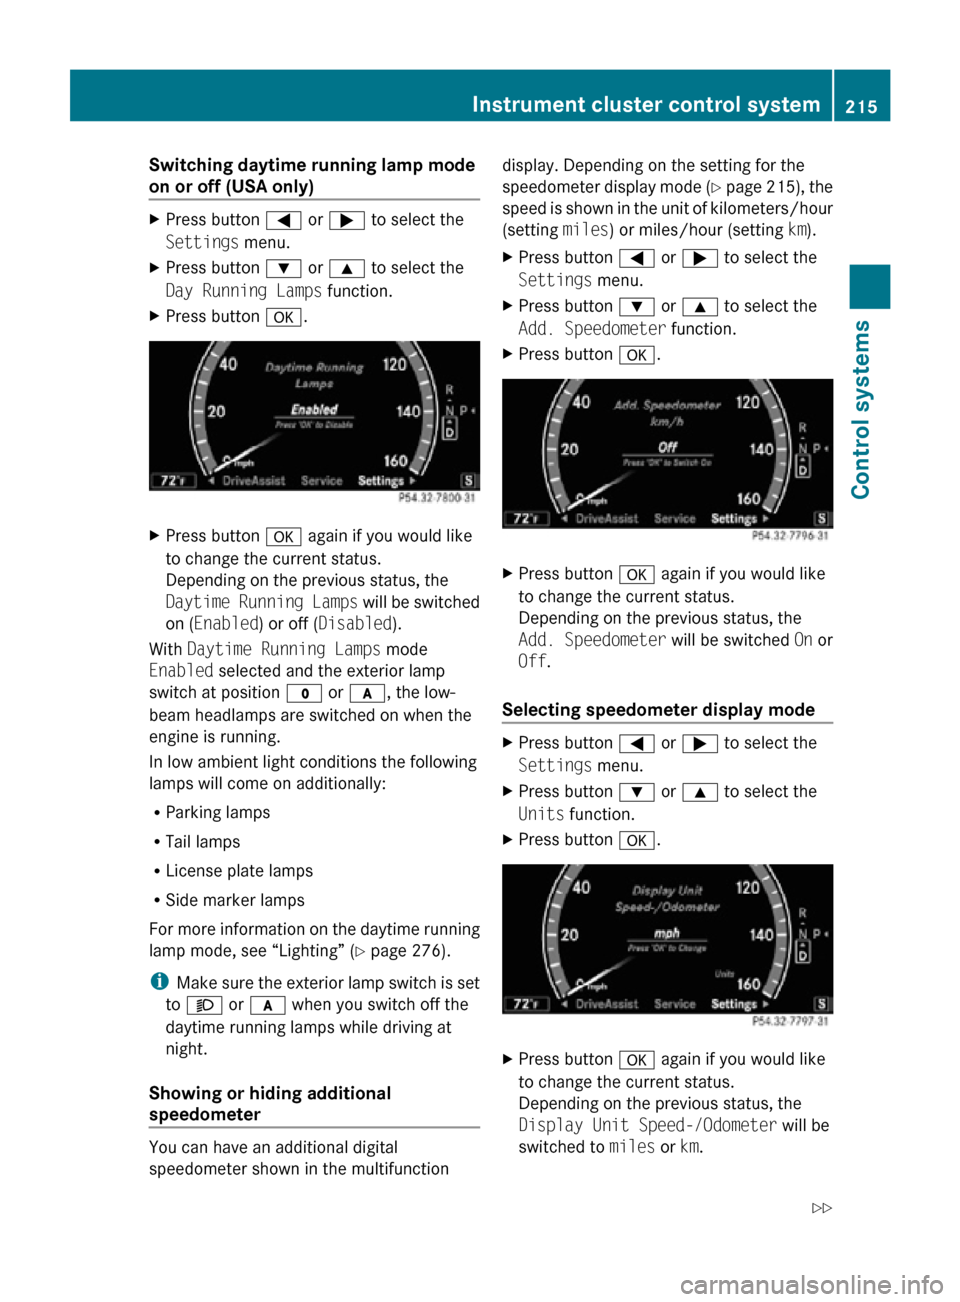
Switching daytime running lamp mode
on or off (USA only)
X
Press button = or ; to select the
Settings menu.
X Press button : or 9 to select the
Day Running Lamps function.
X Press button a. X
Press button a again if you would like
to change the current status.
Depending on the previous status, the
Daytime Running Lamps will be switched
on (Enabled) or off (Disabled).
With Daytime Running Lamps mode
Enabled selected and the exterior lamp
switch at position $ or c, the low-
beam headlamps are switched on when the
engine is running.
In low ambient light conditions the following
lamps will come on additionally:
R Parking lamps
R Tail lamps
R License plate lamps
R Side marker lamps
For more information on the daytime running
lamp mode, see “Lighting” ( Y page 276).
i Make sure the exterior lamp switch is set
to M or c when you switch off the
daytime running lamps while driving at
night.
Showing or hiding additional
speedometer You can have an additional digital
speedometer shown in the multifunction display. Depending on the setting for the
speedometer display mode (Y page 215), the
speed is shown in the unit of kilometers/hour
(setting
miles) or miles/hour (setting km).
X Press button = or ; to select the
Settings menu.
X Press button : or 9 to select the
Add. Speedometer function.
X Press button a. X
Press button a again if you would like
to change the current status.
Depending on the previous status, the
Add. Speedometer will be switched On or
Off.
Selecting speedometer display mode X
Press button = or ; to select the
Settings menu.
X Press button : or 9 to select the
Units function.
X Press button a. X
Press button a again if you would like
to change the current status.
Depending on the previous status, the
Display Unit Speed-/Odometer will be
switched to miles or km. Instrument cluster control system
215Control systems
216_AKB; 3; 90, en-US
d2ureepe, Version: 2.11.8.1 2009-05-15T11:47:50+02:00 - Seite 215 Z
Page 278 of 500

ambient lighting conditions require you to do
so.
In
low
ambient lighting conditions, only switch
from position c to L with the vehicle
at a standstill in a safe location. Switching
from c to L will briefly switch off the
headlamps. Doing so while driving in low
ambient lighting conditions may result in an
accident.
The automatic headlamp feature is only an aid
to the driver. The driver is responsible for the
operation of the vehicle’s lights at all times.
X Switching on: Turn the exterior lamp
switch to position c.
The following lamps come on and go out
depending on the brightness of the ambient
light with the SmartKey in starter switch
position 1 or the KEYLESS-GO start/stop
button pressed once:
R Tail lamps
R Parking lamps
R License plate lamps
R Side marker lamps
When the engine is running, the low-beam
headlamps will also come on and turn off
automatically.
Canada only:
High-beam headlamps are only
available with the exterior lamp switch in
position L.
Daytime running lamp mode In Canada, the daytime running lamp mode is
mandatory
and
therefore in a constant mode.
In the USA, the daytime running lamp mode
is deactivated by default.
X Activate the daytime running lamp mode
using the control system, see “Switching daytime running lamp mode on or off (USA
only)”
(
Y page 215).
X Turn the exterior lamp switch to position
$ or c.
When the engine is running, the low-beam
headlamps come on.
In low ambient lighting conditions, the
following lamps will come on additionally:
R
Tail lamps
R Parking lamps
R License plate lamps
R Side marker lamps
With the daytime running lamp mode
activated and
the engine running, you cannot
switch off the low-beam headlamps manually.
Canada only
With the exterior lamp switch in position
$ or c, you cannot switch on the
high-beam headlamps.
The high-beam flasher is available at all times.
X For nighttime driving turn the exterior lamp
switch to
position L to permit activation
of the high-beam headlamps.
When the engine is running, and you
R shift from a driving position to park
position P with
the vehicle at a standstill or
the electronic parking brake is engaged,
the low-beam headlamps will go out with a
delay of 3 minutes
R turn the exterior lamp switch to position
T, the low-beam headlamps, the tail
and parking lamps, the license plate lamps
and the side marker lamps come on
R turn the exterior lamp switch to position
L, the manual headlamp mode has
priority over the daytime running lamp
mode
The corresponding exterior lamps come on
(Y page 275). 276
Lighting
Controls in detail
216_AKB; 3; 90, en-US
d2ureepe,
Version: 2.11.8.1 2009-05-15T11:47:50+02:00 - Seite 276
Page 279 of 500

USA only
You can only switch on the high-beam
headlamps in low ambient lighting conditions.
The high-beam flasher is available at all times.
When the engine is running, and you turn the
exterior lamp switch to position T or
L, the manual headlamp mode has
priority over the daytime running lamp mode.
The corresponding exterior lamps come on
(Y page 275).
Fog lamps
Fog lamps cannot be switched on with the
exterior lamp switch in position c.
G
Warning!
In low ambient lighting or foggy conditions,
only switch from position c to L with
the vehicle at a standstill in a safe location.
Switching from c to L will briefly
switch off the headlamps. Doing so while
driving in low ambient lighting conditions may
result in an accident.
Fog lamps will operate with the parking lamps
and/or the low-beam headlamps on. Fog
lamps should only be used in conjunction with
low-beam headlamps. Consult your State or
Province Motor Vehicle Regulations
regarding permissible lamp operation.
X Switch on the ignition.
X Turn the exterior lamp switch to position
T or L (Y page 275).
X Switching on front fog lamps: Pull out the
exterior lamp switch to first stop.
The green indicator lamp N in the
exterior lamp switch comes on.
X Switching on rear fog lamp: Pull out the
exterior lamp switch to second stop.
The rear fog lamp, the front fog lamps, the
green N and the yellow indicator lamp
R in the exterior lamp switch come on.
X Switching off front fog lamps/rear fog
lamp: Push in the exterior lamp switch to
its stop. Locator lighting and night security
illumination The locator lighting and night security
illumination are described in the COMAND
vehicle menu section under (Y page 191).
Combination switch
Turn signals
X
Press the combination switch in direction
of arrow ; or ?.
The corresponding turn signal indicator
lamp ! or # in the instrument
cluster flashes.
The combination switch resets automatically
after major steering wheel movements.
To signal minor directional changes:
X Press the combination switch only to the
point of resistance in direction of
arrow ; or ? and release.
The corresponding turn signal lamps will
flash three times. Lighting
277Controls in detail
216_AKB; 3; 90, en-US
d2ureepe, Version: 2.11.8.1 2009-05-15T11:47:50+02:00 - Seite 277 Z
Page 303 of 500

Steam from an overheated engine can cause
serious
burns
which can occur just by opening
the engine hood. Stay away from the engine
if you see or hear steam coming from it.
Stop the vehicle in a safe location away from
other traffic. Turn off the engine, get out of the
vehicle and do not stand near the vehicle until
the engine has cooled down.
During severe operating conditions, e.g. stop-
and-go traffic, the coolant temperature may
rise close to 248‡ (120†), i.e close to the
red zone of the temperature gauge.
! Excessive coolant temperature triggers a
warning in the multifunction display.
The engine should not be operated with a
coolant temperature above 248‡ (120†),
i.e. in the red zone of the coolant
temperature gauge. Doing so may cause
serious engine damage which is not
covered by the Mercedes-Benz Limited
Warranty. Tachometer
The red marking on the tachometer
(Y page
29) denotes excessive engine speed.
! Avoid driving at excessive engine speeds,
as it may result in serious engine damage
that is not covered by the Mercedes-Benz
Limited Warranty.
To help protect the engine, the fuel supply is
interrupted if the engine is operated within
the red marking. Outside temperature indicator
The outside temperature indicator is on the
bottom left-hand side of the instrument
cluster (Y page 29). G
Warning!
The outside temperature indicator is not
designed to serve as an ice-warning device
and is therefore unsuitable for that purpose. Indicated temperatures just above the
freezing
point
do not guarantee that the road
surface is free of ice. The road may still be icy,
especially in wooded areas or on bridges. Fuel gauge
The fuel gauge is on the left-hand side of the
instrument cluster
(Y page 29). Once the fuel
level has fallen below the reserve mark, the
yellow segment indicator for the fuel reserve
comes on. Driving systems
Introduction
This section describes the following driving
systems of your vehicle:
R Cruise control
R DISTRONIC PLUS
R Hill-start assist system
R HOLD function
R AIRMATIC
R Active Body Control (ABC)
R All-wheel drive (4MATIC)
R Parktronic system
R Park Assist
R Advanced Parking Guidance
R Rear view camera
R Night View Assist
R Blind Spot Assist
The driving safety systems ABS, Adaptive
Brake, Adaptive Brake Lights, BAS, BAS
PLUS, EBP, ESC and PRE-SAFE ®
Brake are
described in
the “Safety and security” section
(Y page 56). Driving systems
301
Controls in detail
216_AKB; 3; 90, en-US
d2ureepe, Version: 2.11.8.1 2009-05-15T11:47:50+02:00 - Seite 301 Z
Page 334 of 500

Canceling the Advanced Parking
Guidance
X
Press the Park Assist button (Y page 327).
The Advanced Parking Guidance is
canceled immediately and the Park Assist
is deactivated.
The Advanced Parking Guidance is canceled
automatically if guidance into the parking
space is no longer possible or if an error
occurs.
The parking
space symbol disappears and the
message Parking Guidance Canceled
appears in the multifunction display. Rear view camera
The rear
view camera is an optical parking aid.
The area behind the vehicle appears in the
COMAND system display as a mirror image,
like in the rear view mirror.
In addition, the rear view camera contains
guidelines to help you with driving in reverse. G
Warning!
Make sure no persons or animals are in or
near the area in which you are parking/
maneuvering. Otherwise, they could be
injured. G
Warning!
The rear view camera is only an aid and may
display obstacles
R from a distorted perspective
R inaccurately
R may not display obstacles at all
The rear view camera does not relieve you of
the responsibility to be cautious. Take care
and pay careful attention. The rear view
camera may not show objects which are
R very close to the rear bumper
R under the rear bumper
R above the trunk handle You are responsible for safety at all times and
must continue to pay attention to the
immediate surroundings when parking and
maneuvering. This includes the area behind,
in front of, and beside the vehicle. Otherwise
you could endanger yourself and/or others.
G
Warning!
The rear view camera either will not function
or will not function to its full capability if
R the trunk lid is open
R it is raining very hard, snowing or foggy
R it is night or you are parking/maneuvering
your vehicle
in an area where it is very dark
R the camera is exposed to a very bright white
light
R the immediate surroundings are
illuminated with fluorescent light (the
COMAND system display can flicker)
R there is a sudden change in temperature,
e.g. if you drive into a heated garage from
the cold (lens condensation)
R the camera lens is dirty or covered
R the rear of your vehicle is damaged
In this case, have the position and setting
of the camera checked by a qualified
specialist workshop. Mercedes-Benz
recommends that you contact a Mercedes-
Benz Center for this purpose.
Do not use the rear view camera in these
situations. Otherwise you could injure
yourself or others and/or damage property
including your vehicle while parking/
maneuvering. G
Warning!
Use of rear view camera can be dangerous if
you are color-blind or have impaired color
vision.
Only use
rear view camera if you can see and
distinguish all colored guidelines shown by
rear view camera on the COMAND system
display. 332
Driving systems
Controls in detail
216_AKB; 3; 90, en-US
d2ureepe,
Version: 2.11.8.1 2009-05-15T11:47:50+02:00 - Seite 332
Page 335 of 500

Camera lens
: must be free of dirt, ice,
snow, and slush to function properly. Clean
the camera lens regularly. Being careful not
to scratch or damage the camera lens, see
“Cleaning the rear view camera lens”
(Y page 407).
Switching on or off X
Switching on: Switch on the ignition.
X Switch on the COMAND system.
X Shift the automatic transmission to reverse
gear R.
The COMAND system display will show the
area behind the vehicle with guidelines. G
Warning!
Please note that objects which do not touch
the ground may appear to be further away
than they actually are, for example:
R the bumper of a vehicle parked behind you
R a trailer hitch
R the back of a truck
In such cases, you should not use the
guidelines to judge the distance. You may
misjudge the distance which increases the
risk of impacting the objects.
Even when the object you approach is directly
on the ground do not approach the object any
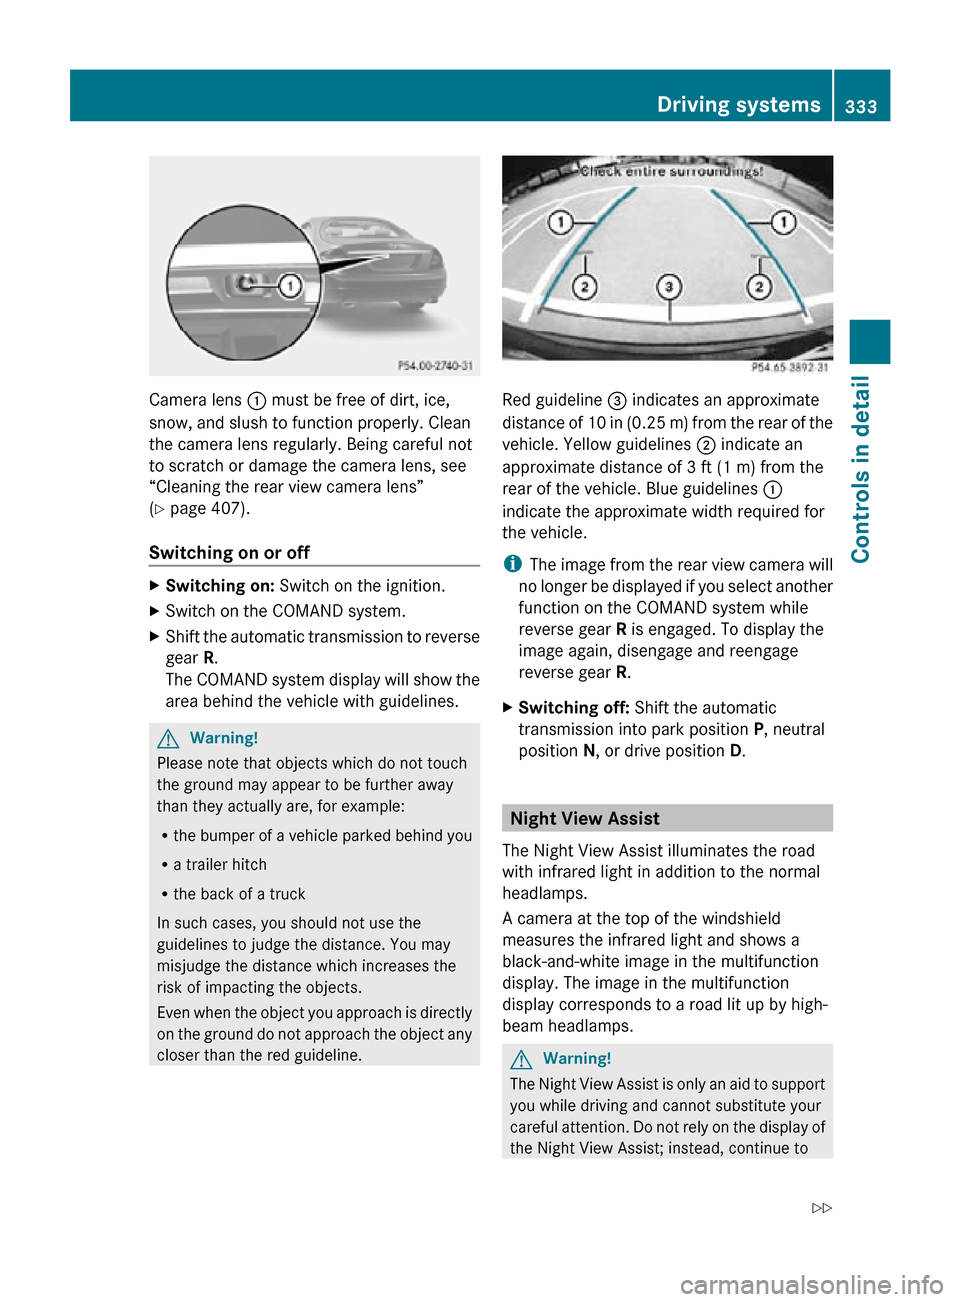
closer than the red guideline. Red guideline
= indicates an approximate
distance of 10 in (0.25 m) from the rear of the
vehicle. Yellow guidelines ; indicate an
approximate distance of 3 ft (1 m) from the
rear of the vehicle. Blue guidelines :
indicate the approximate width required for
the vehicle.
i The image from the rear view camera will
no longer be displayed if you select another
function on the COMAND system while
reverse gear R is engaged. To display the
image again, disengage and reengage
reverse gear R.
X Switching off: Shift the automatic
transmission into park position P, neutral
position N, or drive position D. Night View Assist
The Night View Assist illuminates the road
with infrared light in addition to the normal
headlamps.
A camera at the top of the windshield
measures the infrared light and shows a
black-and-white image in the multifunction
display. The image in the multifunction
display corresponds to a road lit up by high-
beam headlamps. G
Warning!
The Night View Assist is only an aid to support
you while driving and cannot substitute your
careful attention. Do not rely on the display of
the Night View Assist; instead, continue to Driving systems
333Controls in detail
216_AKB; 3; 90, en-US
d2ureepe, Version: 2.11.8.1 2009-05-15T11:47:50+02:00 - Seite 333 Z
Page 336 of 500

look through the windshield. You are always
responsible for safety and must drive in
accordance with traffic conditions.
Otherwise, you could endanger yourself and
others.
The system may be impaired or unavailable
when
R
visibility is poor, e.g. due to snow, rain, fog,
or heavy spray
R the camera area of the windshield is dirty,
fogged up or covered by a sticker for
example
R driving through curves or on inclines or
declines G
Warning!
The Night View Assist cannot record objects
immediately in front of or next to the vehicle.
When maneuvering, continue to look through
the windshield. Make sure no persons or
animals are in the area in which you are
maneuvering. You could otherwise injure
them.
The Night View Assist image in the
multifunction display is not impaired by the
headlamps of approaching vehicles.
As a result, you can better follow the course
of the road and detect obstacles earlier on.
i Infrared light is invisible to the human eye
and thus does not blind. The Night View
Assist can remain switched on
permanently even with oncoming traffic
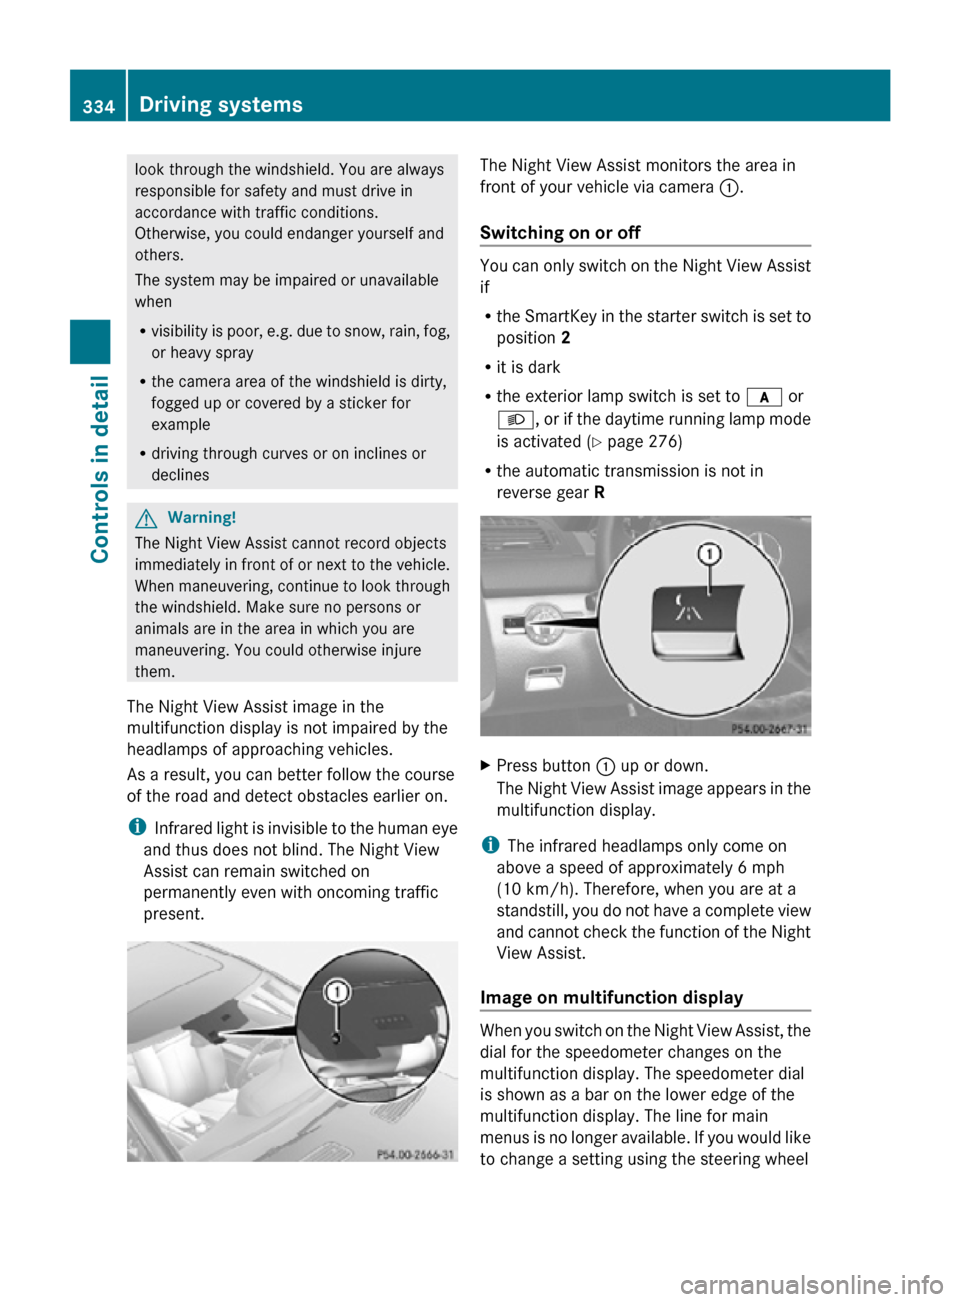
present. The Night View Assist monitors the area in
front of your vehicle via camera
:.
Switching on or off You can only switch on the Night View Assist
if
R
the SmartKey in the starter switch is set to
position 2
R it is dark
R the exterior lamp switch is set to c or
L, or if the daytime running lamp mode
is activated ( Y page 276)
R the automatic transmission is not in
reverse gear R X
Press button : up or down.
The Night View Assist image appears in the
multifunction display.
i The infrared headlamps only come on
above a speed of approximately 6 mph
(10 km/h). Therefore, when you are at a
standstill, you do not have a complete view
and cannot check the function of the Night
View Assist.
Image on multifunction display When you switch on the Night View Assist, the
dial for the speedometer changes on the
multifunction display. The speedometer dial
is shown as a bar on the lower edge of the
multifunction display. The line for main
menus is no longer available. If you would like
to change a setting using the steering wheel334
Driving systemsControls in detail
216_AKB; 3; 90, en-US
d2ureepe,
Version: 2.11.8.1 2009-05-15T11:47:50+02:00 - Seite 334