2010 MERCEDES-BENZ C300 4MATIC lock
[x] Cancel search: lockPage 125 of 364
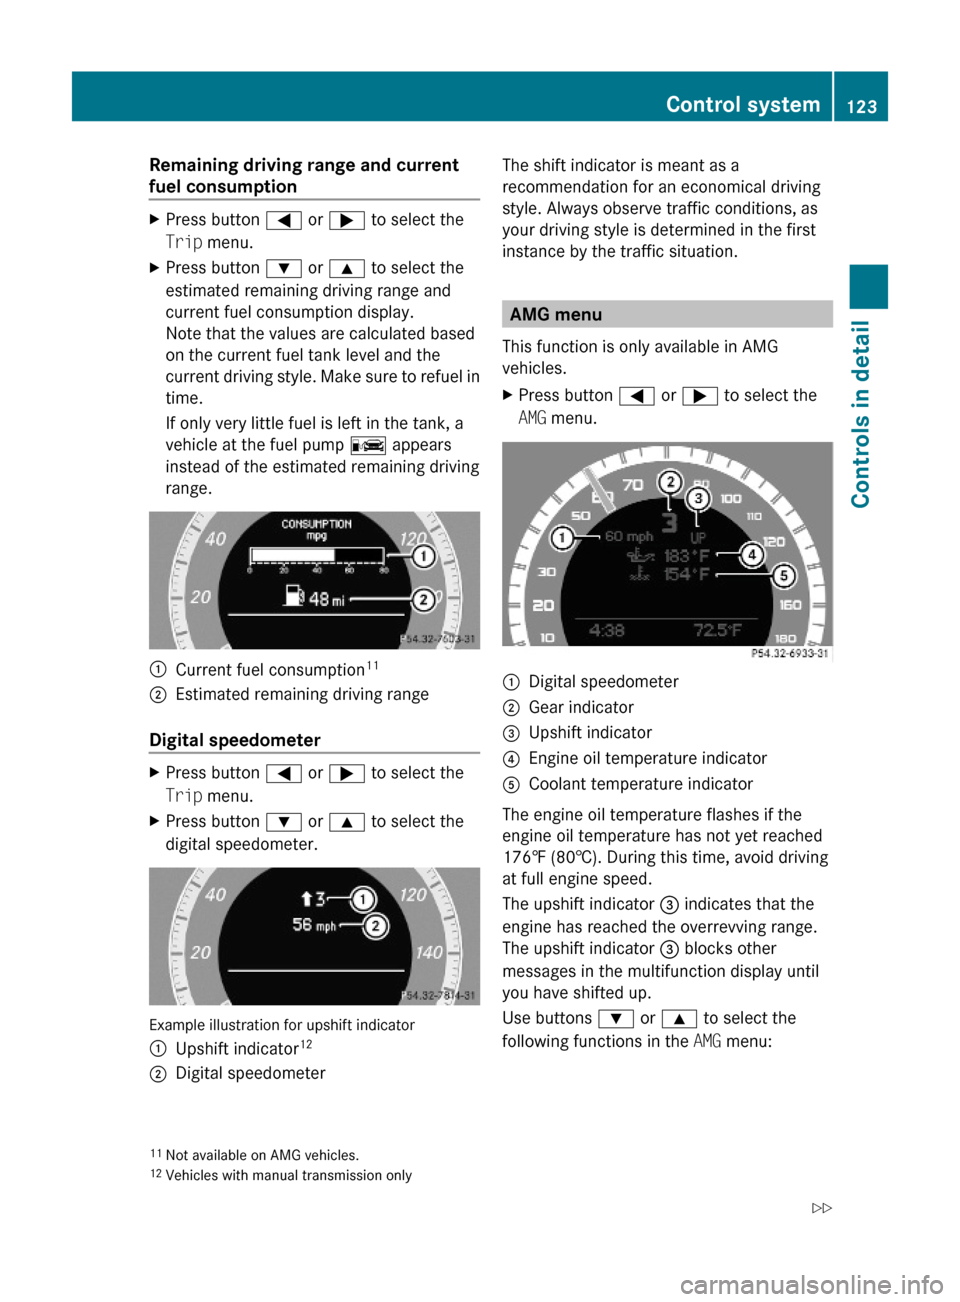
Remaining driving range and current
fuel consumption
XPress button = or ; to select the
Trip menu.
XPress button : or 9 to select the
estimated remaining driving range and
current fuel consumption display.
Note that the values are calculated based
on the current fuel tank level and the
current driving style. Make sure to refuel in
time.
If only very little fuel is left in the tank, a
vehicle at the fuel pump C appears
instead of the estimated remaining driving
range.
:Current fuel consumption11;Estimated remaining driving range
Digital speedometer
XPress button = or ; to select the
Trip menu.
XPress button : or 9 to select the
digital speedometer.
Example illustration for upshift indicator
:Upshift indicator12;Digital speedometerThe shift indicator is meant as a
recommendation for an economical driving
style. Always observe traffic conditions, as
your driving style is determined in the first
instance by the traffic situation.
AMG menu
This function is only available in AMG
vehicles.
XPress button = or ; to select the
AMG menu.
:Digital speedometer;Gear indicator=Upshift indicator?Engine oil temperature indicatorACoolant temperature indicator
The engine oil temperature flashes if the
engine oil temperature has not yet reached
176‡ (80†). During this time, avoid driving
at full engine speed.
The upshift indicator = indicates that the
engine has reached the overrevving range.
The upshift indicator = blocks other
messages in the multifunction display until
you have shifted up.
Use buttons : or 9 to select the
following functions in the AMG menu:
11Not available on AMG vehicles.12Vehicles with manual transmission only
Control system123Controls in detail204_AKB; 5; 23, en-USd2ureepe,Version: 2.11.8.12009-07-16T17:54:06+02:00 - Seite 123Z
Page 133 of 364
XPress button : or 9 to select a
submenu.
Scroll down with button :, scroll up with
button 9.
With the selection marker on the desired
submenu, use the button a to access the
individual functions within that submenu.
Once within the submenu, you can use button
9 to move to the next function or
button : to move to the previous function
within that submenu.
The following lists show what settings can be
changed within the various menus. Detailed
instructions on making individual settings can
be found on the following pages.
Instrument cluster submenu
RSelecting speedometer display mode
(Y page 131)
RShowing or hiding additional
speedometer13 (Y page 132)
RPermanent display14 (speed display or
outside temperature) (Y page 132)
Time/Date submenu
RSetting the time (Y page 132)
RSetting the date (Y page 133)
Lights submenu
RSwitching daytime running lamp mode on
or off (USA only) (Y page 133)
RSwitching locator lighting on or off
(Y page 134)
RSwitching interior lighting delayed shut-off
on or off (Y page 135)
Vehicle submenu
RSwitching automatic central locking on or
off (Y page 135)
Convenience submenu
RActivating easy-entry/exit feature
(Y page 136)
RSwitching fold-in function for exterior rear
view mirrors on or off (Canada only)
(Y page 136)
Instrument cluster submenu
Access the Instr. Cluster submenu via
the Settings menu. Use the Instr.
Cluster submenu to change the instrument
cluster display settings.
The following functions are available:
RSelecting speedometer display mode
(Y page 131)
RShowing or hiding additional
speedometer15 (Y page 132)
RPermanent display16 (speed display or
outside temperature) (Y page 132)
Selecting speedometer display mode
XPress = or ; to select the
Settings menu.
XPress button : or 9 to select the
Instr. Cluster submenu.
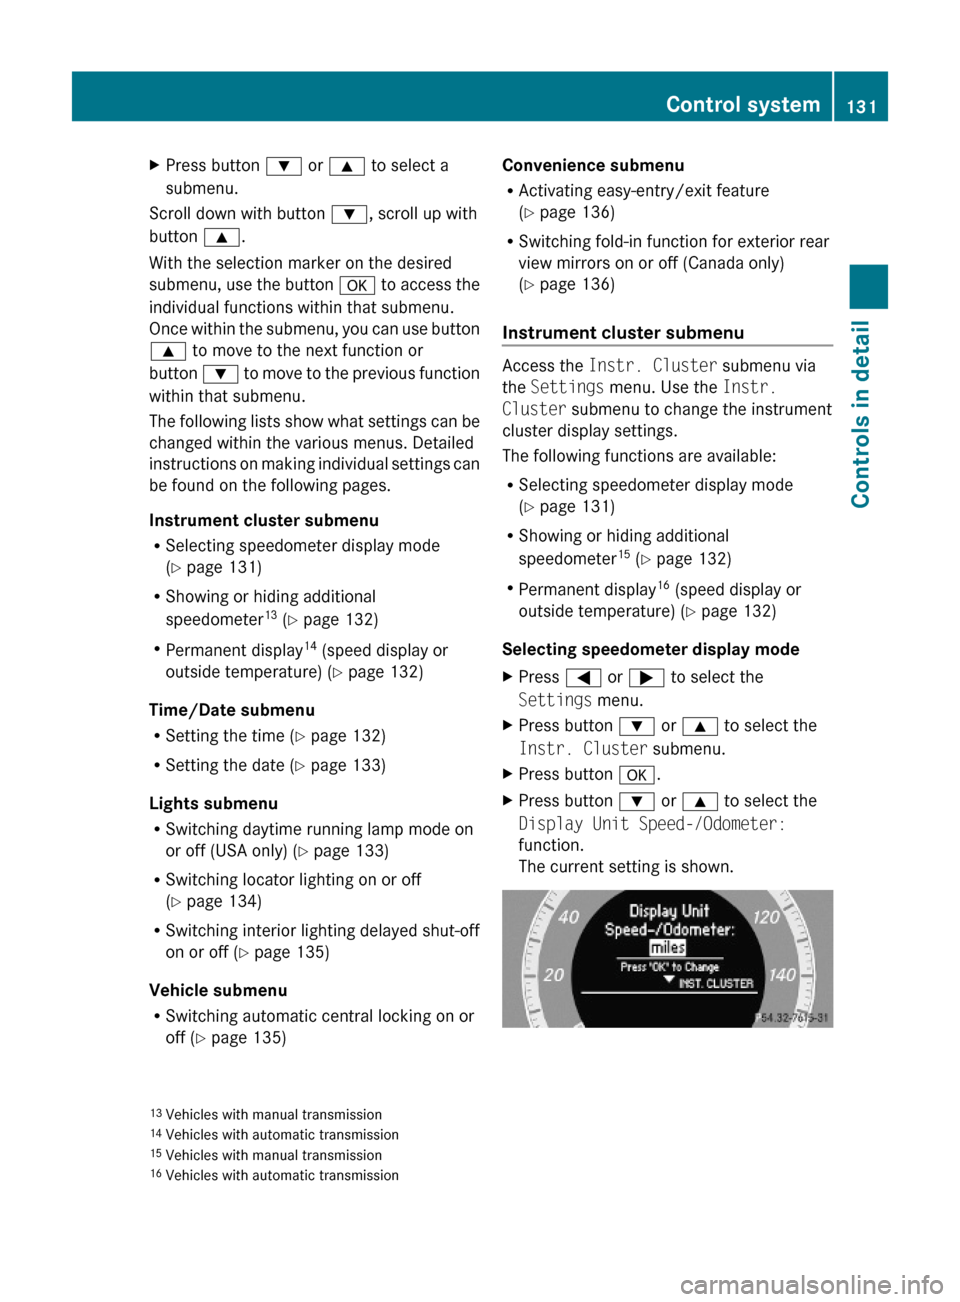
XPress button a.XPress button : or 9 to select the
Display Unit Speed-/Odometer:
function.
The current setting is shown.
13Vehicles with manual transmission14Vehicles with automatic transmission15Vehicles with manual transmission16Vehicles with automatic transmission
Control system131Controls in detail204_AKB; 5; 23, en-USd2ureepe,Version: 2.11.8.12009-07-16T17:54:06+02:00 - Seite 131Z
Page 136 of 364
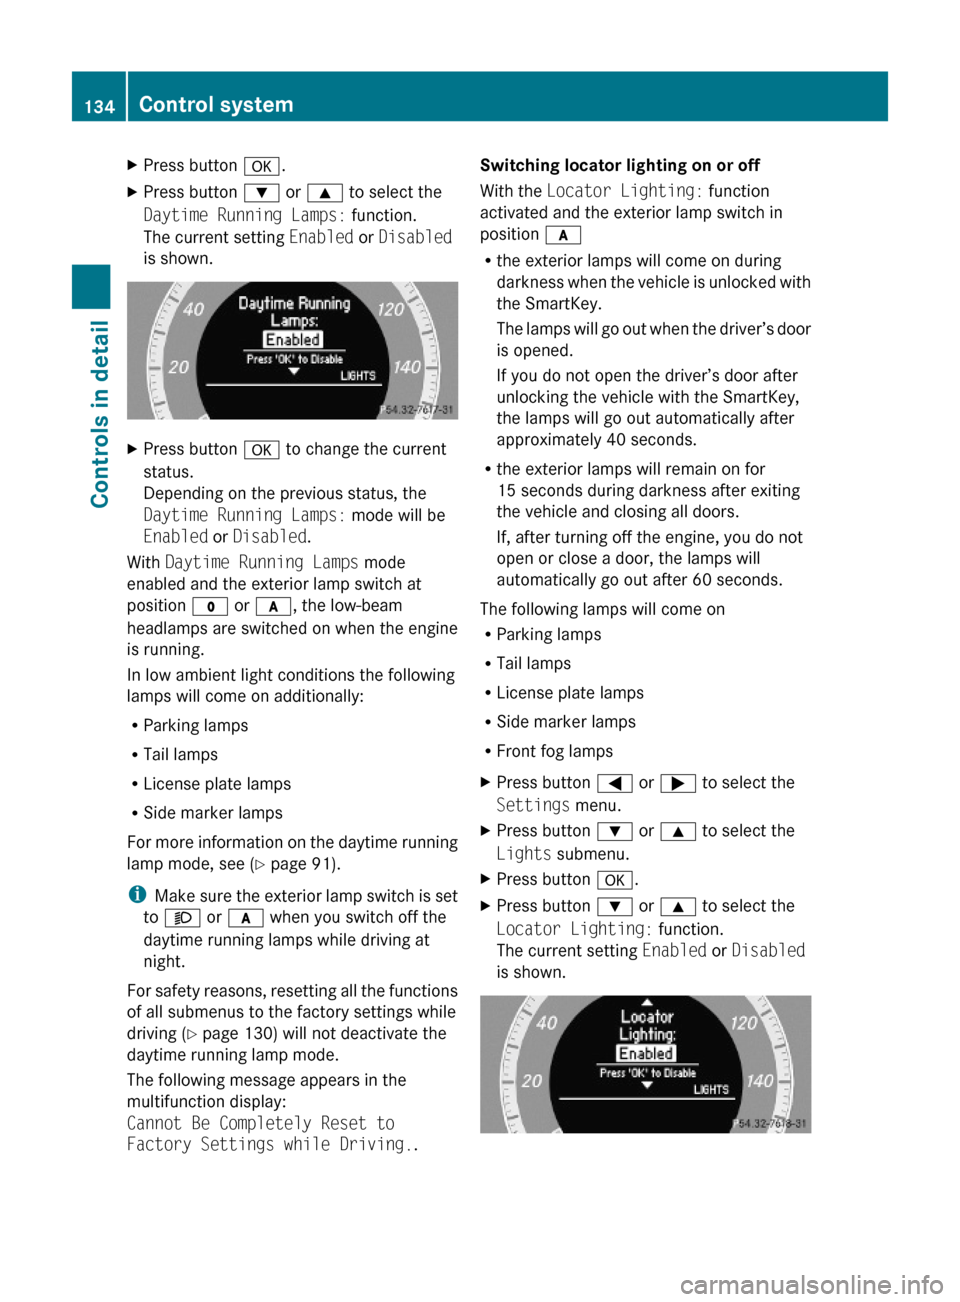
XPress button a.XPress button : or 9 to select the
Daytime Running Lamps: function.
The current setting Enabled or Disabled
is shown.
XPress button a to change the current
status.
Depending on the previous status, the
Daytime Running Lamps: mode will be
Enabled or Disabled.
With Daytime Running Lamps mode
enabled and the exterior lamp switch at
position $ or c, the low-beam
headlamps are switched on when the engine
is running.
In low ambient light conditions the following
lamps will come on additionally:
RParking lamps
RTail lamps
RLicense plate lamps
RSide marker lamps
For more information on the daytime running
lamp mode, see (Y page 91).
iMake sure the exterior lamp switch is set
to M or c when you switch off the
daytime running lamps while driving at
night.
For safety reasons, resetting all the functions
of all submenus to the factory settings while
driving (Y page 130) will not deactivate the
daytime running lamp mode.
The following message appears in the
multifunction display:
Cannot Be Completely Reset to
Factory Settings while Driving..
Switching locator lighting on or off
With the Locator Lighting: function
activated and the exterior lamp switch in
position c
Rthe exterior lamps will come on during
darkness when the vehicle is unlocked with
the SmartKey.
The lamps will go out when the driver’s door
is opened.
If you do not open the driver’s door after
unlocking the vehicle with the SmartKey,
the lamps will go out automatically after
approximately 40 seconds.
Rthe exterior lamps will remain on for
15 seconds during darkness after exiting
the vehicle and closing all doors.
If, after turning off the engine, you do not
open or close a door, the lamps will
automatically go out after 60 seconds.
The following lamps will come on
RParking lamps
RTail lamps
RLicense plate lamps
RSide marker lamps
RFront fog lamps
XPress button = or ; to select the
Settings menu.
XPress button : or 9 to select the
Lights submenu.
XPress button a.XPress button : or 9 to select the
Locator Lighting: function.
The current setting Enabled or Disabled
is shown.
134Control systemControls in detail
204_AKB; 5; 23, en-USd2ureepe,Version: 2.11.8.12009-07-16T17:54:06+02:00 - Seite 134
Page 137 of 364
XPress button a to change the current
status.
Depending on the previous status, the
Locator Lighting: function will be
Enabled or Disabled.
You can temporarily deactivate the
headlamps delayed shut-off feature:
XBefore exiting the vehicle, turn the
SmartKey in the starter switch to
position 0.
XThen turn it to position 2 and back to
position 0.
The headlamps delayed shut-off feature is
deactivated. It will reactivate as soon as
you start the engine.
Switching interior lighting delayed shut-
off on or off
Use this function to set whether you would
like the interior lighting to remain on for
10 seconds during darkness after you have
removed the SmartKey from the starter
switch.
XPress button = or ; to select the
Settings menu.
XPress button : or 9 to select the
Lights submenu.
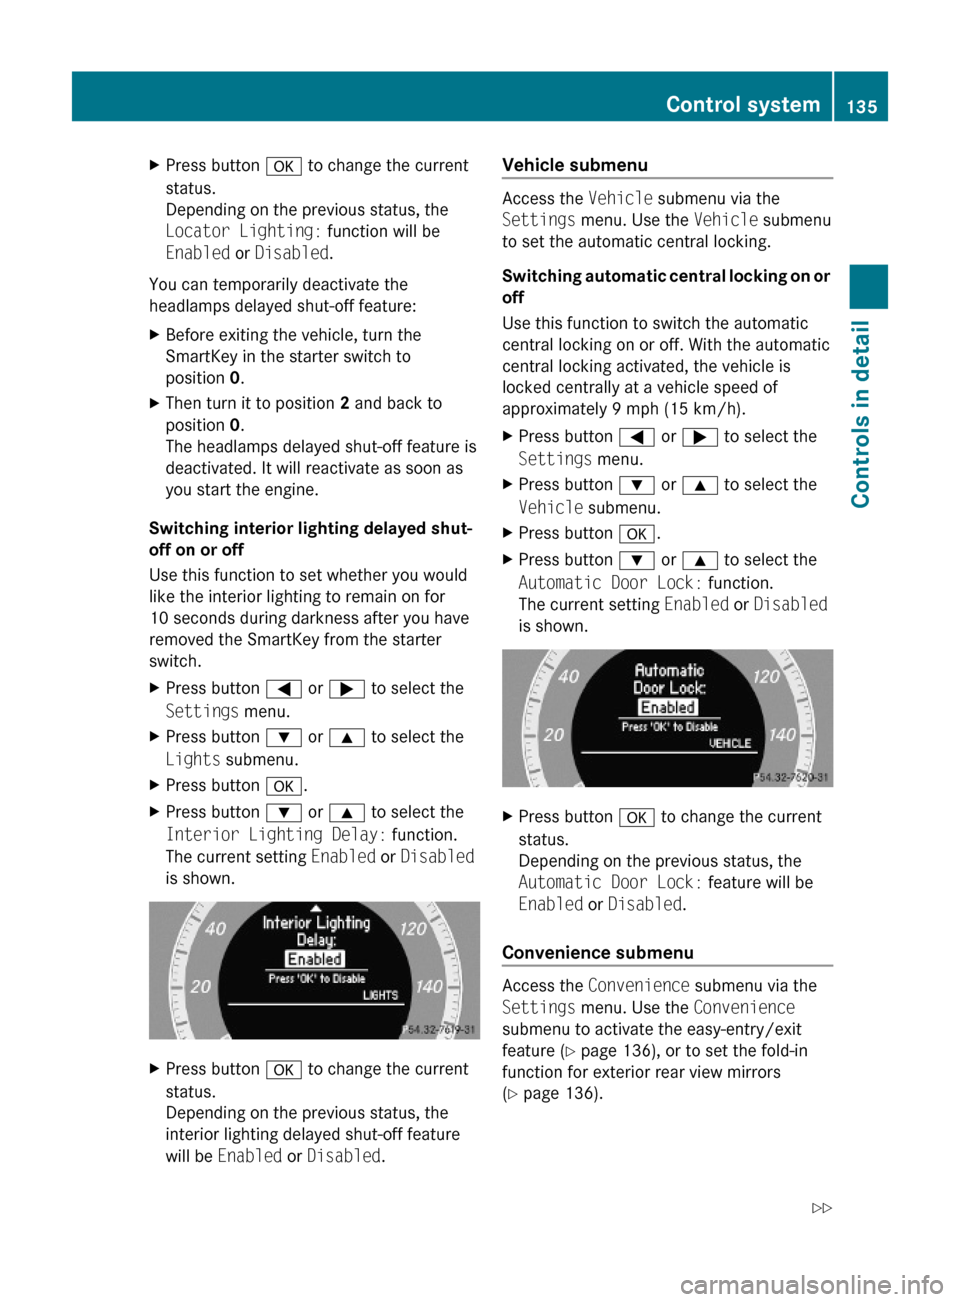
XPress button a.XPress button : or 9 to select the
Interior Lighting Delay: function.
The current setting Enabled or Disabled
is shown.
XPress button a to change the current
status.
Depending on the previous status, the
interior lighting delayed shut-off feature
will be Enabled or Disabled.
Vehicle submenu
Access the Vehicle submenu via the
Settings menu. Use the Vehicle submenu
to set the automatic central locking.
Switching automatic central locking on or
off
Use this function to switch the automatic
central locking on or off. With the automatic
central locking activated, the vehicle is
locked centrally at a vehicle speed of
approximately 9 mph (15 km/h).
XPress button = or ; to select the
Settings menu.
XPress button : or 9 to select the
Vehicle submenu.
XPress button a.XPress button : or 9 to select the
Automatic Door Lock: function.
The current setting Enabled or Disabled
is shown.
XPress button a to change the current
status.
Depending on the previous status, the
Automatic Door Lock: feature will be
Enabled or Disabled.
Convenience submenu
Access the Convenience submenu via the
Settings menu. Use the Convenience
submenu to activate the easy-entry/exit
feature (Y page 136), or to set the fold-in
function for exterior rear view mirrors
(Y page 136).
Control system135Controls in detail204_AKB; 5; 23, en-USd2ureepe,Version: 2.11.8.12009-07-16T17:54:06+02:00 - Seite 135Z
Page 138 of 364
Activating easy-entry/exit feature
Use this function to activate and deactivate
the easy-entry/exit feature (Y page 85).
GWarning!
You must make sure no one can become
trapped or injured by the moving steering
wheel when the easy-entry/exit feature is
activated.
To stop steering wheel movement, move
steering wheel adjustment stalk or press one
of the memory position buttons.
Do not leave children unattended in the
vehicle, or with access to an unlocked vehicle.
Children could open the driver’s door and
unintentionally activate the easy-entry/exit
feature, which could result in an accident
and/or serious personal injury.
XPress button = or ; to select the
Settings menu.
XPress button : or 9 to select the
Convenience submenu.
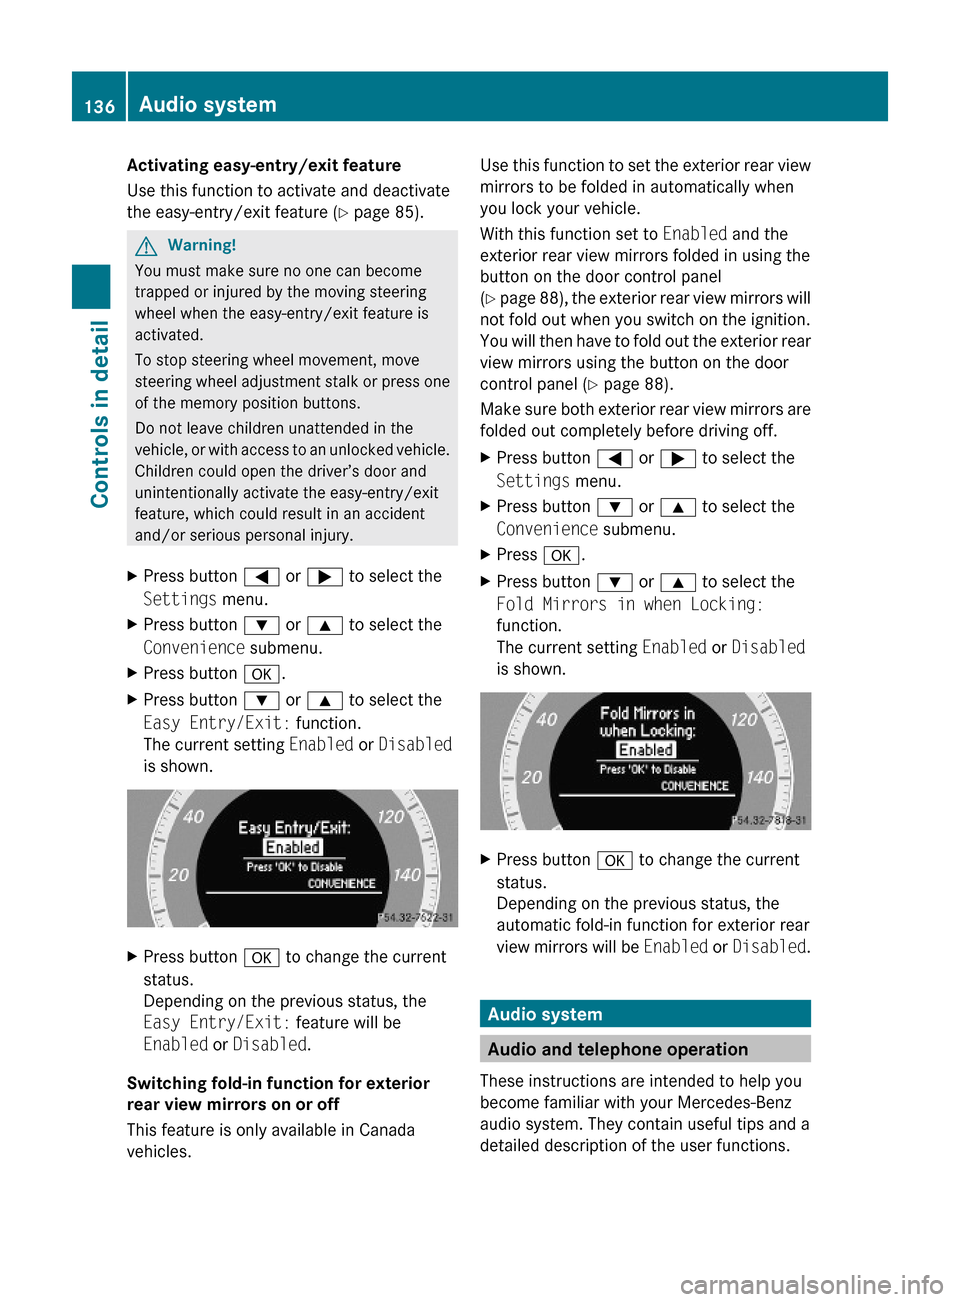
XPress button a.XPress button : or 9 to select the
Easy Entry/Exit: function.
The current setting Enabled or Disabled
is shown.
XPress button a to change the current
status.
Depending on the previous status, the
Easy Entry/Exit: feature will be
Enabled or Disabled.
Switching fold-in function for exterior
rear view mirrors on or off
This feature is only available in Canada
vehicles.
Use this function to set the exterior rear view
mirrors to be folded in automatically when
you lock your vehicle.
With this function set to Enabled and the
exterior rear view mirrors folded in using the
button on the door control panel
(Y page 88), the exterior rear view mirrors will
not fold out when you switch on the ignition.
You will then have to fold out the exterior rear
view mirrors using the button on the door
control panel (Y page 88).
Make sure both exterior rear view mirrors are
folded out completely before driving off.
XPress button = or ; to select the
Settings menu.
XPress button : or 9 to select the
Convenience submenu.
XPress a.XPress button : or 9 to select the
Fold Mirrors in when Locking:
function.
The current setting Enabled or Disabled
is shown.
XPress button a to change the current
status.
Depending on the previous status, the
automatic fold-in function for exterior rear
view mirrors will be Enabled or Disabled.
Audio system
Audio and telephone operation
These instructions are intended to help you
become familiar with your Mercedes-Benz
audio system. They contain useful tips and a
detailed description of the user functions.
136Audio systemControls in detail
204_AKB; 5; 23, en-USd2ureepe,Version: 2.11.8.12009-07-16T17:54:06+02:00 - Seite 136
Page 171 of 364

system. Please make sure any other
Bluetooth ®
device linked with the mobile
phone is switched off before you use the
telephone functions with the audio system.
Changes or modifications not expressly
approved by the party responsible for
compliance could void the user’s authority to
operate the equipment.
The head unit internal Bluetooth ®
transmitter
must not be co-located or operated in
conjunction with any other antenna or
transmitter.
This equipment complies with FCC/IC
radiation exposure limits set forth for
uncontrolled equipment and meets the FCC
radio frequency (RF) Exposure Guidelines in
Supplement C to OET65 and RSS-102 of the
IC radio frequency (RF) Exposure rules. This
equipment has very low levels of RF energy
that it is deemed to comply without testing of
specific absorption ratio (SAR).
Unless otherwise indicated, the descriptions
and illustrations in this section refer to the
audio system.
Caller ID
The audio system can display the telephone
number and the name of the caller, e.g. for an
incoming call and also in other menus or
displays.
For the telephone number to be displayed,
the caller must transmit their telephone
number. Otherwise Unknown will be shown on
the audio display.
This is also the case for name displays. For
this, the telephone number and the name of
the caller must also be saved in the telephone
book.
Functional restrictions
You will not be able to use the mobile phone,
or you may have to wait a while, in the
following situations:
R If the mobile phone is switched off.
R If the mobile phone is not connected via the
Bluetooth ®
interface to the audio system.R If the mobile phone is locked.
R If the mobile phone has not yet acquired a
network signal.
The mobile phone automatically tries to log
into a network. If no network is available,
you will also not be able to make a “911”
emergency call. If you attempt to make an
outgoing call, the No Service message will
appear for a short while.
R If you switch off the audio system in the
middle of a call, e.g. by switching off the
ignition, that call will be cut off. You can
prevent this from happening as follows:
- Switch the mobile phone to “private
mode” before switching the audio
system off (see mobile phone operating
instructions).
Activating the mobile phone
Prerequisites for the mobile phone
For making calls using the audio system via
the Bluetooth ®
interface, you will need a
Bluetooth ®
enabled mobile phone.
Your mobile phone must support the
Bluetooth ®
hands-free profile 1.0 or higher to
make or receive calls (see mobile phone
operating instructions).
i For further information on suitable mobile
phones and connecting Bluetooth ®
-
enabled mobile phones to the audio system
R visit www.mbusa-mobile.com
R call the Mercedes-Benz Customer
Assistance Center at
1-800-FOR-MERCedes
(1-800-367-6372) (in the USA)
R call Customer Service at
1-800-387-0100 (in Canada)
Activating Bluetooth ®
XSwitch on the mobile phone (see mobile
phone operating instructions).XEnter the PIN (not necessary with some
mobile phones or network).Audio system169Controls in detail204_AKB; 5; 23, en-USd2ureepe,Version: 2.11.8.12009-07-16T17:54:06+02:00 - Seite 169Z
Page 175 of 364
RREADY indicates that a call is possible.
R NO SERVICE indicates that the mobile
network is not available.
Setting transmit and receive volume
i These settings should normally not be
changed as the factory settings are
matched to most mobile phones. Find out
about the optimum settings for your mobile
phone at an authorized Mercedes-Benz
Center.
i Changes may result in significant
impairments to the transmission quality.
These settings may not be changed during
an active phone call.
X% Q Tel Q Bluetooth Phones .XSelect a mobile phone from the list.XSelect Options Q Reception Volume or
Transmission Volume .XSetting the volume: Slide ZV Æ or rotate
c V d the audio controller.
The volume bar moves up or down.XExiting menu: Press W or slide XV Y the
audio controller or press button k.
Emergency calls “911”
i The “911” emergency call system is a
public service. Using it without due cause
is a criminal offense.
i This function places a call to the local
“911” provider. It does not initiate a Tele
Aid call.
The following describes how to dial a “911”
emergency call using the audio system head
unit when a Mercedes-Benz specified mobile
phone is connected via the Bluetooth ®
interface to the audio system. Unless
otherwise specified, the descriptions refer to
the audio system head unit.
Consult the separate mobile phone operating
instructions that came with your mobile
phone for information on how to place a
“911” emergency call on the mobile phone.
The following conditions must be met for a
“911” emergency call via the audio system:
R Mobile phone must be switched on.
R The corresponding mobile
communications network must be
available.
i Emergency calls may not be possible with
all telephone networks or if certain network
services and/or telephone functions are
active. Check with your local service
providers and mobile phone instructions.
If you cannot make an emergency call, you
will have to initiate rescue measures yourself.
Placing a “911” emergency call using
audio control unit with the mobile
phone unlockedXPress button % to switch to telephone
mode.XEnter 911 using the number keypad on the
audio control unit.XPress button 6.
or
XPress W for dialing to begin.
Connecting... appears in the audio
display while the mobile phone establishes
the connection.XWait until the emergency call center
answers, then describe the emergency.
i Depending on the phone type, if no SIM
card is inserted in a GSM mobile phone or
if there is no service on a CDMA mobile
phone, NO SERVICE may appear in the
audio display. In that case, you only can
make an emergency call on the mobile
phone itself, without the use of the audio
control unit.
Audio system173Controls in detail204_AKB; 5; 23, en-USd2ureepe,Version: 2.11.8.12009-07-16T17:54:06+02:00 - Seite 173Z
Page 176 of 364
Placing a “911” emergency call with the
mobile phone locked
iIf the mobile phone is locked, you only can
make an emergency call on the mobile
phone itself, without the use of the audio
control unit.
Phone book
You can save telephone numbers in the audio
system’s phone book.
iThese entries are retained even if you use
the audio system with another mobile
phone. You should delete these entries
before handing over or selling your vehicle.
Receiving business cards (vCards)
You can import business cards (vCards) from
external Bluetooth® phones into your audio
system’s phone book. To do this:
RBluetooth® must be activated on the audio
system and on the external Bluetooth®
phone (see the operating instructions of
the mobile phone).
RThe external Bluetooth® phone must be
able to send vCards via Bluetooth® (see the
operating instructions of the mobile
phone).
RThe external Bluetooth® phone in the
vehicle must be switched on and
authorized.
iIf you switch to a different mode while
vCards are being received (e.g., press
button $), reception of vCards will be
aborted.
X% Q Tel Q Receive Business
Card(s).
XPress W to confirm.XWait until the message Ready to
Receive - Received: 0 appears.
XImporting: Start the data transfer on the
external Bluetooth® phone (“Export
business cards (vCards)”, see the operating
instructions of the mobile phone).
The audio system imports the data for the
business cards and displays the number of
business cards received.
iSelect Back or switch to a different mode
to abort reception.
XEnding reception: Press W.
or
XPress button k in the center console
(Y page 141).
Deleting external Data
X% Q Tel Q Delete External
Data.
A prompt appears asking whether the data
should be deleted.
XSelect Yes or No.
If you select Yes all personal data are then
deleted from the phone book.
Opening the phone book
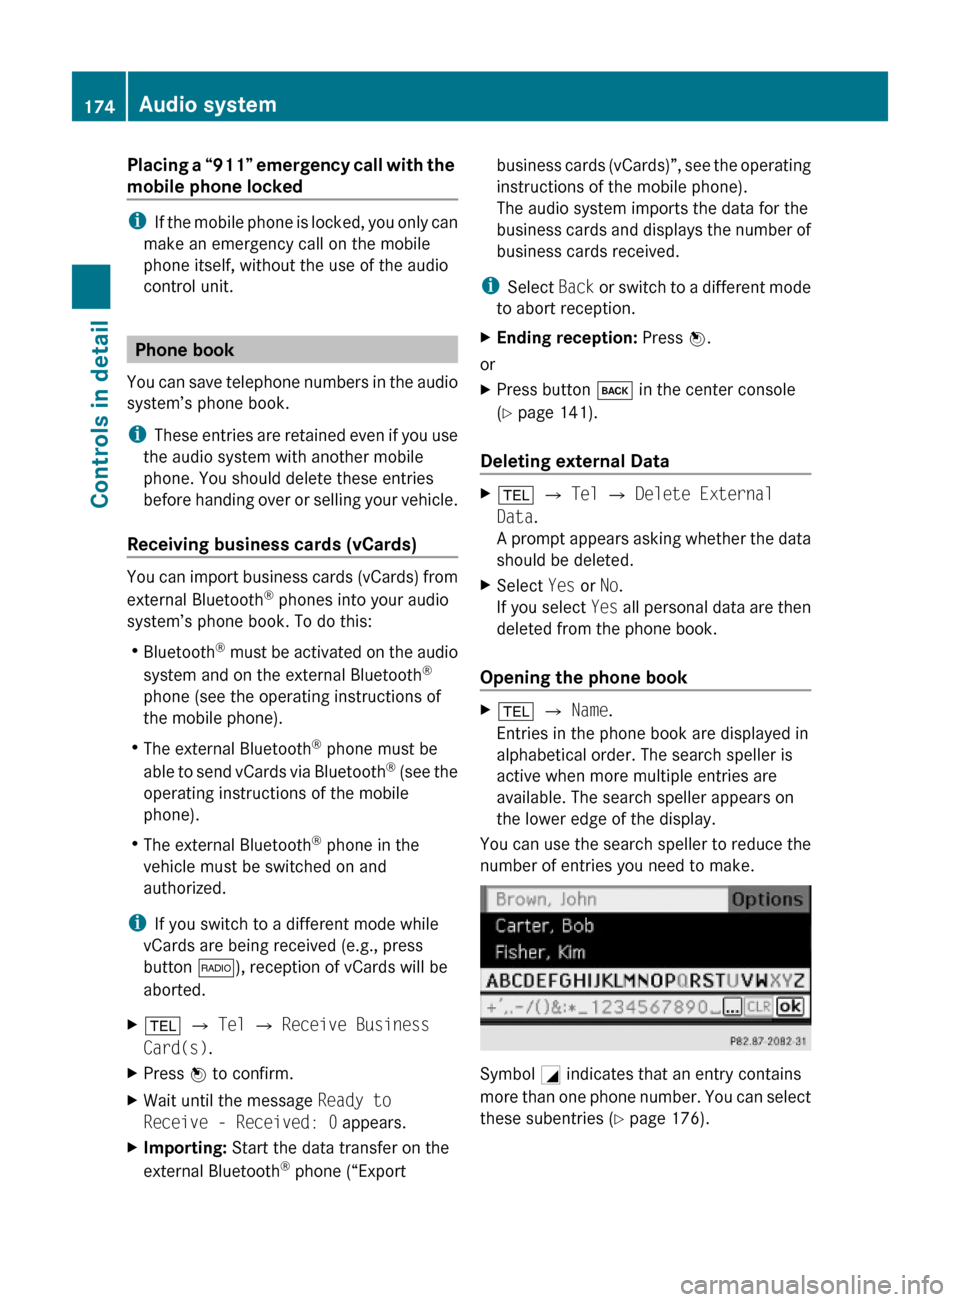
X% Q Name.
Entries in the phone book are displayed in
alphabetical order. The search speller is
active when more multiple entries are
available. The search speller appears on
the lower edge of the display.
You can use the search speller to reduce the
number of entries you need to make.
Symbol G indicates that an entry contains
more than one phone number. You can select
these subentries (Y page 176).
174Audio systemControls in detail
204_AKB; 5; 23, en-USd2ureepe,Version: 2.11.8.12009-07-16T17:54:06+02:00 - Seite 174