2010 MERCEDES-BENZ C300 4MATIC ECO mode
[x] Cancel search: ECO modePage 100 of 364
If the windshield wipers fail to function at
all with the combination switch in position
Ä or Å,
Rset the combination switch to the next
higher wiper speed
Rhave the windshield wipers checked at
the nearest authorized Mercedes-Benz
Center
Power windows
Opening and closing
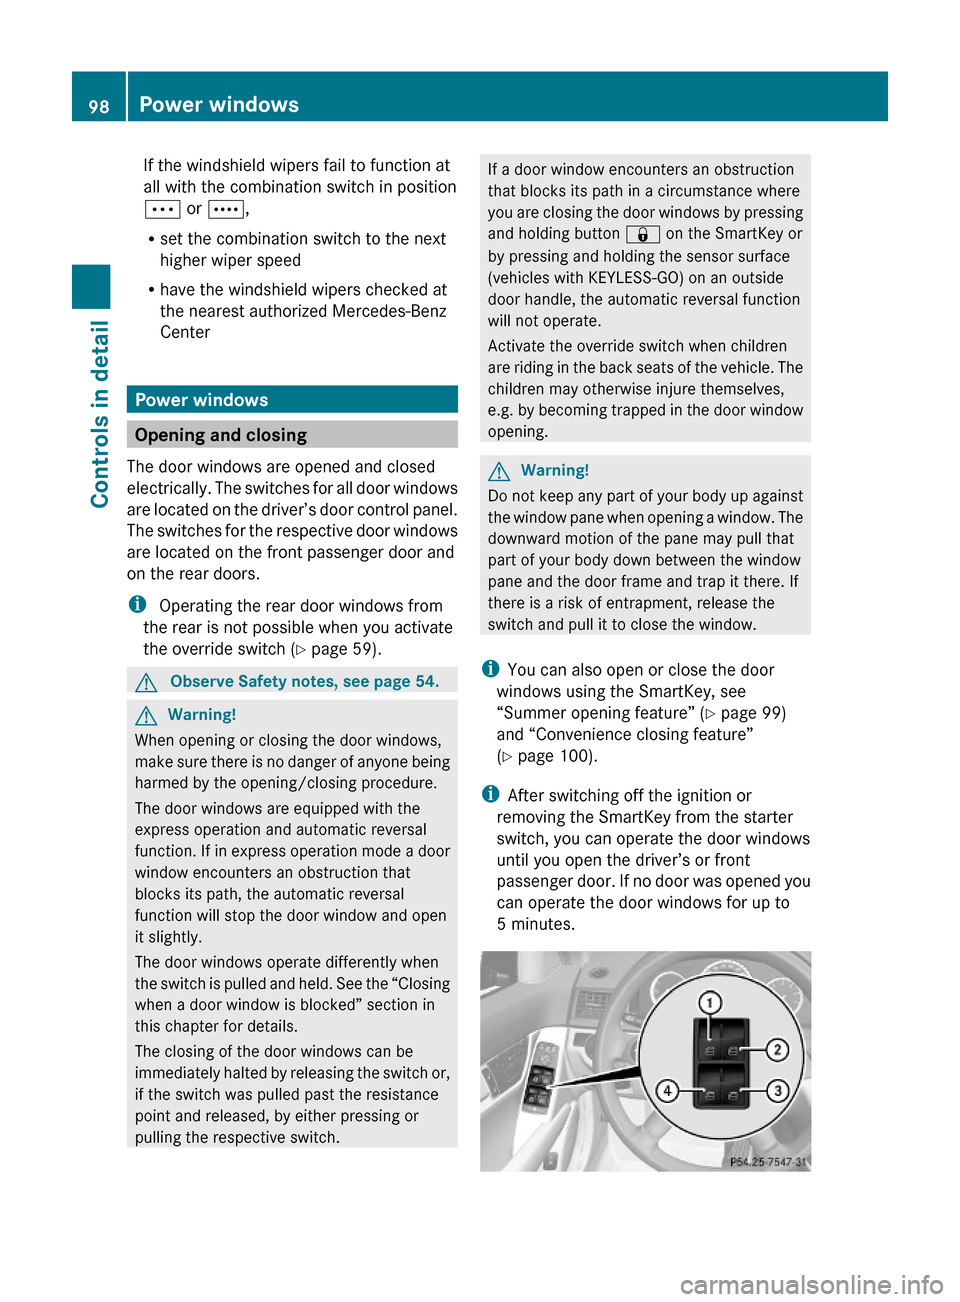
The door windows are opened and closed
electrically. The switches for all door windows
are located on the driver’s door control panel.
The switches for the respective door windows
are located on the front passenger door and
on the rear doors.
i Operating the rear door windows from
the rear is not possible when you activate
the override switch (Y page 59).
GObserve Safety notes, see page 54.GWarning!
When opening or closing the door windows,
make sure there is no danger of anyone being
harmed by the opening/closing procedure.
The door windows are equipped with the
express operation and automatic reversal
function. If in express operation mode a door
window encounters an obstruction that
blocks its path, the automatic reversal
function will stop the door window and open
it slightly.
The door windows operate differently when
the switch is pulled and held. See the “Closing
when a door window is blocked” section in
this chapter for details.
The closing of the door windows can be
immediately halted by releasing the switch or,
if the switch was pulled past the resistance
point and released, by either pressing or
pulling the respective switch.
If a door window encounters an obstruction
that blocks its path in a circumstance where
you are closing the door windows by pressing
and holding button & on the SmartKey or
by pressing and holding the sensor surface
(vehicles with KEYLESS-GO) on an outside
door handle, the automatic reversal function
will not operate.
Activate the override switch when children
are riding in the back seats of the vehicle. The
children may otherwise injure themselves,
e.g. by becoming trapped in the door window
opening.
GWarning!
Do not keep any part of your body up against
the window pane when opening a window. The
downward motion of the pane may pull that
part of your body down between the window
pane and the door frame and trap it there. If
there is a risk of entrapment, release the
switch and pull it to close the window.
iYou can also open or close the door
windows using the SmartKey, see
“Summer opening feature” (Y page 99)
and “Convenience closing feature”
(Y page 100).
iAfter switching off the ignition or
removing the SmartKey from the starter
switch, you can operate the door windows
until you open the driver’s or front
passenger door. If no door was opened you
can operate the door windows for up to
5 minutes.
98Power windowsControls in detail
204_AKB; 5; 23, en-USd2ureepe,Version: 2.11.8.12009-07-16T17:54:06+02:00 - Seite 98
Page 118 of 364

Deactivating manual shift programXVehicles with dynamic handling package:
Press the program mode selector switch
once more.
The last selected automatic program mode
C or S appears in the multifunction display.
or
XRestart the engine.
The automatic transmission will go to the
last selected automatic program mode ( C
or S).XC 63 AMG: Press the program mode
selector switch repeatedly until C or S
appears in the multifunction display.
or
XRestart the engine.
The automatic transmission will go to
automatic program mode ( C or S).
Manual program mode M is not stored.
Emergency operation (limp-home
mode)
If vehicle acceleration becomes less
responsive or sluggish or the automatic
transmission no longer shifts, the automatic
transmission is most likely operating in limp-
home (emergency operation) mode. In this
mode only second gear and reverse gear R
can be selected.
XStop the vehicle in a safe location.XShift the automatic transmission into park
position P.XTurn off the engine.XWait at least 10 seconds before restarting.XRestart the engine.XShift the automatic transmission into drive
position D (for second gear) or reverse gear
R .XHave the automatic transmission checked
at an authorized Mercedes-Benz Center as
soon as possible.Transfer case
This section applies to vehicles equipped with
all-wheel drive (4MATIC) only. Both the front
and rear axles are powered at all times when
the vehicle is being operated.
! Only conduct operational or performance
tests on a two-axle dynamometer. If such
tests are necessary, contact an authorized
Mercedes-Benz Center. You could
otherwise seriously damage the brake
system or the transfer case which is not
covered by the Mercedes-Benz Limited
Warranty.
! Because the ESP ®
operates
automatically, the engine and ignition must
be shut off (SmartKey in starter switch
position 0 or 1 or KEYLESS-GO start/stop
button in position 0 or 1) when the parking
brake is being tested on a brake test
dynamometer.
Active braking action through the ESP ®
may otherwise seriously damage the brake
system which is not covered by the
Mercedes-Benz Limited Warranty.
Instrument cluster
Introduction
For a full view illustration of the instrument
cluster, see “Instrument cluster”
( Y page 28).
GWarning!
No messages will be displayed if either the
instrument cluster or the multifunction
display is inoperative.
As a result, you will not be able to see
information about your driving conditions,
such as
R speed
R outside temperature
R warning/indicator lamps
116Instrument clusterControls in detail
204_AKB; 5; 23, en-USd2ureepe,Version: 2.11.8.12009-07-16T17:54:06+02:00 - Seite 116
Page 126 of 364
RSETUP (Y page 124)
RRACETIMER (Y page 124)
ROverall analysis (Y page 125)
RLap analysis (Y page 126)
SETUP
XPress button = or ; to select the
AMG menu.
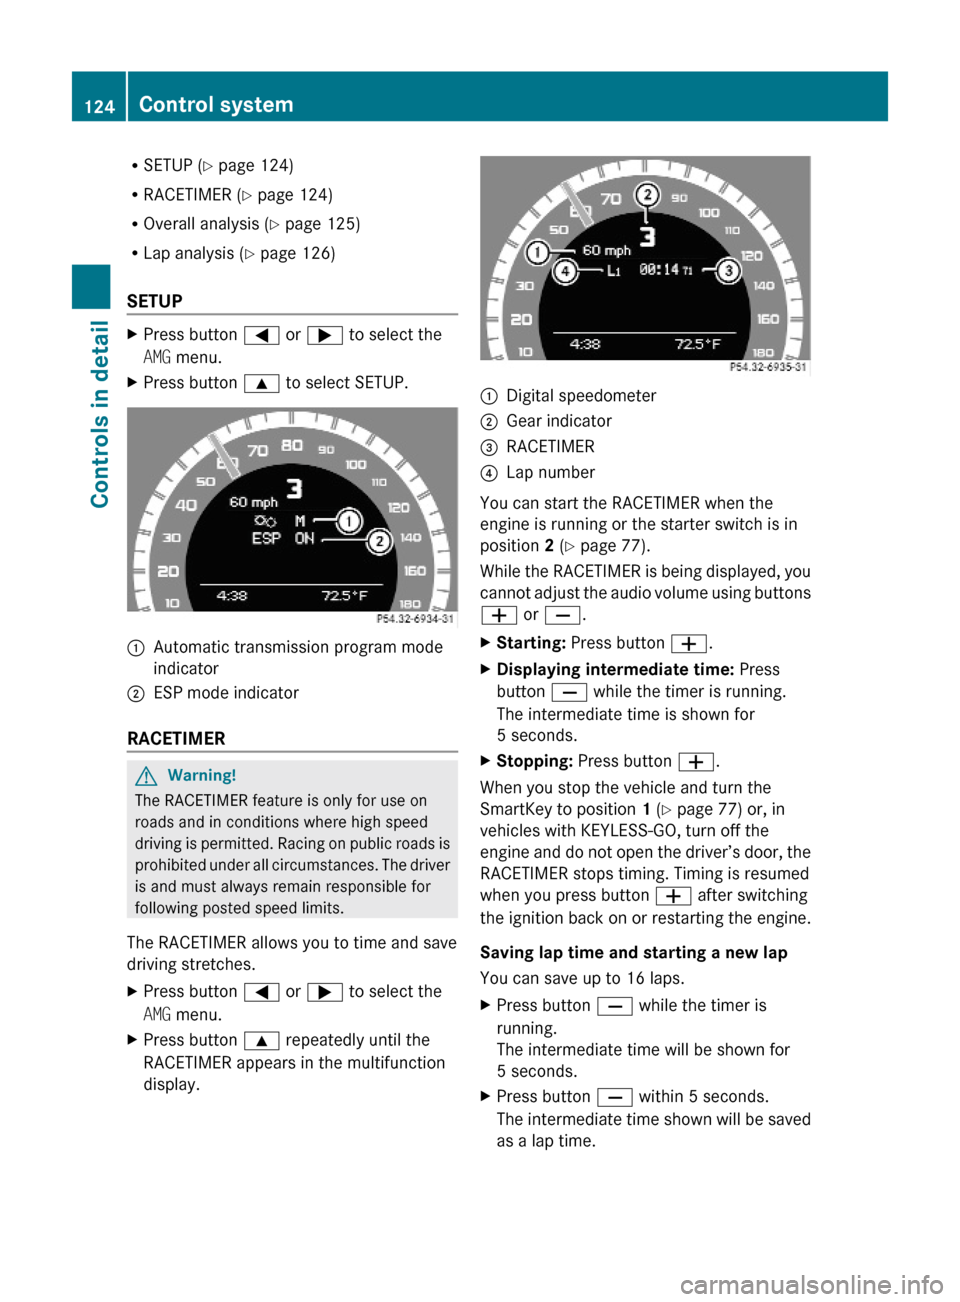
XPress button 9 to select SETUP.:Automatic transmission program mode
indicator
;ESP mode indicator
RACETIMER
GWarning!
The RACETIMER feature is only for use on
roads and in conditions where high speed
driving is permitted. Racing on public roads is
prohibited under all circumstances. The driver
is and must always remain responsible for
following posted speed limits.
The RACETIMER allows you to time and save
driving stretches.
XPress button = or ; to select the
AMG menu.
XPress button 9 repeatedly until the
RACETIMER appears in the multifunction
display.
:Digital speedometer;Gear indicator=RACETIMER?Lap number
You can start the RACETIMER when the
engine is running or the starter switch is in
position 2 (Y page 77).
While the RACETIMER is being displayed, you
cannot adjust the audio volume using buttons
W or X.
XStarting: Press button W.XDisplaying intermediate time: Press
button X while the timer is running.
The intermediate time is shown for
5 seconds.
XStopping: Press button W.
When you stop the vehicle and turn the
SmartKey to position 1 (Y page 77) or, in
vehicles with KEYLESS-GO, turn off the
engine and do not open the driver’s door, the
RACETIMER stops timing. Timing is resumed
when you press button W after switching
the ignition back on or restarting the engine.
Saving lap time and starting a new lap
You can save up to 16 laps.
XPress button X while the timer is
running.
The intermediate time will be shown for
5 seconds.
XPress button X within 5 seconds.
The intermediate time shown will be saved
as a lap time.
124Control systemControls in detail
204_AKB; 5; 23, en-USd2ureepe,Version: 2.11.8.12009-07-16T17:54:06+02:00 - Seite 124
Page 136 of 364
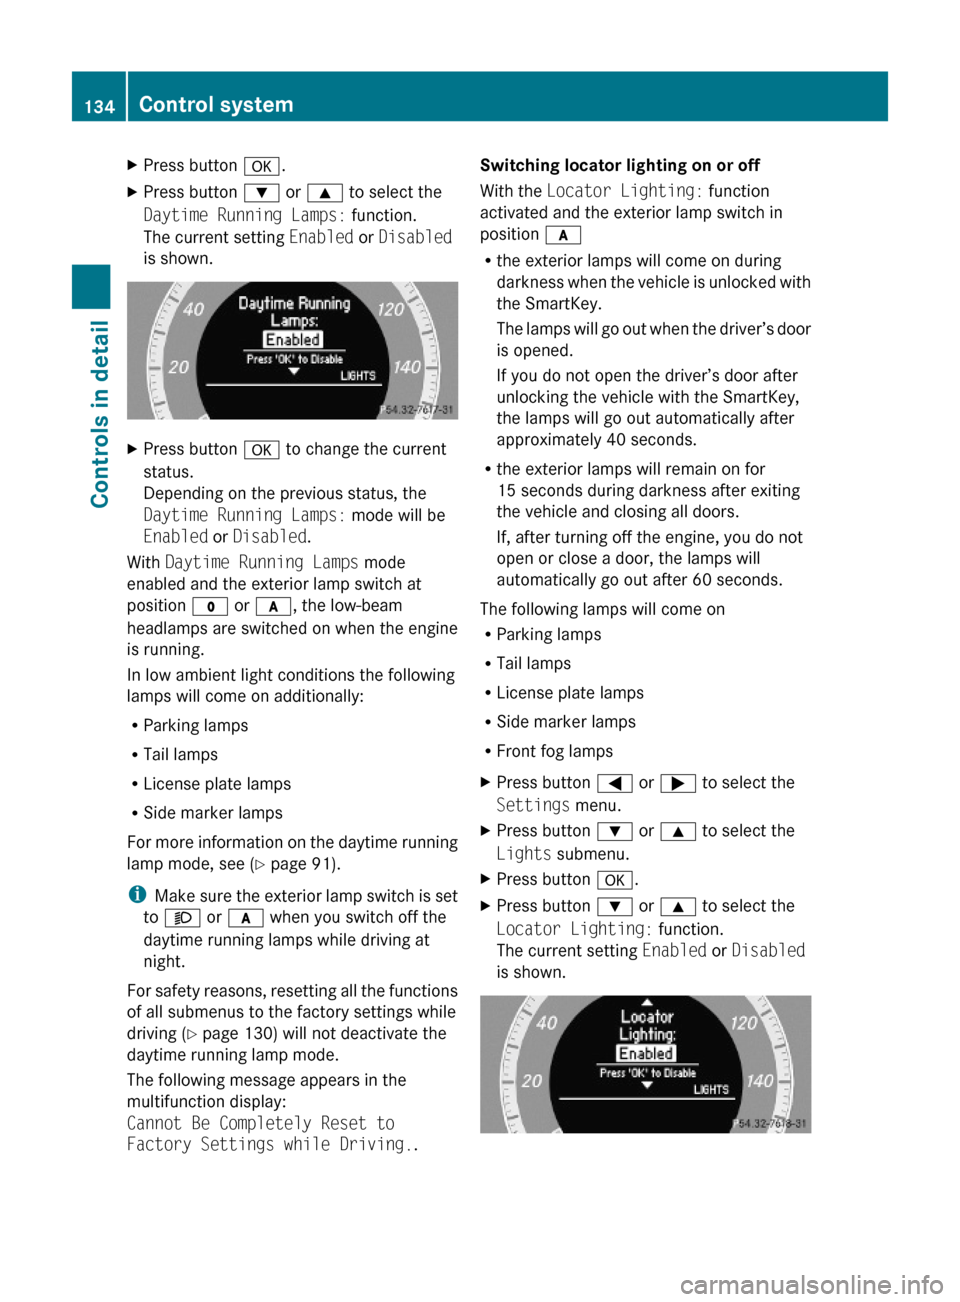
XPress button a.XPress button : or 9 to select the
Daytime Running Lamps: function.
The current setting Enabled or Disabled
is shown.
XPress button a to change the current
status.
Depending on the previous status, the
Daytime Running Lamps: mode will be
Enabled or Disabled.
With Daytime Running Lamps mode
enabled and the exterior lamp switch at
position $ or c, the low-beam
headlamps are switched on when the engine
is running.
In low ambient light conditions the following
lamps will come on additionally:
RParking lamps
RTail lamps
RLicense plate lamps
RSide marker lamps
For more information on the daytime running
lamp mode, see (Y page 91).
iMake sure the exterior lamp switch is set
to M or c when you switch off the
daytime running lamps while driving at
night.
For safety reasons, resetting all the functions
of all submenus to the factory settings while
driving (Y page 130) will not deactivate the
daytime running lamp mode.
The following message appears in the
multifunction display:
Cannot Be Completely Reset to
Factory Settings while Driving..
Switching locator lighting on or off
With the Locator Lighting: function
activated and the exterior lamp switch in
position c
Rthe exterior lamps will come on during
darkness when the vehicle is unlocked with
the SmartKey.
The lamps will go out when the driver’s door
is opened.
If you do not open the driver’s door after
unlocking the vehicle with the SmartKey,
the lamps will go out automatically after
approximately 40 seconds.
Rthe exterior lamps will remain on for
15 seconds during darkness after exiting
the vehicle and closing all doors.
If, after turning off the engine, you do not
open or close a door, the lamps will
automatically go out after 60 seconds.
The following lamps will come on
RParking lamps
RTail lamps
RLicense plate lamps
RSide marker lamps
RFront fog lamps
XPress button = or ; to select the
Settings menu.
XPress button : or 9 to select the
Lights submenu.
XPress button a.XPress button : or 9 to select the
Locator Lighting: function.
The current setting Enabled or Disabled
is shown.
134Control systemControls in detail
204_AKB; 5; 23, en-USd2ureepe,Version: 2.11.8.12009-07-16T17:54:06+02:00 - Seite 134
Page 139 of 364
GWarning!
In order to avoid distraction which could lead
to an accident, the driver should enter system
settings with the vehicle at a standstill and
operate the system only when road and traffic
conditions permit. Always pay full attention to
traffic conditions first before operating
system controls while driving.
Bear in mind that at a speed of just 30 mph
(approximately 50 km/h), your vehicle is
covering a distance of 44 feet (approximately
14 m) every second.
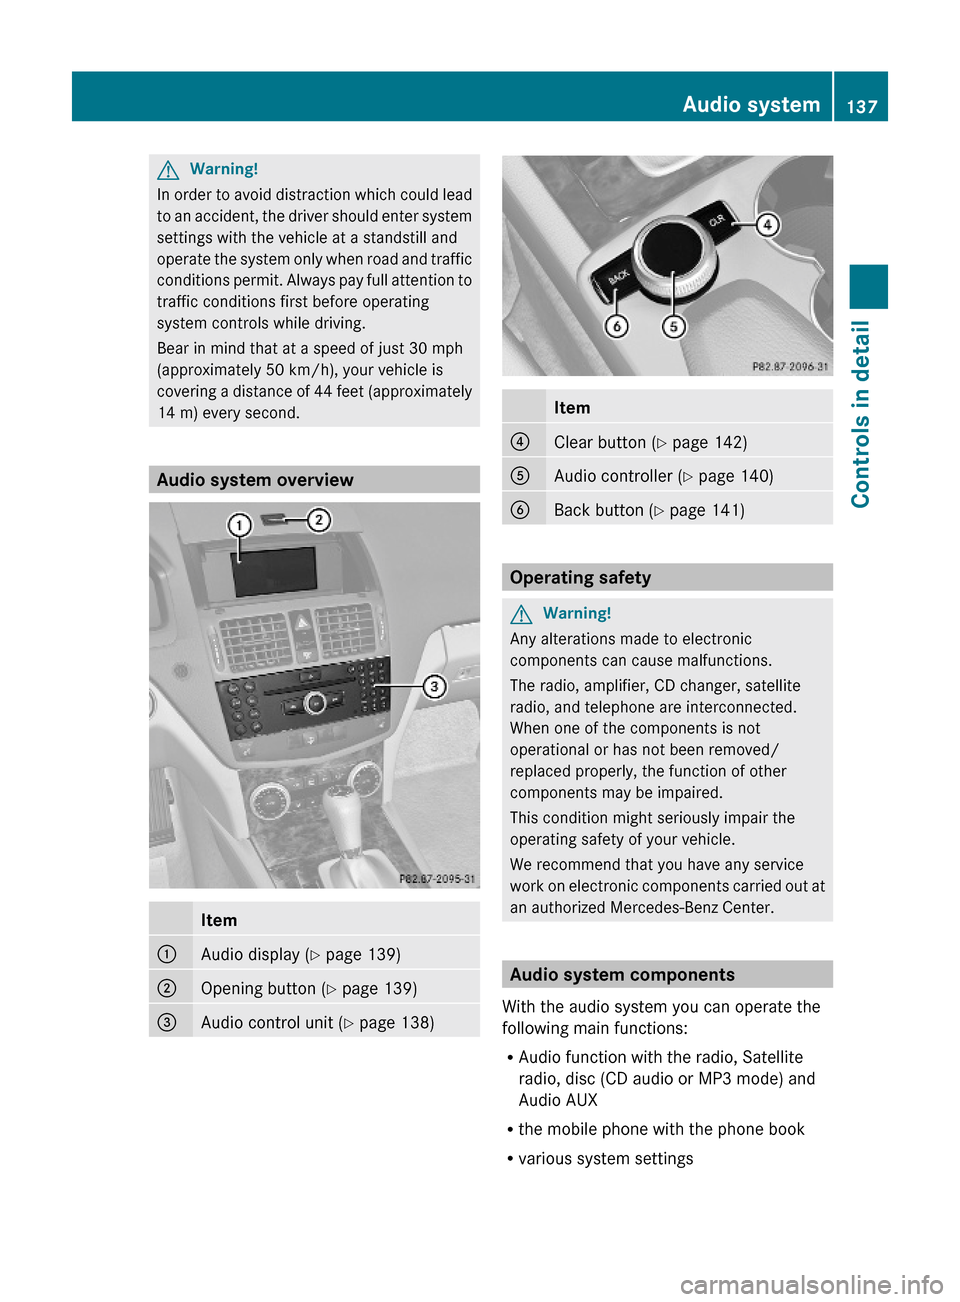
Audio system overview
Item:Audio display (Y page 139);Opening button (Y page 139)=Audio control unit (Y page 138)Item?Clear button (Y page 142)AAudio controller (Y page 140)BBack button (Y page 141)
Operating safety
GWarning!
Any alterations made to electronic
components can cause malfunctions.
The radio, amplifier, CD changer, satellite
radio, and telephone are interconnected.
When one of the components is not
operational or has not been removed/
replaced properly, the function of other
components may be impaired.
This condition might seriously impair the
operating safety of your vehicle.
We recommend that you have any service
work on electronic components carried out at
an authorized Mercedes-Benz Center.
Audio system components
With the audio system you can operate the
following main functions:
RAudio function with the radio, Satellite
radio, disc (CD audio or MP3 mode) and
Audio AUX
Rthe mobile phone with the phone book
Rvarious system settings
Audio system137Controls in detail204_AKB; 5; 23, en-USd2ureepe,Version: 2.11.8.12009-07-16T17:54:06+02:00 - Seite 137Z
Page 148 of 364
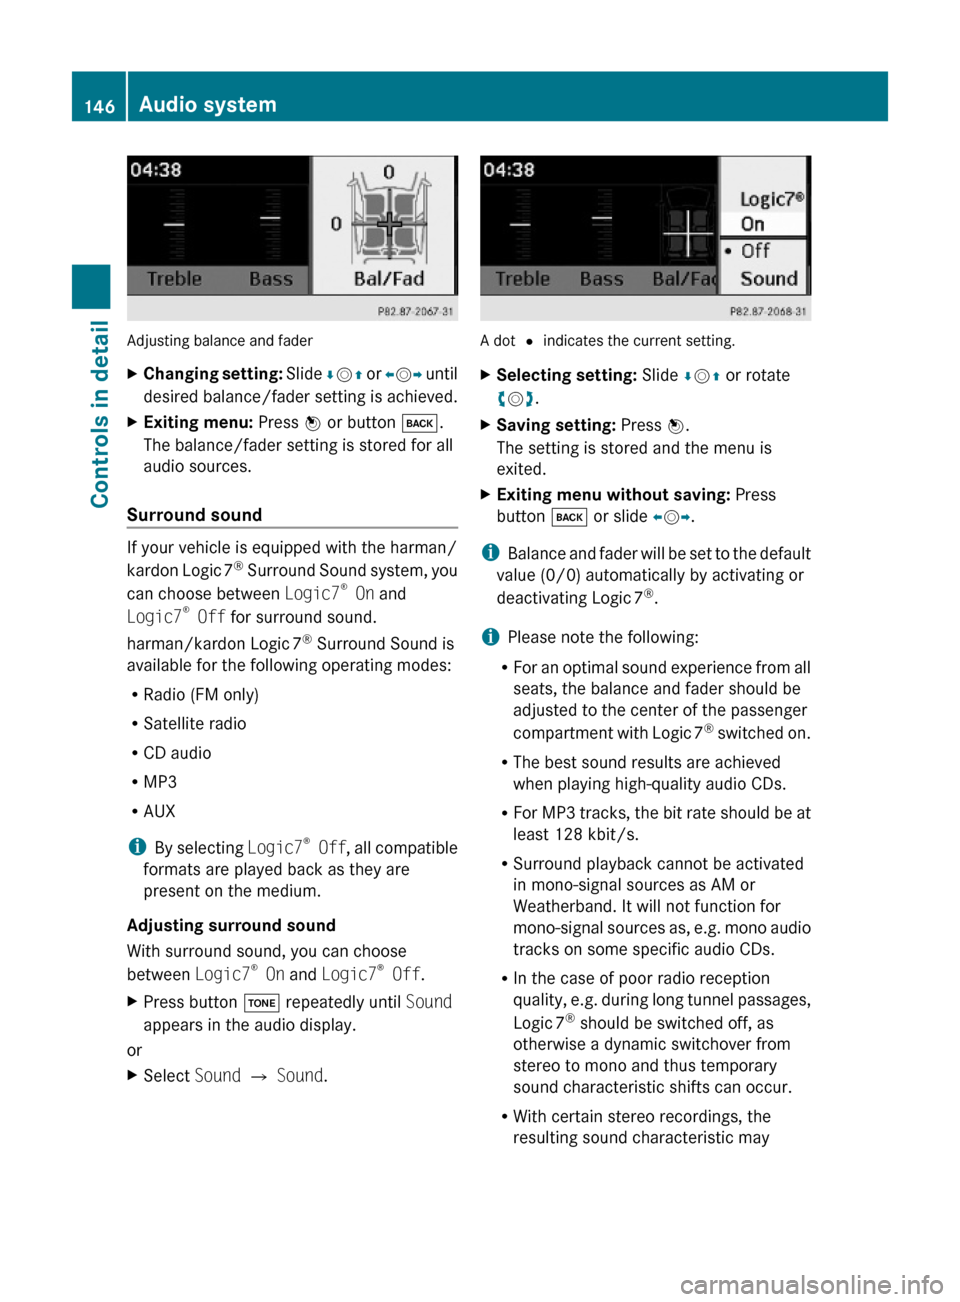
Adjusting balance and fader
XChanging setting: Slide ÆVZ or XVY until
desired balance/fader setting is achieved.
XExiting menu: Press W or button k.
The balance/fader setting is stored for all
audio sources.
Surround sound
If your vehicle is equipped with the harman/
kardon Logic 7® Surround Sound system, you
can choose between Logic7® On and
Logic7® Off for surround sound.
harman/kardon Logic 7® Surround Sound is
available for the following operating modes:
RRadio (FM only)
RSatellite radio
RCD audio
RMP3
RAUX
iBy selecting Logic7® Off, all compatible
formats are played back as they are
present on the medium.
Adjusting surround sound
With surround sound, you can choose
between Logic7® On and Logic7® Off.
XPress button J repeatedly until Sound
appears in the audio display.
or
XSelect Sound Q Sound.
A dot # indicates the current setting.
XSelecting setting: Slide ÆVZ or rotate
cVd.
XSaving setting: Press W.
The setting is stored and the menu is
exited.
XExiting menu without saving: Press
button k or slide XVY.
iBalance and fader will be set to the default
value (0/0) automatically by activating or
deactivating Logic 7®.
iPlease note the following:
RFor an optimal sound experience from all
seats, the balance and fader should be
adjusted to the center of the passenger
compartment with Logic 7® switched on.
RThe best sound results are achieved
when playing high-quality audio CDs.
RFor MP3 tracks, the bit rate should be at
least 128 kbit/s.
RSurround playback cannot be activated
in mono-signal sources as AM or
Weatherband. It will not function for
mono-signal sources as, e.g. mono audio
tracks on some specific audio CDs.
RIn the case of poor radio reception
quality, e.g. during long tunnel passages,
Logic 7® should be switched off, as
otherwise a dynamic switchover from
stereo to mono and thus temporary
sound characteristic shifts can occur.
RWith certain stereo recordings, the
resulting sound characteristic may
146Audio systemControls in detail
204_AKB; 5; 23, en-USd2ureepe,Version: 2.11.8.12009-07-16T17:54:06+02:00 - Seite 146
Page 149 of 364

deviate from conventional stereo
playback.
SYS menu
System settings menu overview
MenuSystemDisplay (Y page 147)BrightnessDay ModeNight ModeAutomaticActivate Bluetooth®
(Y page 147)
Reset (Y page 147)Language (Y page 148)
Display settings
You can adapt the brightness of the audio
display to the prevailing light conditions.
Setting the display design
Xi Q System Q Display.XSelect Brightness, Day Mode, Night
Mode or Automatic.
iWhen you select Brightness, a scale
appears on which you can set the
brightness manually.
In the Automatic setting, the audio system
analyzes the automatic vehicle light sensor
and switches between the display designs
automatically.
Bluetooth® settings
General information about Bluetooth®
Bluetooth® technology is the standard for
short-range wireless technologies, suitable
for transmitting voice and data. It is possible
to connect Bluetooth® devices wirelessly.
Bluetooth® can be used to exchange vCards
or to make calls using a hands-free device.
Bluetooth® technology uses the freely
available ISM (Industrial Scientific Medical)
wave band that works at 2.45 GHz.
Bluetooth® works within a range of up to 33 ft
(10 m).
Activate or deactivate Bluetooth®
Xi Q System Q Activate
Bluetooth.
You have activated or deactivated
Bluetooth®. A checkmark O appears when
Bluetooth® is activated.
Reset
iYou can reset the audio system back to
its factory settings. In this case, all personal
data (e.g. address book entries, call lists,
paired mobile phones, and presets) are
deleted. We recommend that you reset the
values before selling your vehicle.
Audio system147Controls in detail204_AKB; 5; 23, en-USd2ureepe,Version: 2.11.8.12009-07-16T17:54:06+02:00 - Seite 147Z
Page 160 of 364
CD and MP3 mode
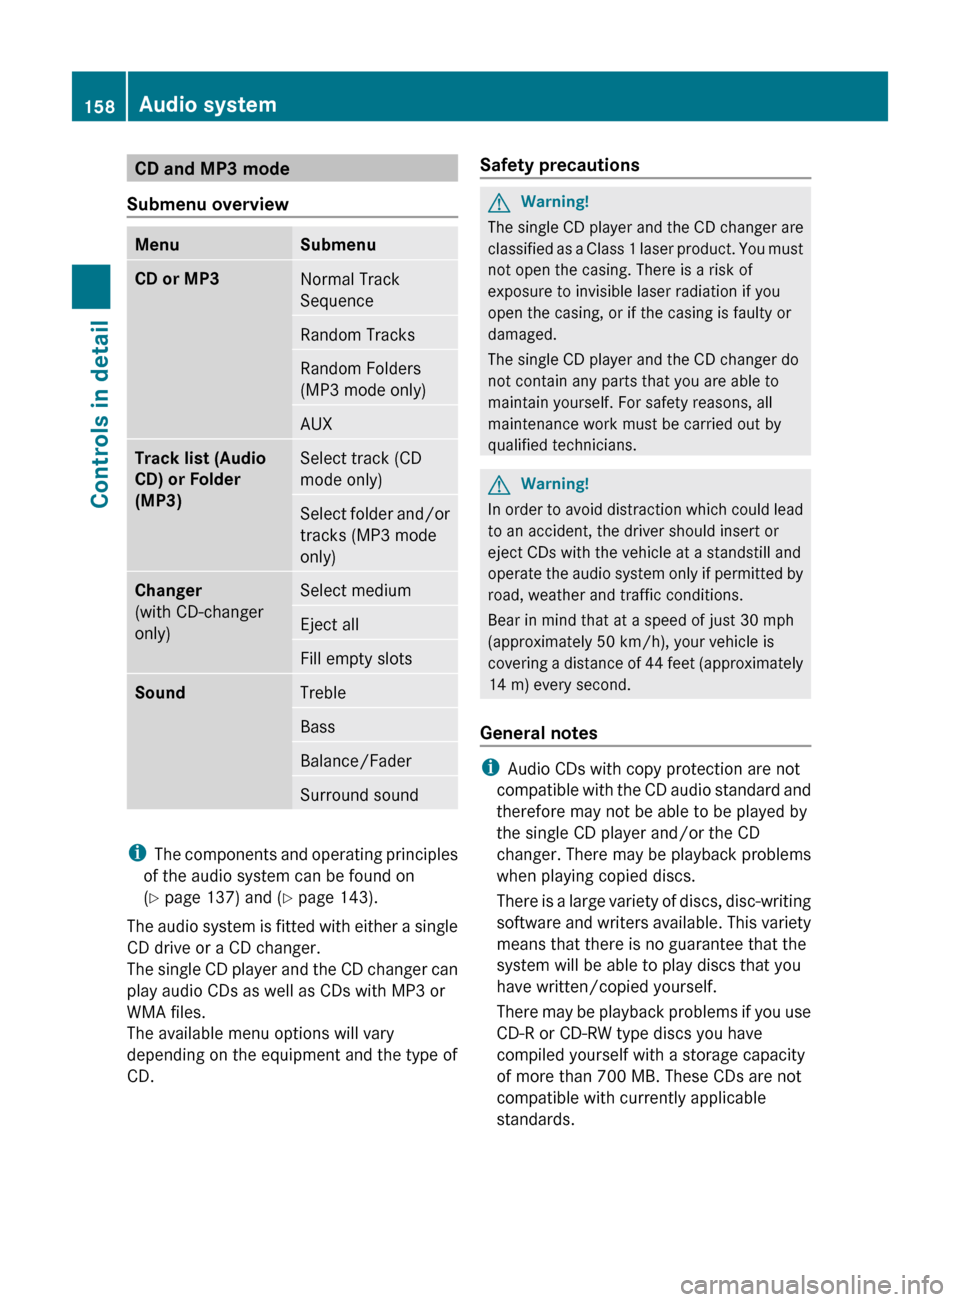
Submenu overviewMenuSubmenuCD or MP3Normal Track
SequenceRandom TracksRandom Folders
(MP3 mode only)AUXTrack list (Audio
CD) or Folder
(MP3)Select track (CD
mode only)Select folder and/or
tracks (MP3 mode
only)Changer
(with CD-changer
only)Select mediumEject allFill empty slotsSoundTrebleBassBalance/FaderSurround sound
i The components and operating principles
of the audio system can be found on
( Y page 137) and ( Y page 143).
The audio system is fitted with either a single
CD drive or a CD changer.
The single CD player and the CD changer can
play audio CDs as well as CDs with MP3 or
WMA files.
The available menu options will vary
depending on the equipment and the type of
CD.
Safety precautionsGWarning!
The single CD player and the CD changer are
classified as a Class 1 laser product. You must
not open the casing. There is a risk of
exposure to invisible laser radiation if you
open the casing, or if the casing is faulty or
damaged.
The single CD player and the CD changer do
not contain any parts that you are able to
maintain yourself. For safety reasons, all
maintenance work must be carried out by
qualified technicians.
GWarning!
In order to avoid distraction which could lead
to an accident, the driver should insert or
eject CDs with the vehicle at a standstill and
operate the audio system only if permitted by
road, weather and traffic conditions.
Bear in mind that at a speed of just 30 mph
(approximately 50 km/h), your vehicle is
covering a distance of 44 feet (approximately
14 m) every second.
General notes
i Audio CDs with copy protection are not
compatible with the CD audio standard and
therefore may not be able to be played by
the single CD player and/or the CD
changer. There may be playback problems
when playing copied discs.
There is a large variety of discs, disc-writing
software and writers available. This variety
means that there is no guarantee that the
system will be able to play discs that you
have written/copied yourself.
There may be playback problems if you use
CD-R or CD-RW type discs you have
compiled yourself with a storage capacity
of more than 700 MB. These CDs are not
compatible with currently applicable
standards.
158Audio systemControls in detail
204_AKB; 5; 23, en-USd2ureepe,Version: 2.11.8.12009-07-16T17:54:06+02:00 - Seite 158