Page 220 of 391
AUDIO/VIDEO SYSTEM
219
D
Setting a single disc:
1. Push the “LOAD” button briefly.
The orange indicators at both ends of the
slot start blinking. After the orange indica-
tors change to green and stay on, the DVD
changer door will open.
2. Insert only one disc while the DVD
changer door is open.
You can set a disc at the lowest empty disc
number.
After insertion, the set disc is automatically
loaded.
If the label faces down, the disc cannot be
played. In this case, “Check disc
×” ap-
pears on the screen.
If you do not insert the disc within 15 sec-
onds after pushing the “LOAD”button, a
beep will sound and the operation will be
canceled automatically.
If you need to insert the next disc, repeat
the same procedure to insert another disc.
ISF/IS NAVI (U)
Finish
7
Page 221 of 391

AUDIO/VIDEO SYSTEM
220
D
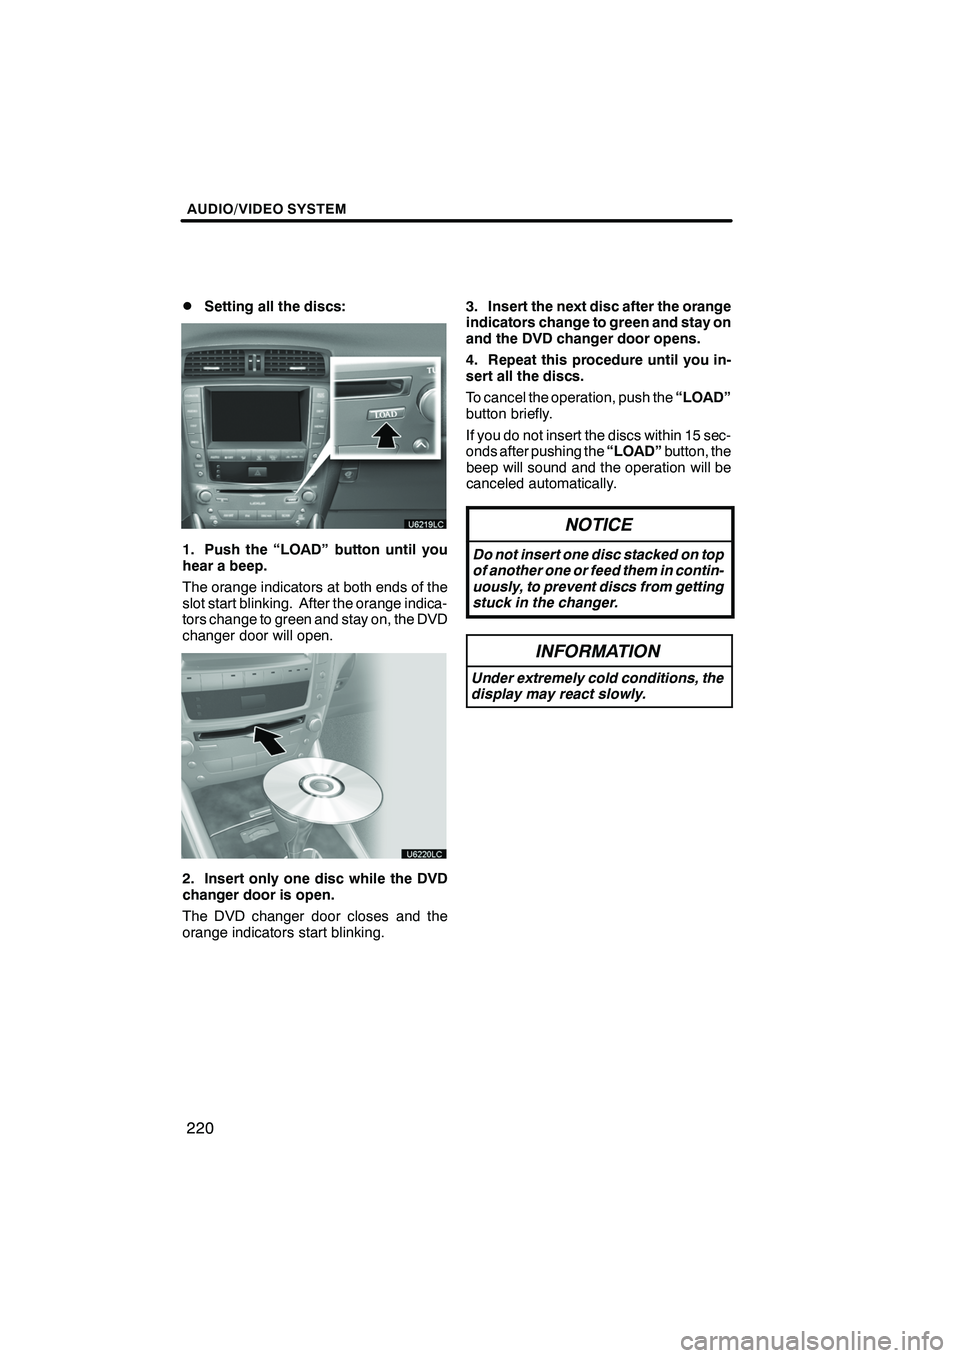
Setting all the discs:
1. Push the “LOAD” button until you
hear a beep.
The orange indicators at both ends of the
slot start blinking. After the orange indica-
tors change to green and stay on, the DVD
changer door will open.
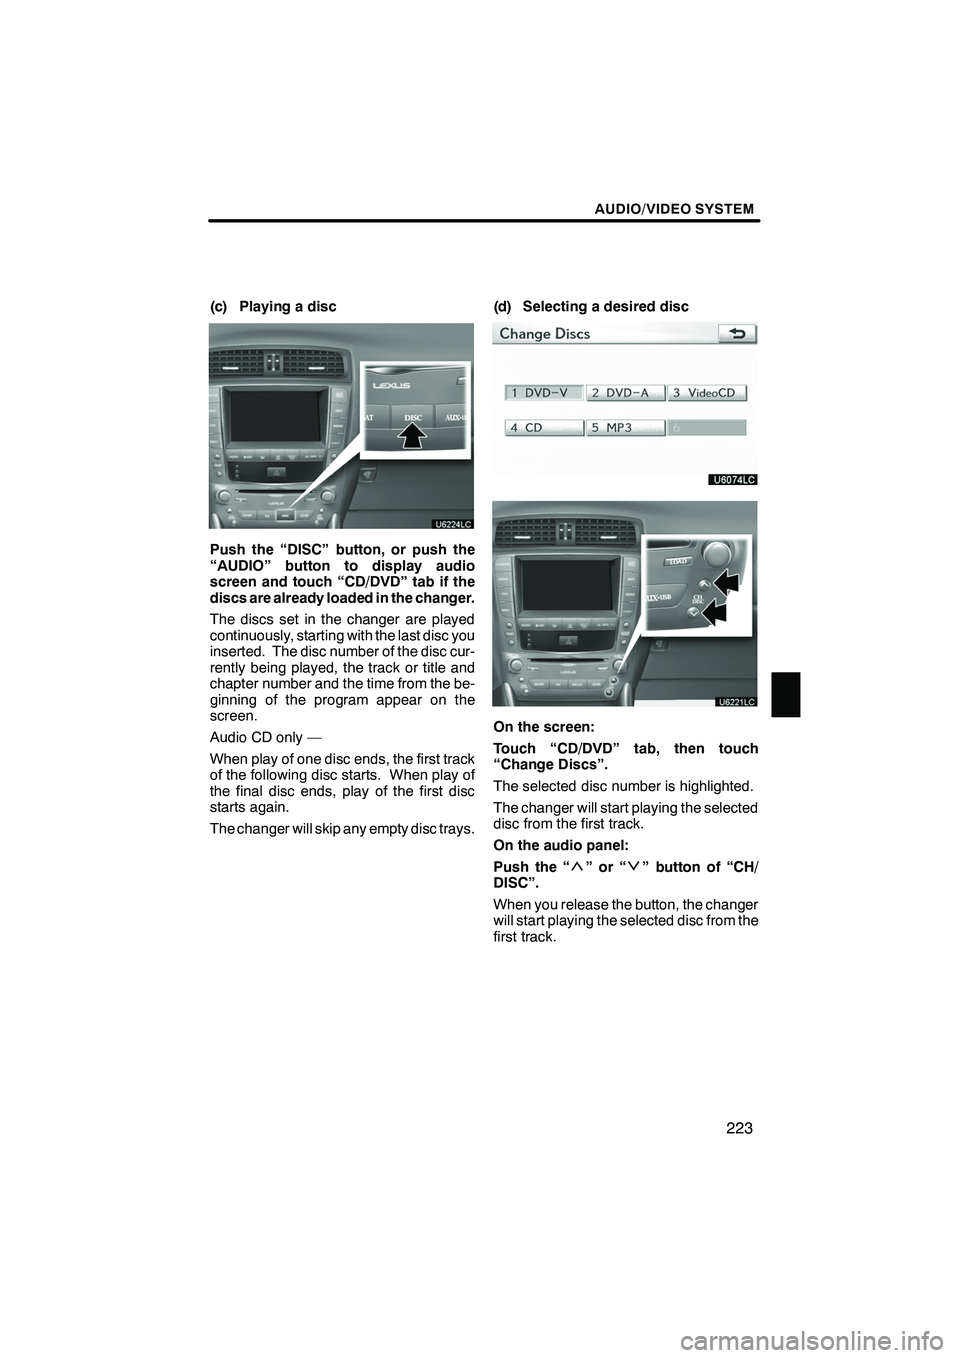
2. Insert only one disc while the DVD
changer door is open.
The DVD changer door closes and the
orange indicators start blinking.
3. Insert the next disc after the orange
indicators change to green and stay on
and the DVD changer door opens.
4. Repeat this procedure until you in-
sert all the discs.
To cancel the operation, push the
“LOAD”
button briefly.
If you do not insert the discs within 15 sec-
onds after pushing the “LOAD”button, the
beep will sound and the operation will be
canceled automatically.
NOTICE
Do not insert one disc stacked on top
of another one or feed them in contin-
uously, to prevent discs from getting
stuck in the changer.
INFORMATION
Under extremely cold conditions, the
display may react slowly.
ISF/IS NAVI (U)
Finish
Page 222 of 391
AUDIO/VIDEO SYSTEM
221
(b) Ejecting discs
DA single disc alone:
1. Push the “”or“” button of “CH/
DISC” or touch the disc number button
on the “Change Discs” screen to high-
light the disc number you want to eject.
To display the “Change Discs” screen,
touch “Change Discs” on each audio
control screen.
2. Push the “” button for the disc
briefly.
At this time, the orange indicators of the
slot start blinking and the disc is ejected.
3. After the blinking indicators stay on,
remove the disc.
ISF/IS NAVI (U)
Finish
7
Page 223 of 391
AUDIO/VIDEO SYSTEM
222
D
Ejecting all the discs:
1. Push the “” button for the disc
until you hear a beep.
At this time, the orange indicators of the
slot start blinking and a disc is ejected.
2. After the blinking indicators stay on,
remove the disc.
The indicators start blinking again and the
next disc is ejected.
If you do not remove the disc within 15 sec-
onds after it is ejected, the beep will sound
and the operation will be canceled auto-
matically.
When all the discs are removed, the indi-
cators go out.
The numbers of the trays where the disc is
not set are dimmed.
ISF/IS NAVI (U)
Finish
Page 224 of 391

AUDIO/VIDEO SYSTEM
223
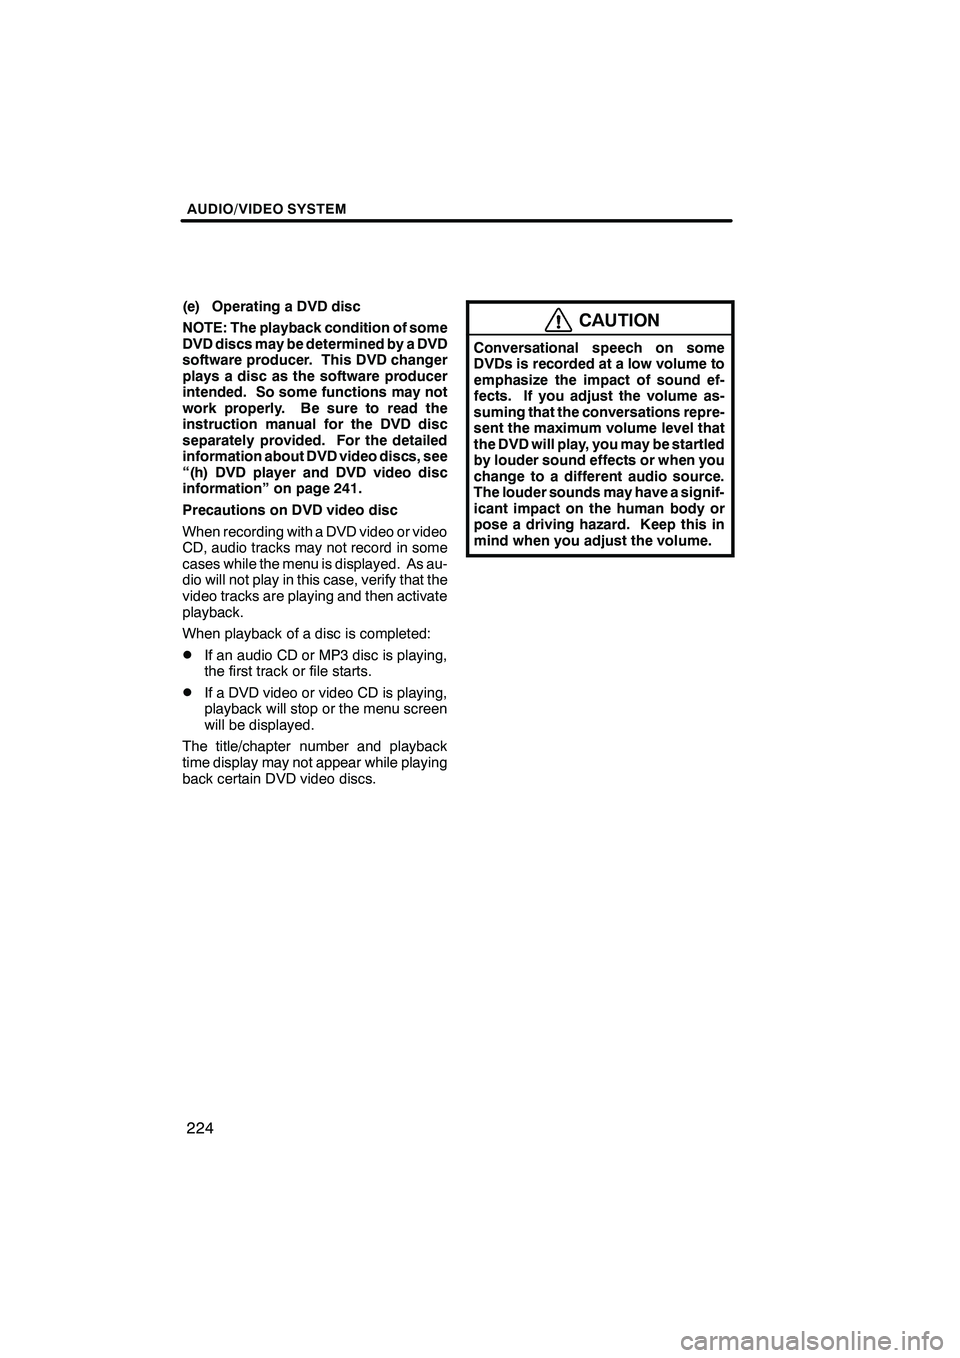
(c) Playing a disc
Push the “DISC” button, or push the
“AUDIO” button to display audio
screen and touch “CD/DVD” tab if the
discs are already loaded in the changer.
The discs set in the changer are played
continuously, starting with the last disc you
inserted. The disc number of the disc cur-
rently being played, the track or title and
chapter number and the time from the be-
ginning of the program appear on the
screen.
Audio CD only —
When play of one disc ends, the first track
of the following disc starts. When play of
the final disc ends, play of the first disc
starts again.
The changer will skip any empty disc trays.(d) Selecting a desired disc
On the screen:
Touch “CD/DVD” tab, then touch
“Change Discs”.
The selected disc number is highlighted.
The changer will start playing the selected
disc from the first track.
On the audio panel:
Push the “
”or“” button of “CH/
DISC”.
When you release the button, the changer
will start playing the selected disc from the
first track.
ISF/IS NAVI (U)
Finish
7
Page 225 of 391

AUDIO/VIDEO SYSTEM
224
(e) Operating a DVD disc
NOTE: The playback condition of some
DVD discs may be determined by a DVD
software producer. This DVD changer
plays a disc as the software producer
intended. So some functions may not
work properly. Be sure to read the
instruction manual for the DVD disc
separately provided. For the detailed
information about DVD video discs, see
“(h) DVD player and DVD video disc
information” on page 241.
Precautions on DVD video disc
When recording with a DVD video or video
CD, audio tracks may not record in some
cases while the menu is displayed. As au-
dio will not play in this case, verify that the
video tracks are playing and then activate
playback.
When playback of a disc is completed:
DIf an audio CD or MP3 disc is playing,
the first track or file starts.
DIf a DVD video or video CD is playing,
playback will stop or the menu screen
will be displayed.
The title/chapter number and playback
time display may not appear while playing
back certain DVD video discs.
CAUTION
Conversational speech on some
DVDs is recorded at a low volume to
emphasize the impact of sound ef-
fects. If you adjust the volume as-
suming that the conversations repre-
sent the maximum volume level that
the DVD will play, you may be startled
by louder sound effects or when you
change to a different audio source.
The louder sounds may have a signif-
icant impact on the human body or
pose a driving hazard. Keep this in
mind when you adjust the volume.
ISF/IS NAVI (U)
Finish
Page 226 of 391
AUDIO/VIDEO SYSTEM
225
This screen appears when the video
screen is first displayed after “ENGINE
START STOP” switch is in ACCESSO-
RY or IGNITION ON mode.PLAYING A DVD DISC
Touch “CD/DVD” tab to display this
screen.
Touch
“Settings” on “DVD” screen, then
touch “Wide” on “Settings” screen. The
screen mode can be changed.
If you touch “Full Screen” when the ve-
hicle is completely stopped and the park-
ing brake is applied, the video screen re-
turns.
ISF/IS NAVI (U)
Finish
7
Page 227 of 391
AUDIO/VIDEO SYSTEM
226
DVD SETTINGS
"DVD video
"DVD audio
If you touch “Settings”on “DVD” screen,
“Settings” screen appears. DESCRIPTION OF DVD VIDEO SET-
TINGS
“DVD Video Settings”:
The initial set up
screen appears. (See page 233.)
“Search”: The title search screen ap-
pears. (See page 229.)
“Return”: Touching this will display the
predetermined scene and start playing
from there.
“Audio”: The audio changing screen ap-
pears. (See page 232.)
“Subtitle”: The subtitle changing screen
appears. (See page 231.)
“Angle”: The angle selection screen ap-
pears. (See page 233.)
“Wide”: The screen mode screen ap-
pears. (See page 191.)
ISF/IS NAVI (U)
Finish