Page 185 of 428
AUDIO/VIDEO SYSTEM
184
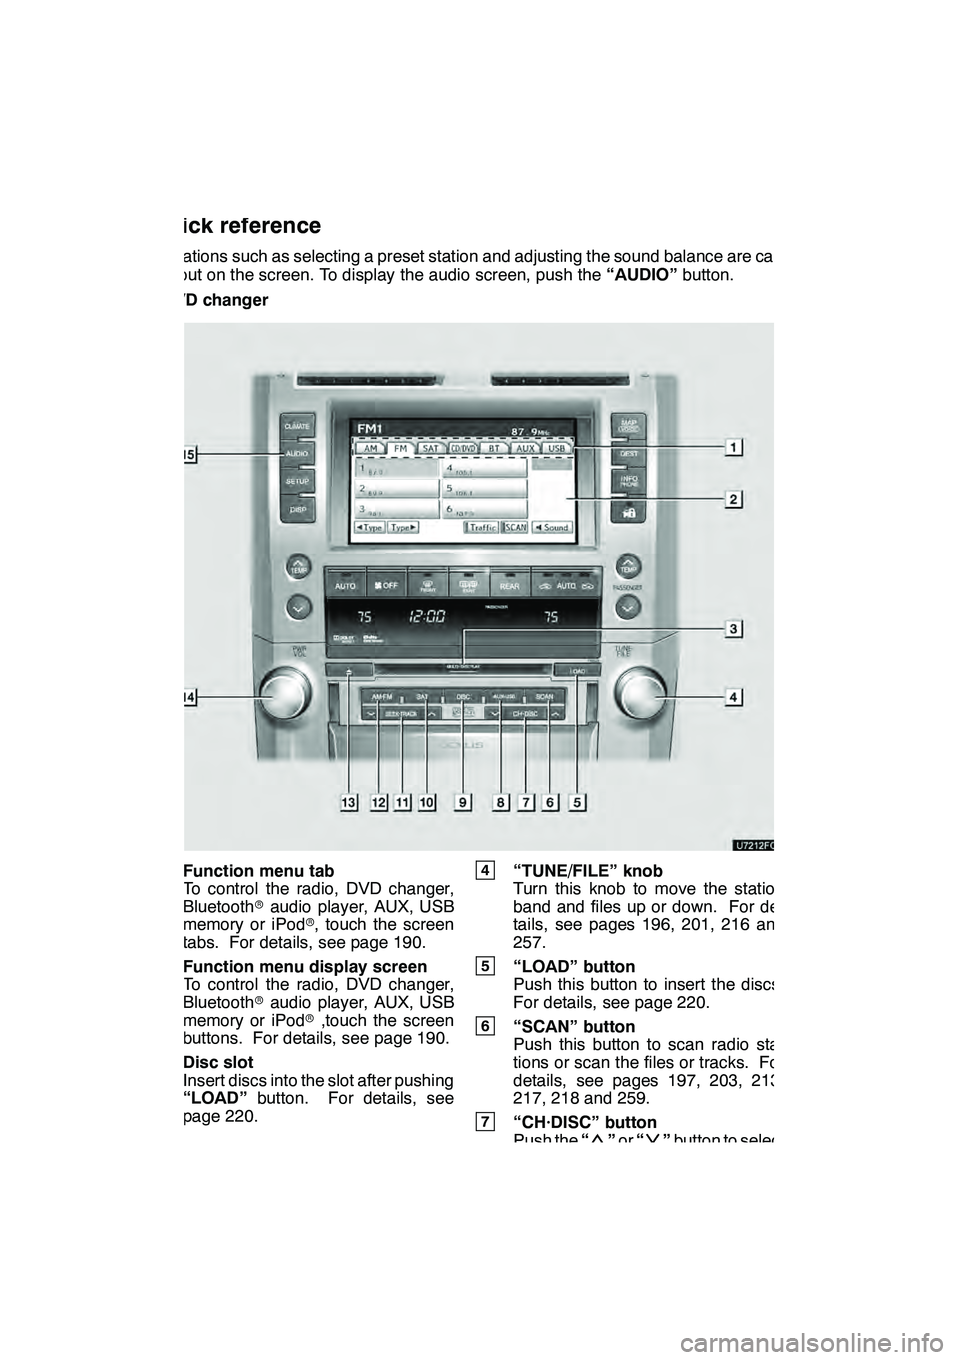
Operations such as selecting a preset station and adjusting the sound balance are car-
ried out on the screen. To display the audio screen, push the“AUDIO”button.
" DVD changer
1Function menu tab
To control the radio, DVD changer,
Bluetooth raudio player, AUX, USB
memory or iPod r, touch the screen
tabs. For details, see page 190.
2Function menu display screen
To control the radio, DVD changer,
Bluetooth raudio player, AUX, USB
memory or iPod r,touch the screen
buttons. For details, see page 190.
3Disc slot
Insert discs into the slot after pushing
“LOAD” button. For details, see
page 220.
4“TUNE/FILE” knob
Turn this knob to move the station
band and files up or down. For de-
tails, see pages 196, 201, 216 and
257.
5“LOAD” button
Push this button to insert the discs.
For details, see page 220.
6“SCAN” button
Push this button to scan radio sta-
tions or scan the files or tracks. For
details, see pages 197, 203, 213,
217, 218 and 259.
7“CH·DISC” button
Push the “”or “”button to select
a preset turning or a selected disc.
For details, see pages 197, 203, 223
and 225.
GX460 Navi (U)
OM60E73U
Finish
09.09.24
Quick reference
Page 187 of 428
AUDIO/VIDEO SYSTEM
186
"CD changer
1Function menu tab
To control the radio, CD changer,
Bluetooth raudio player, AUX, USB
memory or iPod r, touch the screen
tabs. For details, see page 190.
2Function menu display screen
To control the radio, CD changer,
Bluetooth raudio player, AUX, USB
memory or iPod r, touch the screen
buttons. For details, see page 190.
3Disc slot
Insert discs into the slot after pushing
“LOAD” button. For details, see
page 206.
4“TUNE/FILE” knob
Turn this knob to move the station
band and files up or down. For de-
tails, see pages 196, 201, 216 and
257.
5“LOAD” button
Push this button to insert the discs.
For details, see page 206.
6“SCAN” button
Push this button to scan radio sta-
tions or scan the files or tracks. For
details, see pages 197, 203, 213,
217, 218 and 259.
7“CH·DISC” button
Push the “”or “”button to select
a preset turning or a selected disc.
For details, see pages 197, 203 and
208.
GX460 Navi (U)
OM60E73U
Finish
09.09.24
Page 198 of 428
AUDIO/VIDEO SYSTEM
197
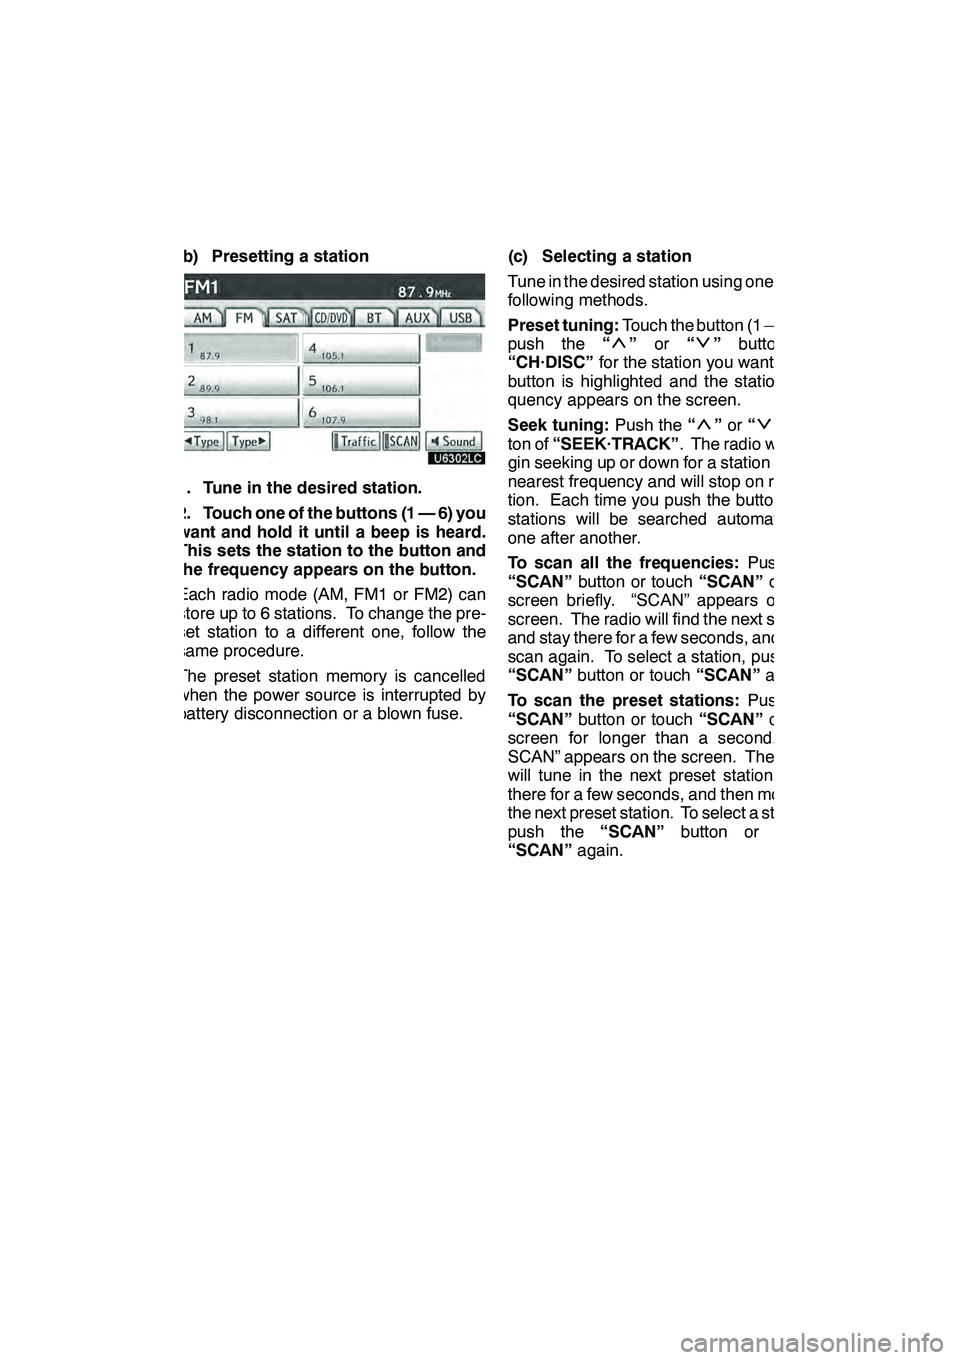
(b) Presetting a station
1. Tune in the desired station.
2. Touch one of the buttons (1 — 6) you
want and hold it until a beep is heard.
This sets the station to the button and
the frequency appears on the button.
Each radio mode (AM, FM1 or FM2) can
store up to 6 stations. To change the pre-
set station to a different one, follow the
same procedure.
The preset station memory is cancelled
when the power source is interrupted by
battery disconnection or a blown fuse.(c) Selecting a station
Tune in the desired station using one of the
following methods.
Preset tuning:
Touch the button (1 — 6) or
push the “
”or “”button of
“CH·DISC” for the station you want. The
button is highlighted and the station fre-
quency appears on the screen.
Seek tuning: Push the“
”or “”but-
ton of “SEEK·TRACK” . The radio will be-
gin seeking up or down for a station of the
nearest frequency and will stop on recep-
tion. Each time you push the button, the
stations will be searched automatically
one after another.
To scan all the frequencies: Push the
“SCAN” button or touch “SCAN”on the
screen briefly. “SCAN” appears on the
screen. The radio will find the next station
and stay there for a few seconds, and then
scan again. To select a station, push the
“SCAN” button or touch “SCAN”again.
To scan the preset stations: Push the
“SCAN” button or touch “SCAN”on the
screen for longer than a second. “P.
SCAN” appears on the screen. The radio
will tune in the next preset station, stay
there for a few seconds, and then move to
the next preset station. To select a station,
push the “SCAN”button or touch
“SCAN” again.
GX460 Navi (U)
OM60E73U
Finish
09.09.24
7
Page 203 of 428
AUDIO/VIDEO SYSTEM
202
(d) Channel category
Touch either“A Type” or“Type "”to go
to the next or previous category. (e) Presetting a channel
1. Tune in the desired channel.
2. Touch one of the channel selector
buttons (1 — 6) and hold it until a beep
is heard.
This sets the channels to the button and
the name and number of the channel ap-
pears on the button.
Each button can store three SAT channels.
To change the preset channel to a different
one, follow the same procedure.
The preset channel memory is cancelled
when the power source is interrupted by
battery disconnection or a blown fuse.
GX460 Navi (U)
OM60E73U
Finish
09.09.24
Page 204 of 428
AUDIO/VIDEO SYSTEM
203
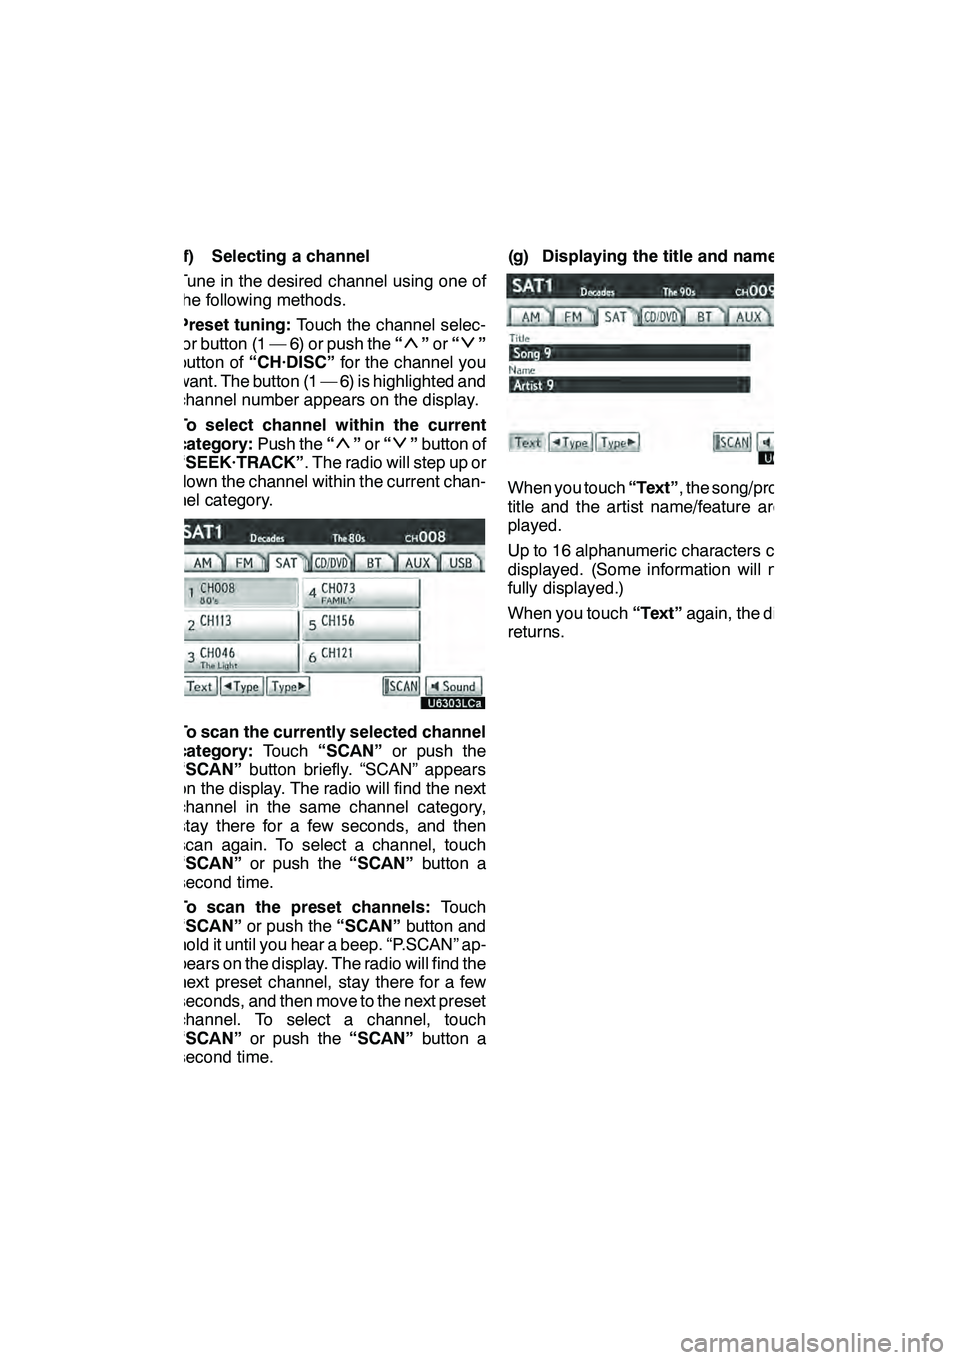
(f) Selecting a channel
Tune in the desired channel using one of
the following methods.
Preset tuning:Touch the channel selec-
tor button (1 — 6) or push the “
”or “”
button of “CH·DISC” for the channel you
want. The button (1 — 6) is highlighted and
channel number appears on the display.
To select channel within the current
category: Push the“
”or “”button of
“SEEK·TRACK” . The radio will step up or
down the channel within the current chan-
nel category.
To scan the currently selected channel
category: Touch“SCAN” or push the
“SCAN” button briefly. “SCAN” appears
on the display. The radio will find the next
channel in the same channel category,
stay there for a few seconds, and then
scan again. To select a channel, touch
“SCAN” or push the “SCAN”button a
second time.
To scan the preset channels: Touch
“SCAN” or push the “SCAN”button and
hold it until you hear a beep. “P.SCAN” ap-
pears on the display. The radio will find the
next preset channel, stay there for a few
seconds, and then move to the next preset
channel. To select a channel, touch
“SCAN” or push the “SCAN”button a
second time. (g) Displaying the title and name
When you touch
“Text”, the song/program
title and the artist name/feature are dis-
played.
Up to 16 alphanumeric characters can be
displayed. (Some information will not be
fully displayed.)
When you touch “Text”again, the display
returns.
GX460 Navi (U)
OM60E73U
Finish
09.09.24
7
Page 220 of 428
AUDIO/VIDEO SYSTEM
219
“RAND”:Use it for automatic and random
selection of the folder or the disc which you
are currently listening to.
Playing the files in one folder in random
order —
Touch “RAND” briefly while the disc is
playing. “RAND” appears on the screen.
The system selects a file in the folder you
are currently listening to. To cancel it,
touch “RAND” once again.
Playing the files in all the folders on one
disc in random order —
Touch “RAND” for longer than a second
while the disc is playing. “FLD.RAND” ap-
pears on the screen. The system selects
a file in all the folders. To cancel it, touch
“RAND” once again.
When a file is skipped or the system is in-
operative, touch “RAND”to reset. (g) If the changer malfunctions
If “CD error” appears on the screen, audio
signals of the disc cannot be read or the
system has trouble. Push the
“CD”button
once again.
If the changer does not operate, check that
the disc surface is not soiled or damaged.
If the disc is O.K., the temperature of the
changer ’s internal mechanism may be
raised because of high external tempera-
ture. Remove the disc from the changer to
cool it.
If the changer still does not operate, have
it checked by your dealer.
If an MP3/WMA disc contains CD− DA
files, only CD −DA files are played. If an
MP3/WMA disc contains files other than
CD− DA, only MP3/WMA files are played.
GX460 Navi (U)
OM60E73U
Finish
09.09.24
7
Page 261 of 428
AUDIO/VIDEO SYSTEM
260 D
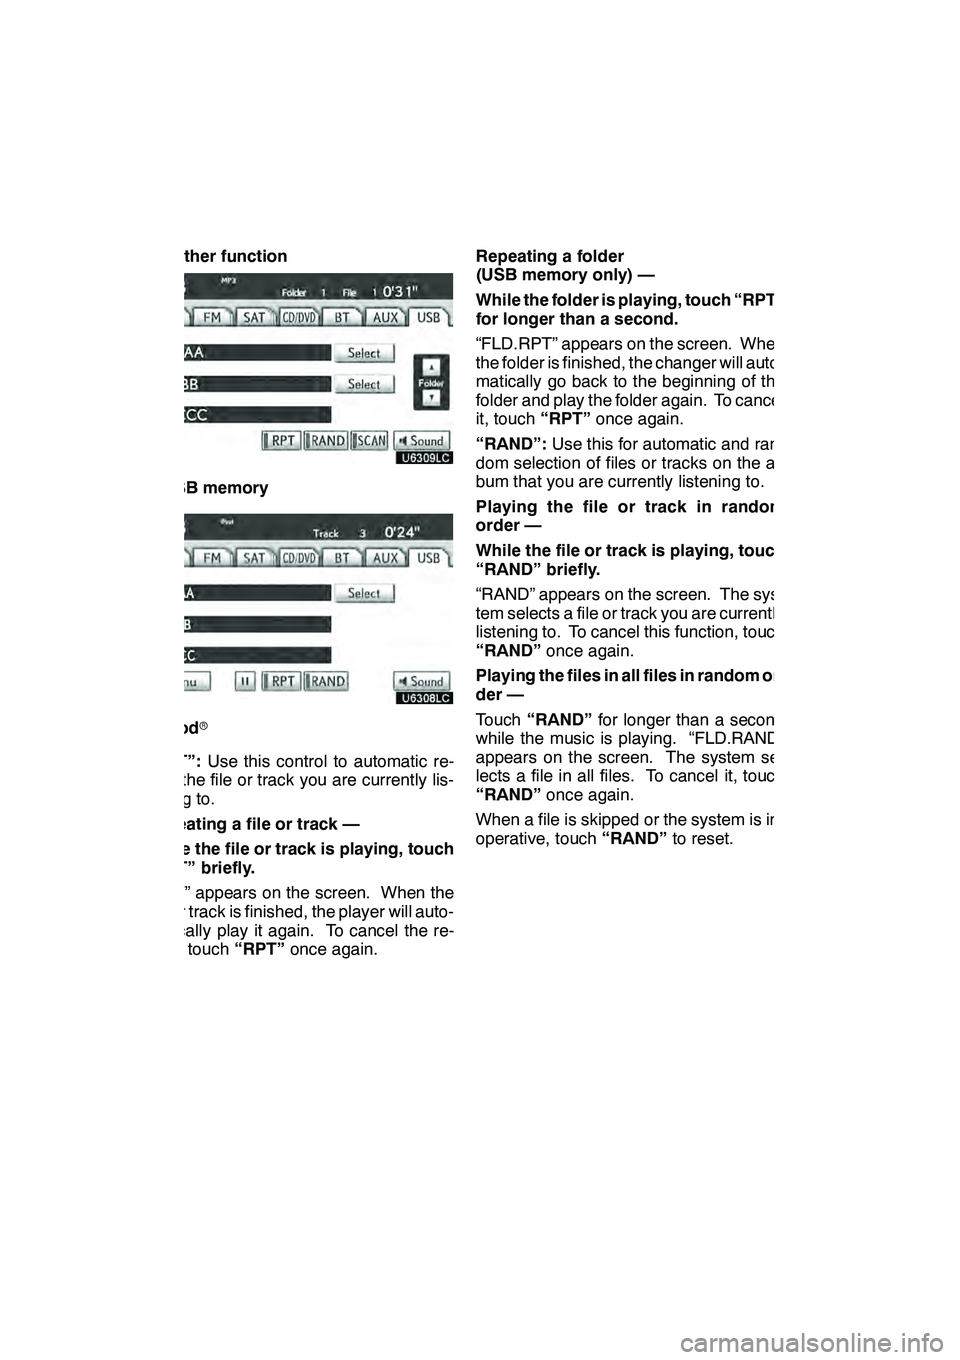
Other function
"USB memory
"iPod r
“RPT”: Use this control to automatic re-
play the file or track you are currently lis-
tening to.
Repeating a file or track —
While the file or track is playing, touch
“RPT” briefly.
“RPT” appears on the screen. When the
file or track is finished, the player will auto-
matically play it again. To cancel the re-
peat, touch “RPT”once again. Repeating a folder
(USB memory only) —
While the folder is playing, touch “RPT”
for longer than a second.
“FLD.RPT” appears on the screen. When
the folder is finished, the changer will auto-
matically go back to the beginning of the
folder and play the folder again. To cancel
it, touch
“RPT”once again.
“RAND”: Use this for automatic and ran-
dom selection of files or tracks on the al-
bum that you are currently listening to.
Playing the file or track in random
order —
While the file or track is playing, touch
“RAND” briefly.
“RAND” appears on the screen. The sys-
tem selects a file or track you are currently
listening to. To cancel this function, touch
“RAND” once again.
Playing the files in all files in random or-
der —
Touch “RAND” for longer than a second
while the music is playing. “FLD.RAND”
appears on the screen. The system se-
lects a file in all files. To cancel it, touch
“RAND” once again.
When a file is skipped or the system is in-
operative, touch “RAND”to reset.
GX460 Navi (U)
OM60E73U
Finish
09.09.24
Page 262 of 428
AUDIO/VIDEO SYSTEM
261
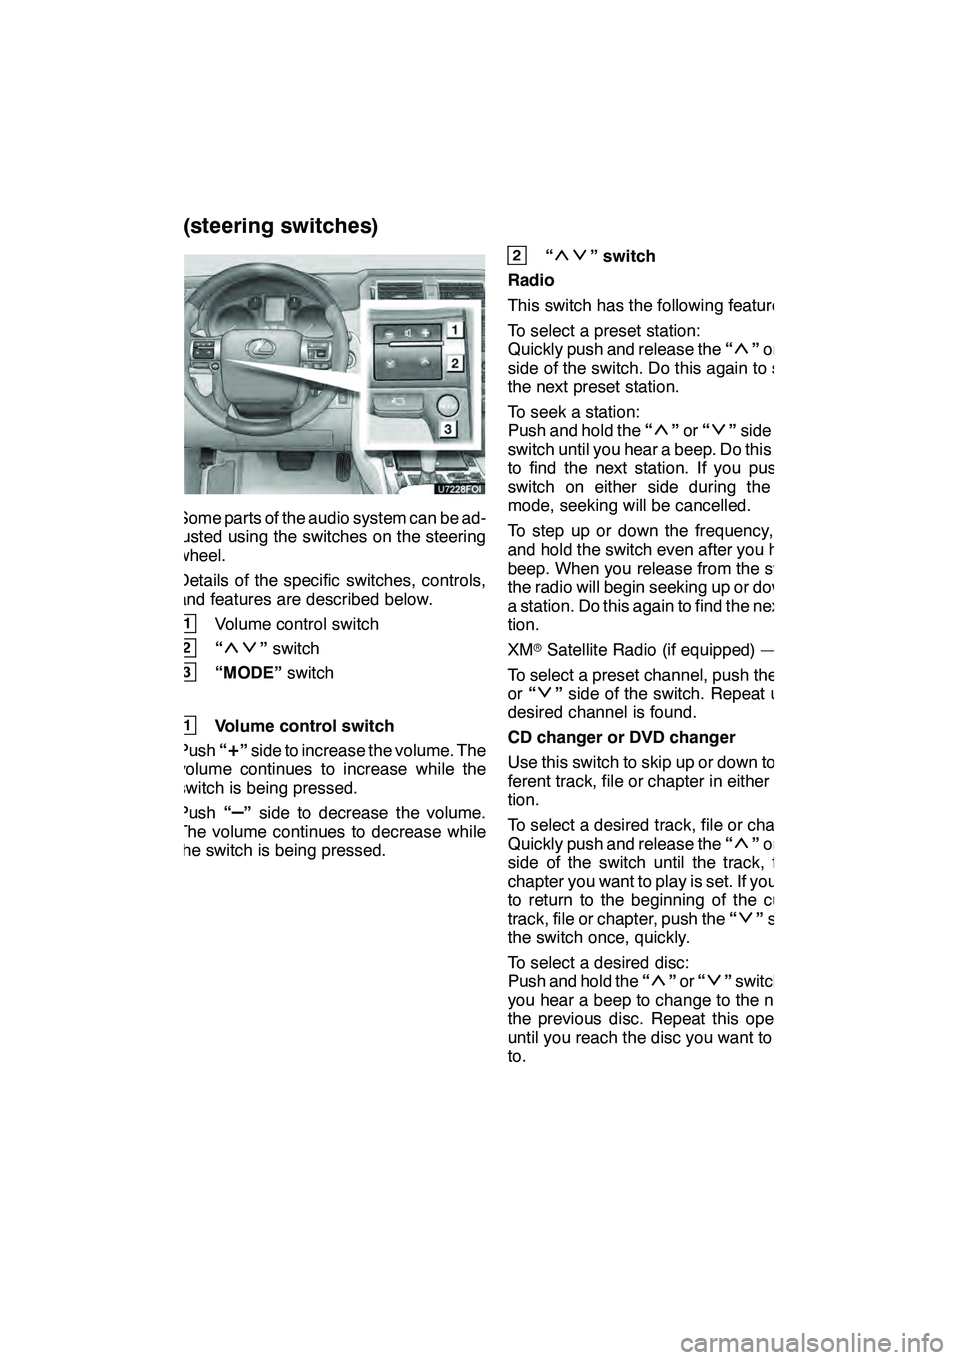
Some parts of the audio system can be ad-
justed using the switches on the steering
wheel.
Details of the specific switches, controls,
and features are described below.
1Volume control switch
2“”switch
3“MODE” switch
1Volume control switch
Push “
+”side to increase the volume. The
volume continues to increase while the
switch is being pressed.
Push “
–”side to decrease the volume.
The volume continues to decrease while
the switch is being pressed.
2“” switch
Radio
This switch has the following features —
To select a preset station:
Quickly push and release the “
”or “”
side of the switch. Do this again to select
the next preset station.
To seek a station:
Push and hold the “
”or “”side of the
switch until you hear a beep. Do this again
to find the next station. If you push the
switch on either side during the seek
mode, seeking will be cancelled.
To step up or down the frequency, push
and hold the switch even after you hear a
beep. When you release from the switch,
the radio will begin seeking up or down for
a station. Do this again to find the next sta-
tion.
XM rSatellite Radio (if equipped) —
To select a preset channel, push the “
”
or “”side of the switch. Repeat until a
desired channel is found.
CD changer or DVD changer
Use this switch to skip up or down to a dif-
ferent track, file or chapter in either direc-
tion.
To select a desired track, file or chapter:
Quickly push and release the “
”or “”
side of the switch until the track, file or
chapter you want to play is set. If you want
to return to the beginning of the current
track, file or chapter, push the “
”side of
the switch once, quickly.
To select a desired disc:
Push and hold the “
”or “”switch until
you hear a beep to change to the next or
the previous disc. Repeat this operation
until you reach the disc you want to listen
to.
GX460 Navi (U)
OM60E73U
Finish
09.09.24
Audio/video remote controls
(steering switches)
7