Page 185 of 428

AUDIO/VIDEO SYSTEM
184
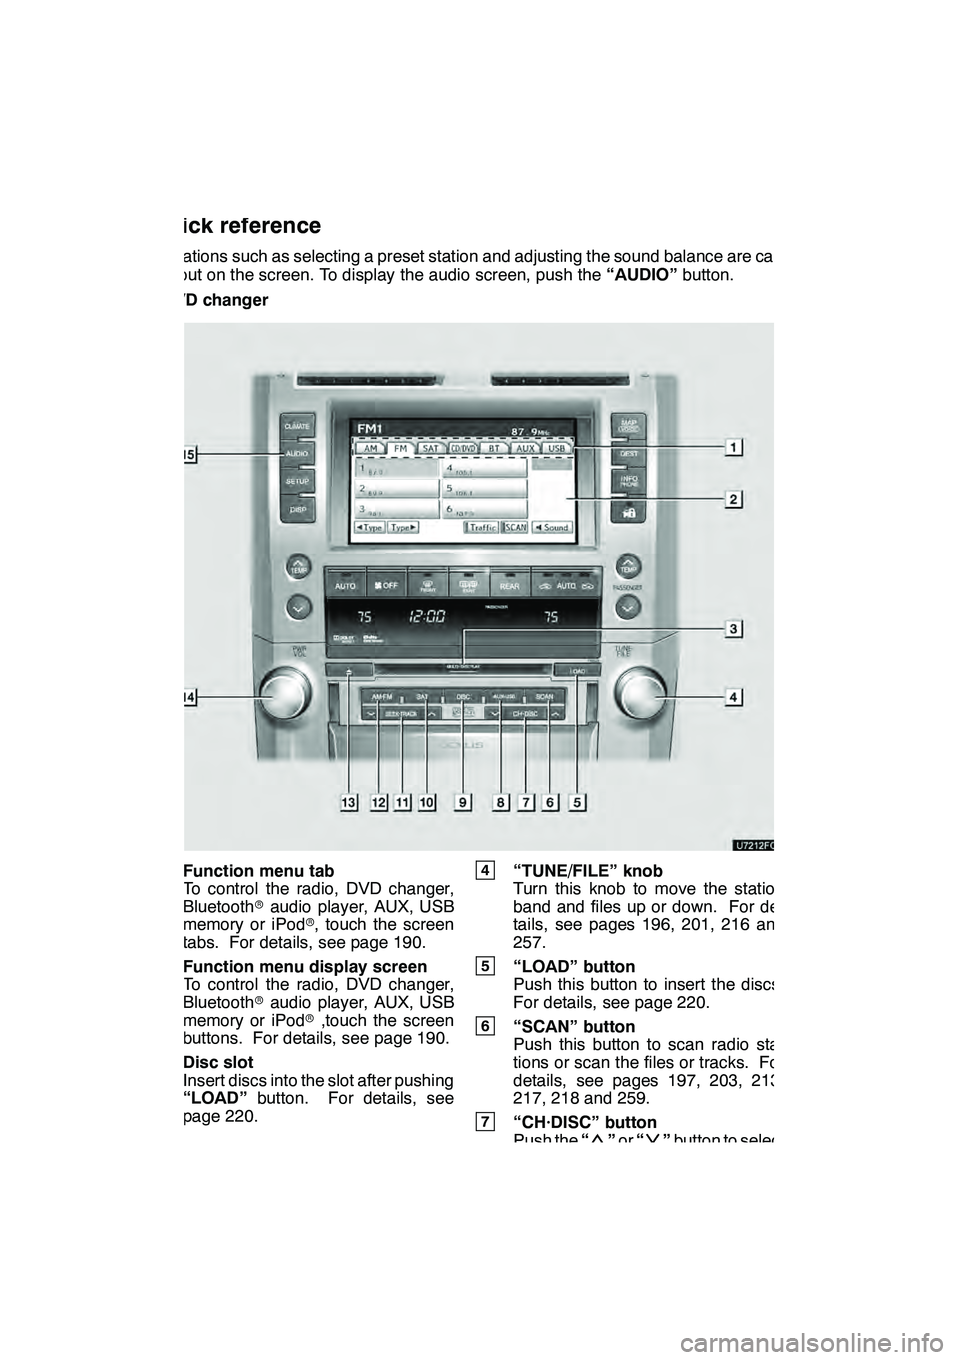
Operations such as selecting a preset station and adjusting the sound balance are car-
ried out on the screen. To display the audio screen, push the“AUDIO”button.
" DVD changer
1Function menu tab
To control the radio, DVD changer,
Bluetooth raudio player, AUX, USB
memory or iPod r, touch the screen
tabs. For details, see page 190.
2Function menu display screen
To control the radio, DVD changer,
Bluetooth raudio player, AUX, USB
memory or iPod r,touch the screen
buttons. For details, see page 190.
3Disc slot
Insert discs into the slot after pushing
“LOAD” button. For details, see
page 220.
4“TUNE/FILE” knob
Turn this knob to move the station
band and files up or down. For de-
tails, see pages 196, 201, 216 and
257.
5“LOAD” button
Push this button to insert the discs.
For details, see page 220.
6“SCAN” button
Push this button to scan radio sta-
tions or scan the files or tracks. For
details, see pages 197, 203, 213,
217, 218 and 259.
7“CH·DISC” button
Push the “”or “”button to select
a preset turning or a selected disc.
For details, see pages 197, 203, 223
and 225.
GX460 Navi (U)
OM60E73U
Finish
09.09.24
Quick reference
Page 187 of 428
AUDIO/VIDEO SYSTEM
186
"CD changer
1Function menu tab
To control the radio, CD changer,
Bluetooth raudio player, AUX, USB
memory or iPod r, touch the screen
tabs. For details, see page 190.
2Function menu display screen
To control the radio, CD changer,
Bluetooth raudio player, AUX, USB
memory or iPod r, touch the screen
buttons. For details, see page 190.
3Disc slot
Insert discs into the slot after pushing
“LOAD” button. For details, see
page 206.
4“TUNE/FILE” knob
Turn this knob to move the station
band and files up or down. For de-
tails, see pages 196, 201, 216 and
257.
5“LOAD” button
Push this button to insert the discs.
For details, see page 206.
6“SCAN” button
Push this button to scan radio sta-
tions or scan the files or tracks. For
details, see pages 197, 203, 213,
217, 218 and 259.
7“CH·DISC” button
Push the “”or “”button to select
a preset turning or a selected disc.
For details, see pages 197, 203 and
208.
GX460 Navi (U)
OM60E73U
Finish
09.09.24
Page 191 of 428
AUDIO/VIDEO SYSTEM
190
(d) Switching between functions
"DVD changer image
Push the “AM·FM”, “SAT”, “DISC”,
“CD” or “AUX·USB” button to turn on
the desired mode. 1. Push the “AUDIO” button.
2. Touch “AM”, “FM”, “SAT”, “CD”,
“CD/DVD”, “BT”, “AUX” or “USB” tab
to turn on the desired mode.
Push these buttons or tabs if you want to
switch from one mode to another.
If the disc is not set, the CD changer/DVD
changer does not turn on.
You can turn off the CD changer/DVD
changer by ejecting a disc.
GX460 Navi (U)
OM60E73U
Finish
09.09.24
Page 197 of 428

AUDIO/VIDEO SYSTEM
196
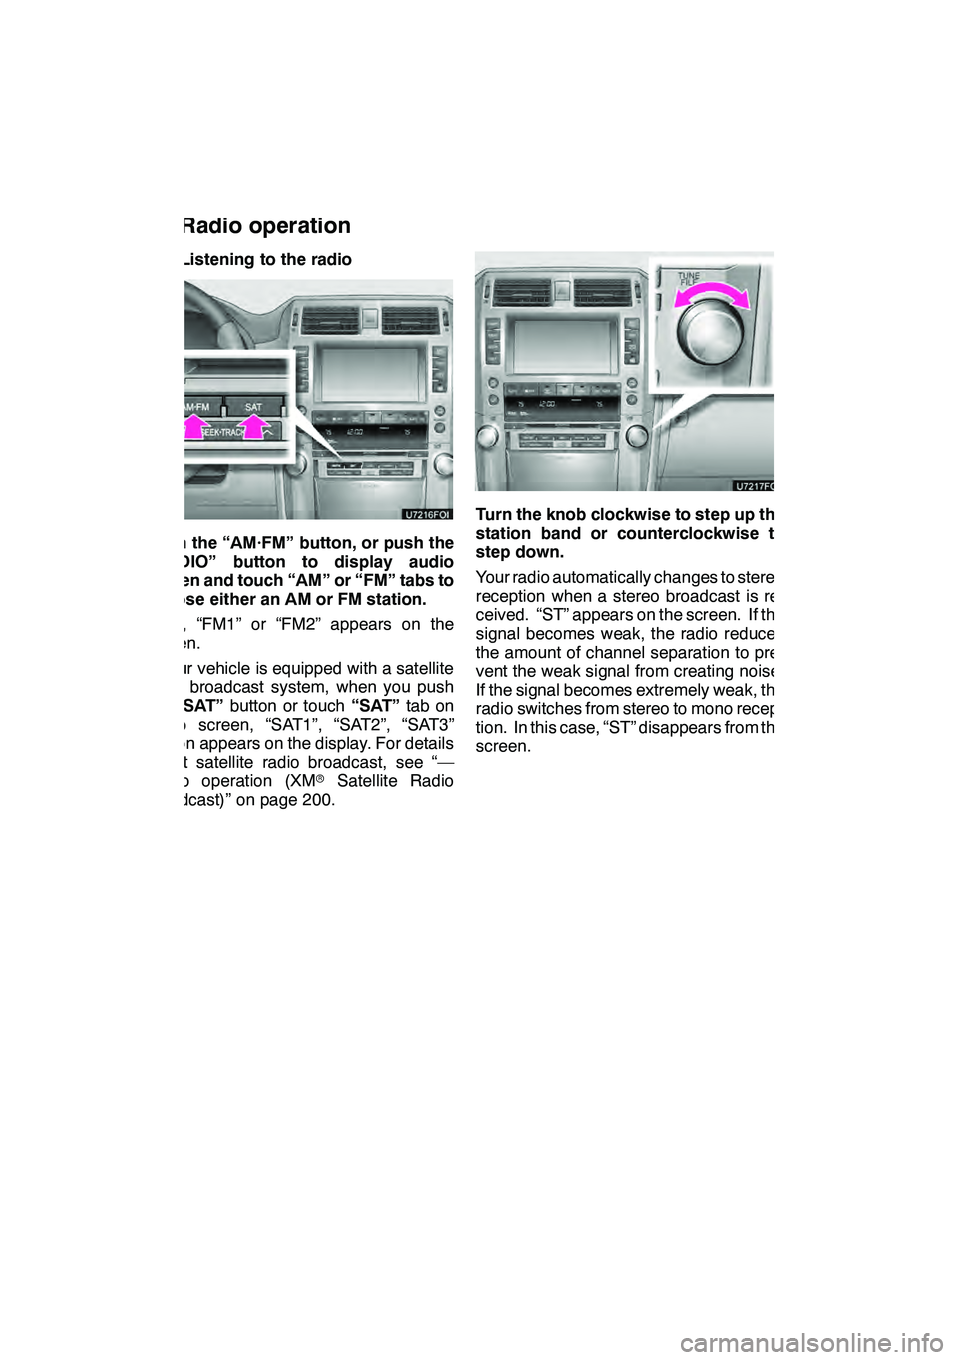
(a) Listening to the radio
Push the “AM·FM” button, or push the
“AUDIO” button to display audio
screen and touch “AM” or “FM” tabs to
choose either an AM or FM station.
“AM”, “FM1” or “FM2” appears on the
screen.
If your vehicle is equipped with a satellite
radio broadcast system, when you push
the“SAT” button or touch “SAT”tab on
audio screen, “SAT1”, “SAT2”, “SAT3”
station appears on the display. For details
about satellite radio broadcast, see “—
Radio operation (XM rSatellite Radio
broadcast)” on page 200.
Turn the knob clockwise to step up the
station band or counterclockwise to
step down.
Your radio automatically changes to stereo
reception when a stereo broadcast is re-
ceived. “ST” appears on the screen. If the
signal becomes weak, the radio reduces
the amount of channel separation to pre-
vent the weak signal from creating noise.
If the signal becomes extremely weak, the
radio switches from stereo to mono recep-
tion. In this case, “ST” disappears from the
screen.
GX460 Navi (U)
OM60E73U
Finish
09.09.24
— Radio operation
Page 327 of 428

INTUITIVE PARKING ASSIST
326 D
The shape of the obstacle may prevent
a sensor from detecting it. Pay particu-
lar attention to the following obstacles:
DWires, fences, ropes, etc.
DCotton, snow and other materials
that absorb radio waves
DSharply−angled objects
DLow obstacles
DTall obstacles with upper sections
projecting outwards in the direction
of your vehicle
CAUTION
Caution when using the intuitive
parking assist
Observe the following precautions.
Failing to do so may result in the ve-
hicle being unable to be driven safely
and possibly cause an accident.
DDo not use the sensor at speeds in
excess of approximately 6 mph (10
km/h).
DDo not attach any accessories
within the sensor range.
NOTICE
Notes when washing the vehicle
Do not apply intensive bursts of wa-
ter or steam to the sensor area.
Doing so may result in the sensor
malfunctioning.
System malfunction
DAn accident will affect the sensors,
resulting in system failure.
DIf the indicators remain on without
a beeping sound, the system may
be malfunctioning.
Contact your Lexus dealer.
If an error is detected when the intuitive
parking assist is turned on, the vehicle
symbol comes on or flashes with beep-
ing sounds.
However, the sensors functioning properly
continue their obstacle detection.
The intuitive parking assist failure warning
display is not given in either of the following
operations:
DChanging to another screen
DTurning the ituitive parking assist mode
off
GX460 Navi (U)
OM60E73U
Finish
09.09.24
— Intuitive parking assist
failure warning