Page 193 of 428

AUDIO/VIDEO SYSTEM
192
The screen buttons for radio, CD
changer, DVD changer, Bluetoothrau-
dio player, AUX, USB memory and
iPod roperation are displayed on the
screen when the audio control mode is
selected.
Touch the tab to select the desired mode
when the audio control mode is selected.
INFORMATION
D If the system does not respond to
a touch of a touch screen button,
move your finger away from the
screen and then touch it again.
D You cannot operate dimmed
touch− screen buttons.
D Wipe off fingerprints using a glass
cleaning cloth. Do not use chemi-
cal cleaners to clean the touch
screen.
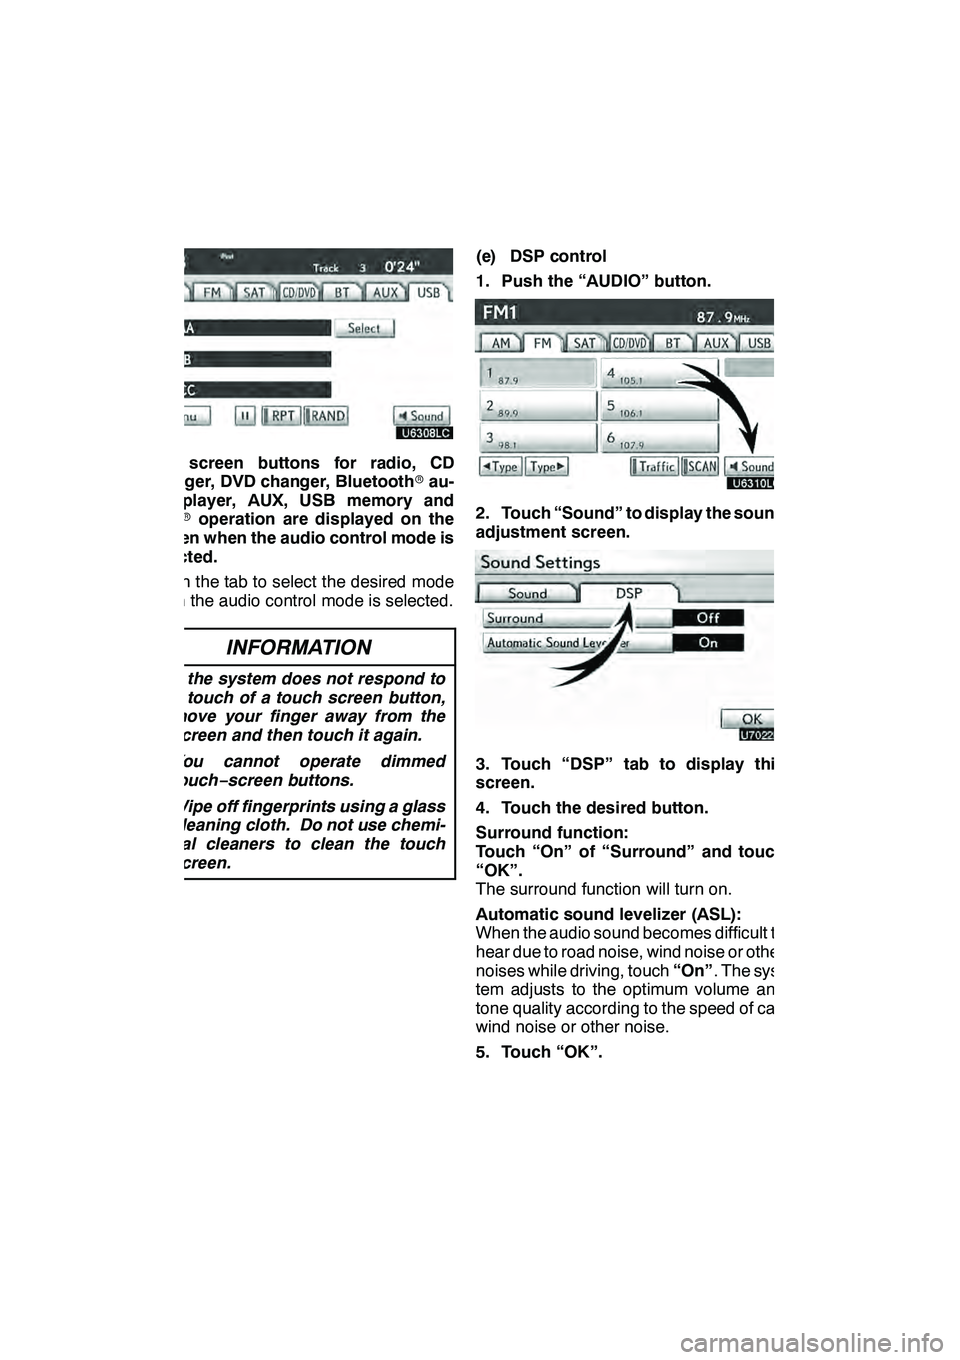
(e) DSP control
1. Push the “AUDIO” button.
2. Touch “Sound” to display the sound
adjustment screen.
3. Touch “DSP” tab to display this
screen.
4. Touch the desired button.
Surround function:
Touch “On” of “Surround” and touch
“OK”.
The surround function will turn on.
Automatic sound levelizer (ASL):
When the audio sound becomes difficult to
hear due to road noise, wind noise or other
noises while driving, touch “On”. The sys-
tem adjusts to the optimum volume and
tone quality according to the speed of car,
wind noise or other noise.
5. Touch “OK”.
GX460 Navi (U)
OM60E73U
Finish
09.09.24
Page 198 of 428

AUDIO/VIDEO SYSTEM
197
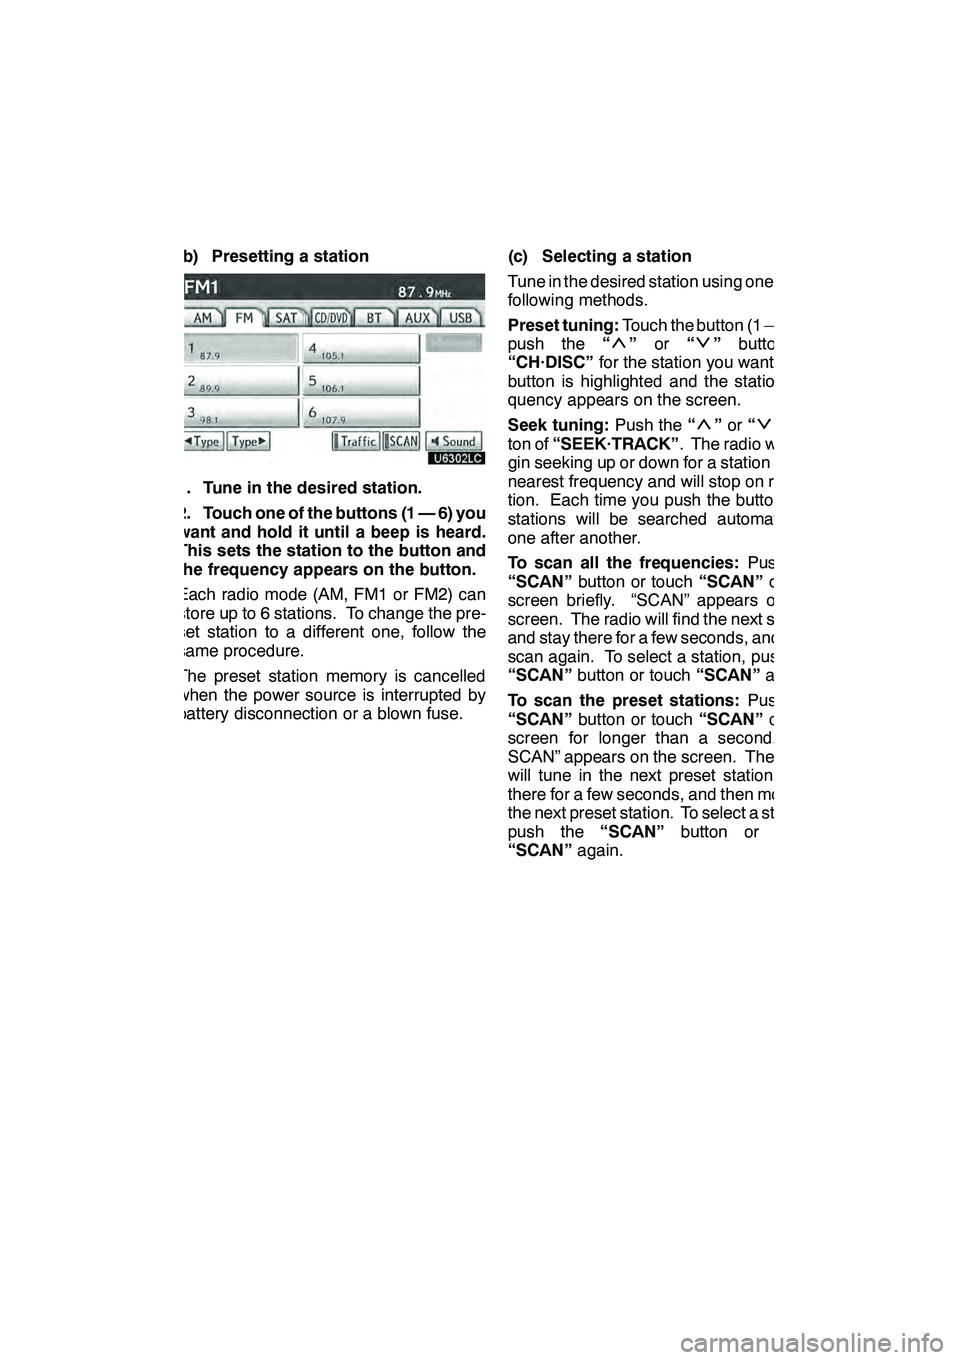
(b) Presetting a station
1. Tune in the desired station.
2. Touch one of the buttons (1 — 6) you
want and hold it until a beep is heard.
This sets the station to the button and
the frequency appears on the button.
Each radio mode (AM, FM1 or FM2) can
store up to 6 stations. To change the pre-
set station to a different one, follow the
same procedure.
The preset station memory is cancelled
when the power source is interrupted by
battery disconnection or a blown fuse.(c) Selecting a station
Tune in the desired station using one of the
following methods.
Preset tuning:
Touch the button (1 — 6) or
push the “
”or “”button of
“CH·DISC” for the station you want. The
button is highlighted and the station fre-
quency appears on the screen.
Seek tuning: Push the“
”or “”but-
ton of “SEEK·TRACK” . The radio will be-
gin seeking up or down for a station of the
nearest frequency and will stop on recep-
tion. Each time you push the button, the
stations will be searched automatically
one after another.
To scan all the frequencies: Push the
“SCAN” button or touch “SCAN”on the
screen briefly. “SCAN” appears on the
screen. The radio will find the next station
and stay there for a few seconds, and then
scan again. To select a station, push the
“SCAN” button or touch “SCAN”again.
To scan the preset stations: Push the
“SCAN” button or touch “SCAN”on the
screen for longer than a second. “P.
SCAN” appears on the screen. The radio
will tune in the next preset station, stay
there for a few seconds, and then move to
the next preset station. To select a station,
push the “SCAN”button or touch
“SCAN” again.
GX460 Navi (U)
OM60E73U
Finish
09.09.24
7
Page 203 of 428
AUDIO/VIDEO SYSTEM
202
(d) Channel category
Touch either“A Type” or“Type "”to go
to the next or previous category. (e) Presetting a channel
1. Tune in the desired channel.
2. Touch one of the channel selector
buttons (1 — 6) and hold it until a beep
is heard.
This sets the channels to the button and
the name and number of the channel ap-
pears on the button.
Each button can store three SAT channels.
To change the preset channel to a different
one, follow the same procedure.
The preset channel memory is cancelled
when the power source is interrupted by
battery disconnection or a blown fuse.
GX460 Navi (U)
OM60E73U
Finish
09.09.24
Page 236 of 428
AUDIO/VIDEO SYSTEM
235
CHANGING THE ANGLE
The angle can be selected for discs that
are multi−angle compatible when the
angle mark appears on the screen.
Each time you touch “Change”, the
angle is selected from the ones stored
in the discs and changed.
When you touch
, and the previous
screen returns. SETUP MENU
There are initial setting buttons on the
“Setup Menu” screen.
After you change the initial setting, touch
. The initial setting screen will be
turned off and return to the picture
previously.
When “Default” is touched, all menus are
initialized.
The initial setting can be changed.
GX460 Navi (U)
OM60E73U
Finish
09.09.24
7
Page 265 of 428
AUDIO/VIDEO SYSTEM
264
The rear seat entertainment system can
be used when the “ENGINE START
STOP” switch is in ACCESSORY or IGNI-
TION ON mode.
DDisplays
A display is installed in the back of each
front seat. When audio−video equipment
is connected to the A/V input adapter, rear
passengers can enjoy different audio
sources on each display. See “—Using the
video mode” on page 284.
DRear seat entertainment system
controller
Use the controller to operate both the left
and right side displays. Some controller
buttons are shared between the left and
right side displays. When operating those
buttons, first select the desired display us-
ing the select display switch.
To operate, aim the controller at the de-
sired display.
1Controller buttons for the left side dis-
play
2Controller buttons for the right side
display
3Turns display off
4Selects the display to be operated
(for some controller buttons only)
GX460 Navi (U)
OM60E73U
Finish
09.09.24
Page 273 of 428
AUDIO/VIDEO SYSTEM
272
1Turning on the DVD mode
2Inputting the selected icon
3Selecting an icon
4Turning on the menu screen
5Playing/pausing a disc
6Fast forwarding a disc
7Turning on the control icon screen
8Reversing a disc
9Turning on the title selection screen
10Push to select a chapter/trackPush and hold to fast forwarding or
reversing a chapter/track
DDVD video and DVD audio
Push “OPTION” if no icons are shown
while watching a DVD video or DVD audio,
and following screens appear.
" DVD video
"DVD audio
“Settings”: Selecting this will display set-
ting screen.
“Hide Buttons”: Selecting this will turn off
the icons from the screen.
If “
” appears on the screen when you se-
lect a control, the operation relevant to the
control is not permitted.
GX460 Navi (U)
OM60E73U
Finish
09.09.30
Page 280 of 428
AUDIO/VIDEO SYSTEM
279
CHANGING THE ANGLE
Select “Angle” on the settings screen.
The angle can be selected for discs that
are multi−angle compatible when the
angle mark appears on the screen.
Each time you select “Angle”, the angle
is selected from the ones stored in the
discs and changed.
When you select
, and the previous
screen returns. SETUP MENU
Select “Setup” on the settings screen.
There are initial setting buttons on the
“Setup Menu” screen.
After you change the initial setting, select
“OK”
. The initial setting screen will be
turned off and return to the picture
previously.
When “Default” is selected, all menus are
initialized.
The initial setting can be changed.
GX460 Navi (U)
OM60E73U
Finish
09.09.24
7
Page 282 of 428
AUDIO/VIDEO SYSTEM
281
ENTER AUDIO LANGUAGE CODE
If you select “Other” on the “Audio
Language” screen, “Subtitle
Language” screen or “DVD Language”
screen, you can select the language
you want to hear or read by entering a
language code. (See page 237.)
1. Enter the 4−digit language code.
If you enter the wrong numbers, select
to delete the numbers.
2. Select “OK”.
DVideo CD
Push “OPTION” if no icons are shown
while watching a video CD, and following
screen appears.
“Settings”: Selecting this will display set-
ting screen.
“Hide Buttons”: Selecting this will turn off
the icons from the screen.
If “
” appears on the display when you se-
lect a control, the operation is not per-
mitted.
GX460 Navi (U)
OM60E73U
Finish
09.09.24
7