2010 KIA VENGA mil
[x] Cancel search: milPage 333 of 379
Maintenance
42
7
Remove the valve cap from the tire
valve stem. Press the tire gage firm-
ly onto the valve to get a pressure
measurement. If the cold tire inflationpressure matches the recommendedpressure on the tire and loading
information label, no further adjust-
ment is necessary. If the pressure is
low, add air until you reach the rec-ommended amount.
If you overfill the tire, release air by pushing on the metal stem in the
center of the tire valve. Recheck the
tire pressure with the tire gage. Be
sure to put the valve caps back on
the valve stems. They help prevent
leaks by keeping out dirt and mois-
ture. Tire rotation
To equalize tread wear, it is recom- mended that the tires be rotated
every 12,000 km (7,500 miles) or
sooner if irregular wear develops.
During rotation, check the tires for
correct balance.
When rotating tires, check for uneven
wear and damage. Abnormal wear is
usually caused by incorrect tire pres-
sure, improper wheel alignment, out-
of-balance wheels, severe braking or
severe cornering. Look for bumps or
bulges in the tread or side of tire.
Replace the tire if you find either of
these conditions. Replace the tire if
fabric or cord is visible. After rotation,
be sure to bring the front and rear tire
pressures to specification and check
lug nut tightness.
Refer to “Tire and wheels” in section 8.
WARNING
Inspect your tires frequently for proper inflation as well as
wear and damage. Always use
a tire pressure gauge.
Tires with too much or too little pressure wear unevenly caus-
ing poor handling, loss of vehi-
cle control, and sudden tirefailure leading to accidents,
injuries, and even death. Therecommended cold tire pres-
sure for your vehicle can be
found in this manual and onthe tire label located on the dri-
ver's side center pillar.
Worn tires can cause acci- dents. Replace tires that are
worn, show uneven wear, or
are damaged.
Remember to check the pres- sure of your spare tire. KIA
recommends that you check
the spare every time you
check the pressure of the
other tires on your vehicle.
Page 337 of 379
Maintenance
46
7
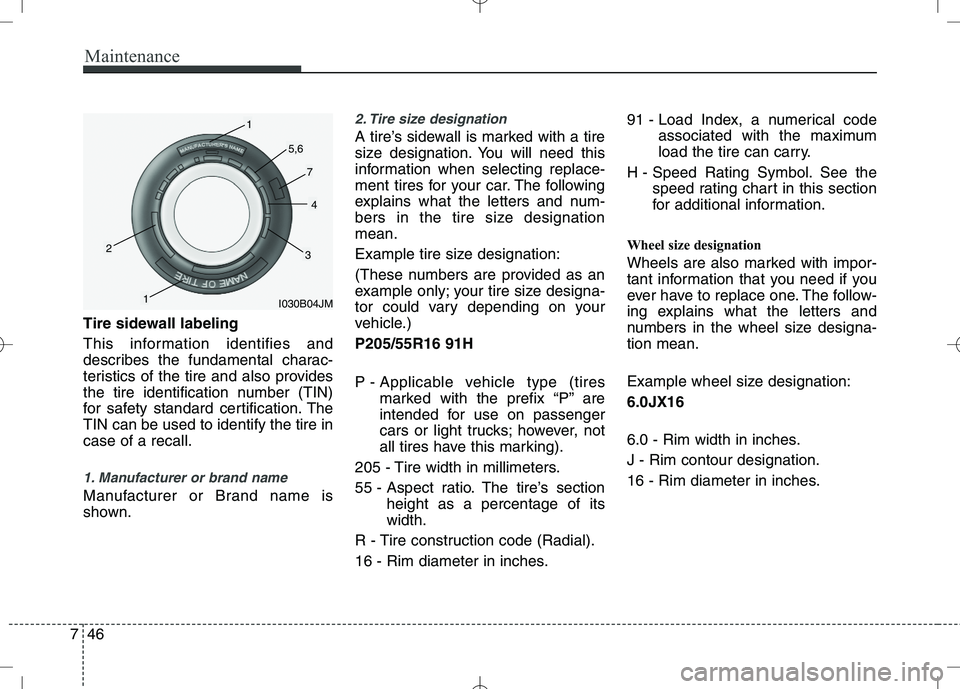
Tire sidewall labeling
This information identifies and
describes the fundamental charac-
teristics of the tire and also provides
the tire identification number (TIN)
for safety standard certification. TheTIN can be used to identify the tire incase of a recall.
1. Manufacturer or brand name
Manufacturer or Brand name is
shown.
2. Tire size designation
A tire’s sidewall is marked with a tire
size designation. You will need this
information when selecting replace-
ment tires for your car. The following
explains what the letters and num-
bers in the tire size designationmean.
Example tire size designation:
(These numbers are provided as an
example only; your tire size designa-
tor could vary depending on your
vehicle.) P205/55R16 91H
P - Applicable vehicle type (tires
marked with the prefix “P’’ are
intended for use on passenger
cars or light trucks; however, not
all tires have this marking).
205 - Tire width in millimeters.
55 - Aspect ratio. The tire’s section height as a percentage of its width.
R - Tire construction code (Radial).
16 - Rim diameter in inches. 91 - Load Index, a numerical code
associated with the maximum
load the tire can carry.
H - Speed Rating Symbol. See the speed rating chart in this section
for additional information.
Wheel size designation
Wheels are also marked with impor-
tant information that you need if you
ever have to replace one. The follow-
ing explains what the letters and
numbers in the wheel size designa-tion mean.
Example wheel size designation: 6.0JX16
6.0 - Rim width in inches. J - Rim contour designation.
16 - Rim diameter in inches.
I030B04JM
1
1
23
4
5,6
7
Page 350 of 379
759
Maintenance
LIGHT BULBS
Use only the bulbs of the specifiedwattage.
✽✽ NOTICE
After heavy, driving rain or washing,
headlight and taillight lenses could
appear frosty. This condition is caused by
the temperature difference between the
lamp inside and outside. This is similar
to the condensation on your windows
inside your vehicle during the rain and
doesn’t indicate a problem with your
vehicle. If the water leaks into the lamp
bulb circuitry, have the vehicle checked
by an authorized KIA dealer.
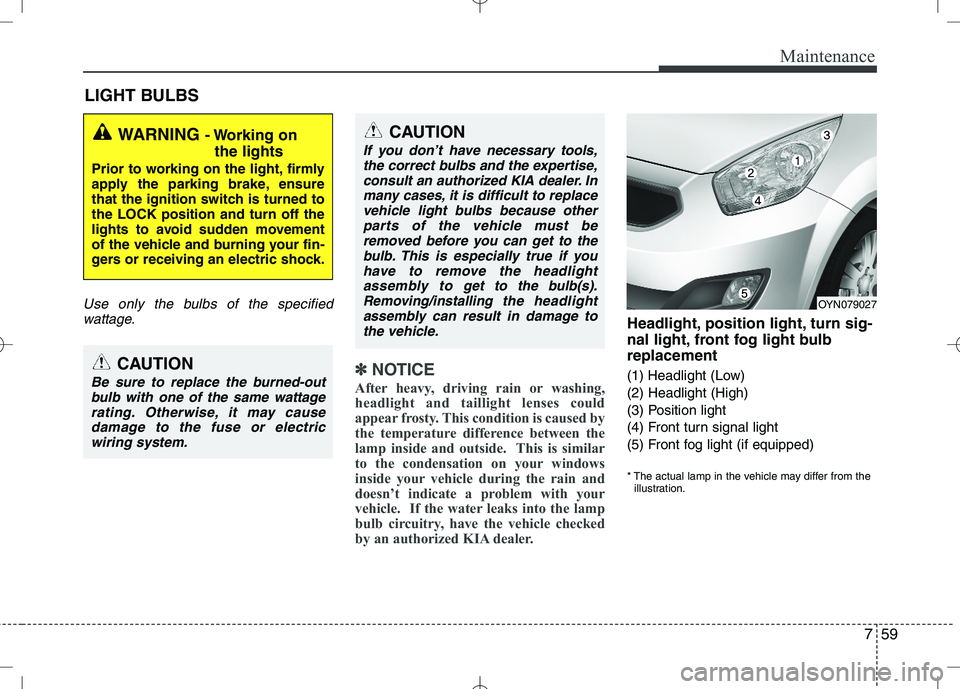
Headlight, position light, turn sig-
nal light, front fog light bulbreplacement
(1) Headlight (Low) (2) Headlight (High)
(3) Position light
(4) Front turn signal light
(5) Front fog light (if equipped)
* The actual lamp in the vehicle may differ from the illustration.
WARNING - Working on
the lights
Prior to working on the light, firmly
apply the parking brake, ensure
that the ignition switch is turned tothe LOCK position and turn off the
lights to avoid sudden movement
of the vehicle and burning your fin-
gers or receiving an electric shock.
CAUTION
Be sure to replace the burned-out bulb with one of the same wattagerating. Otherwise, it may cause
damage to the fuse or electric wiring system.
CAUTION
If you don’t have necessary tools,the correct bulbs and the expertise,
consult an authorized KIA dealer. Inmany cases, it is difficult to replacevehicle light bulbs because other parts of the vehicle must be
removed before you can get to thebulb. This is especially true if youhave to remove the headlight
assembly to
get to the bulb(s).
Removing/installingthe headlight
assembly can result in damage to the vehicle.OYN079027
Page 359 of 379
Maintenance
68
7
APPEARANCE CARE
Exterior care
Exterior general caution
It is very important to follow the label
directions when using any chemical
cleaner or polish. Read all warning andcaution statements that appear on thelabel.
Finish maintenance
Washing
To help protect your vehicle’s finish from
rust and deterioration, wash it thoroughlyand frequently at least once a month with
lukewarm or cold water.
If you use your vehicle for off-road driv-
ing, you should wash it after each off-
road trip. Pay special attention to the
removal of any accumulation of salt, dirt,
mud, and other foreign materials. Make
sure the drain holes in the lower edges of
the doors and rocker panels are keptclear and clean.
Insects, tar, tree sap, bird droppings,
industrial pollution and similar deposits
can damage your vehicle’s finish if not
removed immediately.
Even prompt washing with plain water
may not completely remove all these
deposits. A mild soap, safe for use on
painted surfaces, may be used. After washing, rinse the vehicle thor-
oughly with lukewarm or cold water. Do
not allow soap to dry on the finish.
WARNING -
Wet brakes
After washing the vehicle, test the
brakes while driving slowly to see if
they have been affected by water. If
braking performance is impaired,
dry the brakes by applying them
lightly while maintaining a slow for-
ward speed.
CAUTION
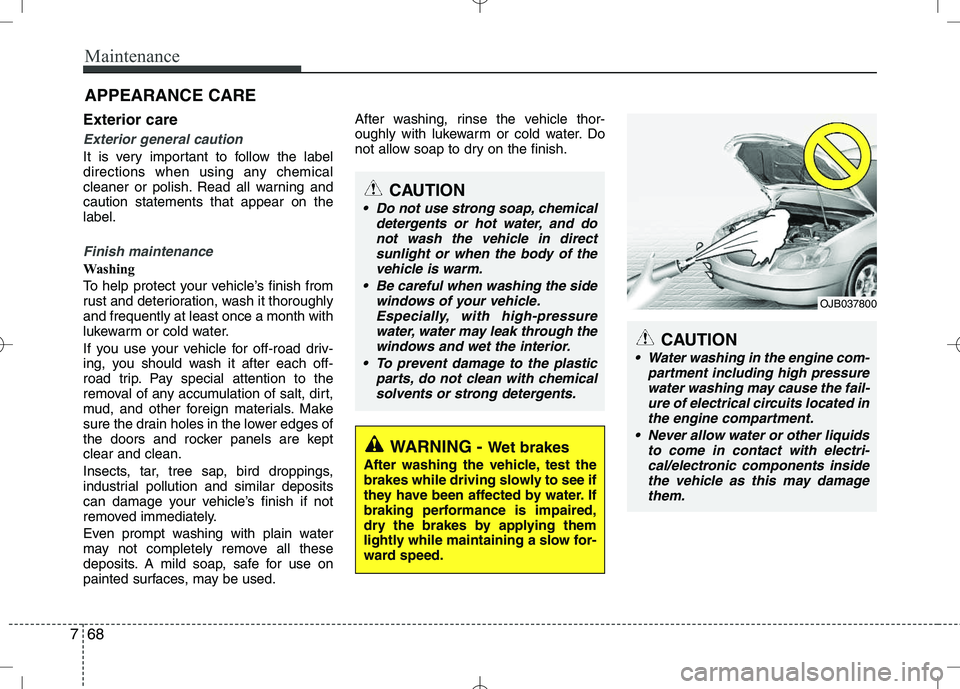
Water washing in the engine com- partment including high pressurewater washing may cause the fail-ure of electrical circuits located in the engine compartment.
Never allow water or other liquids to come in contact with electri-cal/electronic components inside the vehicle as this may damage
them.
OJB037800
CAUTION
Do not use strong soap, chemical detergents or hot water, and donot wash the vehicle in direct
sunlight or when the body of the vehicle is warm.
Be careful when washing the side windows of your vehicle.Especially, with high-pressure
water, water may leak through thewindows and wet the interior.
To prevent damage to the plastic parts, do not clean with chemical
solvents or strong detergents.
Page 360 of 379
769
Maintenance
Waxing
Wax the vehicle when water will no longer bead on the paint.
Always wash and dry the vehicle before
waxing. Use a good quality liquid or
paste wax, and follow the manufacturer’s
instructions. Wax all metal trim to protect
it and to maintain its luster.
Removing oil, tar, and similar materials
with a spot remover will usually strip the
wax from the finish. Be sure to re-wax
these areas even if the rest of the vehicle
does not yet need waxing.Finish damage repair
Deep scratches or stone chips in the
painted surface must be repaired
promptly. Exposed metal will quickly rust
and may develop into a major repair
expense.
✽✽NOTICE
If your vehicle is damaged and requires
any metal repair or replacement, be sure
the body shop applies anti-corrosion
materials to the parts repaired or
replaced.
Bright-metal maintenance
To remove road tar and insects, use a tar remover, not a scraper or other
sharp object.
To protect the surfaces of bright-metal parts from corrosion, apply a coating of
wax or chrome preservative and rub to
a high luster.
During winter weather or in coastal areas, cover the bright metal parts with
a heavier coating of wax or preserva-
tive. If necessary, coat the parts with
non-corrosive petroleum jelly or other
protective compound.
CAUTION
Wiping dust or dirt off the body
with a dry cloth will scratch thefinish.
Do not use steel wool, abrasive cleaners, or strong detergentscontaining highly alkaline or
caustic agents on chrome-platedor anodized aluminum parts. This may result in damage to the pro- tective coating and cause discol-
oration or paint deterioration.
Page 361 of 379
Maintenance
70
7
Underbody maintenance
Corrosive materials used for ice and
snow removal and dust control may col-
lect on the underbody. If these materials
are not removed, accelerated rusting can
occur on the underbody parts such as
the fuel lines, frame, floor pan and
exhaust system, even though they have
been treated with rust protection.
Thoroughly flush the vehicle underbody
and wheel openings with lukewarm or
cold water once a month, after off-road
driving and at the end of each winter. Payspecial attention to these areas because
it is difficult to see all the mud and dirt. It
will do more harm than good to wet down
the road grime without removing it. The
lower edges of the doors, rocker panels,
and frame members have drain holes
that should not clog with dirt; trapped
water in these areas can cause rusting.
Aluminum wheel maintenance
The aluminum wheels are coated with a
clear protective finish.
Do not use any abrasive cleaner, pol-
ishing compound, solvent, or wire
brushes on aluminum wheels. They
may scratch or damage the finish.
Use only a mild soap or neutral deter- gent, and rinse thoroughly with water.
Also, be sure to clean the wheels after
driving on salted roads. This helps pre-
vent corrosion.
Avoid washing the wheels with high- speed car wash brushes.
Do not use any acid detergent. It may damage and corrode the aluminum
wheels coated with a clear protectivefinish.WARNING
After washing the vehicle, test the
brakes while driving slowly to see if
they have been affected by water. If
braking performance is impaired,
dry the brakes by applying them
lightly while maintaining a slow for-
ward speed.
Page 364 of 379

773
Maintenance
Interior care
Interior general precautions
Prevent caustic solutions such as per- fume and cosmetic oil from contacting
the dashboard because they may cause
damage or discoloration. If they do con-tact the dashboard, wipe them off imme-
diately. See the instructions for the prop-
er way to clean vinyl.
Cleaning the upholstery and interiortrim
Vinyl
Remove dust and loose dirt from vinyl
with a whisk broom or vacuum cleaner.
Clean vinyl surfaces with a vinyl cleaner.
Fabric
Remove dust and loose dirt from fabric
with a whisk broom or vacuum cleaner.Clean with a mild soap solution recom-
mended for upholstery or carpets.
Remove fresh spots immediately with a
fabric spot cleaner. If fresh spots do not
receive immediate attention, the fabriccan be stained and its color can be
affected. Also, its fire-resistant properties
can be reduced if the material is not
properly maintained.
Cleaning the lap/shoulder belt web-bing
Clean the belt webbing with any mild
soap solution recommended for cleaning
upholstery or carpet. Follow the instruc-
tions provided with the soap. Do not
bleach or re-dye the webbing because
this may weaken it.
Cleaning the interior window glass
If the interior glass surfaces of the vehi-
cle become fogged (that is, covered with
an oily, greasy or waxy film), they should
be cleaned with glass cleaner. Follow the
directions on the glass cleaner container.CAUTION
Never allow water or other liquids
to come in contact with electrical/electronic components inside thevehicle as this may damage them.
CAUTION
Using anything but recommended
cleaners and procedures may affectthe fabric’s appearance and fire-resistant properties.
CAUTION
Do not scrape or scratch the insideof the rear window. This may result in damage to the rear windowdefroster grid.CAUTION
When cleaning leather products(steering wheel, seats etc.), use
neutral detergents or low alcohol content solutions. If you use highalcohol content solutions oracid/alkaline detergents, the color
of the leather may fade or the sur-face may get stripped off.