2010 KIA VENGA mil
[x] Cancel search: milPage 260 of 379
557
Driving your vehicle
If you do decide to pull a trailer
Here are some important points if you
decide to pull a trailer:
Consider using a sway control. You canask a hitch dealer about sway control.
Do not do any towing with your car dur- ing its first 2,000 km (1,200 miles) in
order to allow the engine to properly
break in. Failure to heed this caution
may result in serious engine or
transaxle damage.
When towing a trailer, be sure to con- sult an authorized KIA dealer for fur-
ther information on additional require-
ments such as a towing kit, etc.
Always drive your vehicle at a moder- ate speed (less than 100 km/h / 60
mph). If your vehicle is a commercial
vehicle, drive less than 80 km/h.
On a long uphill grade, do not exceed 70 km/h (45 mph) or the posted towing
speed limit, whichever is lower.
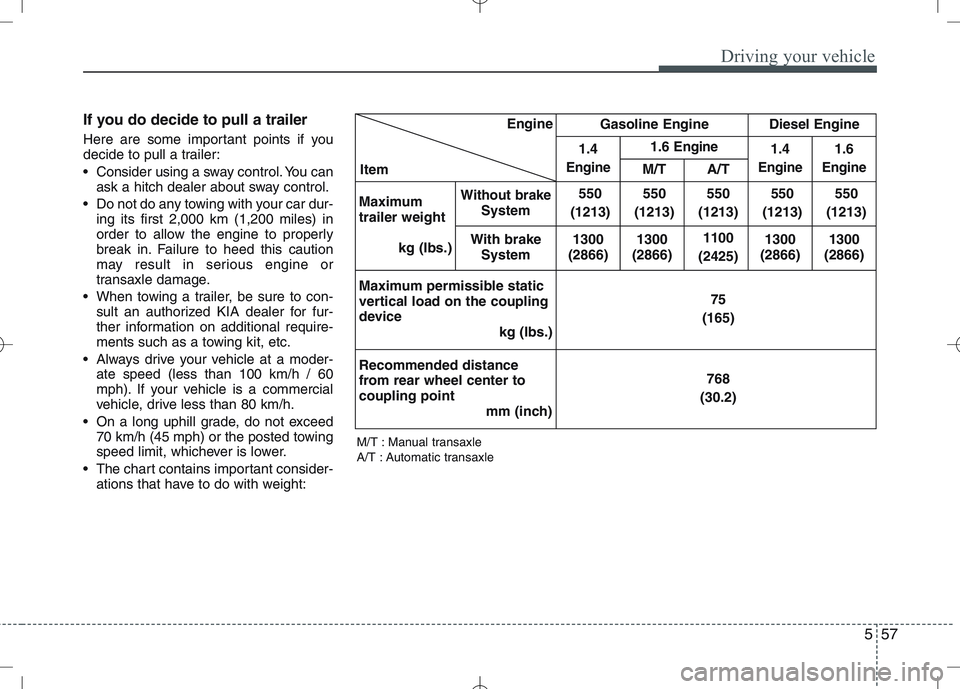
The chart contains important consider- ations that have to do with weight: M/T : Manual transaxle
A/T : Automatic transaxleEngine
Item Gasoline Engine
Diesel Engine
1.4
Engine
1.6 Engine1.4
Engine
1.6
EngineM/T A/T
Maximum trailer weight kg (Ibs.)
Without brakeSystem 550
(1213) 550
(1213)
550
(1213) 550
(1213) 550
(1213)
With brake System 1300
(2866) 1300
(2866)
1100
(2425) 1300
(2866) 1300
(2866)
Maximum permissible static
vertical load on the coupling
device kg (Ibs.) 75
(165)
Recommended distance
from rear wheel center tocoupling point mm (inch) 768
(30.2)
Page 262 of 379
559
Driving your vehicle
This section will guide you in the proper
loading of your vehicle and/or trailer, to
keep your loaded vehicle weight within its
design rating capability, with or without a
trailer. Properly loading your vehicle will
provide maximum return of the vehicle
design performance. Before loading your
vehicle, familiarize yourself with the fol-
lowing terms for determining your vehi-
cle's weight ratings, with or without a
trailer, from the vehicle's specifications
and the certification label: Base curb weight
This is the weight of the vehicle including a full tank of fuel and all standard equip-
ment. It does not include passengers,
cargo, or optional equipment.
Vehicle curb weight
This is the weight of your new vehicle
when you picked it up from your dealer
plus any aftermarket equipment.Cargo weight
This figure includes all weight added to
the Base Curb Weight, including cargoand optional equipment.
GAW (Gross axle weight)
This is the total weight placed on each
axle (front and rear) - including vehicle
curb weight and all payload.
GAWR (Gross axle weight rating)
This is the maximum allowable weight
that can be carried by a single axle (front
or rear). These numbers are shown on
the certification label.
The total load on each axle must never
exceed its GAWR.
GVW (Gross vehicle weight)
This is the Base Curb Weight plus actual
Cargo Weight plus passengers.
GVWR (Gross vehicle weight rating)
This is the maximum allowable weight of
the fully loaded vehicle (including all
options, equipment, passengers and
cargo). The GVWR is shown on the cer-
tification label located on the driver’s (or
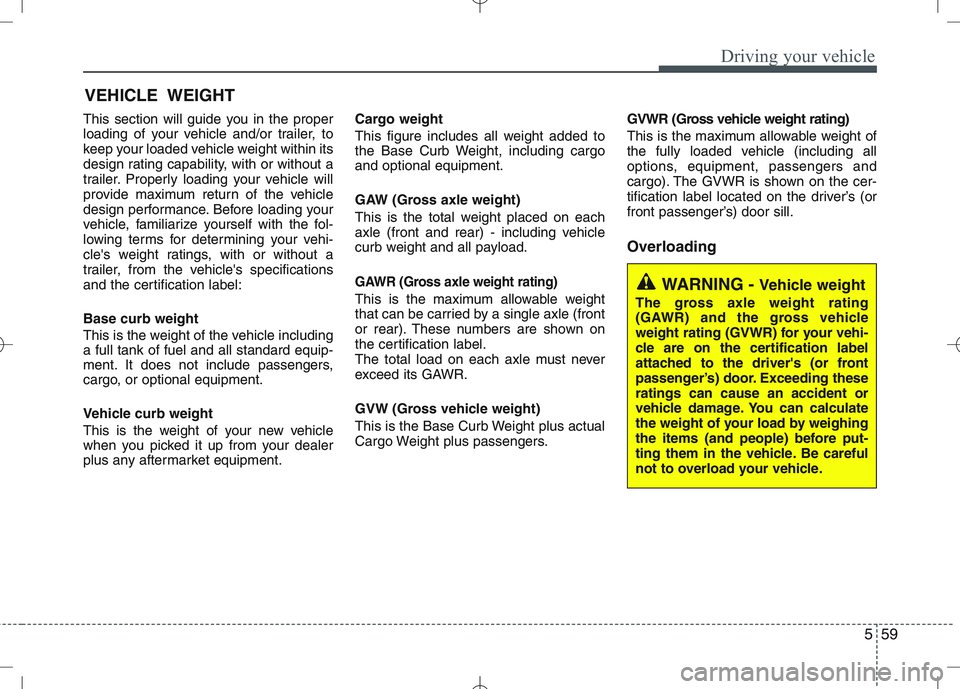
front passenger’s) door sill. Overloading
VEHICLE WEIGHTWARNING -
Vehicle weight
The gross axle weight rating
(GAWR) and the gross vehicle
weight rating (GVWR) for your vehi-
cle are on the certification label
attached to the driver's (or front
passenger’s) door. Exceeding theseratings can cause an accident or
vehicle damage. You can calculate
the weight of your load by weighing
the items (and people) before put-
ting them in the vehicle. Be careful
not to overload your vehicle.
Page 277 of 379
615
What to do in an emergency
IF YOU HAVE A FLAT TIRE (WITH TIREMOBILITYKIT, IF EQUIPPED)
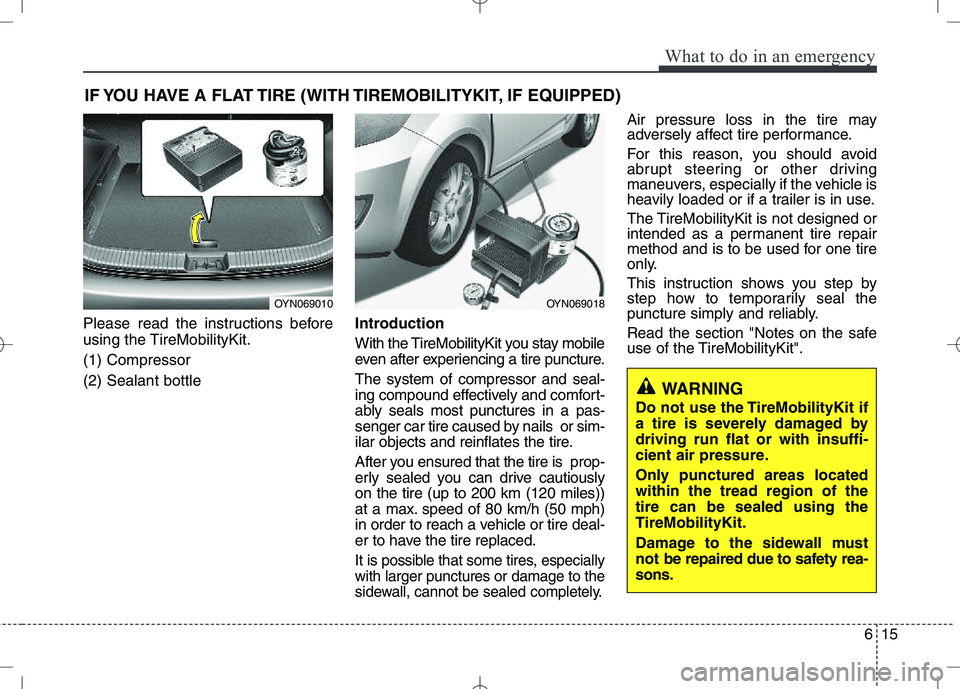
Please read the instructions before
using the TireMobilityKit. (1) Compressor(2) Sealant bottle Introduction
With the TireMobilityKit you stay mobile
even after experiencing a tire puncture. The system of compressor and seal-
ing compound effectively and comfort-
ably seals most punctures in a pas-
senger car tire caused by nails or sim-
ilar objects and reinflates the tire.
After you ensured that the tire is prop-
erly sealed you can drive cautiouslyon the tire (up to 200 km (120 miles))
at a max. speed of 80 km/h (50 mph)
in order to reach a vehicle or tire deal-
er to have the tire replaced.
It is possible that some tires, especiallywith larger punctures or damage to the
sidewall, cannot be sealed completely.
Air pressure loss in the tire may
adversely affect tire performance.
For this reason, you should avoid
abrupt steering or other driving
maneuvers, especially if the vehicle is
heavily loaded or if a trailer is in use.
The TireMobilityKit is not designed or
intended as a permanent tire repair
method and is to be used for one tire
only.
This instruction shows you step by
step how to temporarily seal the
puncture simply and reliably.
Read the section "Notes on the safe
use of the TireMobilityKit".
OYN069010OYN069018
WARNING
Do not use the TireMobilityKit if
a tire is severely damaged bydriving run flat or with insuffi-
cient air pressure.
Only punctured areas located within the tread region of thetire can be sealed using theTireMobilityKit.
Damage to the sidewall must
not be repaired due to safety rea-sons.
Page 280 of 379

What to do in an emergency
18
6
Distributing the sealant
Immediately drive approximately 3 km
(2 miles) to evenly distribute the
sealant in the tire. Producing the tire inflation pres- sure
1) After driving approximately 3 km (2
miles), stop at a suitable location.
2) Connect connection hose 9 of the compressor directly to the tire
valve.
3) Connect between compressor and the vehicle power outlet using
the cable and connectors.
4) Adjust the tire inflation pressure to 220 kPa (32 psi). With the ignition
switched on, proceed as follows.
- To increase the inflation pres- sure: Switch on the compressor,
position I. To check the current
inflation pressure setting, briefly
switch off the compressor. - To reduce the inflation pres-
sure: Press the button 8 on the
compressor.
WARNING
Do not let the compressor run for
more than 10 minutes, otherwise
the device will overheat and may
be damaged.
WARNING
The tire inflation pressure must
be at least 220 kPa (32 psi). If it is
not, do not continue driving. Call
for road side service or towing.
CAUTION
Do not exceed a speed of 60 km/h (35 mph). If possible, donot fall below a speed of 20 km/h (12 mph).
While driving, if you experienceany unusual vibration, ride dis-turbance or noise, reduce yourspeed and drive with caution until you can safely pull off ofthe side of the road.
Call for road side service or tow-ing.
CAUTION
If the inflation pressure is notmaintained, drive the vehicle asecond time, refer to Distributing the sealant. Then repeat steps 1to 4.
Use of the TireMobilityKit maybe ineffectual for tire damagelarger than approximately 4 mm (0.16 in).
Please contact the nearest KIAA/S center, or a workshop thatworks according to KIA repairprocedures with corresponding- ly trained personnel if the tirecannot be made roadworthywith the TireMobilityKit.
Page 284 of 379

What to do in an emergency
22
6
TPMS (Tire Pressure Monitoring System)malfunction indicator
The low tire pressure telltale will illu-
minate after it blinks for approximate-
ly one minute when there is a prob-
lem with the Tire Pressure Monitoring
System. If the system is able to cor-
rectly detect an underinflation warn-
ing at the same time as system fail-ure then it will illuminate both the
TPMS malfunction and low tire pres-
sure position telltales e.g. if Front Left
sensor fails, the TPMS malfunction
indicator illuminates, but if the FrontRight, Rear Left, or Rear Right tire is
under-inflated, the low tire pressure
position telltales may illuminatetogether with the TPMS malfunction
indicator.
Have the system checked by an
authorized KIA dealer as soon as
possible to determine the cause of
the problem.
WARNING - Low pressure
damage
Significantly low tire pressure
makes the vehicle unstable and
can contribute to loss of vehicle
control and increased brakingdistances.
Continued driving on low pres- sure tires can cause the tires to
overheat and fail.CAUTION
The TPMS malfunction indica- tor may be illuminated if thevehicle is moving around elec- tric power supply cables orradios transmitter such as atpolice stations, government and public offices, broadcast-ing stations, military installa-tions, airports, or transmitting towers, etc. This can interferewith normal operation of theTire Pressure Monitoring System (TPMS).
The TPMS malfunction indica- tor may be illuminated if someelectronic devices, such asnotebook computers, are used in the vehicle. This can inter-fere with normal operation ofthe Tire Pressure Monitoring System (TPMS).
Page 286 of 379

What to do in an emergency
24
6
You may not be able identify a low
tire by simply looking at it. Alwaysuse a good quality tire pressuregauge to measure the tire's inflation
pressure. Please note that a tire that
is hot (from being driven) will have ahigher pressure measurement than atire that is cold (from sitting station-
ary for at least 3 hours and driven
less than 1 mile (1.6 km) during that
3 hour period).
Allow the tire to cool before measur-
ing the inflation pressure. Always be
sure the tire is cold before inflating to
the recommended pressure.
A cold tire means the vehicle has
been sitting for 3 hours and driven forless than 1 mile (1.6 km) in that 3
hour period.
CAUTION
Do not use any tire sealant if
your vehicle is equipped with aTire Pressure Monitoring System. The liquid sealant candamage the tire pressure sen-sors.
WARNING - Protecting
TPMS
Tampering with, modifying, or
disabling the Tire PressureMonitoring System (TPMS)
components may interfere withthe system's ability to warn the
driver of low tire pressure con-
ditions and/or TPMS malfunc-
tions. Tampering with, modify-
ing, or disabling the TirePressure Monitoring System
(TPMS) components may void
the warranty for that portion of
the vehicle.WARNING - TPMS
The TPMS cannot alert you to severe and sudden tire dam-
age caused by external fac-
tors such as nails or roaddebris.
If you feel any vehicle instabil- ity, immediately take your foot
off the accelerator, apply the
brakes gradually and with
light force, and slowly move to
a safe position off the road.
Page 290 of 379
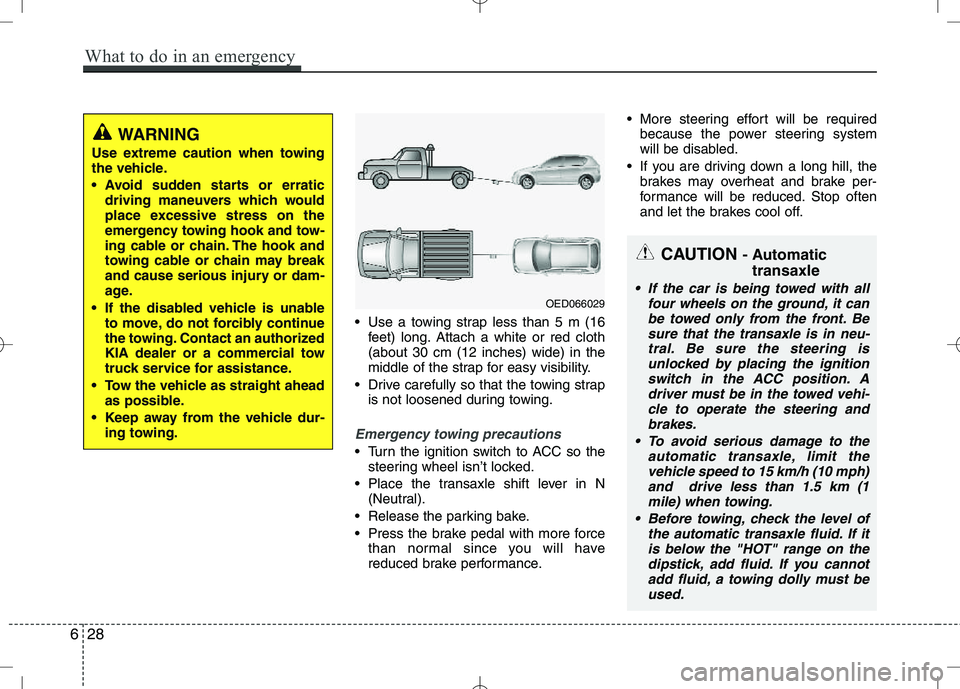
Use a towing strap less than 5 m (16feet) long. Attach a white or red cloth (about 30 cm (12 inches) wide) in the
middle of the strap for easy visibility.
Drive carefully so that the towing strap is not loosened during towing.
Emergency towing precautions
Turn the ignition switch to ACC so thesteering wheel isn’t locked.
Place the transaxle shift lever in N (Neutral).
Release the parking bake.
Press the brake pedal with more force than normal since you will have
reduced brake performance. More steering effort will be required
because the power steering system
will be disabled.
If you are driving down a long hill, the brakes may overheat and brake per-
formance will be reduced. Stop often
and let the brakes cool off.
WARNING
Use extreme caution when towing
the vehicle.
driving maneuvers which would
place excessive stress on the
emergency towing hook and tow-
ing cable or chain. The hook and
towing cable or chain may break
and cause serious injury or dam-
age.
If the disabled vehicle is unable to move, do not forcibly continue
the towing. Contact an authorized
KIA dealer or a commercial tow
truck service for assistance.
Tow the vehicle as straight ahead as possible.
Keep away from the vehicle dur- ing towing.
CAUTION - Automatic
transaxle
If the car is being towed with all four wheels on the ground, it can
be towed only from the front. Besure that the transaxle is in neu- tral. Be sure the steering isunlocked by placing the ignition switch in the ACC position. A
driver must be in the towed vehi-cle to operate the steering and brakes.
To avoid serious damage to the automatic transaxle, limit thevehicle speed to 15 km/h (10 mph)and drive less than 1.5 km (1 mile) when towing.
Before towing, check the level of the automatic transaxle fluid. If itis below the "HOT" range on thedipstick, add fluid. If you cannot add fluid, a towing dolly must be
used.OED066029
628
What to do in an emergency
Page 295 of 379
Maintenance
4
7
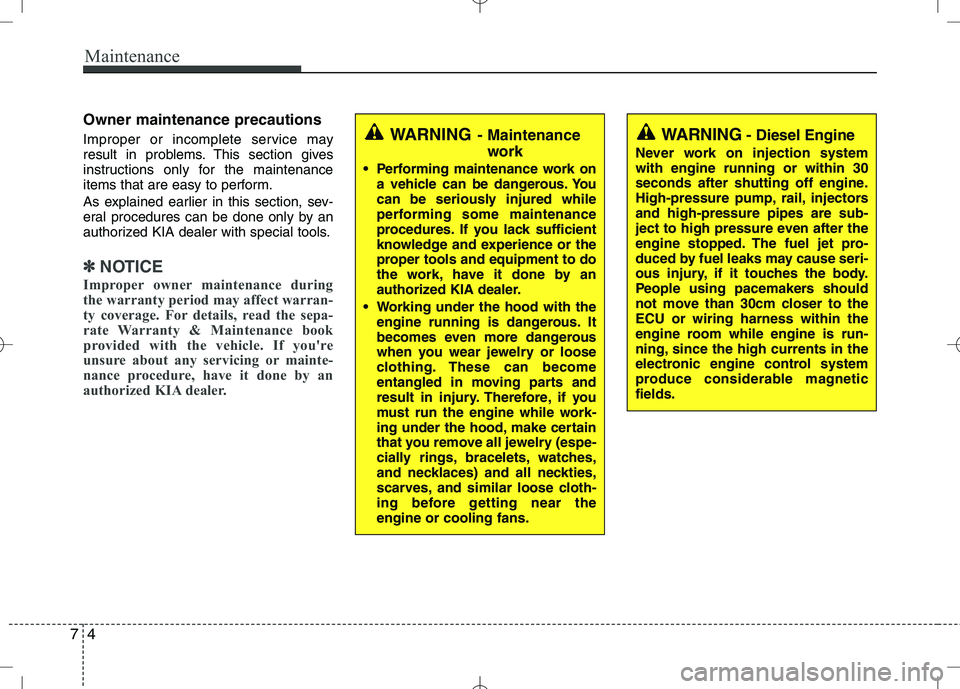
Owner maintenance precautions
Improper or incomplete service may
result in problems. This section gives
instructions only for the maintenance
items that are easy to perform.
As explained earlier in this section, sev-
eral procedures can be done only by an
authorized KIA dealer with special tools.
✽✽
NOTICE
Improper owner maintenance during
the warranty period may affect warran-
ty coverage. For details, read the sepa-
rate Warranty & Maintenance book
provided with the vehicle. If you're
unsure about any servicing or mainte-
nance procedure, have it done by an
authorized KIA dealer.
WARNING - Maintenance
work
Performing maintenance work on a vehicle can be dangerous. You
can be seriously injured while
performing some maintenance
procedures. If you lack sufficient
knowledge and experience or the
proper tools and equipment to do
the work, have it done by an
authorized KIA dealer.
Working under the hood with the engine running is dangerous. It
becomes even more dangerous
when you wear jewelry or loose
clothing. These can become
entangled in moving parts and
result in injury. Therefore, if you
must run the engine while work-
ing under the hood, make certain
that you remove all jewelry (espe-
cially rings, bracelets, watches,
and necklaces) and all neckties,
scarves, and similar loose cloth-
ing before getting near theengine or cooling fans.WARNING - Diesel Engine
Never work on injection system with engine running or within 30
seconds after shutting off engine.
High-pressure pump, rail, injectorsand high-pressure pipes are sub-
ject to high pressure even after the
engine stopped. The fuel jet pro-
duced by fuel leaks may cause seri-
ous injury, if it touches the body.
People using pacemakers should
not move than 30cm closer to theECU or wiring harness within the
engine room while engine is run-
ning, since the high currents in the
electronic engine control system
produce considerable magneticfields.