Page 306 of 371
In case of an emergency
22
6
1
2
3
4
5
6
7
8
9
Tire replacement
1. Park on a level surface and apply
the parking brake firmly.
2. Shift the shift lever into R (Reverse) with manual transaxle
or P (Park) with automatic
transaxle.
3. Activate the hazard warning flash- er. 4. Remove the wheel lug nut wrench,
jack, jack handle, and spare tire
from the vehicle.
5. Block both the front and rear of the wheel that is diagonally opposite
the jack position.
WARNING- Changing a tire
To prevent vehicle movementwhile changing a tire, always
set the parking brake fully, and
always block the wheel diago-
nally opposite the wheel being
changed.
It is recommended that the wheels of the vehicle be
chocked, and that no person
should remain in a vehicle that
is being jacked.
1VQA40221VQA4023
Page 310 of 371
1
2
3
4
5
6
7
8
9Maintenance services / 7-3
Maintenance schedule / 7-4
Explanation of scheduled maintenance items / 7-8
Owner maintenance / 7-12
Engine compartment / 7-15
Engine oil and oil filter / 7-17
Engine cooling system / 7-19
Brakes and clutch / 7-22
Parking brake / 7-23
Power steering / 7-24
Automatic transaxle / 7-25
Rear differential (4WD) / 7-27
Transfer case (4WD) / 7-27
Lubricants and fluids / 7-28
Air cleaner / 7-29
Climate control air filter / 7-30
Wiper blades / 7-31
Battery / 7-33
Tires and wheels / 7-36
Maintenance
Page 314 of 371
75
Maintenance
1
2
3
4
5
6
7
8
9
MAINTENANCE SCHEDULE (CONTINUED)
Kilometers or time in months, whichever comes first
× 1,000 km 8 16 24 32 40 48 56 64 72 80 88 96 104 112 120 128
# Months 4 8 12 16 20 24 28 32 36 40 44 48 52 56 60 64
Air conditioner compressor operation & IIIII
refrigerant amount (if equipped)
Exhaust pipes, heat shield & mountings I I IIIIII
Transfer case fluid (4WD) I R
Rear differential fluid (4WD) I R
Front suspension ball joints I I I I
Brakes/clutch fluid (1) I I I I I I I R IIIII IIR
Front brake pads & discs (3) I I I I I I IIIIIII III
Rear brake pads & discs/drums (3) I I I I I I IIIIIII III
Parking brake I I I IIIII
Brake lines & connections IIIII
(including booster)
Manual transaxle oil (1) I R
Clutch & brake pedal free play I I I I I I IIIIIII III
MAINTENANCE
INTERVALS
MAINTENANCE
ITEM
Chassis and body
Page 319 of 371

Maintenance
10
7
Cooling system
Check cooling system components,
such as radiator, coolant reservoir,
hoses and connections for leakage
and damage. Replace any damaged
parts.
Coolant
The coolant should be changed at
the intervals specified in the mainte-
nance schedule.
Automatic transaxle fluid
The fluid level should be in the "HOT"
range of the dipstick, after the engine
and transaxle are at normal operat-
ing temperature. Check the automat-
ic transaxle fluid level with the engine
running and the transaxle in neutral,
with the parking brake properly
applied.
Brake hoses and lines
Visually check for proper installation,
chafing, cracks, deterioration and
any leakage. Replace any deteriorat-
ed or damaged parts immediately.
Brake fluid
Check brake fluid level in the brake
fluid reservoir. The level should be
between “MIN” and “MAX” marks on
the side of the reservoir. Use only
hydraulic brake fluid conforming to
DOT 3 or DOT 4 specification.
Parking brake
Inspect the parking brake system
including the parking brake pedal
and cables.
Rear brake drums and linings
(if equipped)
Check the rear brake drums and lin-
ings for scoring, burning, leaking
fluid, broken parts, and excessive
wear.
Brake discs, pads, calipers
and rotors
Check the pads for excessive wear,
discs for run out and wear, and
calipers for fluid leakage.
Exhaust pipe and muffler
Visually inspect the exhaust pipes,
muffler and hangers for cracks, dete-
rioration, or damage. Start the
engine and listen carefully for any
exhaust gas leakage. Tighten con-
nections or replace parts as neces-
sary.
Suspension mounting bolts
Check the suspension connections
for looseness or damage. Retighten
to the specified torque.
1
2
3
4
5
6
7
8
9
Page 321 of 371

Maintenance
12
7
1
2
3
4
5
6
7
8
9
OWNER MAINTENANCE
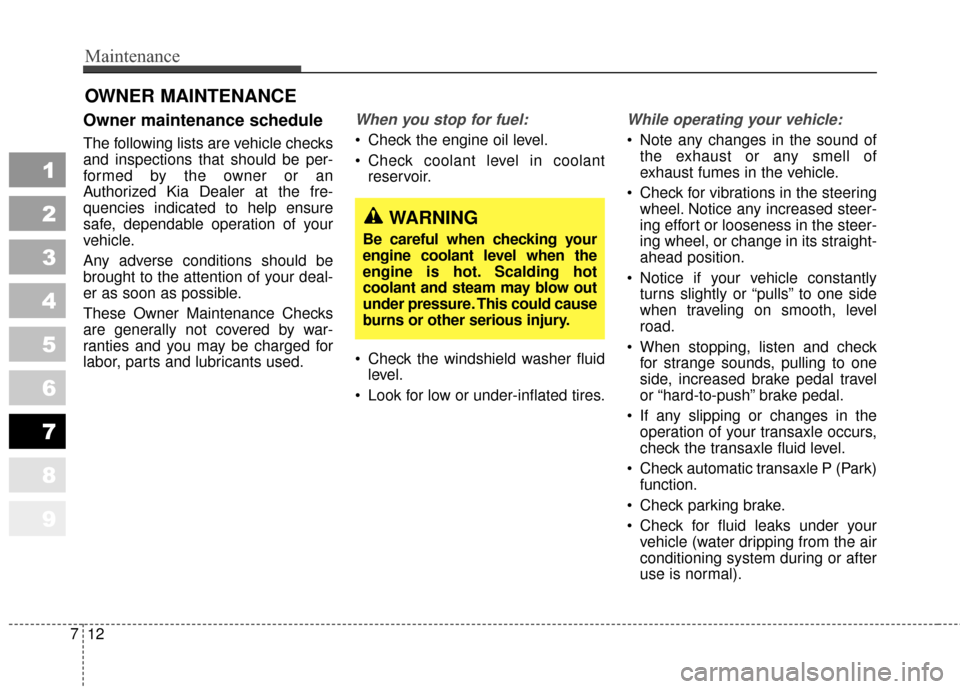
Owner maintenance schedule
The following lists are vehicle checks
and inspections that should be per-
formed by the owner or an
Authorized Kia Dealer at the fre-
quencies indicated to help ensure
safe, dependable operation of your
vehicle.
Any adverse conditions should be
brought to the attention of your deal-
er as soon as possible.
These Owner Maintenance Checks
are generally not covered by war-
ranties and you may be charged for
labor, parts and lubricants used.
When you stop for fuel:
Check the engine oil level.
Check coolant level in coolant
reservoir.
Check the windshield washer fluid level.
Look for low or under-inflated tires.
While operating your vehicle:
Note any changes in the sound of the exhaust or any smell of
exhaust fumes in the vehicle.
Check for vibrations in the steering wheel. Notice any increased steer-
ing effort or looseness in the steer-
ing wheel, or change in its straight-
ahead position.
Notice if your vehicle constantly turns slightly or “pulls” to one side
when traveling on smooth, level
road.
When stopping, listen and check for strange sounds, pulling to one
side, increased brake pedal travel
or “hard-to-push” brake pedal.
If any slipping or changes in the operation of your transaxle occurs,
check the transaxle fluid level.
Check automatic transaxle P (Park) function.
Check parking brake.
Check for fluid leaks under your vehicle (water dripping from the air
conditioning system during or after
use is normal).
WARNING
Be careful when checking your
engine coolant level when the
engine is hot. Scalding hot
coolant and steam may blow out
under pressure. This could cause
burns or other serious injury.
Page 332 of 371
723
Maintenance
1
2
3
4
5
6
7
8
9
✽ ✽NOTICE
Do not allow brake/clutch fluid to
contact the vehicle's body paint, as
paint damage will result.
Brake/clutch fluid, which has been
exposed to open air for an extended
time should never be used as its
quality cannot be guaranteed. It
should be thrown out. Don't put in
the wrong kind of fluid. A few drops
of mineral-based oil, such as engine
oil, in your brake clutch system can
damage brake clutch system parts.
Checking the parking brake
Check the stroke of the parking
brake by counting the number of
“clicks’’ heard while fully applying it
from the released position. Also, the
parking brake alone should securely
hold the vehicle on a fairly steep
grade. If the stroke is more or less
than specified, have the parking
brake adjusted by an Authorized Kia
Dealer.
Stroke : 7~8 “clicks’’ at a force of
20 kg (44 lbs, 196 N).
OKM049050
PARKING BRAKE
Page 334 of 371

725
Maintenance
1
2
3
4
5
6
7
8
9
AUTOMATIC TRANSAXLE (IF EQUIPPED)
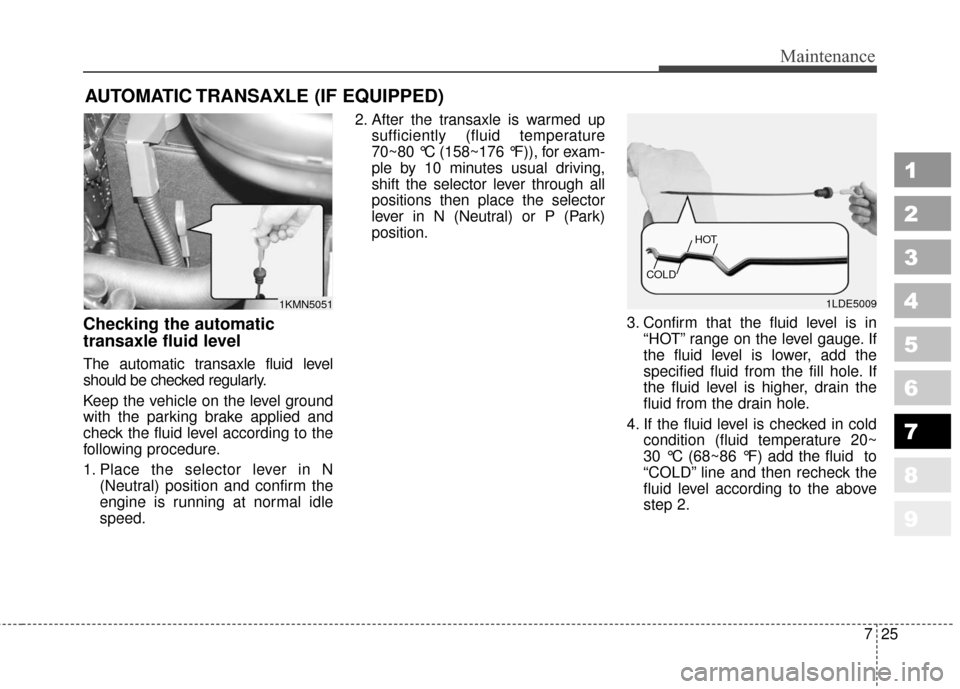
Checking the automatic
transaxle fluid level
The automatic transaxle fluid level
should be checked regularly.
Keep the vehicle on the level ground
with the parking brake applied and
check the fluid level according to the
following procedure.
1. Place the selector lever in N(Neutral) position and confirm the
engine is running at normal idle
speed. 2. After the transaxle is warmed up
sufficiently (fluid temperature
70~80 °C (158~176 °F)), for exam-
ple by 10 minutes usual driving,
shift the selector lever through all
positions then place the selector
lever in N (Neutral) or P (Park)
position.
3. Confirm that the fluid level is in“HOT” range on the level gauge. If
the fluid level is lower, add the
specified fluid from the fill hole. If
the fluid level is higher, drain the
fluid from the drain hole.
4. If the fluid level is checked in cold condition (fluid temperature 20~
30 °C (68~86 °F) add the fluid to
“COLD” line and then recheck the
fluid level according to the above
step 2.
1KMN50511LDE5009
COLD HOT
Page 335 of 371

Maintenance
26
7
1
2
3
4
5
6
7
8
9
✽ ✽
NOTICE
“COLD” scale is for reference only
and should NOT be used to deter-
mine transaxle fluid level.
✽ ✽NOTICE
New automatic transaxle fluid
should be red. The red dye is added
so the assembly plant can identify it
as automatic transaxle fluid and dis-
tinguish it from engine oil or
antifreeze. The red dye, which is not
an indicator of fluid quality, is not
permanent. As the vehicle is driven,
the automatic transaxle fluid will
begin to look darker. The color may
eventually appear light brown.
Therefore, have an Authorized Kia
dealer change the automatic
transaxle fluid according to the
Scheduled Maintenance at the
beginning of this section.
Changing the automatic
transaxle fluid
Have automatic transaxle fluid
changed by an Authorized Kia
Dealer according to the Maintenance
Schedule at the beginning of this
section.
CAUTION
Low fluid level causes
transaxle slippage. Overfillingcan cause foaming, loss of fluidand transaxle malfunction.
The use of a non-specified fluid could result in transaxle mal-function and failure.
WARNING- Parking brake
To avoid sudden movement of
the vehicle, apply parking brake
and depress the brake pedal
before moving the shift lever.
WARNING - Transaxle
fluid
The transaxle fluid level should
be checked when the engine is at
normal operating temperature.
This means that the engine, radi-
ator, radiator hose and exhaust
system etc., are very hot.
Exercise great care not to burn
yourself during this procedure.