2010 KIA Sportage display
[x] Cancel search: displayPage 189 of 371
Driving your vehicle
42
4
1
2
3
4
5
6
7
8
9
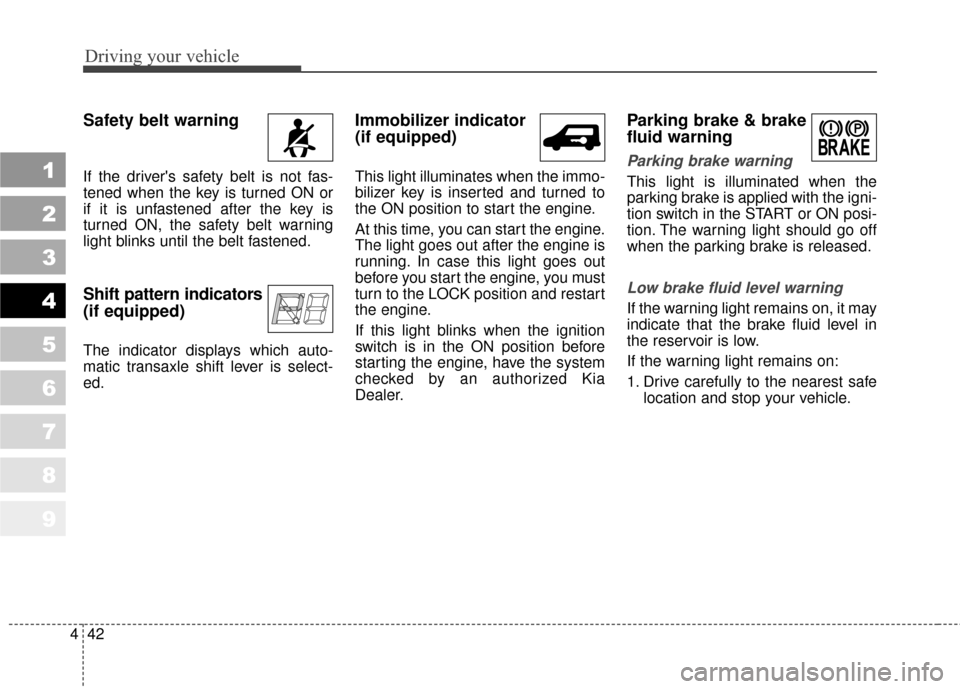
Safety belt warning
If the driver's safety belt is not fas-
tened when the key is turned ON or
if it is unfastened after the key is
turned ON, the safety belt warning
light blinks until the belt fastened.
Shift pattern indicators
(if equipped)
The indicator displays which auto-
matic transaxle shift lever is select-
ed.
Immobilizer indicator
(if equipped)
This light illuminates when the immo-
bilizer key is inserted and turned to
the ON position to start the engine.
At this time, you can start the engine.
The light goes out after the engine is
running. In case this light goes out
before you start the engine, you must
turn to the LOCK position and restart
the engine.
If this light blinks when the ignition
switch is in the ON position before
starting the engine, have the system
checked by an authorized Kia
Dealer.
Parking brake & brake
fluid warning
Parking brake warning
This light is illuminated when the
parking brake is applied with the igni-
tion switch in the START or ON posi-
tion. The warning light should go off
when the parking brake is released.
Low brake fluid level warning
If the warning light remains on, it may
indicate that the brake fluid level in
the reservoir is low.
If the warning light remains on:
1. Drive carefully to the nearest safe
location and stop your vehicle.
Page 198 of 371
451
Driving your vehicle
1
2
3
4
5
6
7
8
9
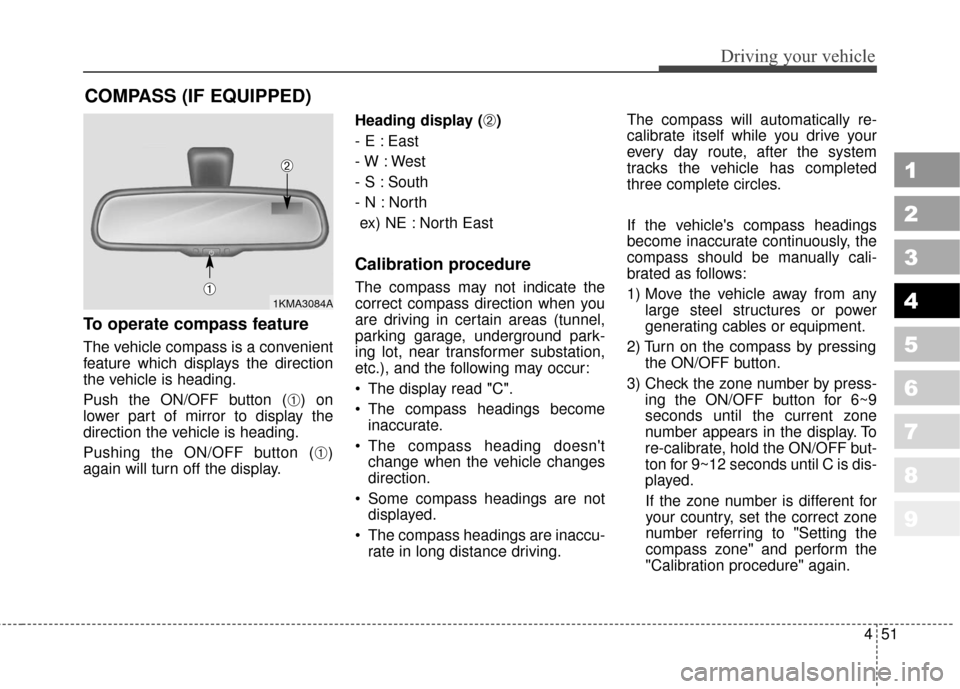
To operate compass feature
The vehicle compass is a convenient
feature which displays the direction
the vehicle is heading.
Push the ON/OFF button (
➀) on
lower part of mirror to display the
direction the vehicle is heading.
Pushing the ON/OFF button (
➀)
again will turn off the display. Heading display (
➁)
- E : East
- W : West
- S : South
- N : North ex) NE : North East
Calibration procedure
The compass may not indicate the
correct compass direction when you
are driving in certain areas (tunnel,
parking garage, underground park-
ing lot, near transformer substation,
etc.), and the following may occur:
The display read "C".
The compass headings become inaccurate.
The compass heading doesn't change when the vehicle changes
direction.
Some compass headings are not displayed.
The compass headings are inaccu- rate in long distance driving. The compass will automatically re-
calibrate itself while you drive your
every day route, after the system
tracks the vehicle has completed
three complete circles.
If the vehicle's compass headings
become inaccurate continuously, the
compass should be manually cali-
brated as follows:
1) Move the vehicle away from any
large steel structures or power
generating cables or equipment.
2) Turn on the compass by pressing the ON/OFF button.
3) Check the zone number by press- ing the ON/OFF button for 6~9
seconds until the current zone
number appears in the display. To
re-calibrate, hold the ON/OFF but-
ton for 9~12 seconds until C is dis-
played.
If the zone number is different for
your country, set the correct zone
number referring to "Setting the
compass zone" and perform the
"Calibration procedure" again.
COMPASS (IF EQUIPPED)
1KMA3084A➀
➁
Page 199 of 371

Driving your vehicle
52
4
1
2
3
4
5
6
7
8
9
4) Make sure the vehicle windshield
wipers are turned off.
5) Drive your vehicle in at least 2 complete (either clockwise or
counter-clockwise) circles at less
than 8 km/h (5 mph) until the com-
pass heading appears. Driving in
a circle in right-handed direction
and opposite direction is possible
and if possible, stop the wiper
operation.
6) If the vehicle's compass headings become inaccurate again, repeat
steps 1 through 6 above.
✽ ✽NOTICE
If new vehicle is first driven or if the
battery has been disconnected, do
the calibration procedure as above.
Setting the compass zone
This compass must be set to com-
pensate for the variation between
true north and magnetic north. To set
variation:
1. Find your current location and
variance zone number on the zone
map.
2. Press and hold the ON/OFF but- ton for 6~9 seconds. The current
zone number will appear in the
display.
3. Release and press the ON/OFF button until the new zone number
appears in the display. After you
stop pressing the button in, the
display will show a compass direc-
tion within a few seconds.
✽ ✽NOTICE
1. Do not install a ski rack, antenna,
etc. that are attached to the vehi-
cle using a magnet as anything
attached to the roof of the vehicle
with a magnet will effect compass
operation.
2. If the compass deviates from the correct indication soon after
repeated adjustment, have the
compass checked at an authorized
dealer.
3. The compass may not indicate the correct compass point in tunnels
or while driving up or down a
steep hill.
(The compass returns to the cor-
rect compass point when the vehi-
cle moves to an area where the
geomagnetism is stabilized.)
Page 218 of 371
471
Driving your vehicle
1
2
3
4
5
6
7
8
9
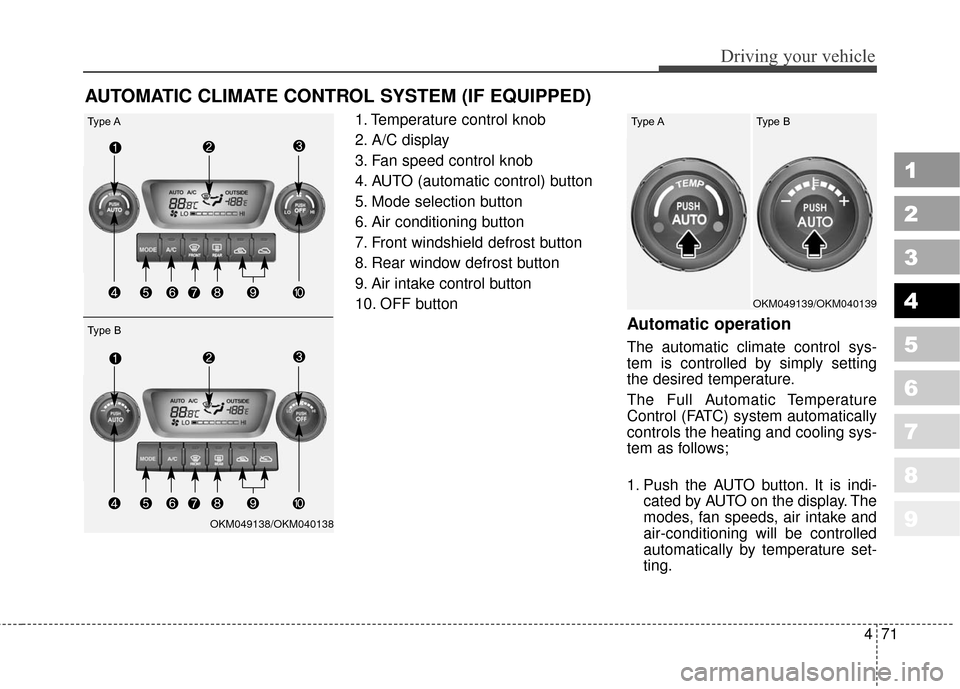
1. Temperature control knob
2. A/C display
3. Fan speed control knob
4. AUTO (automatic control) button
5. Mode selection button
6. Air conditioning button
7. Front windshield defrost button
8. Rear window defrost button
9. Air intake control button
10. OFF button
Automatic operation
The automatic climate control sys-
tem is controlled by simply setting
the desired temperature.
The Full Automatic Temperature
Control (FATC) system automatically
controls the heating and cooling sys-
tem as follows;
1. Push the AUTO button. It is indi-cated by AUTO on the display. The
modes, fan speeds, air intake and
air-conditioning will be controlled
automatically by temperature set-
ting.
AUTOMATIC CLIMATE CONTROL SYSTEM (IF EQUIPPED)
OKM049139/OKM040139
OKM049138/OKM040138
Type A Type A Type B
Type B
Page 220 of 371
473
Driving your vehicle
1
2
3
4
5
6
7
8
9
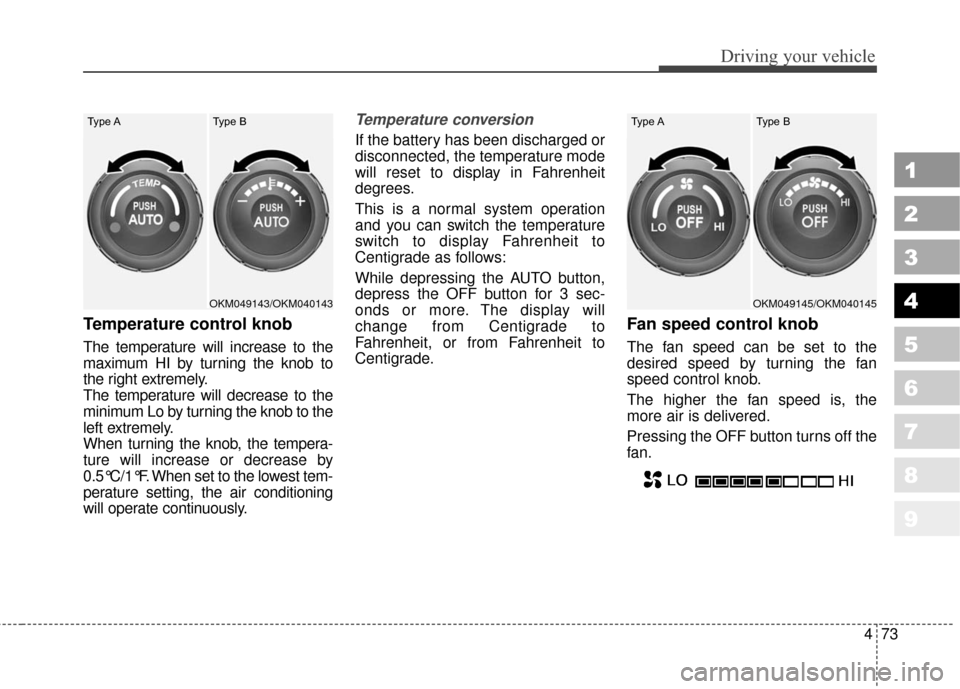
Temperature control knob
The temperature will increase to the
maximum HI by turning the knob to
the right extremely.
The temperature will decrease to the
minimum Lo by turning the knob to the
left extremely.
When turning the knob, the tempera-
ture will increase or decrease by
0.5°C/1°F. When set to the lowest tem-
perature setting, the air conditioning
will operate continuously.
Temperature conversion
If the battery has been discharged or
disconnected, the temperature mode
will reset to display in Fahrenheit
degrees.
This is a normal system operation
and you can switch the temperature
switch to display Fahrenheit to
Centigrade as follows:
While depressing the AUTO button,
depress the OFF button for 3 sec-
onds or more. The display will
change from Centigrade to
Fahrenheit, or from Fahrenheit to
Centigrade.
Fan speed control knob
The fan speed can be set to the
desired speed by turning the fan
speed control knob.
The higher the fan speed is, the
more air is delivered.
Pressing the OFF button turns off the
fan.
OKM049143/OKM040143
Type A Type BOKM049145/OKM040145
Type A Type B
Page 225 of 371
Driving your vehicle
78
4
1
2
3
4
5
6
7
8
9
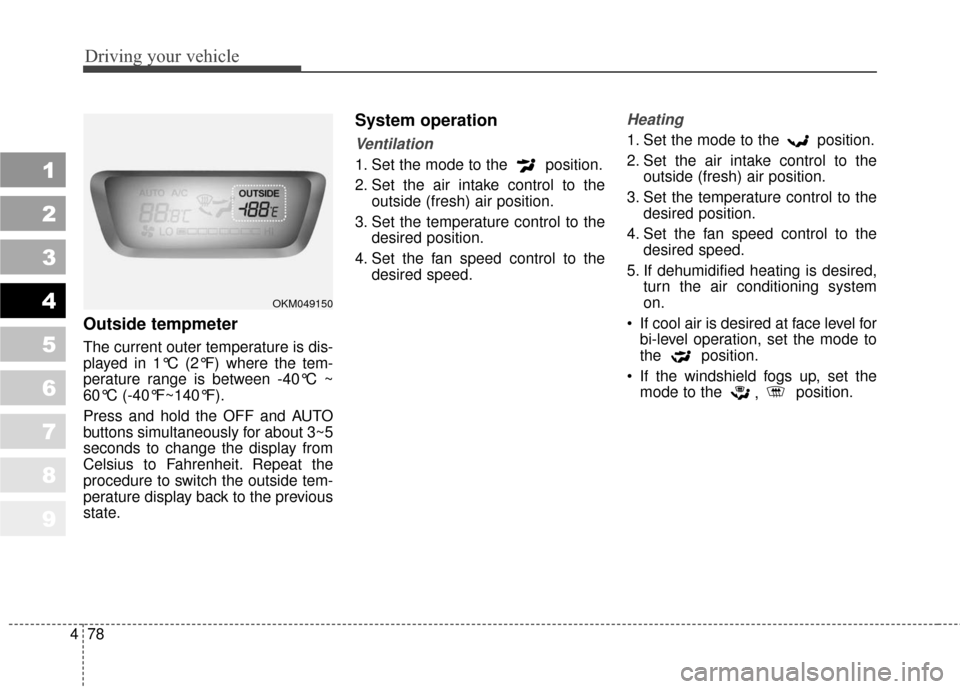
Outside tempmeter
The current outer temperature is dis-
played in 1°C (2°F) where the tem-
perature range is between -40°C ~
60°C (-40°F~140°F).
Press and hold the OFF and AUTO
buttons simultaneously for about 3~5
seconds to change the display from
Celsius to Fahrenheit. Repeat the
procedure to switch the outside tem-
perature display back to the previous
state.
System operation
Ventilation
1. Set the mode to the position.
2. Set the air intake control to the
outside (fresh) air position.
3. Set the temperature control to the desired position.
4. Set the fan speed control to the desired speed.
Heating
1. Set the mode to the position.
2. Set the air intake control to theoutside (fresh) air position.
3. Set the temperature control to the desired position.
4. Set the fan speed control to the desired speed.
5. If dehumidified heating is desired, turn the air conditioning system
on.
If cool air is desired at face level for bi-level operation, set the mode to
the position.
If the windshield fogs up, set the mode to the , position.
OKM049150
Page 232 of 371
485
Driving your vehicle
1
2
3
4
5
6
7
8
9
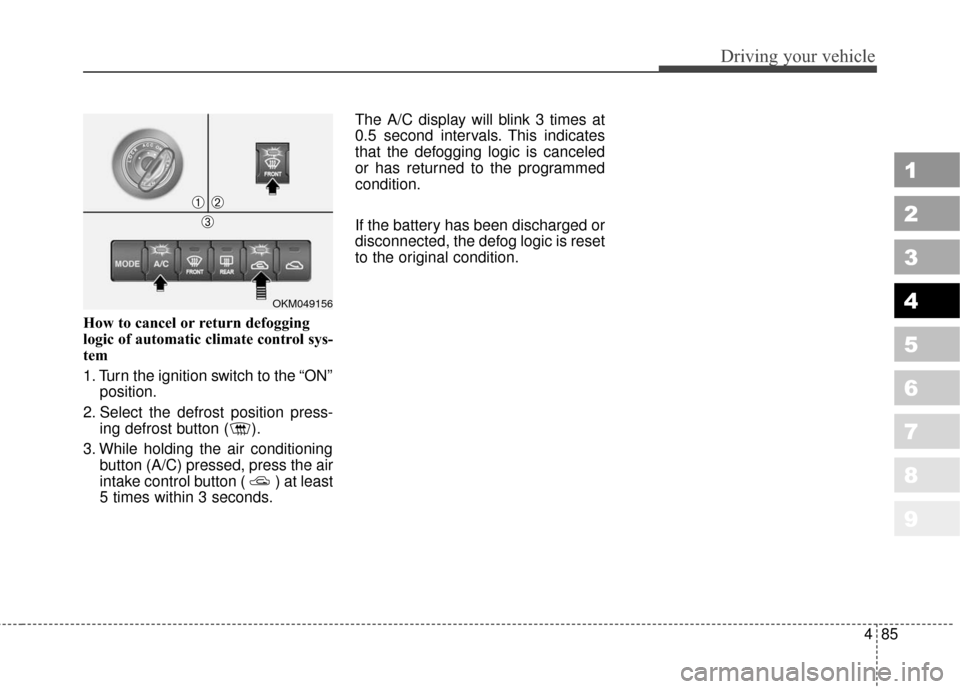
How to cancel or return defogging
logic of automatic climate control sys-
tem
1. Turn the ignition switch to the “ON”position.
2. Select the defrost position press- ing defrost button ( ).
3. While holding the air conditioning button (A/C) pressed, press the air
intake control button ( ) at least
5 times within 3 seconds. The A/C display will blink 3 times at
0.5 second intervals. This indicates
that the defogging logic is canceled
or has returned to the programmed
condition.
If the battery has been discharged or
disconnected, the defog logic is reset
to the original condition.
OKM049156
➀➁
➂
Page 352 of 371
743
Maintenance
1
2
3
4
5
6
7
8
9
3. Checking tire life (TIN : TireIdentification Number)
Any tires that are over 6 years, based
on the manufacturing date, tire
strength and performance, decline
with age naturally (even unused
spare tires). Therefore, the tires
(including the spare tire) should be
replaced by new ones. You can find
the manufacturing date on the tire
sidewall (possibly on the inside of the
wheel), displaying the DOT Code.
The DOT Code is a series of num-
bers on a tire consisting of numbers
and English letters. The manufactur-
ing date is designated by the last four
digits (characters) of the DOT code.
DOT : XXXX XXXX OOOO
The front part of the DOT means a
plant code number, tire size and
tread pattern and the last four num-
bers indicate week and year manu-
factured.
For example:
DOT XXXX XXXX 1608 represents
that the tire was produced in the 16th
week of 2008.
4. Tire ply composition and mate-rial
The number of layers or plies of rub-
bercoated fabric in the tire. Tire man-
ufacturers also must indicate the
materials in the tire, which include
steel, nylon, polyester, and others.
The letter "R" means radial ply con-
struction; the letter "D" means diago-
nal or bias ply construction; and the
letter "B" means belted-bias ply con-
struction.
WARNING - Tire age
Tires degrade over time, even
when they are not being used.
Regardless of the remaining
tread, it is recommended that
tires generally be replaced after
six (6) years of normal service.
Heat caused by hot climates or
frequent high loading condi-
tions can accelerate the aging
process. Failure to follow this
warning can result in sudden
tire failure, which could lead to a
loss of control and an accident
involving serious injury or
death.