Page 34 of 236

325
Knowing your vehicle
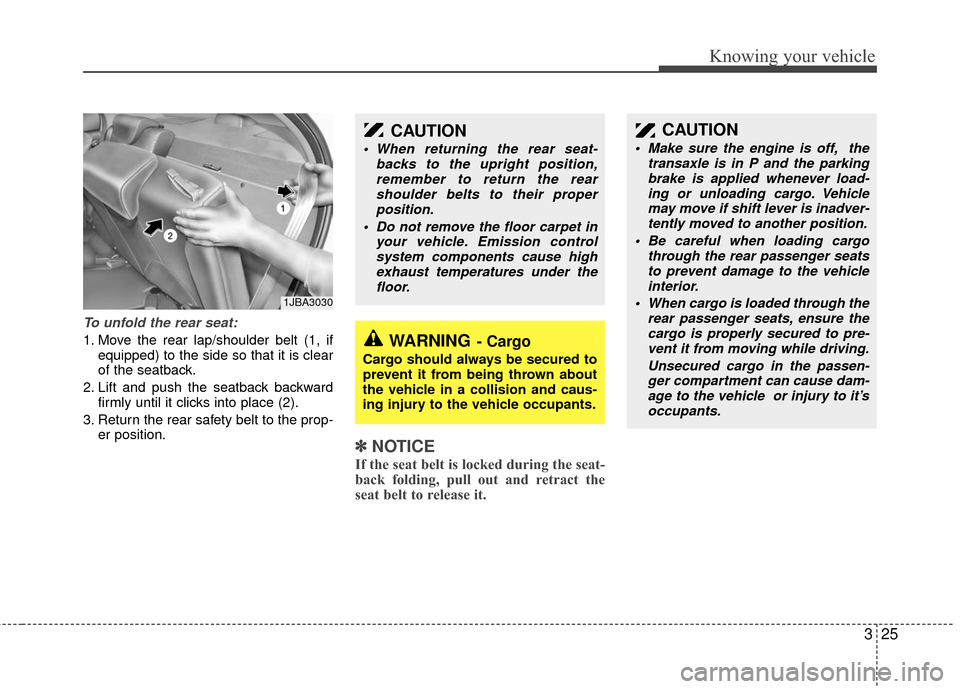
To unfold the rear seat:
1. Move the rear lap/shoulder belt (1, ifequipped) to the side so that it is clear
of the seatback.
2. Lift and push the seatback backward firmly until it clicks into place (2).
3. Return the rear safety belt to the prop- er position.
✽ ✽NOTICE
If the seat belt is locked during the seat-
back folding, pull out and retract the
seat belt to release it.
1JBA3030
CAUTION
When returning the rear seat-
backs to the upright position,remember to return the rearshoulder belts to their proper position.
Do not remove the floor carpet in your vehicle. Emission controlsystem components cause highexhaust temperatures under thefloor.
WARNING- Cargo
Cargo should always be secured to
prevent it from being thrown about
the vehicle in a collision and caus-
ing injury to the vehicle occupants.
CAUTION
Make sure the engine is off, the transaxle is in P and the parkingbrake is applied whenever load- ing or unloading cargo. Vehiclemay move if shift lever is inadver- tently moved to another position.
Be careful when loading cargo through the rear passenger seatsto prevent damage to the vehicleinterior.
When cargo is loaded through the rear passenger seats, ensure thecargo is properly secured to pre- vent it from moving while driving.
Unsecured cargo in the passen-ger compartment can cause dam- age to the vehicle or injury to it’soccupants.
Page 42 of 236

333
Knowing your vehicle
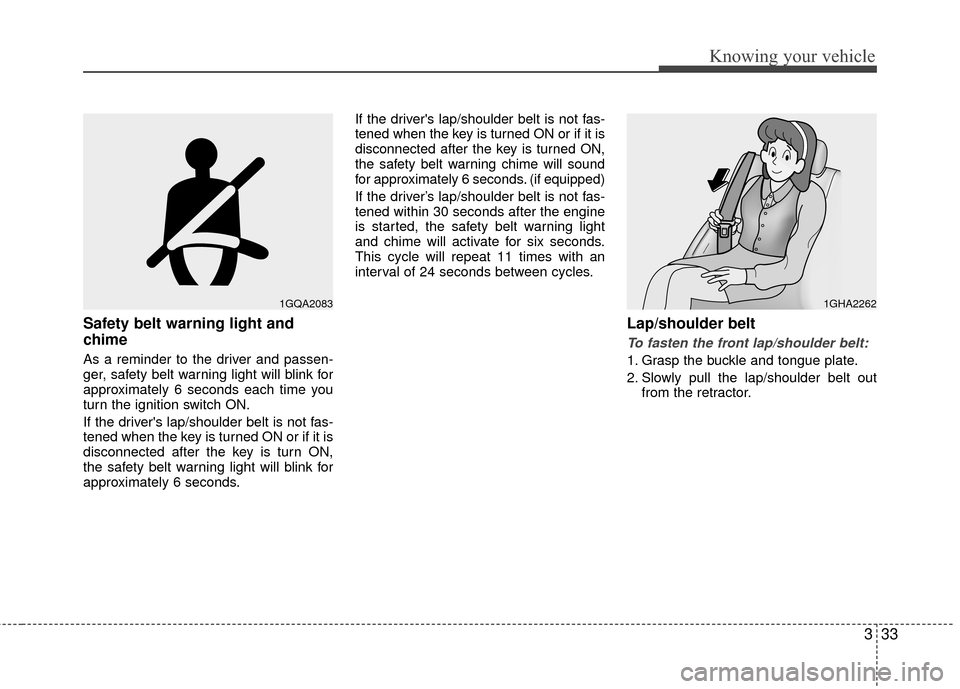
Safety belt warning light and
chime
As a reminder to the driver and passen-
ger, safety belt warning light will blink for
approximately 6 seconds each time you
turn the ignition switch ON.
If the driver's lap/shoulder belt is not fas-
tened when the key is turned ON or if it is
disconnected after the key is turn ON,
the safety belt warning light will blink for
approximately 6 seconds.If the driver's lap/shoulder belt is not fas-
tened when the key is turned ON or if it is
disconnected after the key is turned ON,
the safety belt warning chime will sound
for approximately 6 seconds. (if equipped)
If the driver’s lap/shoulder belt is not fas-
tened within 30 seconds after the engine
is started, the safety belt warning light
and chime will activate for six seconds.
This cycle will repeat 11 times with an
interval of 24 seconds between cycles.
Lap/shoulder belt
To fasten the front lap/shoulder belt:
1. Grasp the buckle and tongue plate.
2. Slowly pull the lap/shoulder belt out
from the retractor.
1GQA20831GHA2262
Page 71 of 236

Knowing your vehicle
62
3
Air bag warning light
The purpose of air bag warning light in
your instrument panel is to alert you of a
potential problem with your air bag -
Supplemental Restraint System (SRS).
When the ignition switch is turned ON,
the indicator light should blink or illumi-
nate for approximately 6 seconds, then
go off.
Have the system checked if:
The light does not turn on briefly when
you turn the ignition ON.
The light stays on after the engine starts.
The light comes on while the vehicle is in motion.
Air bag (Supplemental Restraint
System) service
Your Supplemental Restraint System is
virtually maintenance-free. There are no
parts which you can service.
You must have the system serviced
under the following circumstances:
If an air bag ever inflates, the air bagmust be replaced. Do not try to remove
or discard the air bag by yourself. This
must be done by an authorized Kia
dealer.
If the air bag warning indicator light alerts you to a problem, have the air
bag system checked as soon as possi-
ble. Otherwise, your air bag system
may be ineffective.
WARNING
Never put child restraint in thefront passenger seat. If the front
passenger air bag inflates, it may
cause severe or fatal injuries.
When children are seated in the rear outboard seats in which cur-
tain air bags are equipped, be
sure to put the child restraint sys-
tem as far away from the door
side as possible, and secure the
child restraint system to be
locked in position.
Inflation of side or curtain air bag
(if equipped) could cause severe
injury or death due to the expan-
sion impact.
CAUTION - No modification
Do not modify any part of the air bagsystem. Modification could make the air bag system ineffective orcould cause unnecessary deploy- ment.
W7-147
Page 73 of 236

Knowing your vehicle
64
3
Outside the vehicle
To open the trunk, insert the key into
the lock and turn it to the right (clock-
wise).
To close the trunk, use both hands to push the trunk lid down. Check to see
if the trunk is completely shut.
Trunk room lamp
Trunk room lamp turns on when the trunk
is opened. It remains on until the trunk is
securely closed.
✽ ✽ NOTICE
Make sure to close the trunk securely. If
it remains open while engine is not run-
ning, it may cause battery discharge
because trunk room lamp remains on.
TRUNK (IF EQUIPPED)
1JBN30791JBA3076
PROPOSITION 65
WARNING
Engine exhaust and a wide variety
of automobile components and
parts, including components found
in the interior furnishings in a vehi-
cle, contain or emit chemicals
known to the State of California to
cause cancer and birth defects and
reproductive harm. In addition, cer-
tain fluids contained in vehicles
and certain products of component
wear contain or emit chemicals
known to the State of California to
cause cancer and birth defects or
other reproductive harm.
Page 75 of 236
Knowing your vehicle
66
3
Opening the hood:
1. Pull the release lever on the lower left
side of the instrument panel to unlatch
the hood. The hood should pop open
slightly. 2. Go to the front of the vehicle, raise the
hood slightly, pull the secondary latch
(1) inside of the hood center and lift (2)
the hood. 3. Lift the hood and hold it open with the
support rod by inserting the free end of
the rod into the slot (1).
HOOD
1JBA30781JBA30801JBA3081
CAUTION- Hot parts
Grasp the support rod in the areawrapped in rubber. The rubber willhelp prevent you from being burned by hot metal when the engine is hot.
Page 76 of 236
367
Knowing your vehicle
Closing the hood
1. Before closing the hood, check the fol-lowing:
• All filler caps in engine compartment must be correctly installed.
bustible material must be removed
from the engine compartment.
2. Secure the support rod in its clip.
3. Lower the hood to about 30 cm (12 inches) height and then let it drop to
properly lock in place.
Make sure the hood is properly locked
before driving.
1. Stop the engine.
2. To open the fuel filler lid, pull therelease lever.CAUTION- Hood
• Before closing the hood, make sure that all engine parts andtools have been removed fromthe engine area and that no one’shands are near the hood opening.
Do not leave gloves, rags or any other combustible material in theengine compartment. Doing so may cause a heat-induced fire.
CAUTION
To avoid injury from sharp edges, itis recommended that protective gloves be worn if there is a need toopen the fuel filler door manually.
1JBA3082
1JBA3207
5 Door
4 Door
FUEL FILLER LID
Page 78 of 236

369
Knowing your vehicle
✽
✽NOTICE
• Make sure to refuel your vehicle
according to the "Fuel requirements"
suggested in section 5.
• Check to make sure the fuel filler cap is securely closed after refueling. A
loose fuel filler cap may cause the
“Check fuel filler cap ( )” light in
the instrument panel to illuminate
unnecessarily.
• If the fuel filler cap requires replace- ment, use only a genuine Kia cap or
the equivalent specified for your vehi-
cle. An incorrect fuel filler cap can
result in a serious malfunction of the
fuel system or emission control sys-
tem.
• Do not spill fuel on the exterior sur- faces of the vehicle. Any type of fuel
spilled on painted surfaces may dam-
age the paint. (Continued)
DO NOT use matches or a lighter
and DO NOT SMOKE or leave a lit
cigarette in your vehicle while at a
gas station especially during
refueling. Automotive fuel is high-
ly flammable and can, when ignit-
ed, result in fire.
If a fire breaks out during refuel- ing, leave the vicinity of the vehi-
cle, and immediately contact the
manager of the gas station and
then contact the local fire depart-
ment or 911.(Continued)
Static electricity discharge from
the container can ignite fuel
vapors causing a fire. Once refu-
eling has begun, contact with the
vehicle should be maintained
until the filling is complete.
Use only portable plastic fuel
containers designed to carry and
store gasoline.
Do not use cellular phones while refueling. Electric current and/or
electronic interference from cellu-
lar phones can potentially ignite
fuel vapors causing a fire.
When refueling, always shut the engine off. Sparks produced by
electrical components related to
the engine can ignite fuel vapors
causing a fire. Once refueling is
complete, check to make sure the
filler cap and filler door are
securely closed, before starting
the engine.
(Continued)
Page 81 of 236

Knowing your vehicle
72
3
Outside rearview mirror heater
(if equipped)
The outside rearview mirror heater is
automatically turned on when the rear
window defroster is turned on. To heat
the outside rearview mirror glass, push
the button for the rear window defroster.
The rearview mirror heater (and rear win-
dow defroster) will not operate unless the
engine is running.
The outside rearview mirror glass will be
heated for defrosting or defogging and
will give you improved rear vision in
inclement weather conditions. Push the
button again to turn the heater off. The
outside rearview mirror heater automati-
cally turns off after 20 minutes.
Inside rearview mirror
Adjust the rearview mirror to center on
the view through the rear window. Make
this adjustment before you start driving.
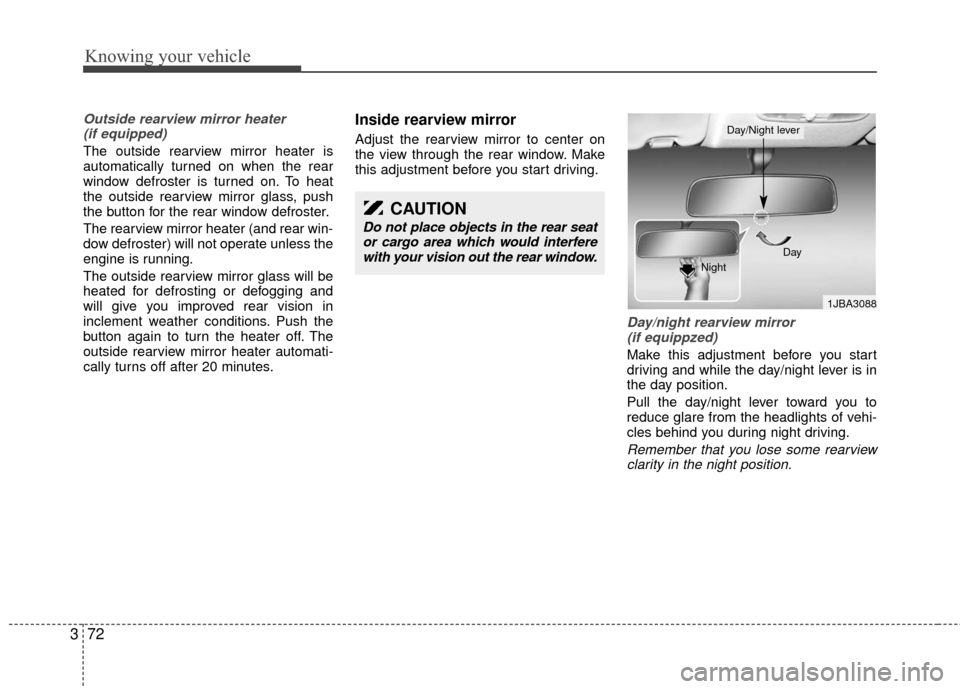
Day/night rearview mirror (if equippzed)
Make this adjustment before you start
driving and while the day/night lever is in
the day position.
Pull the day/night lever toward you to
reduce glare from the headlights of vehi-
cles behind you during night driving.
Remember that you lose some rearviewclarity in the night position.
1JBA3088
Day
Night
Day/Night lever
CAUTION
Do not place objects in the rear seat or cargo area which would interferewith your vision out the rear window.