Page 66 of 460

locking retractor, pull the belt from the retractor until
there is enough to allow you to pass through the child
restraint and slide the latch plate into the buckle. Then,
pull the belt until it is fully extracted from the retrac-
tor. Allow the belt to return to the retractor, pulling on
the excess webbing to tighten the lap portion around
the child restraint. For additional information, refer to
�Automatic Locking Mode�earlier in this section.
•In your vehicle’s 2nd row outboard seating positions,
you may have trouble tightening the lap/shoulder belt
on the child restraint because the buckle or latch plate
is too close to the belt path opening on the restraint.
Disconnect the latch plate from the buckle and twist
the short buckle-end belt several times to shorten it.
Insert the latch plate into the buckle with the release
button facing out.
•If the belt still cannot be tightened, or if pulling and
pushing on the restraint loosens the belt, disconnect the latch plate from the buckle, turn the buckle
around, and insert the latch plate into the buckle
again. If you still cannot make the child restraint
secure, try a different seating position.
•Buckle the child into the restraint exactly as the
manufacturer’s instructions tell you.
•When your child restraint is not in use, secure it in the
vehicle with the seat belt or remove it from the vehicle.
Do not leave it loose in the vehicle. In a sudden stop or
collision, it could strike the occupants or seatbacks and
cause serious personal injury.
NOTE: For additional information, refer to
www.seatcheck.org or call 1–866–SEATCHECK. Cana-
dian residents, should refer to Transport Canada’s web-
site for additional information. http://www.tc.gc.ca/
roadsafety/safedrivers/childsafety/index.htm
66 THINGS TO KNOW BEFORE STARTING YOUR VEHICLE
Page 73 of 460

ENGINE BREAK-IN RECOMMENDATIONS
A long break-in period is not required for the engine in
your vehicle.
Drive moderately during the first 300 miles (500 km).
After the initial 60 miles (100 km), speeds up to 50 or
55 mph (80 or 90 km/h) are desirable.
While cruising, brief full-throttle acceleration within the
limits of local traffic laws, contributes to a good break-in.
Wide-open throttle acceleration in low gear can be detri-
mental and should be avoided.
The engine oil installed in the engine at the factory is a
high-quality energy conserving type lubricant. Oil
changes should be consistent with anticipated climate
conditions under which vehicle operations will occur.
The recommended viscosity and quality grades are
shown in “Engine Oil”, under “Maintenance Procedures”
in section 7 of this manual. NON-DETERGENT OR
STRAIGHT MINERAL OILS MUST NEVER BE USED.A new engine may consume some oil during its first few
thousand miles (kilometers) of operation. This should be
considered a normal part of the break-in and not inter-
preted as an indication of difficulty.
SAFETY TIPS
Transporting Passengers
NEVER TRANSPORT PASSENGERS IN THE CARGO
AREA.
WARNING!
•It is extremely dangerous to ride in a cargo area,
inside or outside of a vehicle. In a collision, people
riding in these areas are more likely to be seri-
ously injured or killed.
(Continued)
2
THINGS TO KNOW BEFORE STARTING YOUR VEHICLE 73
Page 202 of 460

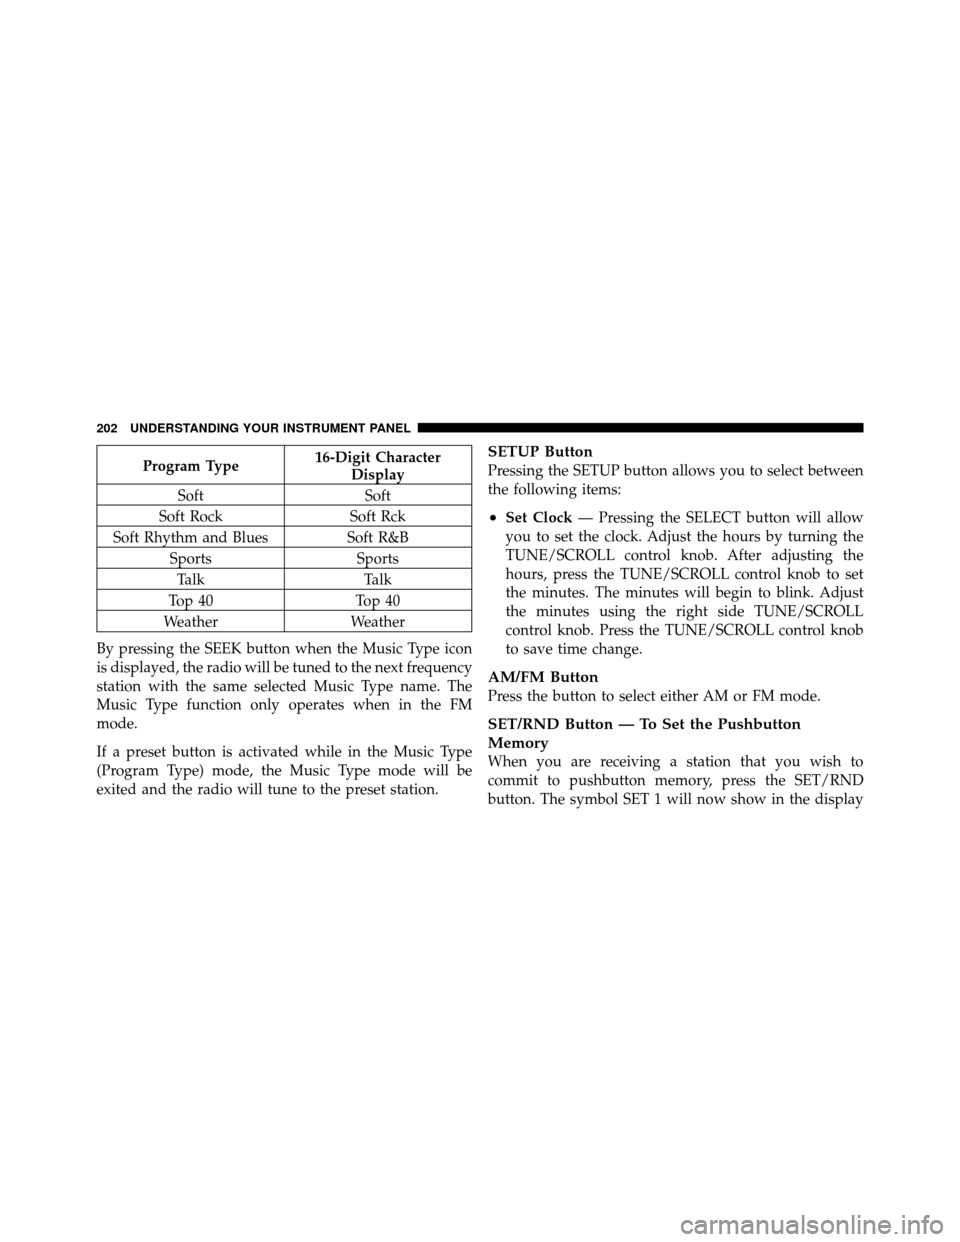
Program Type16-Digit Character
Display
Soft Soft
Soft Rock Soft Rck
Soft Rhythm and Blues Soft R&B
Sports Sports
Talk Talk
Top 40 Top 40
Weather Weather
By pressing the SEEK button when the Music Type icon
is displayed, the radio will be tuned to the next frequency
station with the same selected Music Type name. The
Music Type function only operates when in the FM
mode.
If a preset button is activated while in the Music Type
(Program Type) mode, the Music Type mode will be
exited and the radio will tune to the preset station.SETUP Button
Pressing the SETUP button allows you to select between
the following items:
•Set Clock — Pressing the SELECT button will allow
you to set the clock. Adjust the hours by turning the
TUNE/SCROLL control knob. After adjusting the
hours, press the TUNE/SCROLL control knob to set
the minutes. The minutes will begin to blink. Adjust
the minutes using the right side TUNE/SCROLL
control knob. Press the TUNE/SCROLL control knob
to save time change.
AM/FM Button
Press the button to select either AM or FM mode.
SET/RND Button — To Set the Pushbutton
Memory
When you are receiving a station that you wish to
commit to pushbutton memory, press the SET/RND
button. The symbol SET 1 will now show in the display
202 UNDERSTANDING YOUR INSTRUMENT PANEL