Page 2948 of 3039
(100-00 General Information, Description and Operation) /
Body Repairs (501-25A Body Repairs - General Information, Description and Operation) /
Corrosion Protection (501-25B Body Repairs - Corrosion Protection, Description and Operation) /
Body and Frame (501-26 Body Repairs - Vehicle Specific Information and Tolerance Checks, Description and Operation).
4. Remove the rear wheel and tire.
For additional information, refer to: Wheel and Tire (204-04 Wheels and Tires, Removal and Installation).
5. Remove the rear fender splash shield.
Page 2961 of 3039
11. Release and lay aside the back panel and loadspace wiring harness.
12. Remove the rear bumper cover side retainer.
13. Remove the rear wheel and tire.
For additional information, refer to: Wheel and Tire (204-04 Wheels and Tires, Removal and Installation).
14.
15. Remove the rear fender splash shield.
NOTE: Where applicable spot welds must be drilled
from the inside, this will enable the new panel to be spot
welded on installation. Use a belt sander where there is no
access to drill.
Drill out the spot welds.
Page 2974 of 3039

Rear End Sheet Metal Repairs - Rear Side Member Section
Removal and Installation
Removal Published: 11-May-2011
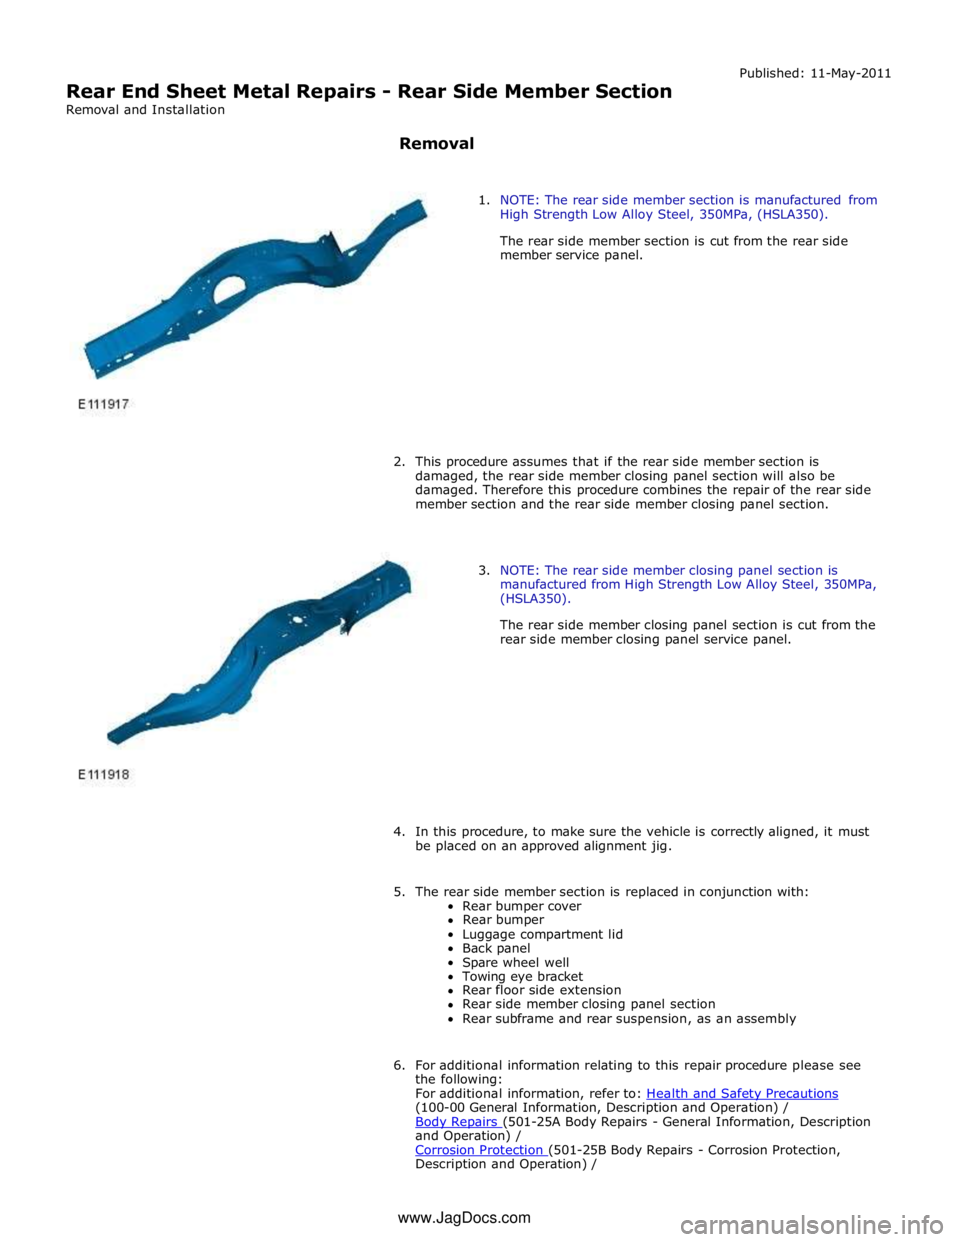
1. NOTE: The rear side member section is manufactured from
High Strength Low Alloy Steel, 350MPa, (HSLA350).
The rear side member section is cut from the rear side
member service panel.
2. This procedure assumes that if the rear side member section is
damaged, the rear side member closing panel section will also be
damaged. Therefore this procedure combines the repair of the rear side
member section and the rear side member closing panel section.
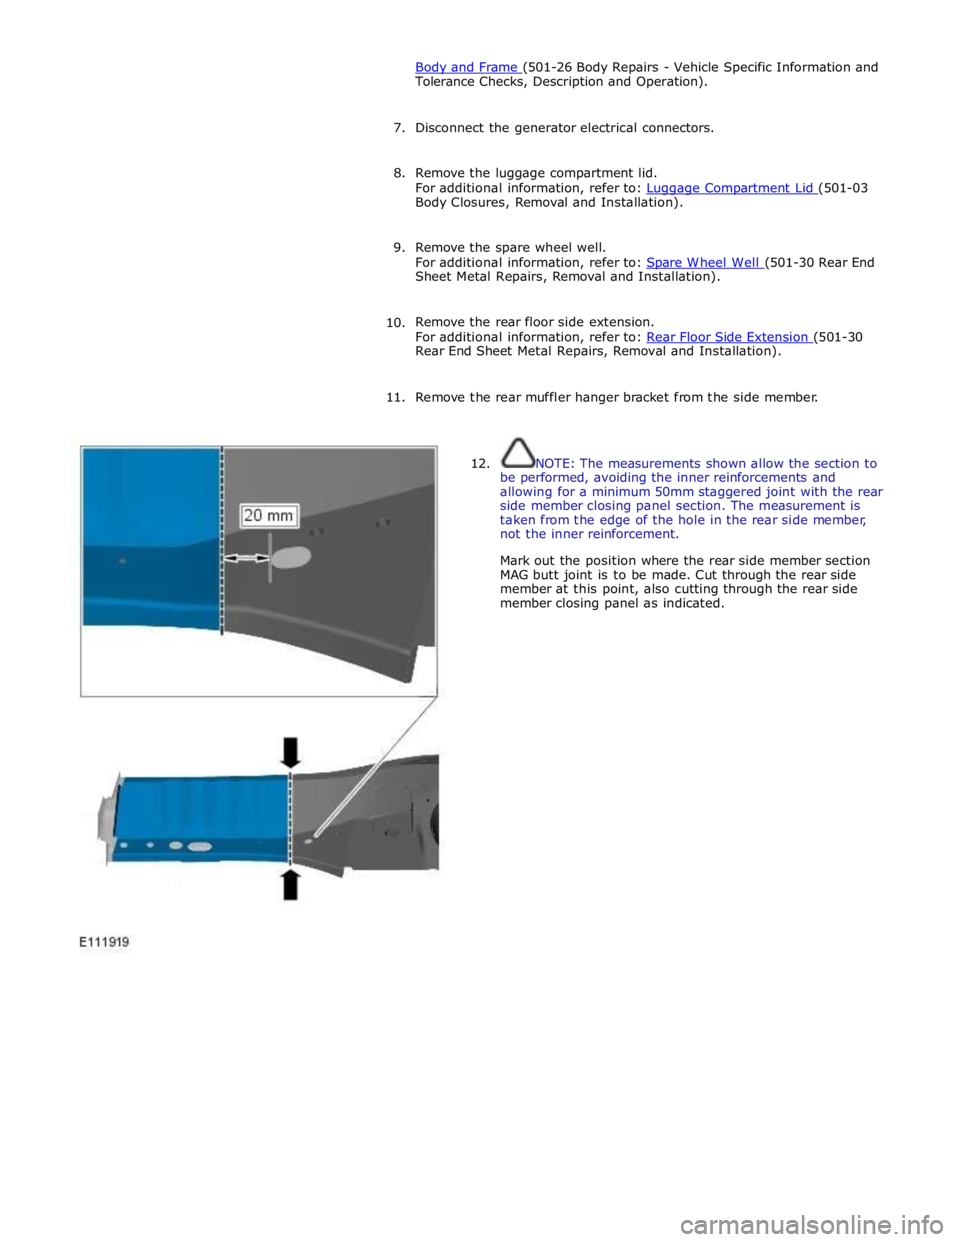
3. NOTE: The rear side member closing panel section is
manufactured from High Strength Low Alloy Steel, 350MPa,
(HSLA350).
The rear side member closing panel section is cut from the
rear side member closing panel service panel.
4. In this procedure, to make sure the vehicle is correctly aligned, it must
be placed on an approved alignment jig.
5. The rear side member section is replaced in conjunction with:
Rear bumper cover
Rear bumper
Luggage compartment lid
Back panel
Spare wheel well
Towing eye bracket
Rear floor side extension
Rear side member closing panel section
Rear subframe and rear suspension, as an assembly
6. For additional information relating to this repair procedure please see
the following:
For additional information, refer to: Health and Safety Precautions (100-00 General Information, Description and Operation) /
Body Repairs (501-25A Body Repairs - General Information, Description and Operation) /
Corrosion Protection (501-25B Body Repairs - Corrosion Protection, Description and Operation) / www.JagDocs.com
Page 2975 of 3039

Body and Frame (501-26 Body Repairs - Vehicle Specific Information and Tolerance Checks, Description and Operation).
7. Disconnect the generator electrical connectors.
8. Remove the luggage compartment lid.
For additional information, refer to: Luggage Compartment Lid (501-03 Body Closures, Removal and Installation).
9. Remove the spare wheel well.
For additional information, refer to: Spare W heel Well (501-30 Rear End Sheet Metal Repairs, Removal and Installation).
10. Remove the rear floor side extension.
For additional information, refer to: Rear Floor Side Extension (501-30 Rear End Sheet Metal Repairs, Removal and Installation).
11. Remove the rear muffler hanger bracket from the side member.
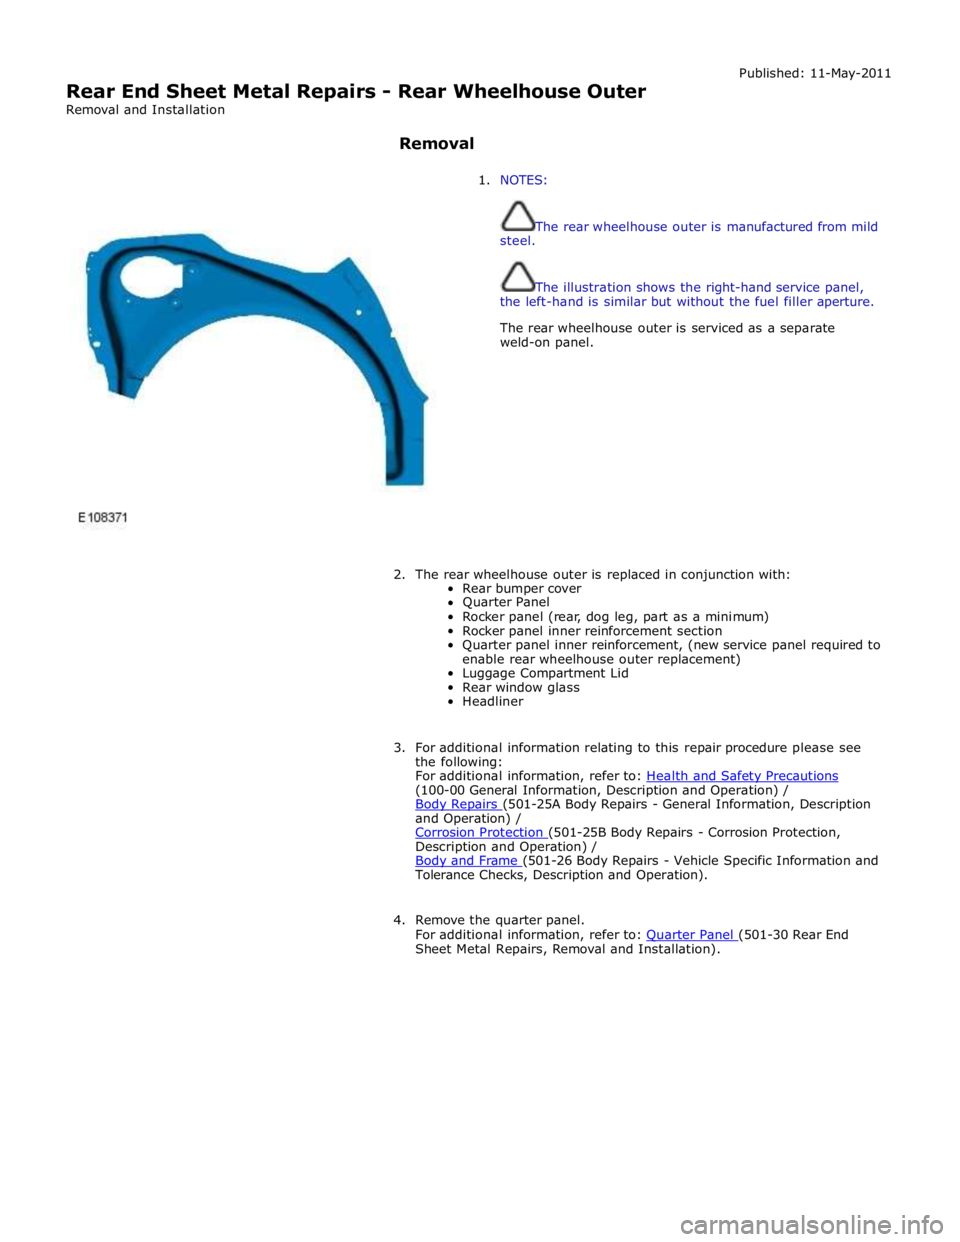
12. NOTE: The measurements shown allow the section to
be performed, avoiding the inner reinforcements and
allowing for a minimum 50mm staggered joint with the rear
side member closing panel section. The measurement is
taken from the edge of the hole in the rear side member,
not the inner reinforcement.
Mark out the position where the rear side member section
MAG butt joint is to be made. Cut through the rear side
member at this point, also cutting through the rear side
member closing panel as indicated.
Page 2980 of 3039

Rear End Sheet Metal Repairs - Rear Wheelhouse Outer
Removal and Installation
Removal Published: 11-May-2011
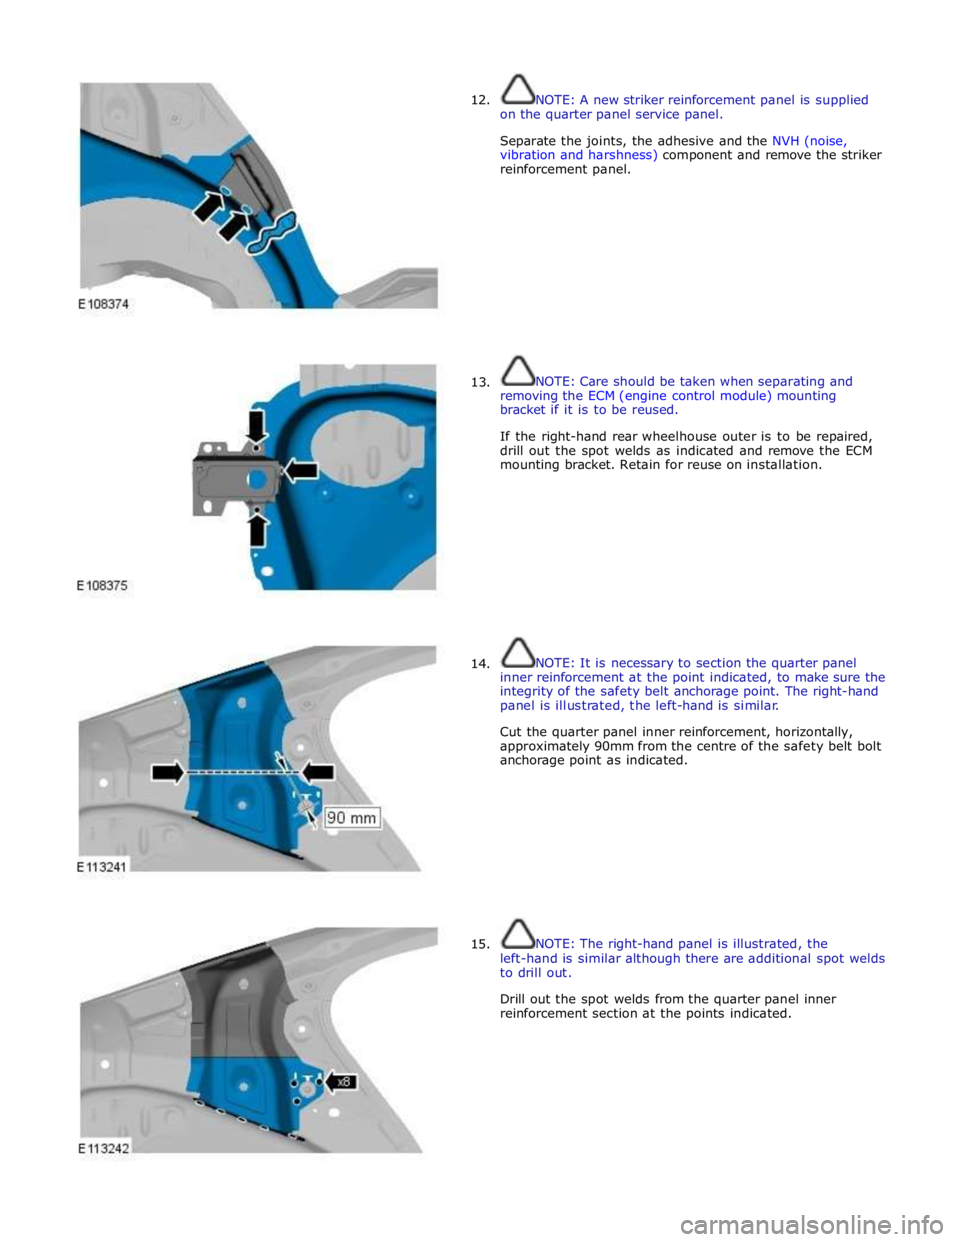
1. NOTES:
The rear wheelhouse outer is manufactured from mild
steel.
The illustration shows the right-hand service panel,
the left-hand is similar but without the fuel filler aperture.
The rear wheelhouse outer is serviced as a separate
weld-on panel.
2. The rear wheelhouse outer is replaced in conjunction with:
Rear bumper cover
Quarter Panel
Rocker panel (rear, dog leg, part as a minimum)
Rocker panel inner reinforcement section
Quarter panel inner reinforcement, (new service panel required to
enable rear wheelhouse outer replacement)
Luggage Compartment Lid
Rear window glass
Headliner
3. For additional information relating to this repair procedure please see
the following:
For additional information, refer to: Health and Safety Precautions (100-00 General Information, Description and Operation) /
Body Repairs (501-25A Body Repairs - General Information, Description and Operation) /
Corrosion Protection (501-25B Body Repairs - Corrosion Protection, Description and Operation) /
Body and Frame (501-26 Body Repairs - Vehicle Specific Information and Tolerance Checks, Description and Operation).
4. Remove the quarter panel.
For additional information, refer to: Quarter Panel (501-30 Rear End Sheet Metal Repairs, Removal and Installation).
Page 2981 of 3039
Section (501-29 Side Panel Sheet Metal Repairs, Removal and Installation).
6. Disconnect the generator electrical connectors.
7. Remove the rear safety belt retractor.
For additional information, refer to: Rear Safety Belt Retractor (501-20A Safety Belt System, Removal and Installation).
8. Disconnect, release the inner quarter panel wiring harness and position
it to one side.
9. If the right-hand rear wheelhouse outer is being repaired, release the
battery positive cable and position it to one side.
10. Release the inner quarter panel insulating material and position it to
one side.
11. Drill out the spot welds from the striker reinforcement
panel.
Page 2982 of 3039

12.
13.
14.
15. NOTE: A new striker reinforcement panel is supplied
on the quarter panel service panel.
Separate the joints, the adhesive and the NVH (noise,
vibration and harshness) component and remove the striker
reinforcement panel.
NOTE: Care should be taken when separating and
removing the ECM (engine control module) mounting
bracket if it is to be reused.
If the right-hand rear wheelhouse outer is to be repaired,
drill out the spot welds as indicated and remove the ECM
mounting bracket. Retain for reuse on installation.
NOTE: It is necessary to section the quarter panel
inner reinforcement at the point indicated, to make sure the
integrity of the safety belt anchorage point. The right-hand
panel is illustrated, the left-hand is similar.
Cut the quarter panel inner reinforcement, horizontally,
approximately 90mm from the centre of the safety belt bolt
anchorage point as indicated.
NOTE: The right-hand panel is illustrated, the
left-hand is similar although there are additional spot welds
to drill out.
Drill out the spot welds from the quarter panel inner
reinforcement section at the points indicated.
Page 2986 of 3039
7. MAG Plug weld.
8. Dress MAG plug welds.
9. If the right-hand rear wheelhouse outer is being repaired, prepare the
panel joint surfaces of the ECM mounting bracket.
10. Offer up the ECM mounting bracket and clamp into position. Check
alignment, if correct, proceed to next step, if not rectify and recheck
before proceeding.
11.
12. MAG Plug weld the ECM mounting bracket.
NOTE: It may be necessary to remove or bend the
safety belt mounting part of the template to aid alignment.
Retain the template as this will be used to form a backing
plate.
Offer up, align and clamp the old quarter panel inner
reinforcement, "template", into position on the inside of the
new quarter panel inner reinforcement. Cut along the top
edge of the template, through the new quarter panel inner
reinforcement, at the point where the MAG butt joint is to
be made.