2010 JAGUAR XFR lock
[x] Cancel search: lockPage 67 of 3039

Do not empty fuel while working in a workshop or a pit
Ensure that working area is well ventilated
Ensure that any work on the fuel system is only carried out by experienced and well qualified maintenance personnel
Ensure that fume extraction equipment is used where appropriate
Fume extraction equipment must be in operation when solvents are used e.g. Trichloroethane, white spirit, sbp3,
methylene chloride, perchlorethylene. Do not smoke in the vicinity of volatile degreasing agents.
Whenever possible, use a ramp or pit whilst working beneath a vehicle, in preference to jacking. Position chocks at the wheels
as well as applying the parking brake. Never rely on a jack alone to support a vehicle. Use axle stands, or blocks carefully
placed at the jacking points, to provide a rigid location. Check that any lifting equipment used has adequate capacity and is
fully serviceable. Ensure that a suitable form of fire extinguisher is conveniently located. When using electrical tools and
equipment, inspect the power lead for damage and check that it is properly earthed. Disconnect the earth (grounded) terminal
of the vehicle battery. Do not disconnect any pipes of the air conditioning refrigeration system unless you are trained and
instructed to do so. A refrigerant is used which can cause blindness if allowed to come into contact with the eyes. Ensure that
adequate ventilation is provided when volatile degreasing agents are being used.
Adhere strictly to handling and safety instructions given on containers and labels. Keep oils and solvents away from naked
flames and other sources of ignition. Do not apply heat in an attempt to free seized nuts or fittings; as well as causing
damage to protective coatings, there is a risk of damage from stray heat to electronic equipment and brake lines. Do not leave
tools, equipment, spilt oil etc. around the work area. Wear protective overalls and use barrier cream when necessary.
Environmental Protection
In some countries it is illegal to pour used oil onto the ground, down sewers or drains, or into water courses. The burning of
used engine oil in small space heaters or boilers is not recommended unless emission control equipment is installed. Dispose
of used oil through authorized waste disposal contractors, to licensed waste disposal sites or to the waste oil reclamation
trade. If in doubt, contact the Local Authority for advice on disposal facilities.
Page 72 of 3039
General Information - Standard Workshop Practices
Description and Operation
Protecting the Vehicle Published: 04-Jul-2014
Always install covers to protect the fenders before commencing work in the engine compartment. Always install the interior
protection kit, wear clean overalls and wash hands or wear gloves before working inside the vehicle. Avoid spilling hydraulic
fluid, antifreeze or battery acid on the paintwork. In the event of spillage, wash off with water immediately. Use polythene
sheets in the luggage compartment to protect carpets. Always use the recommended service tool, or a satisfactory equivalent,
where specified. Protect temporarily exposed screw threads by replacing nuts or installing caps.
Vehicle in Workshop
When working on a vehicle in the workshop always make sure that:
The parking brake is applied or the wheels are securely chocked to prevent the vehicle moving forwards or backwards
If the engine is to be run, there is adequate ventilation, or an extraction hose to remove exhaust fumes is installed
There is adequate room to jack up the vehicle and remove the wheels, if necessary
Fender covers are always installed if any work is to be carried out in the engine compartment
The battery is disconnected if working on the engine, underneath the vehicle, or if the vehicle is jacked up
CAUTION: When electric arc welding on a vehicle, always disconnect the generator wiring to prevent the possibility of a
surge of current causing damage to the internal components of the generator.
If using welding equipment on the vehicle, ensure a suitable fire extinguisher is readily available.
Screw Threads
Damaged nuts, bolts and screws must always be discarded. Attempting to recut or repair damaged threads with a tap
or die impairs the strength and fit of the threads and is not recommended.
NOTES:
During certain repair operations, it may be necessary to remove traces of thread locking agents using a tap. Where this
is necessary, the instruction to do so will appear in the relevant operation and it is essential that a tap of the correct size and
thread is used.
New Taptite bolts when used cut their own threads on the first application.
Some bolts are coated with a thread locking agent and unless stated otherwise, they must not be reused. New bolts
having the same part number as the original must always be installed. When nuts or bolts are to be discarded, the
repair operation and relevant torque chart will include an instruction to that effect. Do not use proprietary thread
locking agents as they may not meet the specification required. See also Encapsulated ('Patched') Bolts and Screws.
Always make sure that replacement nuts and bolts are at least equal in strength to those that they are replacing.
Castellated nuts must not be loosened to accept a split pin except in recommended cases when this forms part of an
adjustment.
Do not allow oil or grease to enter blind holes, the hydraulic action resulting from tightening the bolt or stud can split
the housing and also give a false torque reading.
Always tighten a nut, bolt or screw to the specified torque figure, damaged or corroded threads can give a false torque
reading.
Nut and bolt loosening and tightening sequences, where given, must ALWAYS be followed. Distortion of components or
faulty sealing of joints will result if the sequences are not followed. Where an instruction is given to tighten in stages,
these stages must be adhered to; do not attempt to combine stages particularly where certain stages involve
tightening by degrees.
To check or re-tighten a fixing to a specified torque, first loosen a quarter of a turn, then retighten to the specified
torque figure.
Unless instructed otherwise, do not lubricate bolt or nut threads prior to installing.
Where it is stated that bolts and screws may be reused, the following procedures must be carried out:
Check that threads are undamaged.
Remove all traces of locking agent from the threads.
CAUTION: DO NOT use a wire brush; take care that threads are not damaged.
Make sure that threads are clean and free from oil or grease.
Apply the specified locking agent to the bolt threads.
Page 75 of 3039
WARNINGS:
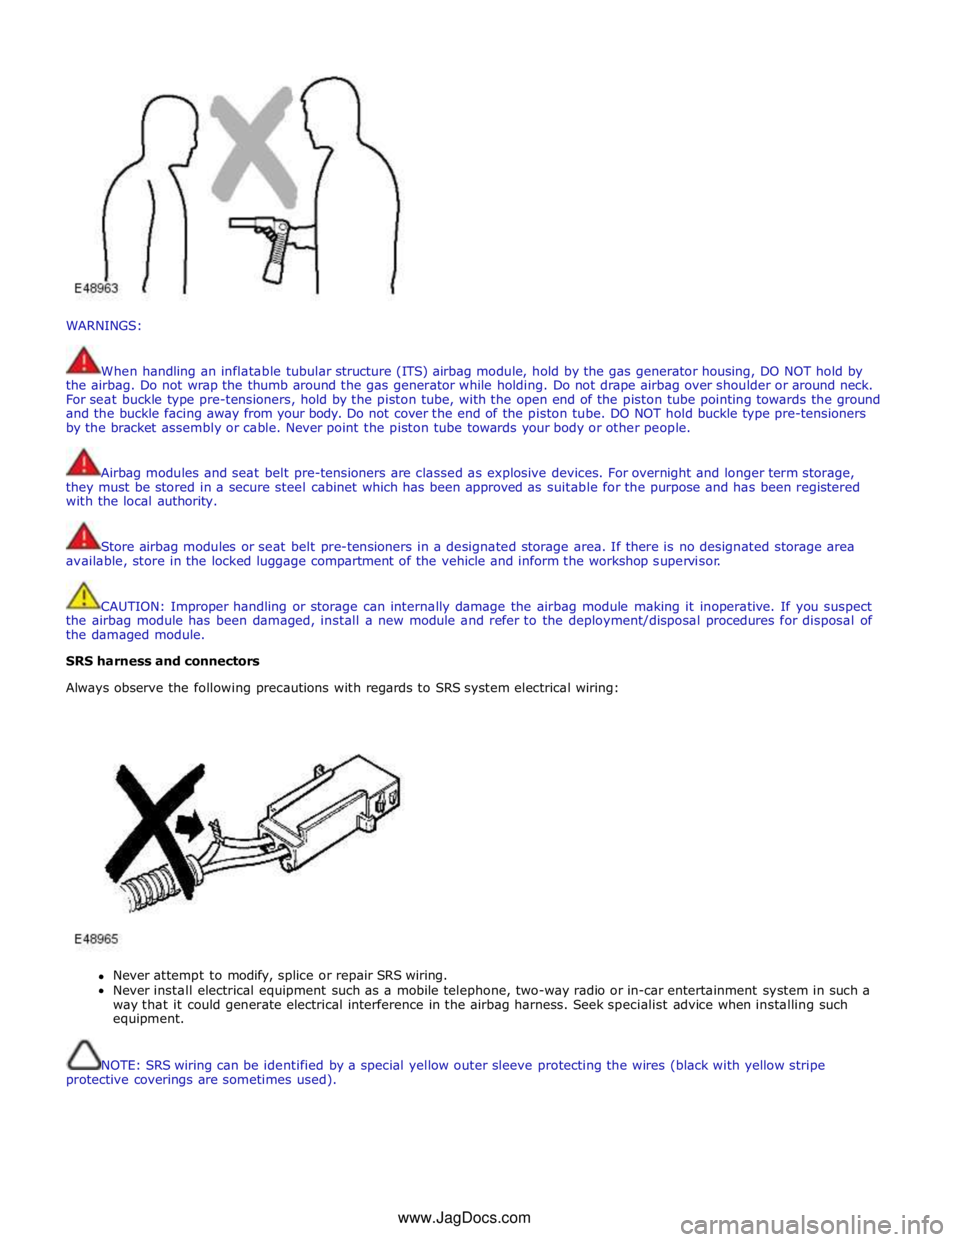
When handling an inflatable tubular structure (ITS) airbag module, hold by the gas generator housing, DO NOT hold by
the airbag. Do not wrap the thumb around the gas generator while holding. Do not drape airbag over shoulder or around neck.
For seat buckle type pre-tensioners, hold by the piston tube, with the open end of the piston tube pointing towards the ground
and the buckle facing away from your body. Do not cover the end of the piston tube. DO NOT hold buckle type pre-tensioners
by the bracket assembly or cable. Never point the piston tube towards your body or other people.
Airbag modules and seat belt pre-tensioners are classed as explosive devices. For overnight and longer term storage,
they must be stored in a secure steel cabinet which has been approved as suitable for the purpose and has been registered
with the local authority.
Store airbag modules or seat belt pre-tensioners in a designated storage area. If there is no designated storage area
available, store in the locked luggage compartment of the vehicle and inform the workshop supervisor.
CAUTION: Improper handling or storage can internally damage the airbag module making it inoperative. If you suspect
the airbag module has been damaged, install a new module and refer to the deployment/disposal procedures for disposal of
the damaged module.
SRS harness and connectors
Always observe the following precautions with regards to SRS system electrical wiring:
Never attempt to modify, splice or repair SRS wiring.
Never install electrical equipment such as a mobile telephone, two-way radio or in-car entertainment system in such a
way that it could generate electrical interference in the airbag harness. Seek specialist advice when installing such
equipment.
NOTE: SRS wiring can be identified by a special yellow outer sleeve protecting the wires (black with yellow stripe
protective coverings are sometimes used). www.JagDocs.com
Page 76 of 3039
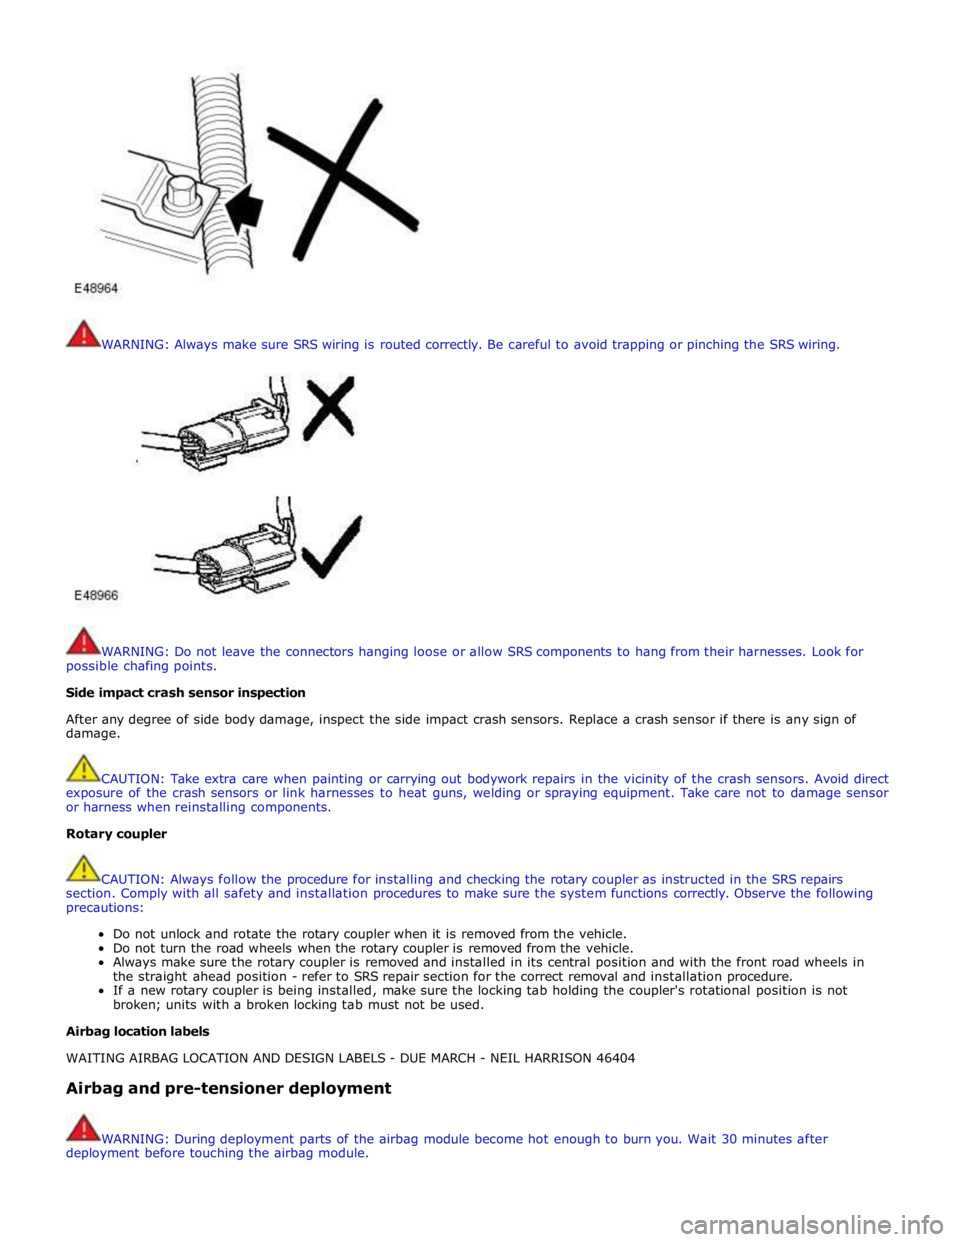
WARNING: Always make sure SRS wiring is routed correctly. Be careful to avoid trapping or pinching the SRS wiring.
WARNING: Do not leave the connectors hanging loose or allow SRS components to hang from their harnesses. Look for
possible chafing points.
Side impact crash sensor inspection
After any degree of side body damage, inspect the side impact crash sensors. Replace a crash sensor if there is any sign of
damage.
CAUTION: Take extra care when painting or carrying out bodywork repairs in the vicinity of the crash sensors. Avoid direct
exposure of the crash sensors or link harnesses to heat guns, welding or spraying equipment. Take care not to damage sensor
or harness when reinstalling components.
Rotary coupler
CAUTION: Always follow the procedure for installing and checking the rotary coupler as instructed in the SRS repairs
section. Comply with all safety and installation procedures to make sure the system functions correctly. Observe the following
precautions:
Do not unlock and rotate the rotary coupler when it is removed from the vehicle.
Do not turn the road wheels when the rotary coupler is removed from the vehicle.
Always make sure the rotary coupler is removed and installed in its central position and with the front road wheels in
the straight ahead position - refer to SRS repair section for the correct removal and installation procedure.
If a new rotary coupler is being installed, make sure the locking tab holding the coupler's rotational position is not
broken; units with a broken locking tab must not be used.
Airbag location labels
WAITING AIRBAG LOCATION AND DESIGN LABELS - DUE MARCH - NEIL HARRISON 46404
Airbag and pre-tensioner deployment
WARNING: During deployment parts of the airbag module become hot enough to burn you. Wait 30 minutes after
deployment before touching the airbag module.
Page 79 of 3039
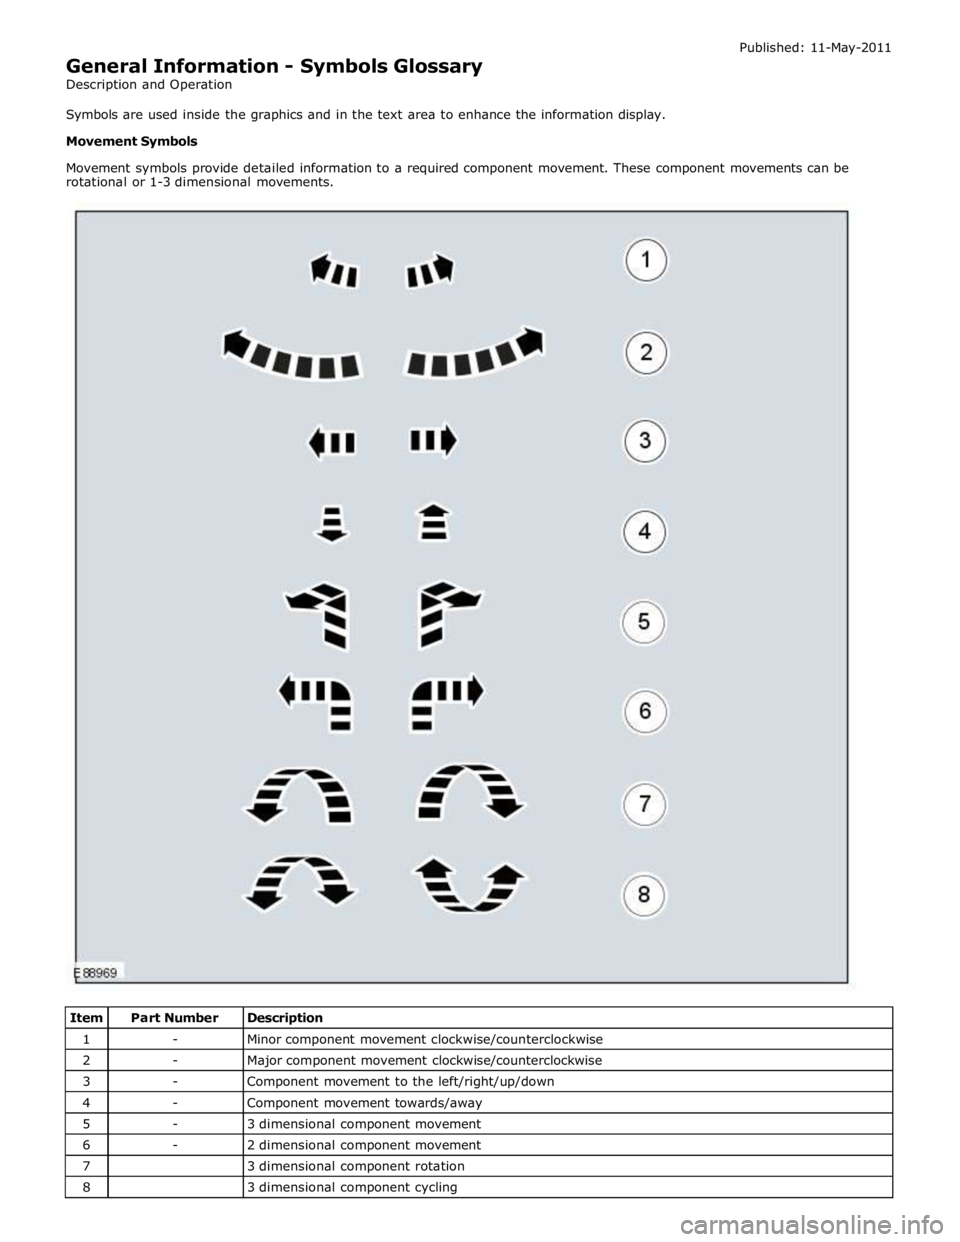
1 - Minor component movement clockwise/counterclockwise 2 - Major component movement clockwise/counterclockwise 3 - Component movement to the left/right/up/down 4 - Component movement towards/away 5 - 3 dimensional component movement 6 - 2 dimensional component movement 7
3 dimensional component rotation 8
3 dimensional component cycling
Page 80 of 3039
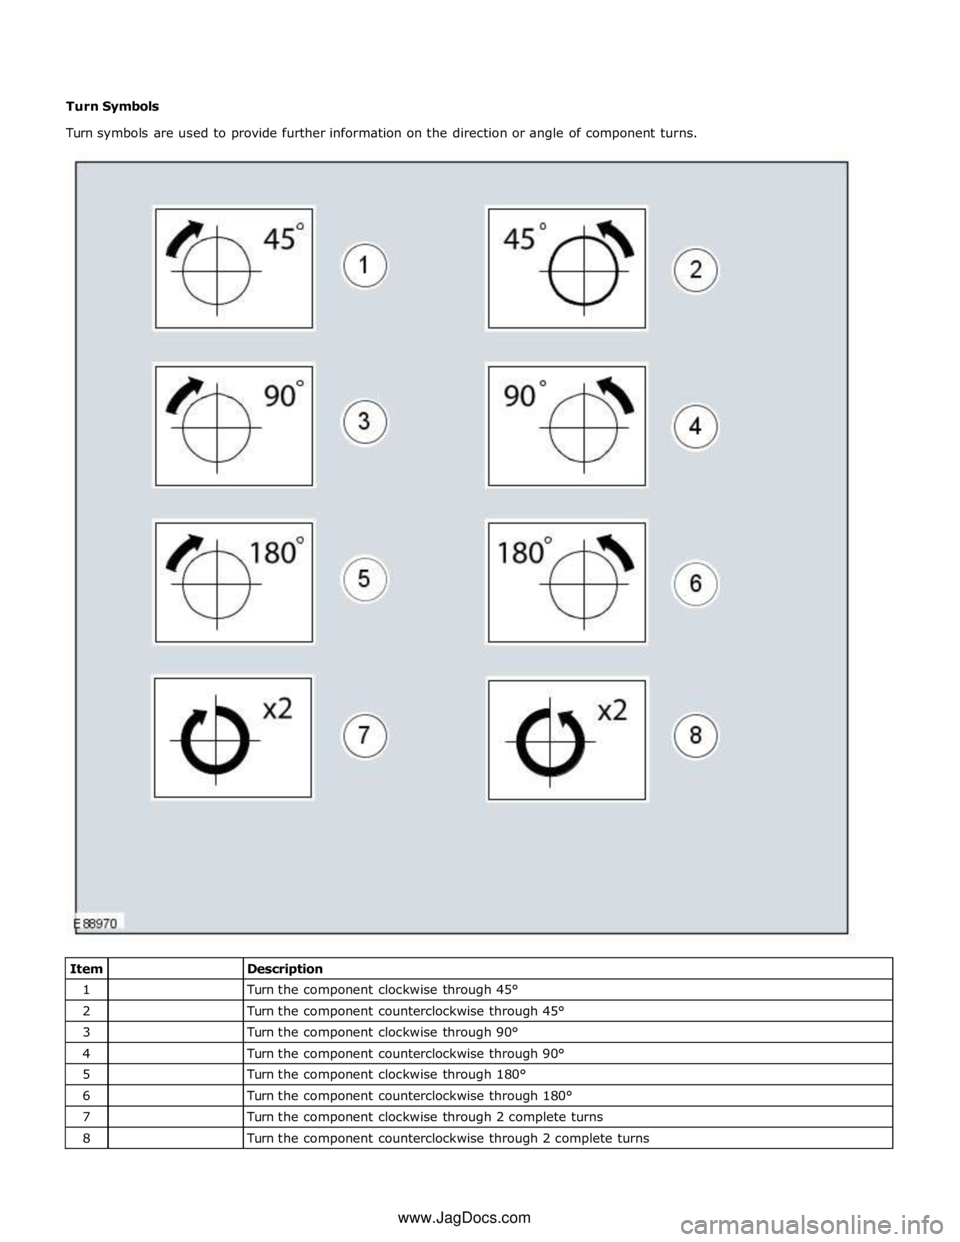
1
Turn the component clockwise through 45° 2
Turn the component counterclockwise through 45° 3
Turn the component clockwise through 90° 4
Turn the component counterclockwise through 90° 5
Turn the component clockwise through 180° 6
Turn the component counterclockwise through 180° 7
Turn the component clockwise through 2 complete turns 8
Turn the component counterclockwise through 2 complete turns www.JagDocs.com
Page 81 of 3039

1
Steering wheel in straight ahead position 2
Steering column lock locked 3
Steering column lock unlocked
Page 87 of 3039

4
Securing ring pliers - outer 5
Hose clamp pliers 6
Locking pliers 7
Long nose pliers Drill symbols
The drill symbols are used to show which type and size of drill bit is recommended to carry out a procedure step.
Item
Description 1
Drill bit with a specified diameter 2
Hole saw with a specified diameter 3
Stepped drill bit with a specified diameter 4
Tap with a specified diameter 5
Die with a specified diameter 6
Scraper for circular holes 7
Scraper for straight edges