Page 161 of 207
6
DO-IT-YOURSELF MAINTENANCE
3ENGINE COMPARTMENT
1. Power Steering Fluid Reservoir (If Installed)
2. Engine Oil Filler Cap 3. Engine Oil Level Dipstick
4. Fuel Filter
G010B01HR-GAT Diesel Engine (2.6 N/A)
G010B01HR
5. Fuse and Relay Box
6. Radiator CapCAUTION:
To inspect or service the en-gine, first move the front seat.(Refer to " To Access the En- gine" on page 1-12).
!
Page 162 of 207
6 DO-IT-YOURSELF MAINTENANCE
4
G010C01HR-GAT Diesel Engine (2.5 TCI)
HHR5001
1. Power Steering Fluid Reservoir (If Installed)
2. Engine Oil Filler Cap 3. Engine Oil Level Dipstick
4. Fuel Filter CAUTION:
o To inspect or service the engine, first move the front seat. (Refer to " To Access the Engine" on page 1-12).
o When inspecting or servic- ing the engine, you shouldhandle tools and other heavy objects carefully so that the plastic cover of theengine is not damaged.
!
5. Fuse and Relay Box
6. Radiator Cap
Page 185 of 207

6
DO-IT-YOURSELF MAINTENANCE
27
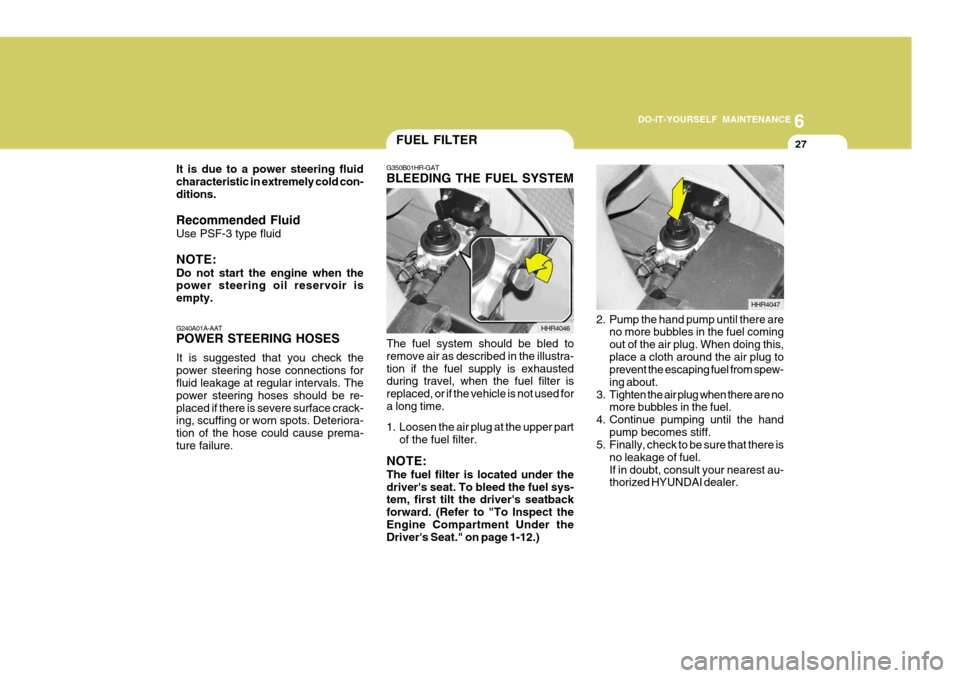
G350B01HR-GAT BLEEDING THE FUEL SYSTEM
The fuel system should be bled to remove air as described in the illustra-tion if the fuel supply is exhausted during travel, when the fuel filter is replaced, or if the vehicle is not used fora long time.
1. Loosen the air plug at the upper part of the fuel filter.
NOTE: The fuel filter is located under the driver's seat. To bleed the fuel sys- tem, first tilt the driver's seatback forward. (Refer to "To Inspect theEngine Compartment Under the Driver's Seat." on page 1-12.) HHR4046
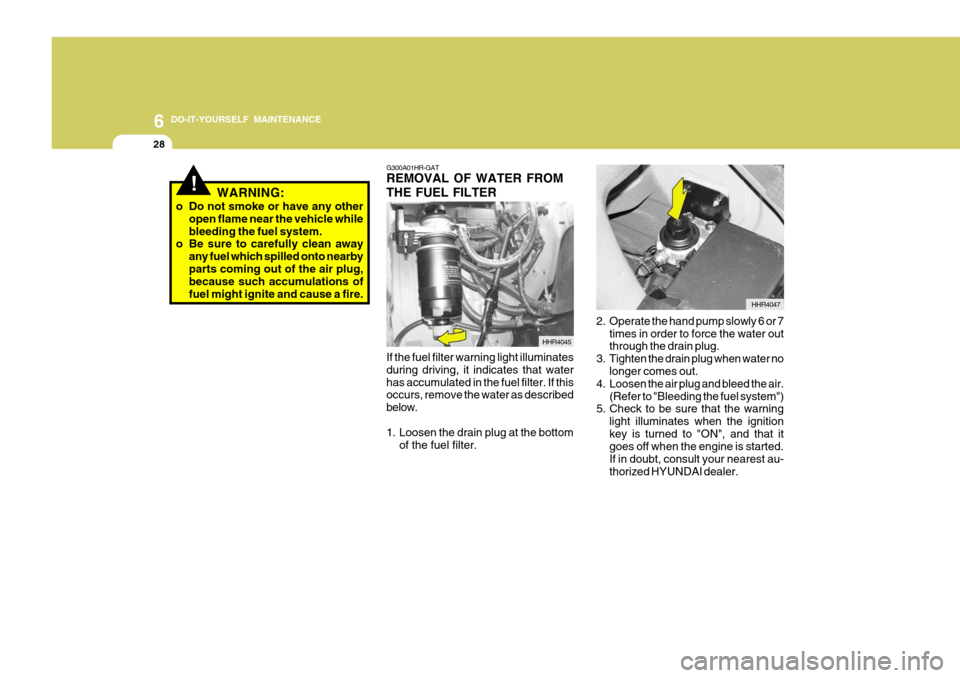
2. Pump the hand pump until there are
no more bubbles in the fuel coming out of the air plug. When doing this,place a cloth around the air plug to prevent the escaping fuel from spew- ing about.
3. Tighten the air plug when there are no more bubbles in the fuel.
4. Continue pumping until the hand
pump becomes stiff.
5. Finally, check to be sure that there is
no leakage of fuel.If in doubt, consult your nearest au- thorized HYUNDAI dealer. HHR4047
FUEL FILTER
G240A01A-AAT POWER STEERING HOSES It is suggested that you check the power steering hose connections for fluid leakage at regular intervals. The power steering hoses should be re-placed if there is severe surface crack- ing, scuffing or worn spots. Deteriora- tion of the hose could cause prema-ture failure.
It is due to a power steering fluidcharacteristic in extremely cold con-ditions. Recommended Fluid Use PSF-3 type fluid NOTE: Do not start the engine when the power steering oil reservoir is empty.
Page 186 of 207

6 DO-IT-YOURSELF MAINTENANCE
28
!WARNING:
o Do not smoke or have any other open flame near the vehicle while bleeding the fuel system.
o Be sure to carefully clean away
any fuel which spilled onto nearbyparts coming out of the air plug, because such accumulations of fuel might ignite and cause a fire. G300A01HR-GAT REMOVAL OF WATER FROM THE FUEL FILTER
HHR4045
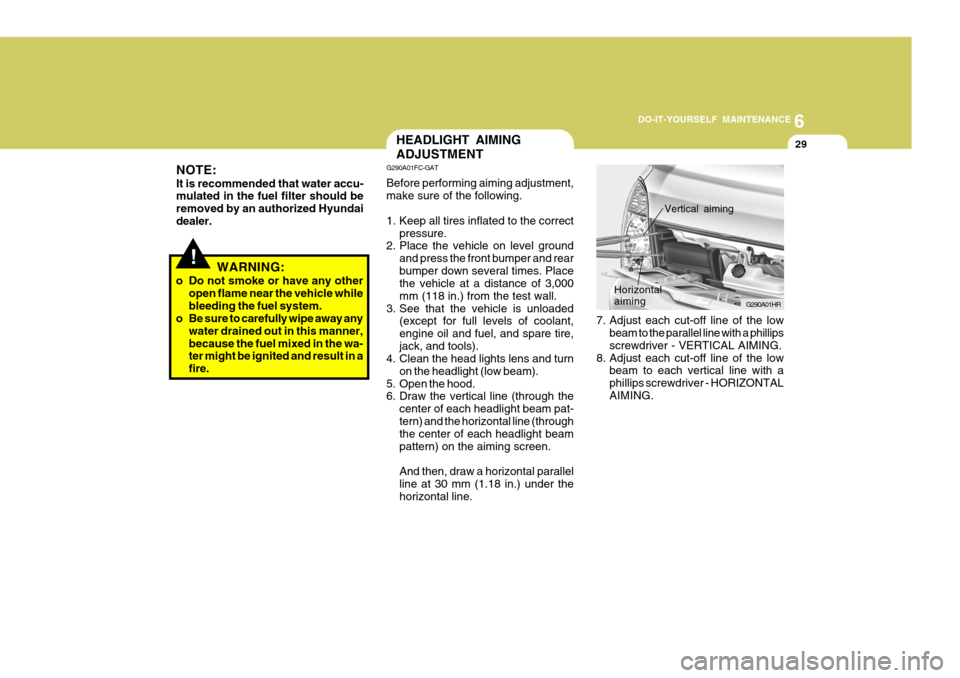
If the fuel filter warning light illuminates during driving, it indicates that waterhas accumulated in the fuel filter. If this occurs, remove the water as described below.
1. Loosen the drain plug at the bottom of the fuel filter. HHR4047
2. Operate the hand pump slowly 6 or 7 times in order to force the water out through the drain plug.
3. Tighten the drain plug when water no longer comes out.
4. Loosen the air plug and bleed the air. (Refer to "Bleeding the fuel system")
5. Check to be sure that the warning
light illuminates when the ignition key is turned to "ON", and that it goes off when the engine is started. If in doubt, consult your nearest au-thorized HYUNDAI dealer.
Page 187 of 207

6
DO-IT-YOURSELF MAINTENANCE
29
!WARNING:
o Do not smoke or have any other open flame near the vehicle while bleeding the fuel system.
o Be sure to carefully wipe away any
water drained out in this manner,because the fuel mixed in the wa- ter might be ignited and result in a fire.
HEADLIGHT AIMING ADJUSTMENT
7. Adjust each cut-off line of the lowbeam to the parallel line with a phillips screwdriver - VERTICAL AIMING.
8. Adjust each cut-off line of the low beam to each vertical line with a phillips screwdriver - HORIZONTALAIMING. G290A01HR
Horizontal aiming
Vertical aiming
G290A01FC-GAT Before performing aiming adjustment, make sure of the following.
1. Keep all tires inflated to the correct
pressure.
2. Place the vehicle on level ground
and press the front bumper and rear bumper down several times. Place the vehicle at a distance of 3,000 mm (118 in.) from the test wall.
3. See that the vehicle is unloaded (except for full levels of coolant,engine oil and fuel, and spare tire,jack, and tools).
4. Clean the head lights lens and turn
on the headlight (low beam).
5. Open the hood.
6. Draw the vertical line (through the
center of each headlight beam pat- tern) and the horizontal line (through the center of each headlight beam pattern) on the aiming screen. And then, draw a horizontal parallel line at 30 mm (1.18 in.) under thehorizontal line.
NOTE: It is recommended that water accu- mulated in the fuel filter should be removed by an authorized Hyundaidealer.