Page 32 of 284

1FEATURES OF YOUR HYUNDAI
20
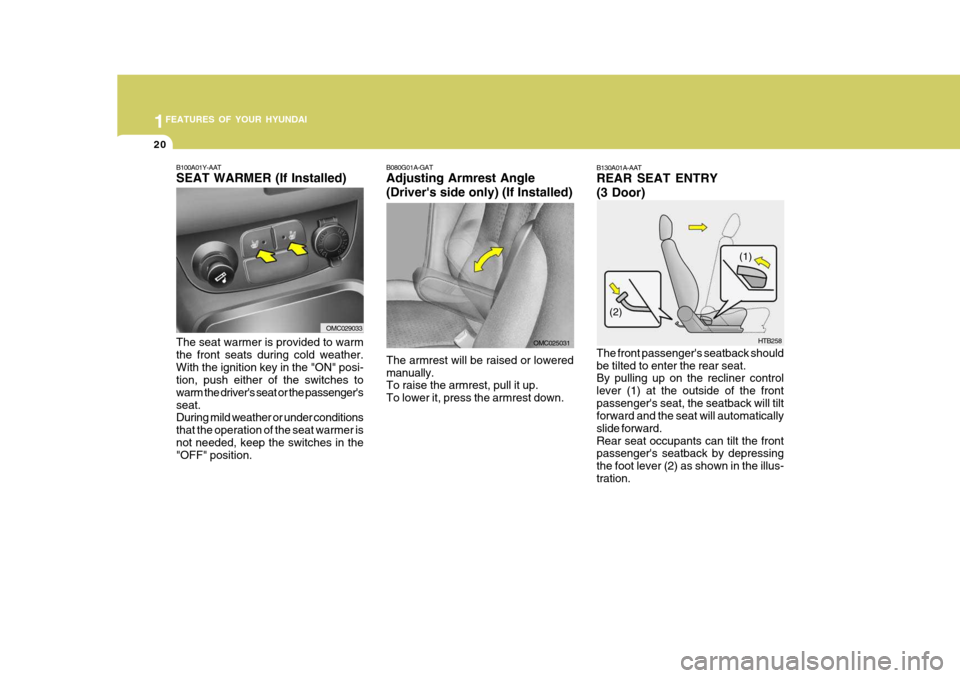
B130A01A-AAT REAR SEAT ENTRY (3 Door) The front passenger's seatback should be tilted to enter the rear seat. By pulling up on the recliner control lever (1) at the outside of the frontpassenger's seat, the seatback will tilt forward and the seat will automatically slide forward.Rear seat occupants can tilt the front passenger's seatback by depressing the foot lever (2) as shown in the illus-tration. HTB258
(1)
(2)B100A01Y-AAT SEAT WARMER (If Installed) The seat warmer is provided to warm the front seats during cold weather.With the ignition key in the "ON" posi- tion, push either of the switches to warm the driver's seat or the passenger'sseat. During mild weather or under conditions that the operation of the seat warmer isnot needed, keep the switches in the "OFF" position.
OMC029033
B080G01A-GAT Adjusting Armrest Angle (Driver's side only) (If Installed)
OMC025031
The armrest will be raised or lowered manually. To raise the armrest, pull it up. To lower it, press the armrest down.
Page 33 of 284

1
FEATURES OF YOUR HYUNDAI
21
!WARNING:
Passengers sitting in the rear seat should be careful not to accidentallypress the foot lever (2) while the vehicle is moving, as this may cause the seatback to move forward andinjure a front seat occupant.
B085A01MC-GAT REAR SEAT Adjusting seatback angle (3 Door)
To recline the seatback, pull up the seatback folding lever (1) and push the seatback rearward. To return the seatback to an upright position, pull upthe seatback folding lever (1) and pull the seatback forward until the seatback locks into upright position.After adjusting the seatback angle, al- ways check that it is securely locked into place. B085A01MC
(1)
!WARNING:
Do not adjust the seatback angle while the vehicle is in motion.
C010303BUN Headrest
OBH038076L
The rear seat(s) is equipped with head- rests in all the seating positions for the occupant's safety and comfort.The headrest not only provides comfort for passengers, but also helps to pro- tect the head and neck in the event ofa collision.
Page 36 of 284
1FEATURES OF YOUR HYUNDAI
24
3. Pull up the seatback folding lever torelease the seatback. CAUTION:
!
o Move the rear lap/shoulder belt to the outside so that they don't inter- fere with the seatback when fold- ing.
B090A02MC
OMC029041
4 Door
3 Door
OMC025039
OMC029039
4 Door
3 Door
o Move the rear lap/shoulder belt tothe side so that it is clear of the seatback when returning to its up- right position.
o Place the rear seat belt to the proper position.
OMC025040
OMC029040
4 Door
3 Door
Page 39 of 284

1
FEATURES OF YOUR HYUNDAI
27
B160C01A-AAT Keep Belts Clean and Dry Seat belts should be kept clean and dry. If belts become dirty, they can be cleaned by using a mild soap solution and warm water. Bleach, dye, strong detergents or abrasives should not beused because they may damage and weaken the fabric. B160D01A-AAT When to Replace Seat Belts Entire in-use seat belt assembly or assemblies should be replaced if the vehicle has been involved in an acci- dent. This should be done even if nodamage is visible. Additional questions concerning seat belt operation should be directed to your Hyundai Dealer.
!
B150G01A-AAT Do Not Lie Down To reduce the chance of injuries in the event of an accident and to achievemaximum effectiveness of the restraint system, all passengers should be sit- ting up and the front seats should be inan upright position when the car is moving. A seat belt cannot operate properly if the person is lying down inthe rear seat or if the front seat is in a reclined position. WARNING:
Sitting in a reclined position or lyingdown when your vehicle is in motion can be dangerous. Even if you buckleup, your seat belts can't do their job when you're reclined. The shoulder belt can't do its jobbecause it won't be against your body. Instead, it will be in front of you. In a crash you could go into itwith great force, receiving serious neck or other injuries. The lap belt can't do its job either. In a crash thebelt could go up over your abdomen. The belt forces would be applied there, not at your strong pelvic bones.
!
This could cause serious internal injuries. For proper protection when the ve- hicle is in motion, have the seatbackupright. Then sit back in the seat and wear your seat belt properly. See page 1-30.
B160A01A-AAT CARE OF SEAT BELTS Seat belt systems should never be disassembled or modified. In addition, care should be taken to assure thatseat belts and belt hardware are not damaged by seat hinges, doors or other abuse.
WARNING:
When you return the rear seatback toits upright position after the rearseatback was folded down, be care- ful not to damage the seat belt web- bing or buckle. Be sure that the web-bing or buckle does not get caught or pinched in the rear seat. B160B01A-AAT Periodic Inspection It is recommended that all seat belts be inspected periodically for wear or dam-age of any kind. Parts of the system that are damaged should be replaced as soon as possible.
Page 42 of 284

1FEATURES OF YOUR HYUNDAI
30
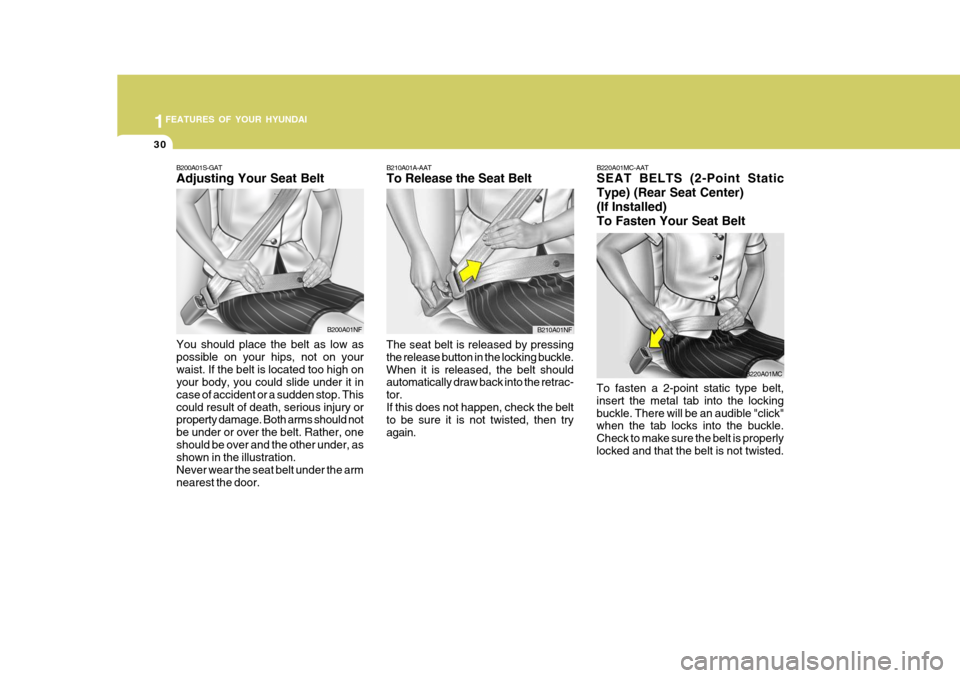
B200A01S-GAT Adjusting Your Seat Belt You should place the belt as low as possible on your hips, not on yourwaist. If the belt is located too high on your body, you could slide under it in case of accident or a sudden stop. Thiscould result of death, serious injury or property damage. Both arms should not be under or over the belt. Rather, oneshould be over and the other under, as shown in the illustration. Never wear the seat belt under the armnearest the door.
B200A01NF B210A01A-AAT To Release the Seat Belt
The seat belt is released by pressing the release button in the locking buckle.When it is released, the belt should automatically draw back into the retrac- tor.If this does not happen, check the belt to be sure it is not twisted, then try again.B210A01NF B220A01MC-AAT SEAT BELTS (2-Point Static Type) (Rear Seat Center)(If Installed)To Fasten Your Seat Belt
To fasten a 2-point static type belt, insert the metal tab into the lockingbuckle. There will be an audible "click" when the tab locks into the buckle. Check to make sure the belt is properlylocked and that the belt is not twisted.
B220A01MC
Page 50 of 284

1FEATURES OF YOUR HYUNDAI
38
B230B01NF
Child Restraint Hook Holder Spacer
B230B02A-GAT Using a Child Restraint System with "Tether Anchorage" Sys-tem For small children and babies, the use of a child seat or infant seat is required. This child seat or infant seat should be of appropriate size for the child andshould be installed in accordance with the manufacturer's instructions. It is further required that the seat be placedin the vehicle's rear seat since this can make an important contribution to safety. Your vehicle is provided withthree child restraint hook holders for installing the child seat or infant seat. Holder Bolt (5/16"-22 mm) Conical Spring Washer Child Restraint Hook Holder Retainer Washer
!WARNING:
We recommends that a child restraint seat be installed in the rear seat, even if the passenger's front airbagswitch is set to "OFF". To ensure the safety of your child, the passenger's front airbag must bedeactivated when it should be neces- sary to install a child restraint seat on the front passenger seat in excep-tional circumstances. B230C03A-GAT Securing a Child Restraint Sys- tem with "Tether Anchorage"System (4 Door) Three child restraint hook holders are located on the rear seat package tray.
1. Open the tether anchor cover on the
rear seat package tray.
B230C01MC
Page 51 of 284
1
FEATURES OF YOUR HYUNDAI
39
B230C02MC
2. Route the child restraint seat strap over the seatback. For vehicles with adjustable head- rests, route the tether strap under theheadrest and between the headrest posts, otherwise route the tether strap over the top of the seatback.
3. Connect the tether strap hook (2) to the child restraint hook holder (1) and tighten to secure the seat.
B230E01MC-GAT Securing a Child Restraint Sys- tem with "Tether Anchorage" System (3 Door) Three child restraint hook holders are located on the rear floor panel.
2. Route the child restraint seat strap
over the seatback. For vehicles with adjustable head- rests, route the tether strap under theheadrest and between the headrest posts, otherwise route the tether strap over the top of the seatback.
3. Connect the tether strap hook (2) to the child restraint hook holder (1) andtighten to secure the seat. B230C02MC
1. Open the tether anchor cover on therear floor panel.
B230E01MC
Page 52 of 284

1FEATURES OF YOUR HYUNDAI
40
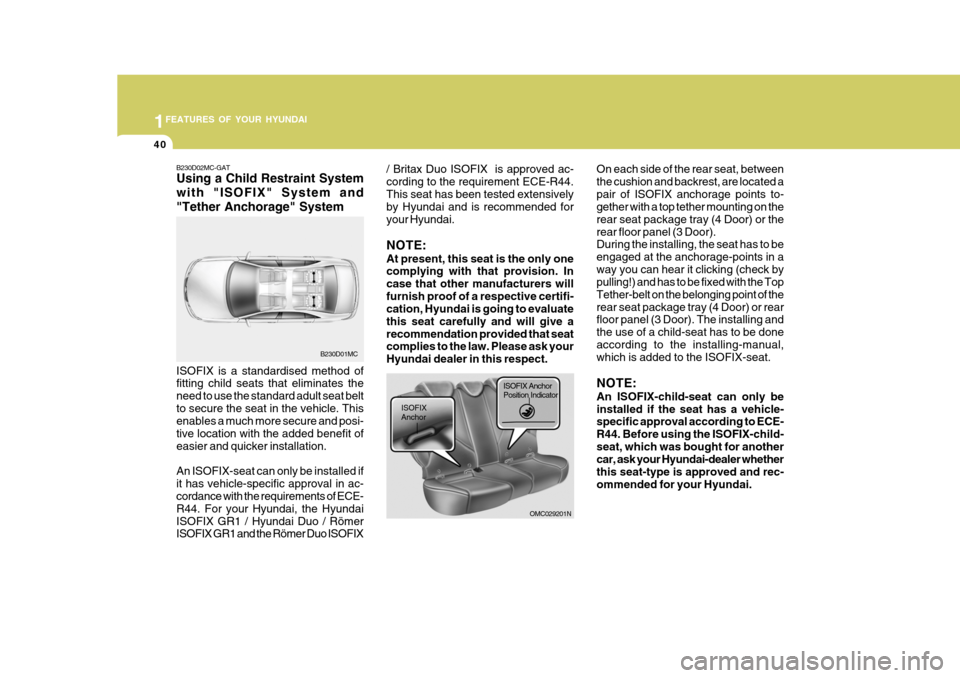
B230D02MC-GAT Using a Child Restraint System with "ISOFIX" System and"Tether Anchorage" System ISOFIX is a standardised method of fitting child seats that eliminates the need to use the standard adult seat beltto secure the seat in the vehicle. This enables a much more secure and posi- tive location with the added benefit ofeasier and quicker installation. An ISOFIX-seat can only be installed if it has vehicle-specific approval in ac- cordance with the requirements of ECE- R44. For your Hyundai, the HyundaiISOFIX GR1 / Hyundai Duo / Römer ISOFIX GR1 and the Römer Duo ISOFIX
B230D01MC / Britax Duo ISOFIX is approved ac- cording to the requirement ECE-R44.This seat has been tested extensively by Hyundai and is recommended for your Hyundai. NOTE: At present, this seat is the only one complying with that provision. In case that other manufacturers willfurnish proof of a respective certifi- cation, Hyundai is going to evaluate this seat carefully and will give arecommendation provided that seat complies to the law. Please ask your Hyundai dealer in this respect.
OMC029201N
ISOFIX Anchor
ISOFIX Anchor Position Indicator On each side of the rear seat, between the cushion and backrest, are located apair of ISOFIX anchorage points to- gether with a top tether mounting on the rear seat package tray (4 Door) or therear floor panel (3 Door). During the installing, the seat has to be engaged at the anchorage-points in away you can hear it clicking (check by pulling!) and has to be fixed with the Top Tether-belt on the belonging point of therear seat package tray (4 Door) or rear floor panel (3 Door). The installing and the use of a child-seat has to be doneaccording to the installing-manual, which is added to the ISOFIX-seat. NOTE: An ISOFIX-child-seat can only be installed if the seat has a vehicle- specific approval according to ECE- R44. Before using the ISOFIX-child-seat, which was bought for another car, ask your Hyundai-dealer whether this seat-type is approved and rec-ommended for your Hyundai.