Page 159 of 526

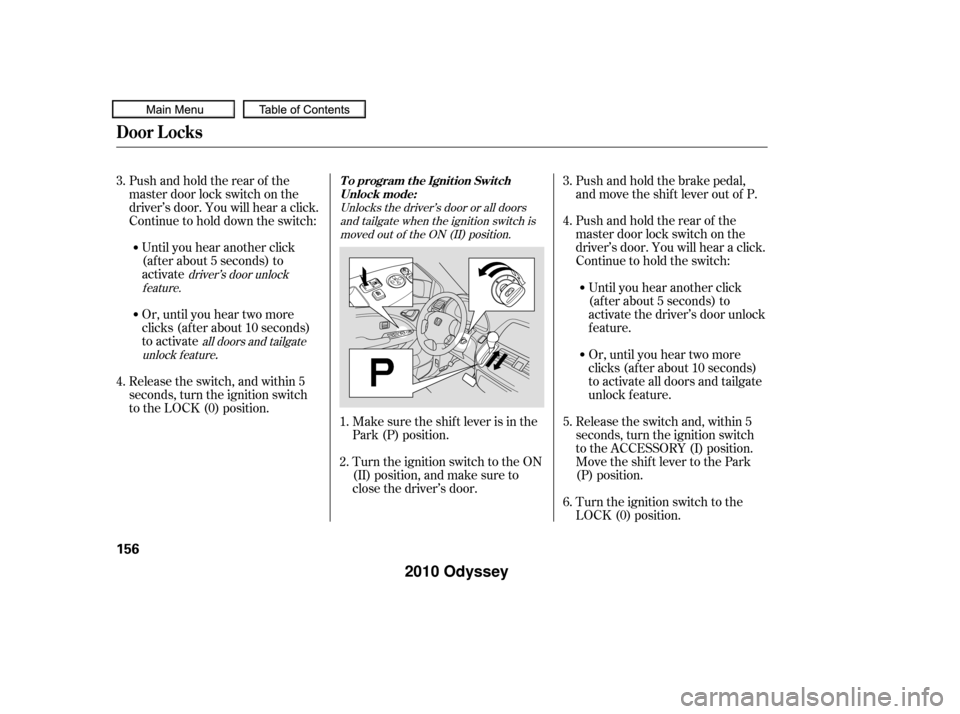
Unlocks the driver’s door or all doorsand tailgate when the ignition switch ismoved out of the ON (II) position.
all doors and tailgate
unlock f eature driver’s door unlock
feature.
Make sure the shif t lever is in the
Park (P) position. Pushandholdtherearof the
master door lock switch on the
driver’s door. You will hear a click.
Continue to hold the switch:
Release the switch and, within 5
seconds, turn the ignition switch
to the ACCESSORY (I) position.
Move the shift lever to the Park
(P) position.
Turn the ignition switch to the
LOCK (0) position.
Turn the ignition switch to the ON
(II) position, and make sure to
close the driver’s door. Push and hold the brake pedal,
and move the shif t lever out of P.
Release the switch, and within 5
seconds, turn the ignition switch
to the LOCK (0) position. Pushandholdtherearof the
master door lock switch on the
driver’s door. You will hear a click.
Continue to hold down the switch: Or, until you hear two more
clicks (af ter about 10 seconds)
to activate
.
Until you hear another click
(af ter about 5 seconds) to
activate the driver’s door unlock
feature.
Or, until you hear two more
clicks (af ter about 10 seconds)
to activate all doors and tailgate
unlock f eature.
Until you hear another click
(af ter about 5 seconds) to
activate
4.
5.
1.
2. 3.
6.
3.
4.
T o program t he Ignit ion Swit ch
Unlock mode:
Door L ocks
156
�����—�����—�
���y�
���������
���y���
�(�����������y���
���
�y
2010 Odyssey
Page 161 of 526

The tailgate can also be closed by
pressing the button on the tailgate. If
you press the button again while the
tailgate is closing, you will hear three
beeps, and the tailgate will stop
moving, reverse direction, and stop
at the f ully opened position.
Press and hold the tailgate button on
the remote transmitter or the
dashboard switch f or about 1 second
to open or close the tailgate. Each
time you press the button on the
remote transmitter or the dashboard
switch, you will hear a beep, and
some f ront and rear lights will f lash.
To open or close the tailgate
manually, see page .
If you push the same button or
switch again while the tailgate is
opening or closing, you will hear
three beeps, and the tailgate will stop
moving, reverse direction, and stop
at the f ully opened or closed position.
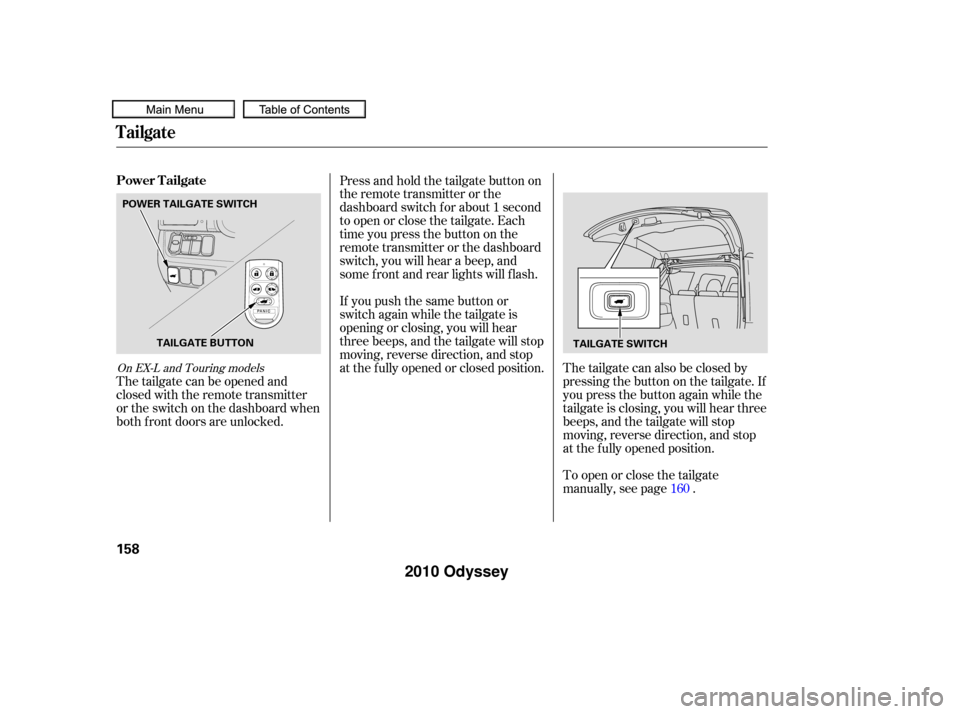
The tailgate can be opened and
closed with the remote transmitter
or the switch on the dashboard when
both f ront doors are unlocked.
160On EX-L and Touring models
Power Tailgate
Tailgate
158
TAILGATE SWITCH
POWER TAILGATE SWITCH
TAILGATE BUTTON
�����—�����—�
���y�
�������������y���
�(�����������y���
�����y
2010 Odyssey
Page 169 of 526

If the power sliding door indicator
comesonandstayson,thereisa
problem in the system. Turn the
MAIN switch to OFF, and have the
system inspected by a dealer.
Each sliding door has a pinch sensor
on the f ront edge. Do not damage
this sensor, or the power sliding door
may not operate properly. If there is a problem in the power
sliding door system, you will see a
‘‘CHECK LEFT SLIDING DOOR’’ or
‘‘CHECK RIGHT SLIDING DOOR’’
message on the multi-information
display (see page ). If this
message stays on, turn the MAIN
switch to OFF, and have the system
inspected by your dealer.
If the battery is disconnected or goes
dead, close the sliding door
completely by hand. If it still does
not operate properly af ter the
battery is reconnected, have your
vehicle checked by a dealer.
89
On EX and EX-L models On Touring models
On EX, EX-L and Touring models
Pinch Sensor Power Sliding Door Indicator
Sliding Doors
166
PINCH SENSOR
POWER SLIDING DOOR INDICATOR
U.S. model is shown
�����—�����—�
���y�
������
������y���
�(�����������y���
���
�y
2010 Odyssey
Page 170 of 526
There are bucket seats with
armrests for two front passengers,
bucket seats with armrests for two
passengers in the second row, and a
bench seat f or three passengers in
the third row.
For greater cargo capacity, the seats
in the second row can be removed,
andthebenchseatinthethirdrow
can be f olded into the f loor.
Your vehicle has a second row plus-
one seat that can be installed
between the second row bucket
seats when needed. The plus-one
seat can also be used as a second
row center console.
Except U.S. LX and Canadian DXmodels
Passenger Seating
Convert ible Second Row BucketSeat s
Seats
Inst rument s and Cont rols
167
�����—�����—�
���y�
������
����
�y���
�(�����������y���
�����y
2010 Odyssey
Page 171 of 526

�µ
See pages f or important saf ety
inf ormation and warnings about how toproperly position the seats and seat-backs. 1312
The third row seats do not adjust
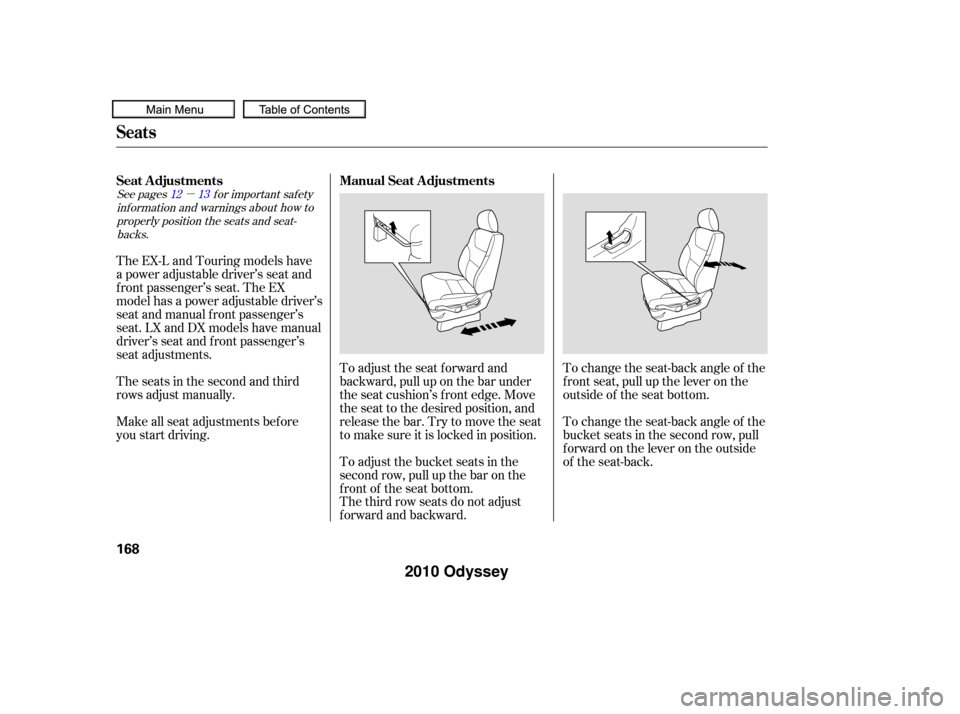
f orward and backward. To adjust the seat forward and
backward, pull up on the bar under
the seat cushion’s f ront edge. Move
the seat to the desired position, and
releasethebar.Trytomovetheseat
to make sure it is locked in position.
To adjust the bucket seats in the
second row, pull up the bar on the
front of the seat bottom. To change the seat-back angle of the
f ront seat, pull up the lever on the
outside of the seat bottom.
To change the seat-back angle of the
bucket seats in the second row, pull
forwardontheleverontheoutside
of the seat-back.
The EX-L and Touring models have
a power adjustable driver’s seat and
f ront passenger’s seat. The EX
model has a power adjustable driver’s
seat and manual f ront passenger’s
seat. LX and DX models have manual
driver’s seat and f ront passenger’s
seat adjustments.
The seats in the second and third
rows adjust manually.
Make all seat adjustments bef ore
you start driving. Seat Adjustments
Manual Seat Adjustments
Seats
168
�����—�����—�
���y�
������
������y���
�(�����������y���
�����y
2010 Odyssey
Page 174 of 526
They are most ef f ective when you
adjust them so the center of the back
of the occupant’s head rests against
the center of the restraint.
An armrest is located on each of the
frontseatsandoneachsideof the
second row seats (depending on
models).Pivotitdowntouseit.
When you remove the bucket seats
in the second row, pivot the armrests
up out of the way.
Theangleof thearmrestoneach
f ront seat is adjustable. Pivot the
armrest down, and pull it up to the desired angle.
Your vehicle is equipped with head
restraints in all seating positions to
help protect you and your
passengers f rom whiplash and other
injuries.
CONT INUED
See page f or important saf ety
inf ormation and a warning aboutimproperly positioning head restraints.
On EX-L and Touring models 14
Armrests
Head Restraints
Seats
Inst rument s and Cont rols
171
�����—�����—�
���y�
���������
���y���
�(�����������y���
�����y
2010 Odyssey
Page 181 of 526
To reinstall the seat, hook the f ront
of the seat to the f loor, then push the
rear of the seat-back until it locks in
place. Make sure the seat is securely
latched bef ore driving.
Unlock the seat f rom the f loor by
pulling the lock release lever
under the seat cushion’s f ront
edge and lif ting the rear of the
seat.
Unhook the f ront of the seat f rom
the f loor by pulling it back slightly,
then pivoting it upward. Your vehicle has a plus-one seat for
the second row center position.
You can remove the plus-one seat
when it is not used. Do not remove
the seat while driving.
2.
3.
Except U.S. LX and Canadian DX models
Removing the Second Row
Plus-One Seat
Seats
178
�����—�����—�
���y�
�������������y���
�(�����������y���
�����y
2010 Odyssey
Page 187 of 526

Store a driver’s seat position only
when the vehicle is parked.Turn the ignition switch to the ON
(II) position. You cannot add a
new seat position in memory
unless the ignition switch is in the
ON (II) position. You can recall a
memorized position with the
ignition switch in any position. Press and release the MEMO
button on the driver’s door. You
will hear a beep. Then, both
indicators in the memory buttons
will start to blink. Press and hold
one of the memory buttons (1 or
2) within 5 seconds af ter you press
the MEMO button. When the
system completes storing a new
driving position, you hear two
beeps. The indicator in the stored
memory button will come on.
Adjust the seat to a comfortable
position (see page ).
Adjust the outside mirrors f or best
visibility (see page ).
Your vehicle has a memory feature
f or the driver’s seat and outside
mirror positions.
Two seat and outside mirror
positionscanbestoredinseparate
memories. You select a memorized
position by pushing the appropriate
button or using the appropriate
remote transmitter (Driver 1 or
Driver 2).
This setting can be linked or
unlinked with the remote transmitter.
For more inf ormation, see page .
You can change the ‘‘MEMORY
POSITION LINK’’ setting on the
multi-inf ormation display (see page
). 1.
2.
3.
4.
191
149
116 169
On Touring modelsStoring a Driving Position in
Memory
Driving Position Memory System
184
MEMO BUTTON
MEMORY
BUTTONS
INDICATORS
�����—�����—�
���y�
�������������y���
�(�����������y���
�����y
2010 Odyssey