Page 92 of 351

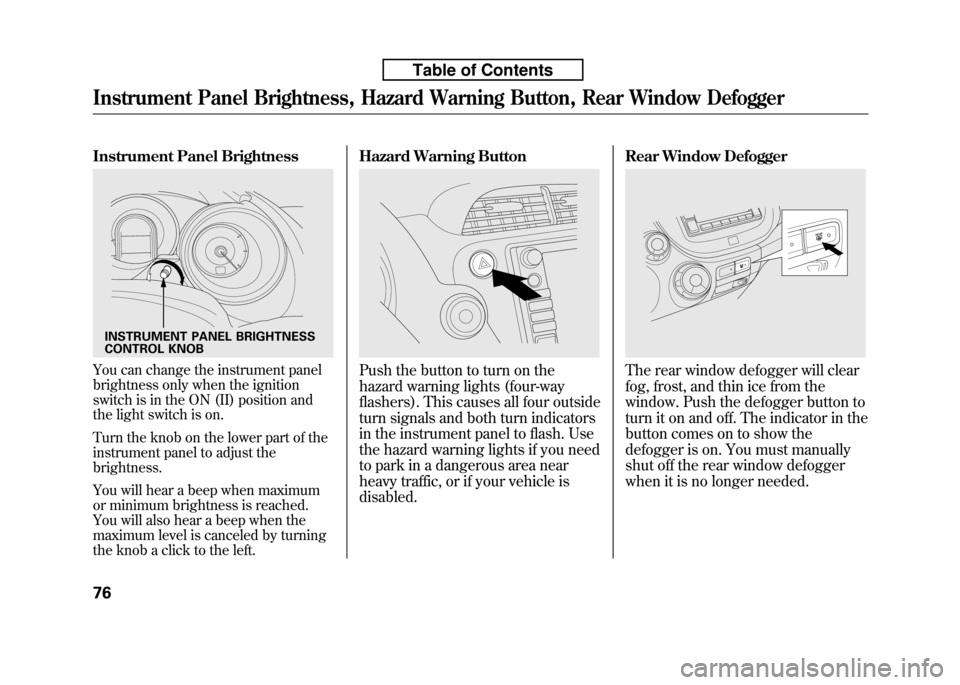
Instrument Panel Brightness
You can change the instrument panel
brightness only when the ignition
switch is in the ON (II) position and
the light switch is on.
Turn the knob on the lower part of the
instrument panel to adjust thebrightness.
You will hear a beep when maximum
or minimum brightness is reached.
You will also hear a beep when the
maximum level is canceled by turning
the knob a click to the left.Hazard Warning ButtonPush the button to turn on the
hazard warning lights (four-way
flashers). This causes all four outside
turn signals and both turn indicators
in the instrument panel to flash. Use
the hazard warning lights if you need
to park in a dangerous area near
heavy traffic, or if your vehicle isdisabled.
Rear Window DefoggerThe rear window defogger will clear
fog, frost, and thin ice from the
window. Push the defogger button to
turn it on and off. The indicator in the
button comes on to show the
defogger is on. You must manually
shut off the rear window defogger
when it is no longer needed.
INSTRUMENT PANEL BRIGHTNESS
CONTROL KNOB
Instrument Panel Brightness, Hazard Warning Button, Rear Window Defogger
76
Table of Contents
Page 93 of 351

Make sure the rear window is clear
and you have good visibility before
starting to drive.
The defogger wires on the inside of
the rear window can be accidentally
damaged. When cleaning the glass,
always wipe side-to-side.
If equipped
Pushing this button also turns the
mirror heaters on or off. For more
information, see page 102.Steering Wheel Adjustments
Make any steering wheel adjustment
before you start driving.
Adjusting the steering wheel
position while driving may
cause you to lose control of the
vehicle and be seriously injured
in a crash.
Adjust the steering wheel only
when the vehicle is stopped.
1. Pull the lever under the steering column toward you until it stops.
2. Move the steering wheel up or down, and in or out, so it points
toward your chest, not toward your
face. Make sure you can see the
instrument panel gauges andindicators.
3. Push the lever forward fully to lockthe steering wheel in position.
4. Make sure you have securely locked the steering wheel in place
by trying to move it up, down, in,
and out.
Rear Window Defogger, Steering Wheel Adjustments
77
Instruments and Controls
Table of Contents
Page 96 of 351

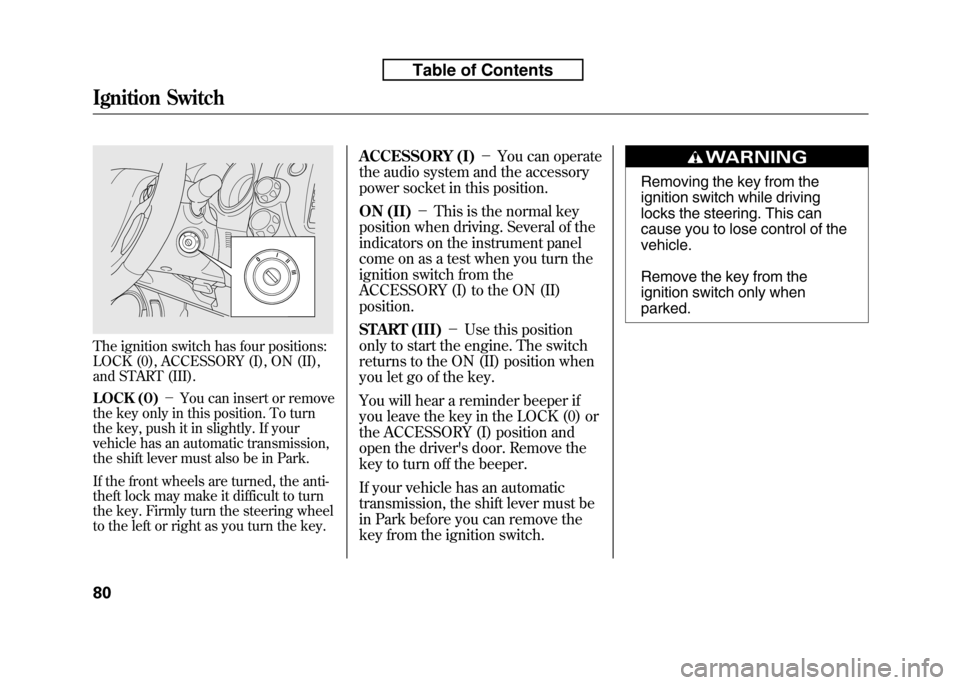
The ignition switch has four positions:
LOCK (0), ACCESSORY (I), ON (II),
and START (III).
LOCK (0)-You can insert or remove
the key only in this position. To turn
the key, push it in slightly. If your
vehicle has an automatic transmission,
the shift lever must also be in Park.
If the front wheels are turned, the anti-
theft lock may make it difficult to turn
the key. Firmly turn the steering wheel
to the left or right as you turn the key. ACCESSORY (I)
-You can operate
the audio system and the accessory
power socket in this position.
ON (II) -This is the normal key
position when driving. Several of the
indicators on the instrument panel
come on as a test when you turn the
ignition switch from the
ACCESSORY (I) to the ON (II)position.
START (III) -Use this position
only to start the engine. The switch
returns to the ON (II) position when
you let go of the key.
You will hear a reminder beeper if
you leave the key in the LOCK (0) or
the ACCESSORY (I) position and
open the driver's door. Remove the
key to turn off the beeper.
If your vehicle has an automatic
transmission, the shift lever must be
in Park before you can remove the
key from the ignition switch.
Removing the key from the
ignition switch while driving
locks the steering. This can
cause you to lose control of thevehicle.
Remove the key from the
ignition switch only whenparked.
Ignition Switch
80
Table of Contents
Page 118 of 351
3. Push the appropriate edge of theadjustment switch to move the
mirror right, left, up, or down.
4. When you finish, move the selector switch to the center (off)
position. This turns the adjustment
switch off to keep your settings.Heated Mirrors
On Canadian Sport and LX models
The outside mirrors are heated to
remove fog and frost. With the
ignition switch in the ON (II)
position, turn on the heaters by
pressing the button. The indicator in
the button comes on as a reminder.
Press the button again to turn the
heaters off. Pressing this button also
turns the rear window defogger on
and off. Parking Brake
To apply the parking brake, pull the
lever up fully. To release it, pull up
slightly, push the button, and lower
the lever. The parking brake
indicator on the instrument panel
should go out when the parking
brake is fully released (see page 60).
HEATED MIRROR BUTTONPARKING BRAKE LEVER
Mirrors, Parking Brake
102
Table of Contents
Page 136 of 351

Adjusting the Sound
Press the SOUND (
) button to
select an appropriate setting: bass,
treble, fader, balance, and SVC
(speed-sensitive volume
compensation). Turn the VOL/
SELECT knob to adjust the setting. BASS -Adjusts the bass.
TREBLE -Adjusts the treble.
FADER -Adjusts the front-to-back
strength of the sound.BALANCE -Adjusts the side-to-
side strength of the sound.
Each mode is shown in the display as
it changes. Turn the VOL/SELECT
knob to adjust the setting to your
liking. When the level reaches the
center, you will see ‘‘C ’’in the
display. SVC
-Adjusts the volume level
based on the vehicle speed.
The system will return to the audio
display about 10 seconds after you
stop adjusting a mode.
Speed-sensitive Volume Compensation (SVC)
The SVC mode controls the volume
based on vehicle speed. The faster
you go, the louder the audio volume
becomes. As you slow down, the
audio volume decreases.
The SVC has four modes; SVC OFF,
SVC LOW, SVC MID, and SVC
HIGH. Turn the VOL/SELECT knob
to adjust the setting to your liking. If
you feel the sound is too loud,
choose low. If you feel the sound is
too quiet, choose high.
This function is set to MID as the
default setting when the vehicle
leaves the factory. Audio System Lighting
You can use the instrument panel
brightness control knob to adjust the
illumination of the audio system (see
page 76). The audio system
illuminates when the parking lights
are on, even if the system is turnedoff.
Playing the FM/AM Radio (Models without navigation system)
121
Features
Table of Contents
Page 163 of 351
Screen Mode
You can select the background
screen to display the sound level.
There are three screen modes: level
(the sound level is shown with the
vertical bars), spectrum analysis (the
sound level appears as ripples of
water), and off. Each time you touch
the background icon, the displaychanges.Audio System Lighting
You can use the instrument panel
brightness control knob to adjust the
illumination of the control panel (see
page 76). The audio system
illuminates when the parking lights
are on, even if the radio is turned off.
Playing the AM/FM Radio (Models with navigation system)
148
Table of Contents
Page 208 of 351

On Sport model
The security system helps to protect
your vehicle and valuables from
theft. The horn sounds and a
combination of headlights, parking/
side marker lights and taillights
flashes if someone attempts to break
into your vehicle or remove the audio
unit. This alarm continues for 2
minutes, then the system resets. To
reset an activated system before the
2 minutes have elapsed, unlock the
driver's door with the key or the
remote transmitter.
The security system automatically
sets 15 seconds after you lock the
doors, hood, and the tailgate. For the
system to activate, you must lock the
doors and the tailgate from the
outside with the key, driver's lock
tab, door lock master switch, or
remote transmitter. The security
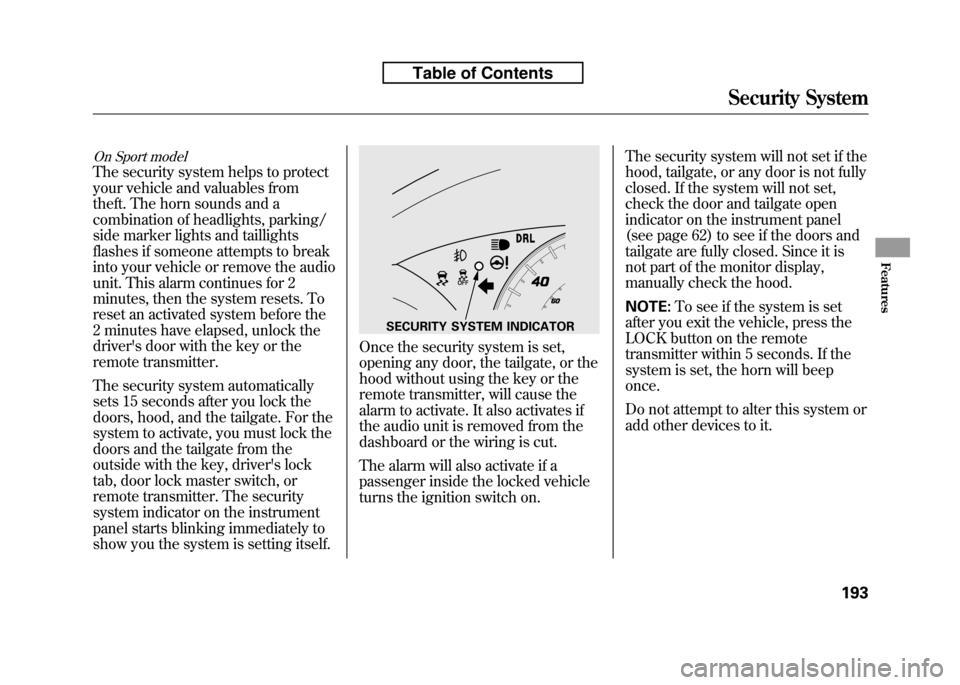
system indicator on the instrument
panel starts blinking immediately to
show you the system is setting itself.
Once the security system is set,
opening any door, the tailgate, or the
hood without using the key or the
remote transmitter, will cause the
alarm to activate. It also activates if
the audio unit is removed from the
dashboard or the wiring is cut.
The alarm will also activate if a
passenger inside the locked vehicle
turns the ignition switch on.The security system will not set if the
hood, tailgate, or any door is not fully
closed. If the system will not set,
check the door and tailgate open
indicator on the instrument panel
(see page 62) to see if the doors and
tailgate are fully closed. Since it is
not part of the monitor display,
manually check the hood. NOTE:
To see if the system is set
after you exit the vehicle, press the
LOCK button on the remote
transmitter within 5 seconds. If the
system is set, the horn will beeponce.
Do not attempt to alter this system or
add other devices to it.
SECURITY SYSTEM INDICATOR
Security System
193
Features
Table of Contents
Page 209 of 351

On Sport model and Canadian LX model
Cruise control allows you to maintain
a set speed above 25 mph (40 km/h)
without keeping your foot on the
accelerator pedal. It should be used
for cruising on straight, open
highways. It is not recommended for
city driving, winding roads, slippery
roads, heavy rain, or bad weather.
Improper use of the cruise
control can lead to a crash.
Use the cruise control only
when traveling on open
highways in good weather.Using the Cruise Control
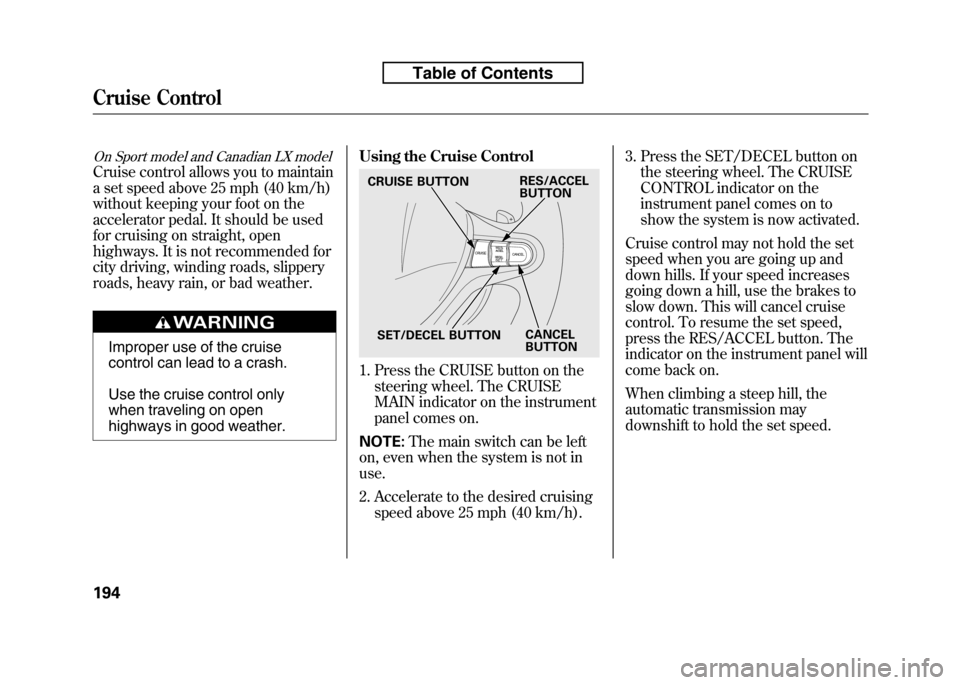
1. Press the CRUISE button on the
steering wheel. The CRUISE
MAIN indicator on the instrument
panel comes on.
NOTE: The main switch can be left
on, even when the system is not inuse.
2. Accelerate to the desired cruising speed above 25 mph (40 km/h). 3. Press the SET/DECEL button on
the steering wheel. The CRUISE
CONTROL indicator on the
instrument panel comes on to
show the system is now activated.
Cruise control may not hold the set
speed when you are going up and
down hills. If your speed increases
going down a hill, use the brakes to
slow down. This will cancel cruise
control. To resume the set speed,
press the RES/ACCEL button. The
indicator on the instrument panel will
come back on.
When climbing a steep hill, the
automatic transmission may
downshift to hold the set speed.
CRUISE BUTTON
SET/DECEL BUTTON CANCEL
BUTTON
RES/ACCEL
BUTTON
Cruise Control
194
Table of Contents