Page 267 of 441

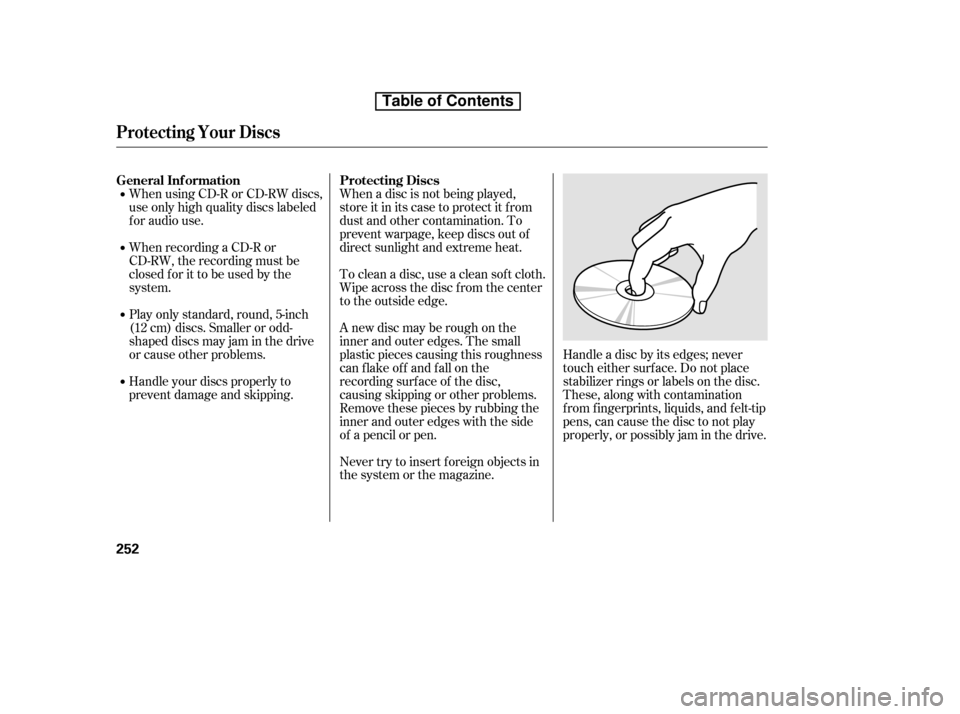
Handle a disc by its edges; never
touch either surf ace. Do not place
stabilizer rings or labels on the disc.
These, along with contamination
f rom f ingerprints, liquids, and f elt-tip
pens, can cause the disc to not play
properly, or possibly jam in the drive.
When using CD-R or CD-RW discs,
use only high quality discs labeled
f or audio use.
When recording a CD-R or
CD-RW, the recording must be
closedforittobeusedbythe
system.
When a disc is not being played,
store it in its case to protect it f rom
dust and other contamination. To
prevent warpage, keep discs out of
direct sunlight and extreme heat.
To clean a disc, use a clean sof t cloth.
Wipe across the disc f rom the center
to the outside edge.
A new disc may be rough on the
inner and outer edges. The small
plastic pieces causing this roughness
can f lake of f and f all on the
recording surf ace of the disc,
causing skipping or other problems.
Remove these pieces by rubbing the
inner and outer edges with the side
of a pencil or pen.
Never try to insert f oreign objects in
the system or the magazine.
Play only standard, round, 5-inch
(12 cm) discs. Smaller or odd-
shaped discs may jam in the drive
or cause other problems.
Handle your discs properly to
prevent damage and skipping.
General Inf ormation Protecting Discs
Protecting Your Discs
252
Table of Contents
Page 279 of 441

If equipped
Once the security system is set,
opening any door without using the
key or the remote transmitter, the
hood, or the tailgate will cause the
system to alarm.Use the remote transmitter
to quickly check that the hood, the
tailgate, and all doors are closed.
Push the lock button twice within 5
seconds. There should be an audible
conf irmation beep.
Do not attempt to alter this system
or add other devices to it.
The security system automatically
sets 15 seconds after you lock the
doors, hood, and the tailgate. For the
system to activate, you must lock the
doorsandthetailgatefromthe
outside with the key, driver’s lock
tab, door lock master switch, or
remote transmitter. The security
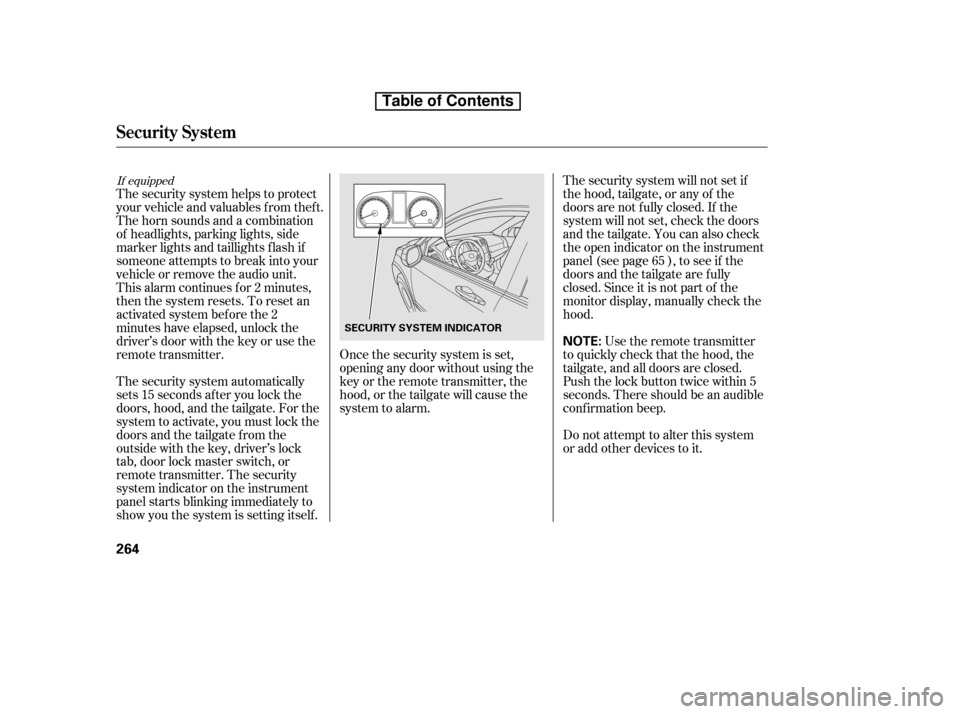
system indicator on the instrument
panel starts blinking immediately to
show you the system is setting itself .
The security system helps to protect
your vehicle and valuables f rom thef t.
The horn sounds and a combination
of headlights, parking lights, side
marker lights and taillights f lash if
someone attempts to break into your
vehicle or remove the audio unit.
This alarm continues f or 2 minutes,
then the system resets. To reset an
activated system before the 2
minutes have elapsed, unlock the
driver’s door with the key or use the
remote transmitter.
The security system will not set if
the hood, tailgate, or any of the
doors are not f ully closed. If the
system will not set, check the doors
and the tailgate. You can also check
the open indicator on the instrument
panel (see page ), to see if the
doors and the tailgate are f ully
closed. Since it is not part of the
monitor display, manually check thehood.
65
Security System
264
NOTE:
SECURITY SYSTEM INDICATOR
Table of Contents
Page 282 of 441

You can increase the set cruising
speed in any of these ways:You can decrease the set cruising
speed in any of these ways:
Press and hold the RES/ACCEL
button. When you reach the
desired cruising speed, release the
button.
To increase the speed in very
small amounts, tap the RES/
ACCEL button. Each time you do
this, your vehicle will speed up
about 1 mph (1.6 km/h).
Cruise control may not hold the set
speed when you are going up and
down hills. If your vehicle speed
increases going down a hill, use the
brakes to slow down. This will cancel
thecruisecontrol.Toresumetheset
speed, press the RES/ACCEL button.
The CRUISE CONTROL indicator
on the instrument panel will come
back on.
To slow down in very small
amounts, tap the SET/DECEL
button. Each time you do this,
your vehicle will slow down about
1 mph (1.6 km/h).
Press and hold the SET/DECEL
button. Release the button when
you reach the desired speed.
If you need to decrease your
speed quickly, use the brakes as you
normally would.
Push on the accelerator pedal.
Accelerate to the desired cruising
speed, then press the SET/
DECEL button.
Tap the brake pedal lightly with
your f oot. The CRUISE
CONTROL indicator on the
instrument panel goes out. When
the vehicle slows to the desired
speed, press the SET/DECEL
button.
CONT INUED
Changing the Set Speed
Cruise Control
Features
267
NOTE:
Table of Contents
Page 312 of 441

To close the hood, lif t it up slightly to
remove the support rod f rom the
hole. Put the support rod back into
its holding clip. Lower the hood to
about a f oot (30 cm) above the
f ender, then let it drop. Make sure it
is securely latched.
Park the vehicle, and set the
parking brake. Pull the hood
release handle located under the
lower lef t corner of the dashboard.
The hood will pop up slightly.
Reach in between the hood and
the f ront grille with your f ingers.
The hood latch handle is above
the ‘‘H’’ logo. Push this handle up
until it releases the hood. Lif t thehood.
If the hood latch handle moves
stif f ly, or if you can open the hood
without lifting the handle, the
mechanism should be cleaned and
lubricated.Holding the grip, pull the support
rod out of its clip. Insert the end
into the hole in the hood
designated by an arrow.
2.
1. 3.
Opening and Closing the Hood
Service Station Procedures
Bef ore Driving
297
LATCH
CLIPGRIP
SUPPORT ROD
HOOD RELEASE HANDLE
Table of Contents
Page 314 of 441

�µ�µ
�µ �µ
Fuel economy is not a f ixed number.
It varies based on driving conditions,
driving habits and vehicle condition.
Theref ore, it is not possible f or one
set of estimates to predict f uel
economy precisely f or all drivers in
all environments.
Represents urban
driving in light traf f ic. A range of
miles per gallon achieved is also
provided.
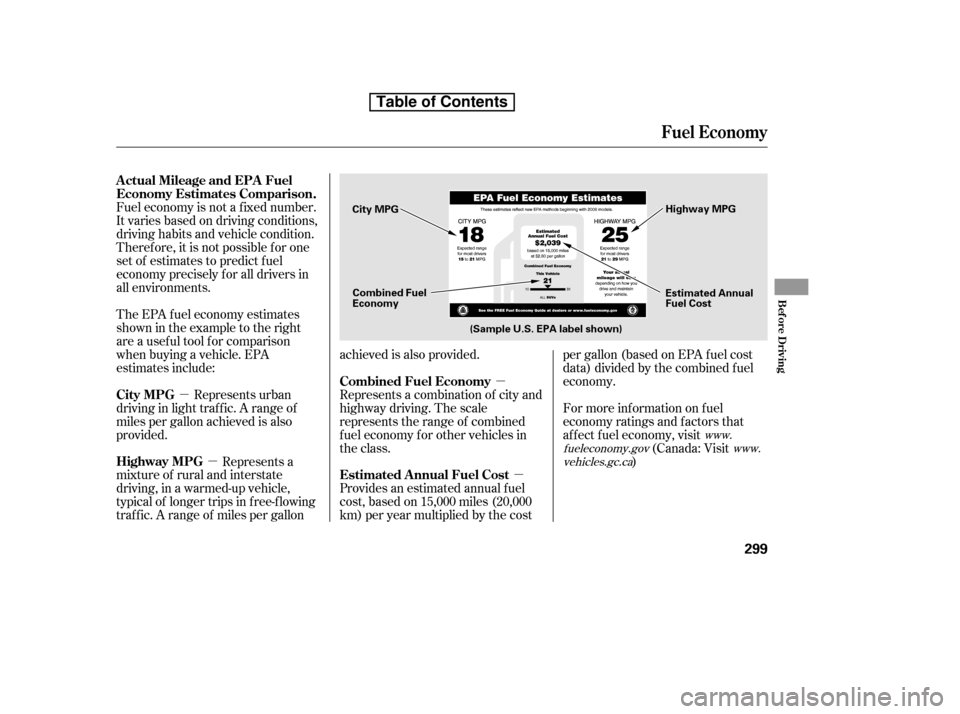
The EPA f uel economy estimates
shownintheexampletotheright
are a usef ul tool f or comparison
when buying a vehicle. EPA
estimates include:
Represents a combination of city and
highway driving. The scale
represents the range of combined
f uel economy f or other vehicles in
the class.
Represents a
mixture of rural and interstate
driving, in a warmed-up vehicle,
typical of longer trips in f ree-f lowing
traf f ic. A range of miles per gallon achieved is also provided.
Provides an estimated annual f uel
cost, based on 15,000 miles (20,000
km) per year multiplied by the costpergallon(basedonEPAfuelcost
data) divided by the combined f uel
economy.
For more inf ormation on f uel
economy ratings and factors that
af f ect f uel economy, visit
(Canada: Visit
)
www.
fueleconomy.gov www. vehicles.gc.ca
Actual Mileage and EPA Fuel
Economy Estimates Comparison.
City MPG Combined Fuel Economy
Highway MPG Estimated Annual Fuel Cost
Fuel Economy
Bef ore Driving
299
Combined Fuel
Economy
(Sample U.S. EPA label shown) Estimated Annual
Fuel Cost
City MPG
Highway MPG
Table of Contents
Page 317 of 441

Modif ying your vehicle, or installing
some non-Honda accessories, can
make it unsaf e. Bef ore you make any
modif ications or add any accessories,
be sure to read the f ollowing
inf ormation.Bef ore installing any accessory:
Make sure the accessory does not
obscure any lights, or interf ere
with proper vehicle operation or
perf ormance.
Bef ore installing any electronic
accessory, have the installer
contact your dealer for assistance.
If possible, have your dealer
inspect the f inal installation.
Do not install accessories on the
side pillars or across the rear
windows. Accessories installed in
theseareasmayinterferewith
proper operation of the side
curtain airbags.
Your dealer has Honda accessories
that allow you to personalize your
vehicle. These accessories have
been designed and approved f or your
vehicle, and are covered by warranty.
Although non-Honda accessories
may f it on your vehicle, they may not
meet f actory specif ications, and
could adversely af f ect your vehicle’s
handling and stability.
Be sure electronic accessories do
not overload electrical circuits
(see page ) or interf ere with
proper operation of your vehicle.
When properly installed, cellular
phones, alarms, two-way radios, and
low-powered audio systems should
not interf ere with your vehicle’s
computer controlled systems, such
as your airbags, anti-lock brakes, and
tire pressure monitoring system. 398
A ccessories and Modif ications
A ccessories
302
Improper accessories or
modifications can affect your
vehicle’s handling, stability, and
performance, and cause a
crash in which you can be hurt
or killed.
Follow all instructions in this
owner’s manual regarding
accessories and modifications.
Table of Contents
Page 324 of 441
The f our hooks on the f loor can be
used to install a net f or securing
items.
Theseparationnetcanbeusedto
hold back sof t, lightweight items
stored in the cargo area. Heavy
items should be properly secured on
the f loor of the cargo area. The net
may not prevent heavy items f rom
being thrown f orward in a crash or a
sudden stop.
Your vehicle also has cargo hooks on
the side panel in the cargo area.
They are designed to hold light
items. Heavy objects may damage
thehook.Makesureanyitemsput
on each hook weigh less than 6.5 lbs
(3 kg).If equipped
Cargo Hooks
Optional Separation Net
Carrying Cargo
Bef ore Driving
309
HOOKS
Table of Contents
Page 328 of 441
Check the adjustment of the
inside and outside mirrors (see
page ).
Check the steering wheel
adjustment (see page ).
Fasten your seat belt. Check that
your passengers have f astened
their seat belts (see page ).
Make sure the doors and the
tailgate are securely closed and
locked.
Youshoulddothefollowingchecks
and adjustments bef ore you drive
your vehicle.
Make sure all windows, mirrors,
and outside lights are clean and
unobstructed. Remove f rost, snow,
or ice.
Check that the hood is f ully closed.
Visually check the tires. If a tire
looks low, use a gauge to check its
pressure.
Check that any items you may be
carrying are stored properly or
f astened down securely. When you start the engine, check
the gauges and indicators in the
instrument panel (see pages to
).
Check the seat adjustment (see
pages and ).
1. 2.
10.
3. 4. 5. 6. 7. 8. 9.
114
81
15
68 61
97 98
Preparing to Drive
Driving
313
Table of Contents