Page 124 of 441

Make sure that the f olded up right
rear seat does not interf ere with the
f ront passenger’s seat-back. This will
cause the f ront passenger’s weight
sensors and the f ront passenger’s
seat belt reminder indicator to work
improperly (see page ). Also
check the passenger airbag of f
indicator to assure proper operation
of the passenger’s advanced f ront
airbag.
Reverse this procedure to return the
seat to the upright position.
Make sure the seat is securely
latched bef ore driving.
When you are not using the
fastening strap, store the strap into
the slit on the seat-back.Make sure both outer seat belts are
positioned in side of the rear seat-
backs.
Make sure all items in the cargo area
are secured. Loose items can f ly
f orward and cause injury if you have
to brake hard (See
on page ).
Do not use the dual deck cargo shelf
(if equipped) when the seats are
folded down or forward.
The seat belt in the rear center seat
is equipped with a detachable anchor.
This allows the center seat belt to be
unlatched when the rear center seat
back is f olded down or the right side
rear seat is folded forward.
In the center seating position of the
rear seat, be sure the detachable
anchor is latched securely bef ore
using the seat belt (see next column).
33
304
CONT INUED
Carrying CargoDetachable A nchor
Seats
Inst rument s and Cont rols
109
Using the seat belt with the
detachable anchor unlatched
increases the chance of serious
injury or death in a crash.
Before using the seat belt,
make sure the detachable
anchor is correctly latched.
Table of Contents
Page 125 of 441
Pull out the small latch plate and the
latch plate f rom each holding slot in
the ceiling, and pull out the seat belt
to extend it.Line up the triangle marks on the
small latch plate and anchor buckle
when reattaching the belt and buckle.
Tug on the seat belt to verify that
the detachable anchor is securely
latched. Make sure the seat belt is
not twisted.To unlatch the detachable anchor,
insert the latch plate into the slot on
the side of the anchor buckle. Store
the detachable anchor and seat belt
latch plates in the retractor housing.
Seats
110
TRIANGLE
MARKS
ANCHOR BUCKLE
SMALL LATCH PLATE
LATCH PLATE LATCH PLATE
ANCHOR BUCKLE
Table of Contents
Page 132 of 441
The dual deck cargo shelf will
separate the storage area into two
storage areas. On the upper area,
you can store small and light items.
Youshouldplaceheavyitemsinthe
lower storage area. You can remove
the dual deck cargo shelf and store it
on the cargo area f loor to make a
larger cargo area.To store the dual deck cargo shelf ,
lif t up either side of it, then move it
as shown above.
Make sure to use the dual deck cargo shelf f ully opened and securely
latched.
To remove the dual deck cargo shelf ,
f old up the rear half of the shelf
forward onto the front half, push up
on both sides, then pull it toward you.
Place the dual deck cargo shelf on
the f ar side of the cargo f loor, then
slide it f orward while f olding out the
upperhalfoftheshelf.
If equipped
CONT INUED
Dual Deck Cargo Shelf
Interior Convenience Items
Inst rument s and Cont rols
117
Table of Contents
Page 133 of 441

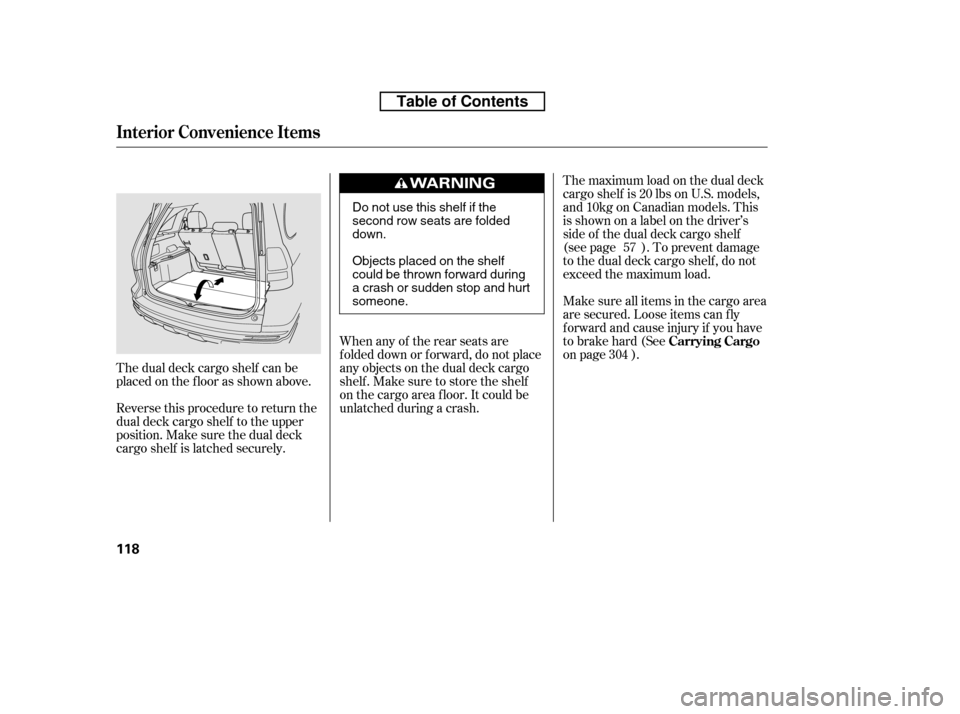
The dual deck cargo shelf can be
placed on the f loor as shown above.
Reverse this procedure to return the
dual deck cargo shelf to the upper
position. Make sure the dual deck
cargo shelf is latched securely.The maximum load on the dual deck
cargo shelf is 20 lbs on U.S. models,
and10kgonCanadianmodels.This
isshownonalabelonthedriver’s
side of the dual deck cargo shelf
(see page ). To prevent damage
to the dual deck cargo shelf , do not
exceed the maximum load.
Make sure all items in the cargo area
are secured. Loose items can f ly
f orward and cause injury if you have
to brake hard (See
on page ).
When any of the rear seats are
f olded down or f orward, do not place
any objects on the dual deck cargo
shelf . Make sure to store the shelf
on the cargo area f loor. It could be
unlatched during a crash. 57
304 Carrying Cargo
Interior Convenience Items
118
Do not use this shelf if the
second row seats are foldeddown.
Objects placed on the shelf
could be thrown forward during
a crash or sudden stop and hurtsomeone.
Table of Contents
Page 144 of 441

The heating and air conditioning
system in your vehicle provides a
comf ortable driving environment in
all weather conditions.
The standard audio system has
many f eatures. This section
describes those f eatures and how to
use them.
Your vehicle has an anti-theft audio
system that requires a code number
to enable it.
The security system helps to
discourage vandalism and thef t of
your vehicle..............
Vents, Heating, and A/C . 130...............
Climate Control System . 135
..........
Dual Temperature Control . 140
..............
Climate Control Sensors . 142
................................
Audio System . 143 ..........
Playing the AM/FM Radio . 145
................................
Playing a Disc . 149
.......
Disc Player Error Messages . 156
..........
Playing the AM/FM Radio . 157
................
Playing the XM
Radio . 161
.................................
Playing Discs . 166
.......
Disc Player Error Messages . 176
............................
PlayinganiPod
. 177
.................
iPod
Error Messages . 183
Playing a USB Flash Memory ........................................
Device . 184
USB Flash Memory Device Error ...................................
Messages . 193
..........
Playing the AM/FM Radio . 194
................
Playing the XM
Radio . 200
................................
Playing a Disc . 206
.......
Disc Player Error Messages . 214
...................................
CD Changer . 215
.....
CD Changer Error Messages . 221
..........................
Playing a PC card . 222 .............
PC card Error Messages . 234
............................
PlayinganiPod
. 235
.................
iPod
Error Messages . 241
Playing a USB Flash Memory
........................................
Device . 242
USB Flash Memory Device Error ...................................
Messages . 249
............
AM/FM Radio Reception . 250
..................
Protecting Your Discs . 252
................
Remote Audio Controls . 255
...
Playing an Optional Audio Unit . 257
.................
Radio Thef t Protection . 258
..........................
Setting the Clock . 259
.........................................
Compass . 260
............................
Security System . 264
...
Rearview Camera and Monitor . 265
...............................
Cruise Control . 266
........
HandsFreeLink. 269
LX model
EX and EX-L models without navigationsystem
EX-L Models with navigation system Bluetooth
Features
Features
129
Page 194 of 441
Connect your dock connector to
the iPod correctly and securely.
Install the dock connector to the
USB adapter cable securely.If the iPod indicator does not appear
in the audio display, check the
connections, and try to reconnect the
iPod a f ew times.
If the audio system still does not
recognize the iPod, the iPod may
need to be reset. Follow the
instructions that came with your
iPod, or you can f ind reset
instructions online at
Push the release button to release
the USB adapter cable.
Open the upper glove box.
1. 2. 3. 4.
www.apple.com/
ipod.
CONT INUED
Connect ing an iPod
Playing an iPod(EX and EX-L models without navigation system)
Features
179
DOCK CONNECTOR
USB ADAPTER
CABLE
USB ADAPTER CABLE
RELEASE BUTTON
Table of Contents
Page 200 of 441

�Î
�Î
CONT INUED
This audio system can operate the
audio f iles on a USB f lash memory
device with the same controls used
f or the in-dash disc changer. To play
a USB f lash memory device, connect
it to the USB adapter cable in the
upper glove box, then press the CD/
AUX or AUX button.
The audio system reads and plays
the audio f iles on the USB f lash
memory device in MP3, WMA or
AAC f ormats. Depending on the
f ormat, the display shows MP3,
WMA or AAC when a USB flash
memory device is playing. The USB
f lash memory device limit is up to
700 f olders or up to 65535 f iles. Only AAC f ormat f iles recorded
with iTunes are playable on this
audio unit. The recommended USB f lash
memory devices are 256 MB or
higher, and f ormatted with the FAT
f ile system. Some digital audio
players may be compatible as well.
Do not use an extension cable to
the USB adapter cable equipped
with your vehicle.
Do not connect your USB f lash
memory device using a hub.
Do not use a device such as a card
reader or hard drive as the device
or your f iles may be damaged.
Some USB f lash memory devices
(such as devices with security lock-
out f eatures, etc.) will not work in
this audio unit. Do not keep a USB f lash memory
device in the vehicle. Direct
sunlight and high heat will damage
it.
We recommend backing up your
data bef ore playing a USB f lash
memory device.
Some devices cannot be powered
or charged via the USB adapter. If
this is the case, use the accessory
adapter to supply power to your
device.
Depending on the sof tware the
f iles were made with, it may not be
possibletoplaysomefiles,or
display some text data.
Depending on the type and
number of f iles, it may take some
time bef ore they begin to play.
:
To Play a USB Flash Memory
Device
Playing a USB Flash Memory Device (EX and EX-L models without navi
gation system)
Features
185
NOTE:
Table of Contents
Page 202 of 441
CONT INUED
When the USB f lash memory device
is connected, the USB indicator is
showninthedisplay.Connect the USB f lash memory
device to the USB connector
correctly and securely.
Open the upper glove box.
Push the release button to release
the USB adapter cable.
In WMA or AAC format, DRM
(digital rights management) f iles
cannot be played. If the system f inds
a DRM f ile, the audio unit displays
UNPLAYABLE FILE, and then skips
to the next file.
1. 2.3.
Playing a USB Flash Memory Device (EX and EX-L models without navi
gation system)
Connect ing a USB Flash Memory
Device
Features
187
NOTE:
USB ADAPTER CABLE
RELEASE BUTTON
USB ADAPTER CABLE
Table of Contents