2010 GMC YUKON HYBRID tire pressure
[x] Cancel search: tire pressurePage 95 of 120
Always do a safety check first. SeeIf a Tire Goes Flaton page 6‑34.
1. Remove the tire sealant and compressor kit from its storage location. See Tire Sealant and
Compressor Kit Storage on page 6‑55.
Make sure the on/off button (D) is in the off (O)
position.
2. Unwrap the sealant/air hose (F) and the power plug (C).
3. Place the kit on the ground. Make sure the tire valve stem is positioned close to
the ground so the hose will reach it.
4. Remove the valve stem cap from the flat tire by turning it counterclockwise.
5. Attach the sealant/air hose (F) onto the tire valve stem. Turn it clockwise until it is tight. 6. Plug the power plug (C) into the accessory power
outlet in the vehicle. Unplug all items from other
accessory power outlets. See “Accessory Power
Outlet(s) in the owner manual.”
If the vehicle has an accessory power outlet,
do not use the cigarette lighter.
If the vehicle only has a cigarette lighter, use the
cigarette lighter.
Do not pinch the power plug cord in the door or
window.
7. Start the vehicle. The vehicle must be running while using the air compressor.
8. Press the on/off (D) button to turn the tire sealant and compressor kit on.
The compressor will inject sealant and air into
the tire.
The pressure gage (E) will initially show a high
pressure while the compressor pushes the sealant
into the tire. Once the sealant is completely
dispersed into the tire, the pressure will quickly
drop and start to rise again as the tire inflates with
air only.
6-39
Page 96 of 120

9. Inflate the tire to the recommended inflationpressure using the pressure gage (E).
The recommended inflation pressure can be
found on the Tire and Loading Information label.
See Inflation - Tire Pressure on page 6‑28.
The pressure gage (E) may read higher than the
actual tire pressure while the compressor is on.
Turn the compressor off to get an accurate
pressure reading. The compressor may be turned
on/off until the correct pressure is reached.
Notice: If the recommended pressure cannot be
reached after approximately 25 minutes, the vehicle
should not be driven farther. The tire is too severely
damaged and the tire sealant and compressor kit
cannot inflate the tire. Remove the power plug from
the accessory power outlet and unscrew the
inflating hose from the tire valve. See “Roadside
Assistance Program” in the owner manual. 10. Press the on/off button (D) to turn the tire sealant
and compressor kit off.
The tire is not sealed and will continue to
leak air until the vehicle is driven and the
sealant is distributed in the tire, therefore,
Steps 11 through 17 must be done immediately
after Step 10.
Be careful while handling the tire sealant and
compressor kit as it could be warm after usage.
11. Unplug the power plug (C) from the accessory power outlet in the vehicle.
12. Turn the sealant/air hose (F) counterclockwise to remove it from the tire valve stem.
13. Replace the tire valve stem cap.
14. Replace the sealant/air hose (F), and the power plug (C) back in their original location.
6-40
Page 97 of 120
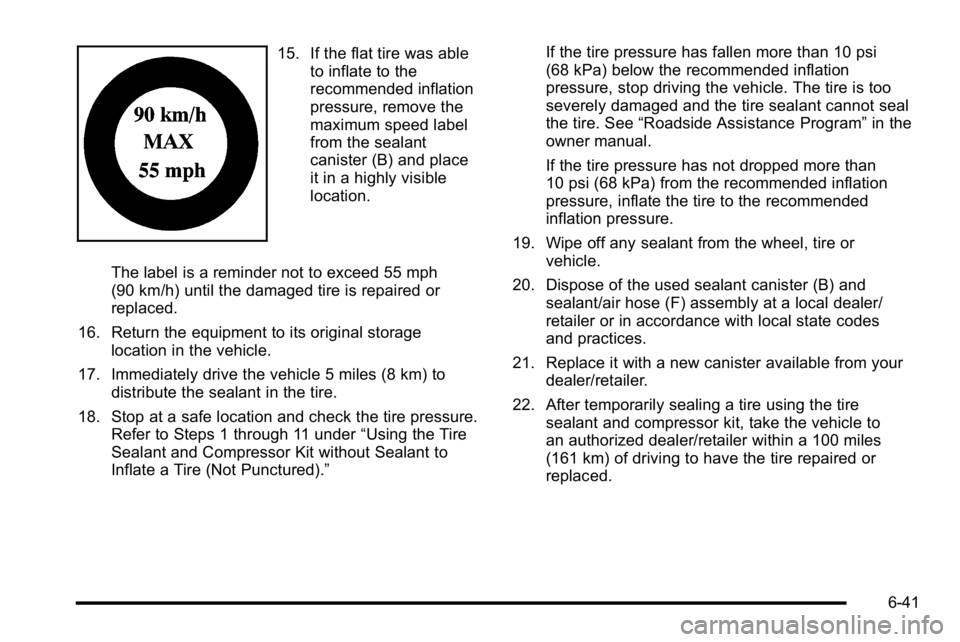
15. If the flat tire was ableto inflate to the
recommended inflation
pressure, remove the
maximum speed label
from the sealant
canister (B) and place
it in a highly visible
location.
The label is a reminder not to exceed 55 mph
(90 km/h) until the damaged tire is repaired or
replaced.
16. Return the equipment to its original storage location in the vehicle.
17. Immediately drive the vehicle 5 miles (8 km) to distribute the sealant in the tire.
18. Stop at a safe location and check the tire pressure. Refer to Steps 1 through 11 under “Using the Tire
Sealant and Compressor Kit without Sealant to
Inflate a Tire (Not Punctured).” If the tire pressure has fallen more than 10 psi
(68 kPa) below the recommended inflation
pressure, stop driving the vehicle. The tire is too
severely damaged and the tire sealant cannot seal
the tire. See
“Roadside Assistance Program” in the
owner manual.
If the tire pressure has not dropped more than
10 psi (68 kPa) from the recommended inflation
pressure, inflate the tire to the recommended
inflation pressure.
19. Wipe off any sealant from the wheel, tire or vehicle.
20. Dispose of the used sealant canister (B) and sealant/air hose (F) assembly at a local dealer/
retailer or in accordance with local state codes
and practices.
21. Replace it with a new canister available from your dealer/retailer.
22. After temporarily sealing a tire using the tire sealant and compressor kit, take the vehicle to
an authorized dealer/retailer within a 100 miles
(161 km) of driving to have the tire repaired or
replaced.
6-41
Page 99 of 120
8. Plug the power plug (C) into the accessory poweroutlet in the vehicle. Unplug all items from other
accessory power outlets. See “Accessory Power
Outlet(s) in the owner manual.”
If the vehicle has an accessory power outlet,
do not use the cigarette lighter.
If the vehicle only has a cigarette lighter, use the
cigarette lighter.
Do not pinch the power plug cord in the door or
window.
9. Start the vehicle. The vehicle must be running while using the air compressor.
10. Press the on/off (D) button to turn the compressor on.
The compressor will inflate the tire with air only.
11. Inflate the tire to the recommended inflation pressure using the pressure gage (E).
The recommended inflation pressure can be
found on the Tire and Loading Information label.
See Inflation - Tire Pressure on page 6‑28. The pressure gage (E) may read higher than the
actual tire pressure while the compressor is on.
Turn the compressor off to get an accurate
reading. The compressor may be turned on/off until
the correct pressure is reached.
12. Press the on/off button (D) to turn the tire sealant and compressor kit off.
Be careful while handling the tire sealant and
compressor kit as it could be warm after usage.
13. Unplug the power plug (C) from the accessory power outlet in the vehicle.
14. Disconnect the air only hose (C) from the tire valve stem, by turning it counterclockwise, and replace
the tire valve stem cap.
15. Replace the air only hose (F) and the power plug (C) back in its original location.
16. Place the equipment in the original storage location in the vehicle.
6-43
Page 102 of 120
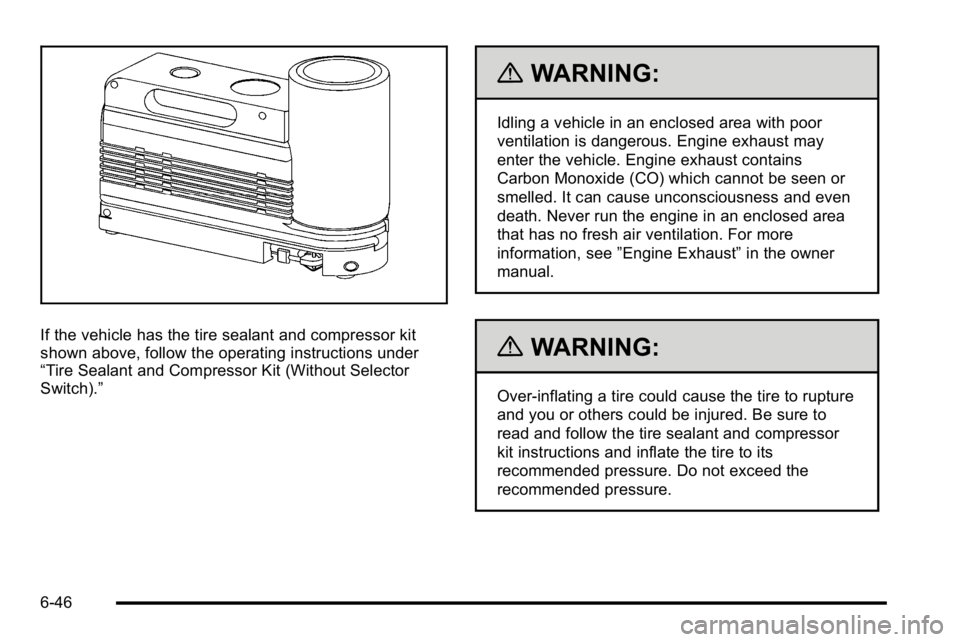
If the vehicle has the tire sealant and compressor kit
shown above, follow the operating instructions under
“Tire Sealant and Compressor Kit (Without Selector
Switch).”
{WARNING:
Idling a vehicle in an enclosed area with poor
ventilation is dangerous. Engine exhaust may
enter the vehicle. Engine exhaust contains
Carbon Monoxide (CO) which cannot be seen or
smelled. It can cause unconsciousness and even
death. Never run the engine in an enclosed area
that has no fresh air ventilation. For more
information, see”Engine Exhaust” in the owner
manual.
{WARNING:
Over-inflating a tire could cause the tire to rupture
and you or others could be injured. Be sure to
read and follow the tire sealant and compressor
kit instructions and inflate the tire to its
recommended pressure. Do not exceed the
recommended pressure.
6-46
Page 103 of 120
{WARNING:
Storing the tire sealant and compressor kit or
other equipment in the passenger compartment of
the vehicle could cause injury. In a sudden stop or
collision, loose equipment could strike someone.
Store the tire sealant and compressor kit in its
original location.
If this vehicle has a tire sealant and compressor kit,
there may not be a spare tire, tire changing equipment,
and on some vehicles there may not be a place to
store a tire.
The tire sealant and compressor can be used to
temporarily seal punctures up to ¼ inch (6 mm) in the
tread area of the tire. It can also be used to inflate an
under inflated tire.
If the tire has been separated from the wheel, has
damaged sidewalls, or has a large puncture, the tire
is too severely damaged for the tire sealant and
compressor kit to be effective. See “Roadside
Assistance Program” in the owner manual. Read and follow all of the tire sealant and compressor
kit instructions.
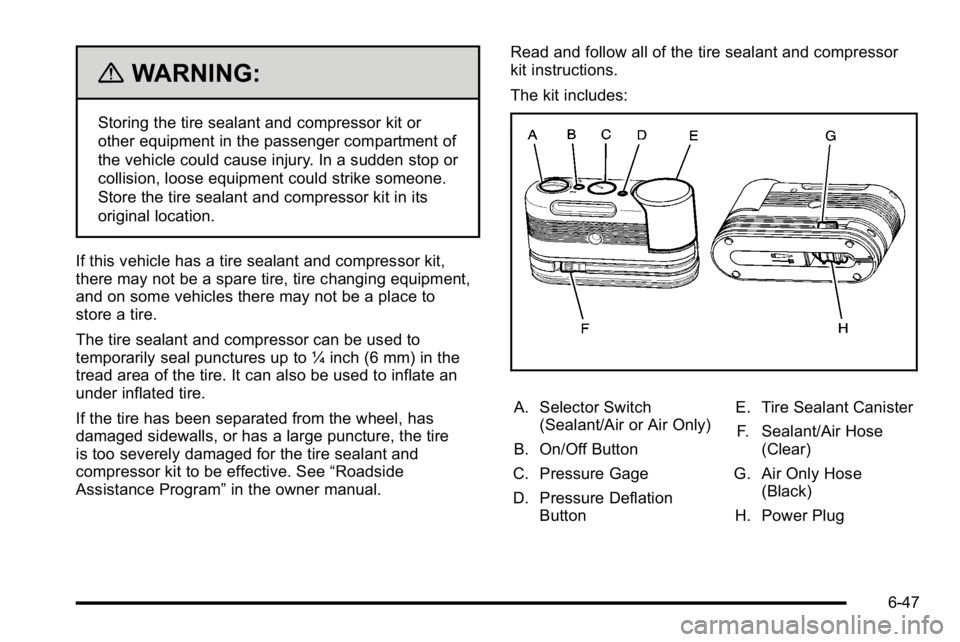
The kit includes:
A. Selector Switch
(Sealant/Air or Air Only)
B. On/Off Button
C. Pressure Gage
D. Pressure Deflation Button E. Tire Sealant Canister
F. Sealant/Air Hose (Clear)
G. Air Only Hose (Black)
H. Power Plug
6-47
Page 105 of 120
Always do a safety check first. SeeIf a Tire Goes Flaton page 6‑34. Do not remove any objects that have
penetrated the tire.
1. Remove the tire sealant and compressor kit from its storage location. See Tire Sealant and
Compressor Kit Storage on page 6‑55.
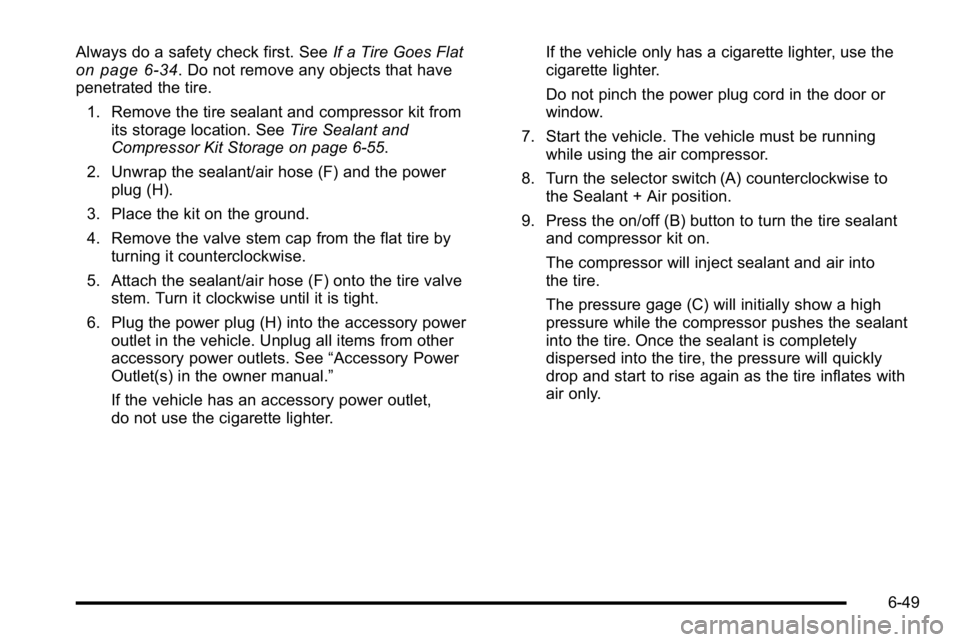
2. Unwrap the sealant/air hose (F) and the power plug (H).
3. Place the kit on the ground.
4. Remove the valve stem cap from the flat tire by turning it counterclockwise.
5. Attach the sealant/air hose (F) onto the tire valve stem. Turn it clockwise until it is tight.
6. Plug the power plug (H) into the accessory power outlet in the vehicle. Unplug all items from other
accessory power outlets. See “Accessory Power
Outlet(s) in the owner manual.”
If the vehicle has an accessory power outlet,
do not use the cigarette lighter. If the vehicle only has a cigarette lighter, use the
cigarette lighter.
Do not pinch the power plug cord in the door or
window.
7. Start the vehicle. The vehicle must be running while using the air compressor.
8. Turn the selector switch (A) counterclockwise to the Sealant + Air position.
9. Press the on/off (B) button to turn the tire sealant and compressor kit on.
The compressor will inject sealant and air into
the tire.
The pressure gage (C) will initially show a high
pressure while the compressor pushes the sealant
into the tire. Once the sealant is completely
dispersed into the tire, the pressure will quickly
drop and start to rise again as the tire inflates with
air only.
6-49
Page 106 of 120

10. Inflate the tire to the recommended inflationpressure using the pressure gage (C).
The recommended inflation pressure can be
found on the Tire and Loading Information label.
See Inflation - Tire Pressure on page 6‑28.
The pressure gage (C) may read higher than the
actual tire pressure while the compressor is on.
Turn the compressor off to get an accurate
pressure reading. The compressor may be turned
on/off until the correct pressure is reached.
Notice: If the recommended pressure cannot be
reached after approximately 25 minutes, the vehicle
should not be driven farther. The tire is too severely
damaged and the tire sealant and compressor kit
cannot inflate the tire. Remove the power plug from
the accessory power outlet and unscrew the
inflating hose from the tire valve. See “Roadside
Assistance Program” in the owner manual. 11. Press the on/off button (B) to turn the tire sealant
and compressor kit off.
The tire is not sealed and will continue to
leak air until the vehicle is driven and the
sealant is distributed in the tire, therefore,
Steps 12 through 18 must be done immediately
after Step 11.
Be careful while handling the tire sealant and
compressor kit as it could be warm after usage.
12. Unplug the power plug (H) from the accessory power outlet in the vehicle.
13. Turn the sealant/air hose (F) counterclockwise to remove it from the tire valve stem.
14. Replace the tire valve stem cap.
15. Replace the sealant/air hose (F), and the power plug (H) back in their original location.
6-50