2010 GMC SIERRA instrument panel
[x] Cancel search: instrument panelPage 375 of 630
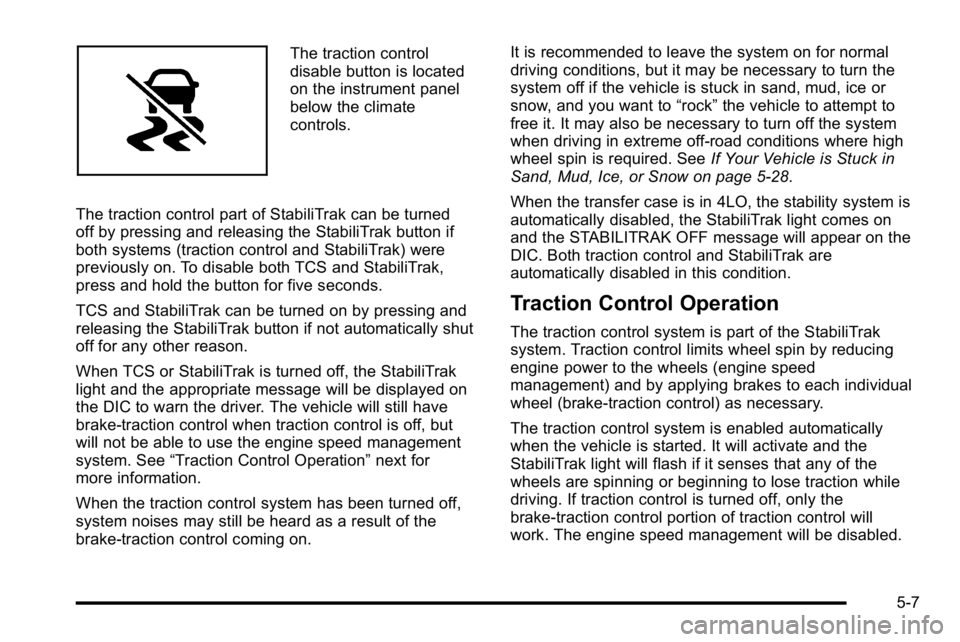
The traction control
disable button is located
on the instrument panel
below the climate
controls.
The traction control part of StabiliTrak can be turned
off by pressing and releasing the StabiliTrak button if
both systems (traction control and StabiliTrak) were
previously on. To disable both TCS and StabiliTrak,
press and hold the button for five seconds.
TCS and StabiliTrak can be turned on by pressing and
releasing the StabiliTrak button if not automatically shut
off for any other reason.
When TCS or StabiliTrak is turned off, the StabiliTrak
light and the appropriate message will be displayed on
the DIC to warn the driver. The vehicle will still have
brake-traction control when traction control is off, but
will not be able to use the engine speed management
system. See “Traction Control Operation” next for
more information.
When the traction control system has been turned off,
system noises may still be heard as a result of the
brake-traction control coming on. It is recommended to leave the system on for normal
driving conditions, but it may be necessary to turn the
system off if the vehicle is stuck in sand, mud, ice or
snow, and you want to
“rock”the vehicle to attempt to
free it. It may also be necessary to turn off the system
when driving in extreme off-road conditions where high
wheel spin is required. See If Your Vehicle is Stuck in
Sand, Mud, Ice, or Snow on page 5‑28.
When the transfer case is in 4LO, the stability system is
automatically disabled, the StabiliTrak light comes on
and the STABILITRAK OFF message will appear on the
DIC. Both traction control and StabiliTrak are
automatically disabled in this condition.
Traction Control Operation
The traction control system is part of the StabiliTrak
system. Traction control limits wheel spin by reducing
engine power to the wheels (engine speed
management) and by applying brakes to each individual
wheel (brake-traction control) as necessary.
The traction control system is enabled automatically
when the vehicle is started. It will activate and the
StabiliTrak light will flash if it senses that any of the
wheels are spinning or beginning to lose traction while
driving. If traction control is turned off, only the
brake-traction control portion of traction control will
work. The engine speed management will be disabled.
5-7
Page 395 of 630

WARNING: (Continued)
If the vehicle is stuck in the snow:
.Clear away snow from around the base of
your vehicle, especially any that is blocking
the exhaust pipe.
.Check again from time to time to be sure
snow does not collect there.
.Open a window about 5 cm (two inches) on
the side of the vehicle that is away from the
wind to bring in fresh air.
.Fully open the air outlets on or under the
instrument panel.
.Adjust the Climate Control system to a setting
that circulates the air inside the vehicle and
set the fan speed to the highest setting.
See Climate Control System in the Index.
For more information about carbon monoxide, see
Engine Exhaust on page 3‑54.
Snow can trap exhaust gases under your vehicle.
This can cause deadly CO (carbon monoxide) gas
to get inside. CO could overcome you and kill you. (Continued)
WARNING: (Continued)
You cannot see it or smell it, so you might not
know it is in your vehicle. Clear away snow from
around the base of your vehicle, especially any
that is blocking the exhaust.
Run the engine for short periods only as needed to
keep warm, but be careful.
To save fuel, run the engine for only short periods as
needed to warm the vehicle and then shut the engine
off and close the window most of the way to save heat.
Repeat this until help arrives but only when you feel
really uncomfortable from the cold. Moving about to
keep warm also helps.
If it takes some time for help to arrive, now and then
when you run the engine, push the accelerator pedal
slightly so the engine runs faster than the idle speed.
This keeps the battery charged to restart the vehicle
and to signal for help with the headlamps. Do this as
little as possible to save fuel.
5-27
Page 431 of 630
Safety Chains
Always attach chains between the vehicle and the
trailer. Cross the safety chains under the tongue of the
trailer to help prevent the tongue from contacting the
road if it becomes separated from the hitch. Instructions
about safety chains may be provided by the hitch
manufacturer or by the trailer manufacturer. If the trailer
being towed weighs up to 5,000 lbs (2 271 kg) with a
factory-installed step bumper, safety chains may be
attached to the attaching points on the bumper,
otherwise, safety chains should be attached to holes on
the trailer hitch platform. Always leave just enough
slack so the combination can turn. Never allow safety
chains to drag on the ground.
Tow/Haul Mode
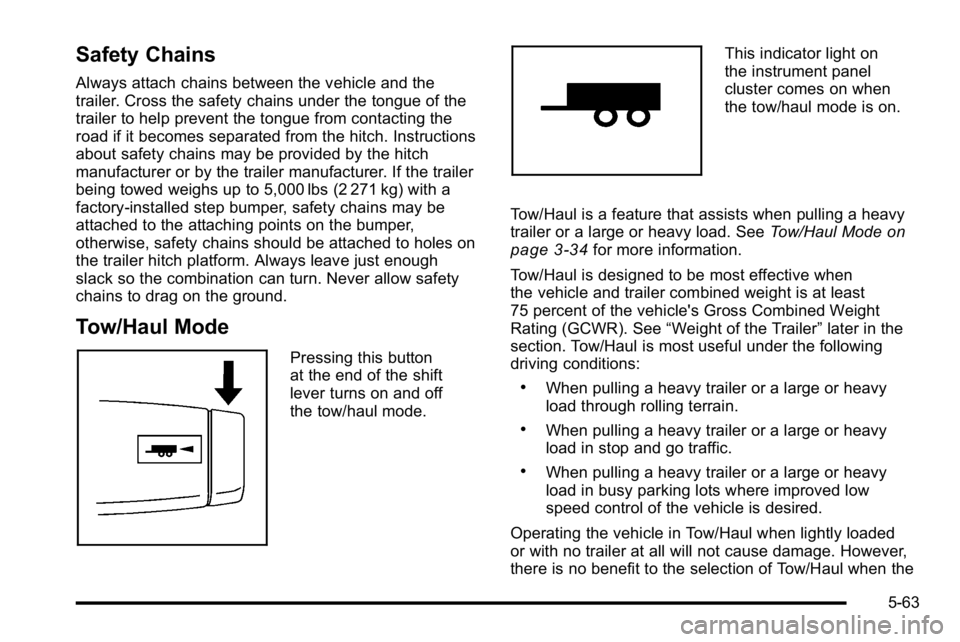
Pressing this button
at the end of the shift
lever turns on and off
the tow/haul mode.
This indicator light on
the instrument panel
cluster comes on when
the tow/haul mode is on.
Tow/Haul is a feature that assists when pulling a heavy
trailer or a large or heavy load. See Tow/Haul Mode
on
page 3‑34for more information.
Tow/Haul is designed to be most effective when
the vehicle and trailer combined weight is at least
75 percent of the vehicle's Gross Combined Weight
Rating (GCWR). See “Weight of the Trailer” later in the
section. Tow/Haul is most useful under the following
driving conditions:
.When pulling a heavy trailer or a large or heavy
load through rolling terrain.
.When pulling a heavy trailer or a large or heavy
load in stop and go traffic.
.When pulling a heavy trailer or a large or heavy
load in busy parking lots where improved low
speed control of the vehicle is desired.
Operating the vehicle in Tow/Haul when lightly loaded
or with no trailer at all will not cause damage. However,
there is no benefit to the selection of Tow/Haul when the
5-63
Page 434 of 630
Trailer Brake Control Panel
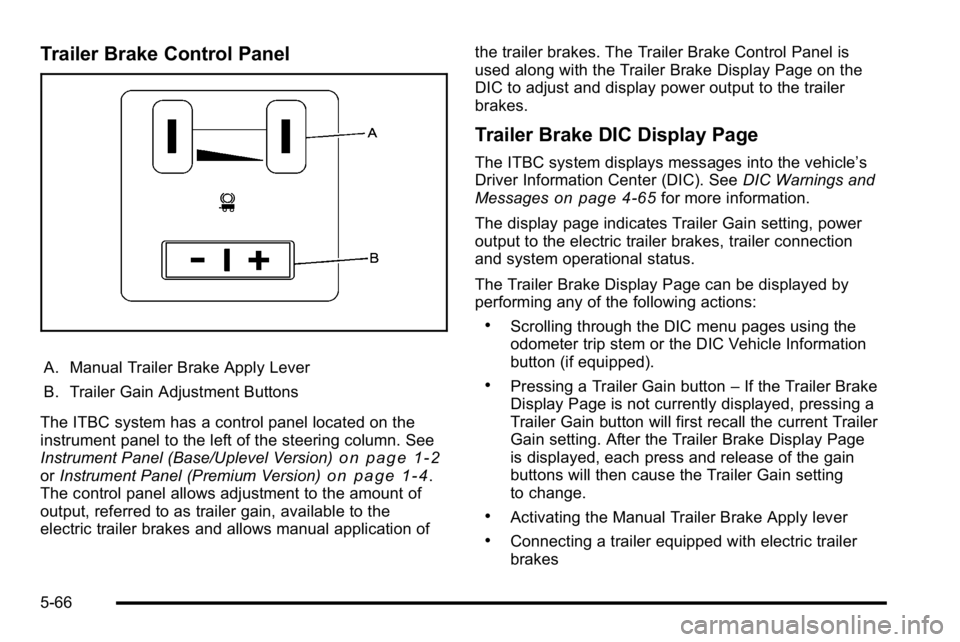
A. Manual Trailer Brake Apply Lever
B. Trailer Gain Adjustment Buttons
The ITBC system has a control panel located on the
instrument panel to the left of the steering column. See
Instrument Panel (Base/Uplevel Version)
on page 1‑2or Instrument Panel (Premium Version)on page 1‑4.
The control panel allows adjustment to the amount of
output, referred to as trailer gain, available to the
electric trailer brakes and allows manual application of the trailer brakes. The Trailer Brake Control Panel is
used along with the Trailer Brake Display Page on the
DIC to adjust and display power output to the trailer
brakes.
Trailer Brake DIC Display Page
The ITBC system displays messages into the vehicle’s
Driver Information Center (DIC). See
DIC Warnings and
Messages
on page 4‑65for more information.
The display page indicates Trailer Gain setting, power
output to the electric trailer brakes, trailer connection
and system operational status.
The Trailer Brake Display Page can be displayed by
performing any of the following actions:
.Scrolling through the DIC menu pages using the
odometer trip stem or the DIC Vehicle Information
button (if equipped).
.Pressing a Trailer Gain button –If the Trailer Brake
Display Page is not currently displayed, pressing a
Trailer Gain button will first recall the current Trailer
Gain setting. After the Trailer Brake Display Page
is displayed, each press and release of the gain
buttons will then cause the Trailer Gain setting
to change.
.Activating the Manual Trailer Brake Apply lever
.Connecting a trailer equipped with electric trailer
brakes
5-66
Page 439 of 630
WARNING: (Continued)
To maximize safety when towing a trailer:
.Have the exhaust system inspected for leaks
and make necessary repairs before starting
a trip.
.Never drive with the liftgate, trunk/hatch,
or rear-most window open.
.Fully open the air outlets on or under the
instrument panel.
.Adjust the Climate Control system to a setting
that brings in only outside air and set the fan
speed to the highest setting. See Climate
Control System in the Index.
For more information about carbon monoxide, see
Engine Exhaust on page 3‑54.
Towing a trailer requires a certain amount of
experience. The combination you are driving is longer
and not as responsive as the vehicle itself. Get
acquainted with the handling and braking of the rig
before setting out for the open road. Before starting, check all trailer hitch parts and
attachments, safety chains, electrical connectors,
lamps, tires and mirrors. If the trailer has electric
brakes, start the combination moving and then apply the
trailer brake controller by hand to be sure the
brakes work.
During the trip, check occasionally to be sure that the
load is secure and the lamps and any trailer brakes
still work.
Following Distance
Stay at least twice as far behind the vehicle ahead as
you would when driving the vehicle without a trailer.
This can help to avoid heavy braking and sudden turns.
Passing
More passing distance is needed when towing a trailer.
The combination will not accelerate as quickly and is
longer so it is necessary to go much farther beyond the
passed vehicle before returning to the lane.
Backing Up
Hold the bottom of the steering wheel with one hand.
To move the trailer to the left, move that hand to the left.
To move the trailer to the right, move your hand to the
right. Always back up slowly and, if possible, have
someone guide you.
5-71
Page 440 of 630
Making Turns
Notice:Making very sharp turns while trailering
could cause the trailer to come in contact with the
vehicle. The vehicle could be damaged. Avoid
making very sharp turns while trailering.
When turning with a trailer, make wider turns than
normal. Do this so the trailer will not strike soft
shoulders, curbs, road signs, trees or other objects.
Avoid jerky or sudden maneuvers. Signal well in
advance.
If the trailer turn signal bulbs burn out, the arrows on the
instrument panel will still flash for turns. It is important to
check occasionally to be sure the trailer bulbs are still
working.
Driving On Grades
Reduce speed and shift to a lower gear beforestarting
down a long or steep downgrade. If the transmission is
not shifted down, the brakes might get hot and no
longer work well.
Vehicles can tow in D (Drive). Shift the transmission to
a lower gear if the transmission shifts too often under
heavy loads and/or hilly conditions.
The tow/haul mode may be used if the transmission
shifts too often. See Tow/Haul Mode on page 3‑34. When towing at high altitude on steep uphill grades,
consider the following: Engine coolant will boil at a
lower temperature than at normal altitudes. If the engine
is turned off immediately after towing at high altitude on
steep uphill grades, the vehicle may show signs similar
to engine overheating. To avoid this, let the engine run
while parked, preferably on level ground, with the
automatic transmission in P (Park) for a few minutes
before turning the engine off. If the overheat warning
comes on, see
Engine Overheating on page 6‑34.
Parking on Hills
{WARNING:
Parking the vehicle on a hill with the trailer
attached can be dangerous. If something goes
wrong, the rig could start to move. People can be
injured, and both the vehicle and the trailer can be
damaged. When possible, always park the rig on
a flat surface.
If parking the rig on a hill: 1. Press the brake pedal, but do not shift into P (Park) yet. Turn the wheels into the curb if facing downhill
or into traffic if facing uphill.
5-72
Page 444 of 630
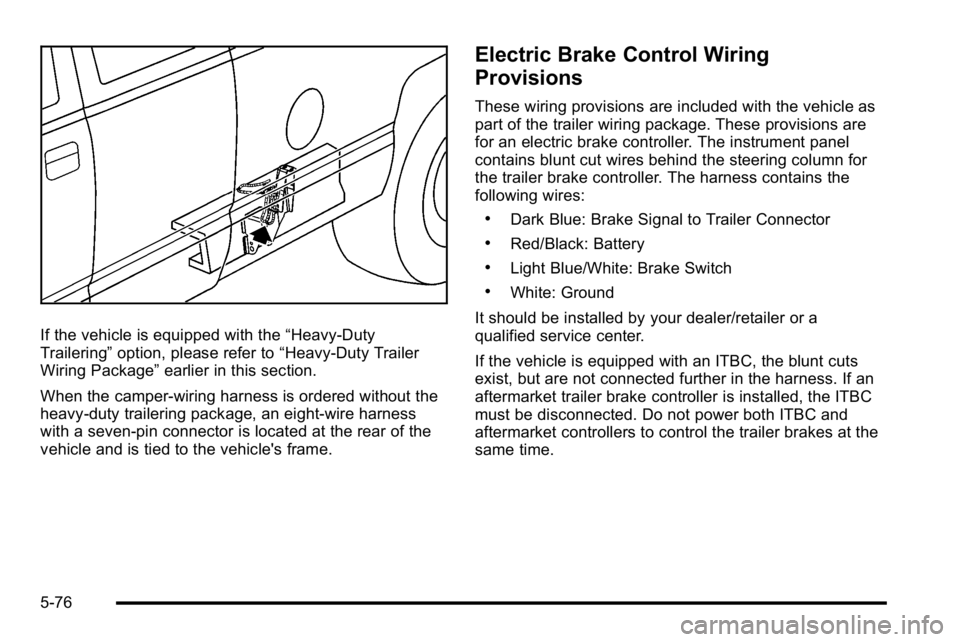
If the vehicle is equipped with the“Heavy-Duty
Trailering” option, please refer to “Heavy-Duty Trailer
Wiring Package” earlier in this section.
When the camper-wiring harness is ordered without the
heavy-duty trailering package, an eight-wire harness
with a seven-pin connector is located at the rear of the
vehicle and is tied to the vehicle's frame.
Electric Brake Control Wiring
Provisions
These wiring provisions are included with the vehicle as
part of the trailer wiring package. These provisions are
for an electric brake controller. The instrument panel
contains blunt cut wires behind the steering column for
the trailer brake controller. The harness contains the
following wires:
.Dark Blue: Brake Signal to Trailer Connector
.Red/Black: Battery
.Light Blue/White: Brake Switch
.White: Ground
It should be installed by your dealer/retailer or a
qualified service center.
If the vehicle is equipped with an ITBC, the blunt cuts
exist, but are not connected further in the harness. If an
aftermarket trailer brake controller is installed, the ITBC
must be disconnected. Do not power both ITBC and
aftermarket controllers to control the trailer brakes at the
same time.
5-76
Page 449 of 630
Section 6 Service and Appearance Care
Appearance Care. . . . . . . . . . . . . . . . . . . . . . . . . . . . . . . . 6-110
Interior Cleaning . . . . . . . . . . . . . . . . . . . . . . . . . . . . . 6-110
Fabric/Carpet . . . . . . . . . . . . . . . . . . . . . . . . . . . . . . . . . 6-111
Leather . . . . . . . . . . . . . . . . . . . . . . . . . . . . . . . . . . . . . . . 6-112
Instrument Panel, Vinyl, and Other Plastic Surfaces . . . . . . . . . . . . . . . . 6-112
Care of Safety Belts . . . . . . . . . . . . . . . . . . . . . . . . . . 6-112
Weatherstrips . . . . . . . . . . . . . . . . . . . . . . . . . . . . . . . . . 6-113
Washing Your Vehicle . . . . . . . . . . . . . . . . . . . . . . . . 6-113
Cleaning Exterior Lamps/Lenses . . . . . . . . . . . . . 6-113
Finish Care . . . . . . . . . . . . . . . . . . . . . . . . . . . . . . . . . . . 6-114
Windshield and Wiper Blades . . . . . . . . . . . . . . . . . 6-114
Aluminum or Chrome-Plated Wheels and Trim . . . . . . . . . . . . . . . . . . . . . . . . . . . . . . . . . . . . 6-115
Tires . . . . . . . . . . . . . . . . . . . . . . . . . . . . . . . . . . . . . . . . . . 6-116
Sheet Metal Damage . . . . . . . . . . . . . . . . . . . . . . . . . 6-116
Finish Damage . . . . . . . . . . . . . . . . . . . . . . . . . . . . . . . 6-116
Underbody Maintenance . . . . . . . . . . . . . . . . . . . . . . 6-116
Chemical Paint Spotting . . . . . . . . . . . . . . . . . . . . . . 6-116 Vehicle Identification
. . . . . . . . . . . . . . . . . . . . . . . . . . . . 6-117
Vehicle Identification Number (VIN) . . . . . . . . . . . 6-117
Service Parts Identification Label . . . . . . . . . . . . . 6-117
Electrical System . . . . . . . . . . . . . . . . . . . . . . . . . . . . . . . . 6-117
Add-On Electrical Equipment . . . . . . . . . . . . . . . . . 6-117
Windshield Wiper Fuses . . . . . . . . . . . . . . . . . . . . . . 6-118
Power Windows and Other Power Options . . . 6-118
Fuses and Circuit Breakers . . . . . . . . . . . . . . . . . . . 6-118
Instrument Panel Fuse Block . . . . . . . . . . . . . . . . . 6-119
Center Instrument Panel Fuse Block . . . . . . . . . 6-121
Underhood Fuse Block . . . . . . . . . . . . . . . . . . . . . . . 6-122
Capacities and Specifications . . . . . . . . . . . . . . . . . .6-126
6-3