2010 GMC SIERRA DENALI light
[x] Cancel search: lightPage 105 of 550

If the On Indicator is Lit for a Child
Restraint
If a child restraint has been installed and the on
indicator is lit:1. Turn the vehicle off.
2. Remove the child restraint from the vehicle.
3. Remove any additional items from the seat such as blankets, cushions, seat covers, seat heaters,
or seat massagers.
4. Reinstall the child restraint following the directions provided by the child restraint manufacturer and
refer to Securing a Child Restraint in the Right
Front Seat Position on page 2‑52. 5. If, after reinstalling the child restraint and restarting
the vehicle, the on indicator is still lit, turn the
vehicle off. Then slightly recline the vehicle
seatback and adjust the seat cushion, if adjustable,
to make sure that the vehicle seatback is not
pushing the child restraint into the seat cushion.
Also make sure the child restraint is not trapped
under the vehicle head restraint. If this happens,
adjust the head restraint. See Head Restraints
on
page 2‑2.
6. Restart the vehicle. The passenger sensing system may or may not
turn off the airbag for a child in a child restraint
depending upon the child’s seating posture and
body build. It is better to secure the child restraint
in a rear seat.
2-69
Page 109 of 550
Restraint System Check
Checking the Restraint Systems
Safety Belts
Now and then, check that the safety belt reminder light,
safety belts, buckles, latch plates, retractors, and
anchorages are all working properly.
Look for any other loose or damaged safety belt system
parts that might keep a safety belt system from doing its
job. See your dealer/retailer to have it repaired. Torn or
frayed safety belts may not protect you in a crash. They
can rip apart under impact forces. If a belt is torn or
frayed, get a new one right away.
Make sure the safety belt reminder light is working. See
Safety Belt Reminders
on page 4‑30for more
information.
Keep safety belts clean and dry. See Care of Safety
Belts
on page 6‑108.
Airbags
The airbag system does not need regularly scheduled
maintenance or replacement. Make sure the airbag
readiness light is working. See Airbag Readiness Light
on page 4‑31for more information.
Notice: If an airbag covering is damaged, opened,
or broken, the airbag may not work properly. Do not
open or break the airbag coverings. If there are any
opened or broken airbag covers, have the airbag
covering and/or airbag module replaced. For the
location of the airbag modules, see What Makes an
Airbag Inflate?
on page 2‑63. See your dealer/
retailer for service.
2-73
Page 110 of 550
Replacing Restraint System Parts
After a Crash
{WARNING:
A crash can damage the restraint systems in your
vehicle. A damaged restraint system may not
properly protect the person using it, resulting in
serious injury or even death in a crash. To help
make sure your restraint systems are working
properly after a crash, have them inspected and
any necessary replacements made as soon as
possible.
If the vehicle has been in a crash, do you need new
safety belts or LATCH system (if equipped) parts?
After a very minor crash, nothing may be necessary. But
the safety belt assemblies that were used during any
crash may have been stressed or damaged. See your
dealer/retailer to have the safety belt assemblies
inspected or replaced. If the vehicle has the LATCH system and it was being
used during a crash, you may need new LATCH system
parts.
New parts and repairs may be necessary even if the
safety belt or LATCH system (if equipped), was not
being used at the time of the crash.
If an airbag inflates, you will need to replace airbag
system parts. See the part on the airbag system earlier
in this section.
Have the safety belt pretensioners checked if the
vehicle has been in a crash, if the airbag readiness light
stays on after the vehicle is started, or while you are
driving. See
Airbag Readiness Light
on page 4‑31.
2-74
Page 115 of 550
Q(Lock):Press to lock all the doors.
If enabled through the Driver Information Center (DIC),
the turn signal lamps flash once to indicate locking has
occurred. If enabled through the DIC, the horn chirps
when
Qis pressed again within three seconds. See DIC
Vehicle Customization (With DIC Buttons)
on
page 4‑67for additional information.
Pressing
Qarms the content theft‐deterrent system.
See Content Theft-Deterrent on page 3‑18.
K(Unlock): Press once to unlock only the driver door.
If
Kis pressed again within three seconds, all
remaining doors unlock. The interior lamps may come
on and stay on for 20 seconds or until the ignition is
turned on.
If enabled through the DIC, the turn signal lamps flash
twice to indicate unlocking has occurred. See DIC
Vehicle Customization (With DIC Buttons)
on
page 4‑67. If enabled through the DIC, the exterior
lights may turn on. See “APPROACH LIGHTING” under
DIC Vehicle Customization (With DIC Buttons)
on
page 4‑67.
Pressing
Kon the RKE transmitter disarms the content
theft‐deterrent system. See Content Theft-Deterrent
on
page 3‑18.
L(Vehicle Locator/Panic Alarm): Press and release
to locate the vehicle. The turn signal lamps flash and
the horn sounds three times.
Press and hold
Lfor more than two seconds to
activate the panic alarm. The turn signal lamps flash
and the horn sounds repeatedly for 30 seconds. The
alarm turns off when the ignition is moved to ON/RUN
or
Lis pressed again. The ignition must be in LOCK/
OFF for the panic alarm to work.
Programming Transmitters to the
Vehicle
Only RKE transmitters programmed to this vehicle will
work. If a transmitter is lost or stolen, a replacement can
be purchased and programmed through your dealer/
retailer. When the replacement transmitter is
programmed to this vehicle, all remaining transmitters
must also be reprogrammed. Any lost or stolen
transmitters will no longer work once the new
transmitter is programmed. Each vehicle can have up
to eight transmitters programmed to it. See “Relearn
Remote Key” underDIC Operation and Displays (Using
Trip Odometer Reset Stem)
on page 4‑44or DIC
Operation and Displays (Using DIC Buttons)on
page 4‑48for instructions on how to match RKE
transmitters to your vehicle.
3-5
Page 118 of 550
/(Remote Start) : This button will be on the RKE
transmitter if you have remote start.
To start the vehicle using the remote start feature:
1. Aim the transmitter at the vehicle.
2. Press and release the transmitter's lock button. The vehicle's doors will lock. Immediately press
and hold the transmitter's remote start button until
the turn signal lights flash. If you cannot see the
vehicle's lights, press and hold the remote start
button for two to four seconds. Pressing the remote
start button again after the vehicle has started will
turn the engine off.
When the vehicle starts, the parking lamps will turn
on and remain on while the vehicle is running.
If the vehicle is left running it will automatically shut
off after 10 minutes unless a time extension has
been done.
3. If it is the first remote start since the vehicle has been driven, repeat these steps, while the engine
is still running, to extend the engine running time
by 10 minutes. Remote start can be extended
one time. After entering the vehicle during a remote start, insert
and turn the key to RUN to drive the vehicle.
To manually shut off a remote start, do any of the
following:
.Aim the RKE transmitter at the vehicle and press
the remote start button until the parking lamps
turn off.
.Turn on the hazard warning flashers.
.Turn the ignition switch on and then off.
The vehicle can be remote started two separate times
between driving sequences. The engine will run for
10 minutes after each remote start.
Or, you can extend the engine run time by another
10 minutes within the first 10 minute remote start time
frame, and before the engine stops.
For example, if the lock button and then the remote start
buttons are pressed again after the vehicle has been
running for five minutes, 10 minutes are added, allowing
the engine to run for 15 minutes.
3-8
Page 119 of 550

The additional ten minutes are considered a second
remote vehicle start.
Once two remote starts, or a single remote start with
one time extension has been done, the vehicle must be
started with the key. After the key is removed from the
ignition, the vehicle can be remote started again.
The vehicle cannot be remote started if the key is in the
ignition, the hood is not closed, or if there is an
emission control system malfunction and the check
engine light comes on.
Also, the engine will turn off during a remote vehicle
start if the coolant temperature gets too high or if the oil
pressure gets low.Vehicles that have the remote vehicle start feature are
shipped from the factory with the remote vehicle start
system enabled. The system may be enabled or
disabled through the DIC. See
“REMOTE START”
under DIC Vehicle Customization (With DIC Buttons)
on
page 4‑67for additional information. If your vehicle
does not have DIC buttons, see your dealer/retailer to
enable or disable the remote vehicle start system.
Remote Start Ready
If your vehicle does not have the remote vehicle start
feature, it may have the remote start ready feature. This
feature allows your dealer/retailer to add the
manufacturer's remote vehicle start feature.
See your dealer/retailer if you would like to add the
manufacturer's remote vehicle start feature to your
vehicle.
3-9
Page 124 of 550
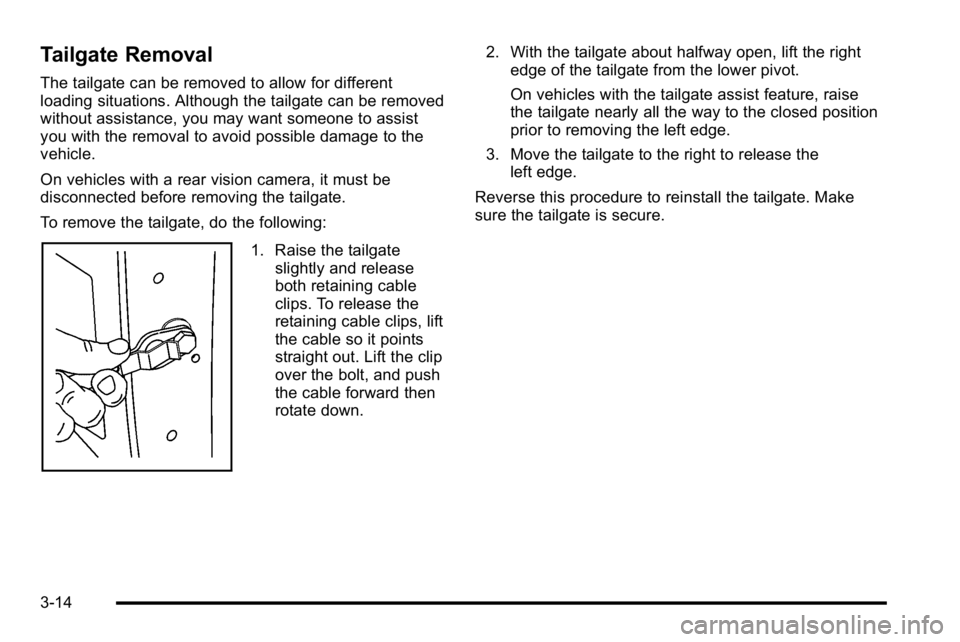
Tailgate Removal
The tailgate can be removed to allow for different
loading situations. Although the tailgate can be removed
without assistance, you may want someone to assist
you with the removal to avoid possible damage to the
vehicle.
On vehicles with a rear vision camera, it must be
disconnected before removing the tailgate.
To remove the tailgate, do the following:
1. Raise the tailgateslightly and release
both retaining cable
clips. To release the
retaining cable clips, lift
the cable so it points
straight out. Lift the clip
over the bolt, and push
the cable forward then
rotate down. 2. With the tailgate about halfway open, lift the right
edge of the tailgate from the lower pivot.
On vehicles with the tailgate assist feature, raise
the tailgate nearly all the way to the closed position
prior to removing the left edge.
3. Move the tailgate to the right to release the left edge.
Reverse this procedure to reinstall the tailgate. Make
sure the tailgate is secure.
3-14
Page 127 of 550
Express Down Windows
Vehicles with the express down feature allow the driver
and front passenger windows to be lowered without
holding the switch. Press down fully on the window
switch, then release, to activate the express down
mode. The express down mode can be canceled at any
time by pulling up on the switch. To open the window
partway, press the switch to the first depression
position, until the window is at the desired position.
Window Lockout
o(Window Lockout) : If your crew cab or extended
cab vehicle has power windows, the driver's door power
window switch has a lockout feature. The lockout switch
is located in front of the window switches. This feature
prevents the rear windows from operating, except from
the driver's position. Press the switch to engage or
disengage the lockout feature. An indicator light on the
switch will come on when the lockout feature is
engaged, and will go off when disengaged.
Sliding Rear Window
If your vehicle has this feature, squeeze the latch in the
center of the window and slide the glass to open.
When you close the window, be sure the latch is
engaged.
The sliding rear window does not have rear defogger.
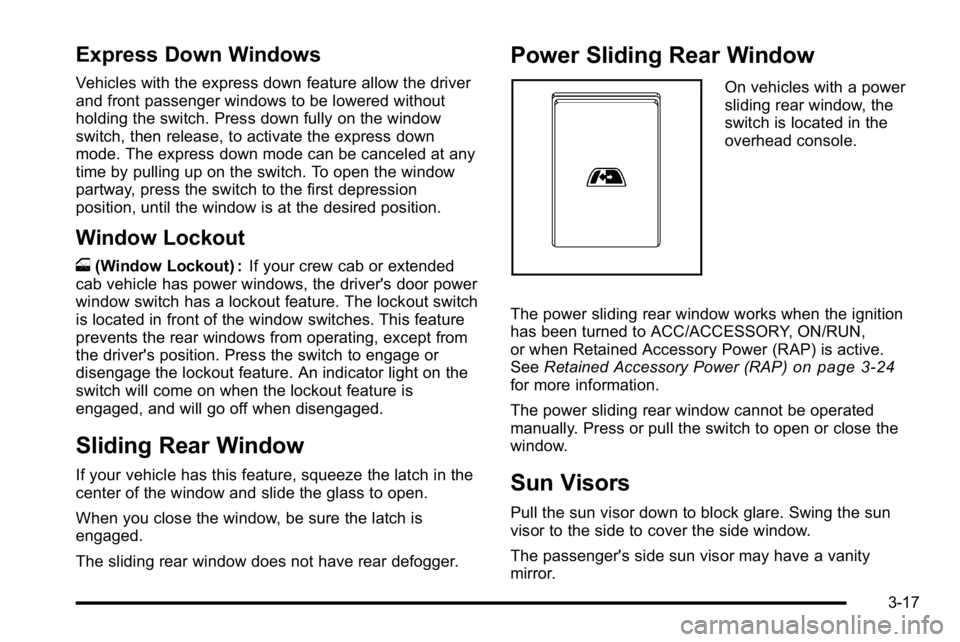
Power Sliding Rear Window
On vehicles with a power
sliding rear window, the
switch is located in the
overhead console.
The power sliding rear window works when the ignition
has been turned to ACC/ACCESSORY, ON/RUN,
or when Retained Accessory Power (RAP) is active.
See Retained Accessory Power (RAP)
on page 3‑24for more information.
The power sliding rear window cannot be operated
manually. Press or pull the switch to open or close the
window.
Sun Visors
Pull the sun visor down to block glare. Swing the sun
visor to the side to cover the side window.
The passenger's side sun visor may have a vanity
mirror.
3-17