2010 GMC SIERRA DENALI turn signal
[x] Cancel search: turn signalPage 173 of 550
Section 4 Instrument Panel
Instrument Panel Overview. . . . . . . . . . . . . . . . . . . . . . . .4-3
Hazard Warning Flashers . . . . . . . . . . . . . . . . . . . . . . . 4-3
Horn . . . . . . . . . . . . . . . . . . . . . . . . . . . . . . . . . . . . . . . . . . . . 4-3
Tilt Wheel . . . . . . . . . . . . . . . . . . . . . . . . . . . . . . . . . . . . . . . 4-3
Turn Signal/Multifunction Lever . . . . . . . . . . . . . . . . . . 4-4
Turn and Lane-Change Signals . . . . . . . . . . . . . . . . . 4-4
Headlamp High/Low-Beam Changer . . . . . . . . . . . . 4-5
Flash-to-Pass . . . . . . . . . . . . . . . . . . . . . . . . . . . . . . . . . . . 4-5
Windshield Wipers . . . . . . . . . . . . . . . . . . . . . . . . . . . . . . 4-6
Windshield Washer . . . . . . . . . . . . . . . . . . . . . . . . . . . . . 4-6
Cruise Control . . . . . . . . . . . . . . . . . . . . . . . . . . . . . . . . . . 4-7
Exterior Lamps . . . . . . . . . . . . . . . . . . . . . . . . . . . . . . . . 4-10
Headlamps on Reminder . . . . . . . . . . . . . . . . . . . . . . . 4-11
Daytime Running Lamps (DRL) . . . . . . . . . . . . . . . . 4-11
Automatic Headlamp System . . . . . . . . . . . . . . . . . . 4-12
Puddle Lamps . . . . . . . . . . . . . . . . . . . . . . . . . . . . . . . . . 4-13
Fog Lamps . . . . . . . . . . . . . . . . . . . . . . . . . . . . . . . . . . . . 4-13
Instrument Panel Brightness . . . . . . . . . . . . . . . . . . . 4-13
Dome Lamps . . . . . . . . . . . . . . . . . . . . . . . . . . . . . . . . . . 4-13
Dome Lamp Override . . . . . . . . . . . . . . . . . . . . . . . . . . 4-14
Entry Lighting . . . . . . . . . . . . . . . . . . . . . . . . . . . . . . . . . . 4-14
Exit Lighting . . . . . . . . . . . . . . . . . . . . . . . . . . . . . . . . . . . 4-14
Reading Lamps . . . . . . . . . . . . . . . . . . . . . . . . . . . . . . . . 4-14
Cargo Lamp . . . . . . . . . . . . . . . . . . . . . . . . . . . . . . . . . . . 4-14
Electric Power Management . . . . . . . . . . . . . . . . . . . 4-15 Battery Run-Down Protection . . . . . . . . . . . . . . . . . . 4-15
Accessory Power Outlet(s) . . . . . . . . . . . . . . . . . . . . . 4-16
Ashtray(s) and Cigarette Lighter . . . . . . . . . . . . . . . 4-17
Climate Controls . . . . . . . . . . . . . . . . . . . . . . . . . . . . . . . . . . 4-17
Climate Control System (With Air
Conditioning) . . . . . . . . . . . . . . . . . . . . . . . . . . . . . . . . 4-17
Climate Control System (With Heater Only) . . . . 4-20
Dual Automatic Climate Control System . . . . . . . 4-21
Outlet Adjustment . . . . . . . . . . . . . . . . . . . . . . . . . . . . . . 4-27
Warning Lights, Gages, and Indicators . . . . . . . . . .4-27
Instrument Panel Cluster . . . . . . . . . . . . . . . . . . . . . . . 4-28
Speedometer and Odometer . . . . . . . . . . . . . . . . . . . 4-29
Trip Odometer . . . . . . . . . . . . . . . . . . . . . . . . . . . . . . . . . 4-29
Tachometer . . . . . . . . . . . . . . . . . . . . . . . . . . . . . . . . . . . . 4-29
Safety Belt Reminders . . . . . . . . . . . . . . . . . . . . . . . . . 4-30
Airbag Readiness Light . . . . . . . . . . . . . . . . . . . . . . . . 4-31
Passenger Airbag Status Indicator . . . . . . . . . . . . . 4-32
Charging System Light . . . . . . . . . . . . . . . . . . . . . . . . 4-33
Voltmeter Gage . . . . . . . . . . . . . . . . . . . . . . . . . . . . . . . . 4-33
Brake System Warning Light . . . . . . . . . . . . . . . . . . . 4-34
Antilock Brake System (ABS) Warning Light . . . 4-36
StabiliTrak
®Indicator Light . . . . . . . . . . . . . . . . . . . . . 4-36
Engine Coolant Temperature Gage . . . . . . . . . . . . 4-37
Tire Pressure Light . . . . . . . . . . . . . . . . . . . . . . . . . . . . 4-37
4-1
Page 175 of 550
Instrument Panel Overview
Hazard Warning Flashers
|(Hazard Warning Flasher):Press this button
located on top of the steering column, to make the front
and rear turn signal lamps flash on and off. This warns
others that you are having trouble. Press again to turn
the flashers off.
When the hazard warning flashers are on, the vehicle's
turn signals will not work.
Horn
To sound the horn, press the horn symbols located on
the steering wheel.
Tilt Wheel
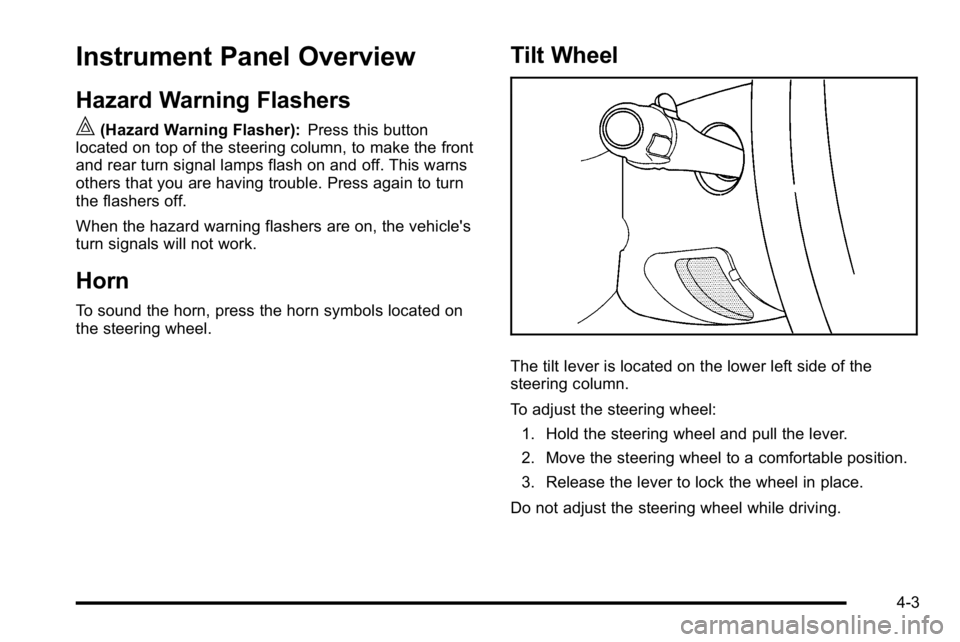
The tilt lever is located on the lower left side of the
steering column.
To adjust the steering wheel:
1. Hold the steering wheel and pull the lever.
2. Move the steering wheel to a comfortable position.
3. Release the lever to lock the wheel in place.
Do not adjust the steering wheel while driving.
4-3
Page 176 of 550
Turn Signal/Multifunction Lever
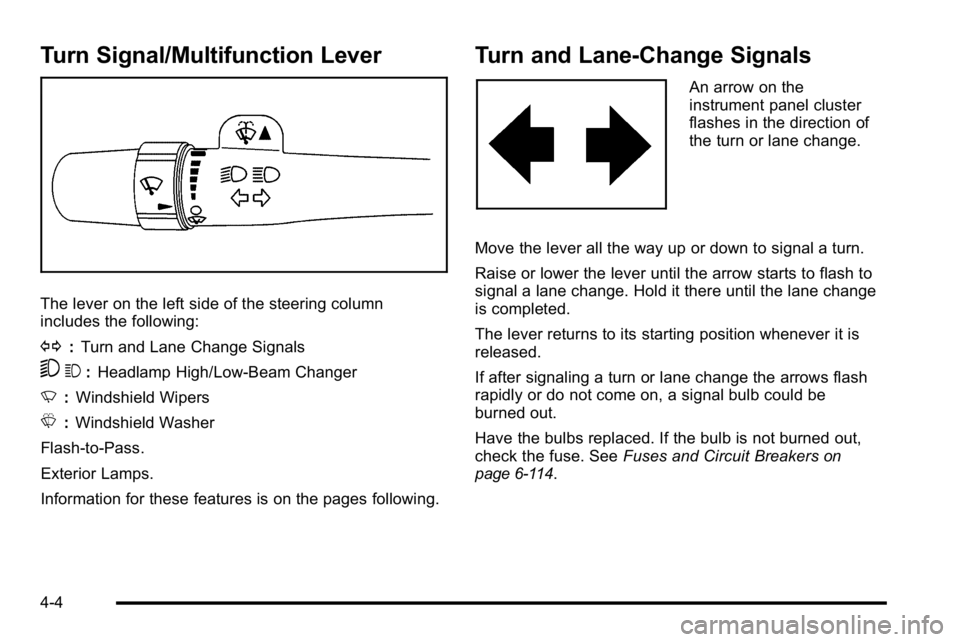
The lever on the left side of the steering column
includes the following:
G:Turn and Lane Change Signals
53 :Headlamp High/Low-Beam Changer
N :Windshield Wipers
L :Windshield Washer
Flash-to-Pass.
Exterior Lamps.
Information for these features is on the pages following.
Turn and Lane-Change Signals
An arrow on the
instrument panel cluster
flashes in the direction of
the turn or lane change.
Move the lever all the way up or down to signal a turn.
Raise or lower the lever until the arrow starts to flash to
signal a lane change. Hold it there until the lane change
is completed.
The lever returns to its starting position whenever it is
released.
If after signaling a turn or lane change the arrows flash
rapidly or do not come on, a signal bulb could be
burned out.
Have the bulbs replaced. If the bulb is not burned out,
check the fuse. See Fuses and Circuit Breakers
on
page 6‑114.
4-4
Page 177 of 550
Turn Signal On Chime
If the turn signal is left on for more than 3/4 of a mile
(1.2 km), a chime sounds at each flash of the turn signal
and the message TURN SIGNAL ON also appears in
the Driver Information Center (DIC). Move the turn
signal lever to the off position, to turn the chime and
message off.
Headlamp High/Low-Beam Changer
53(Headlamp High/Low Beam Changer) : Push the
lever toward the instrument panel, to change the
headlamps from low to high beam.
Pull the multifunction lever toward you and release it, to
return to low-beam headlamps.
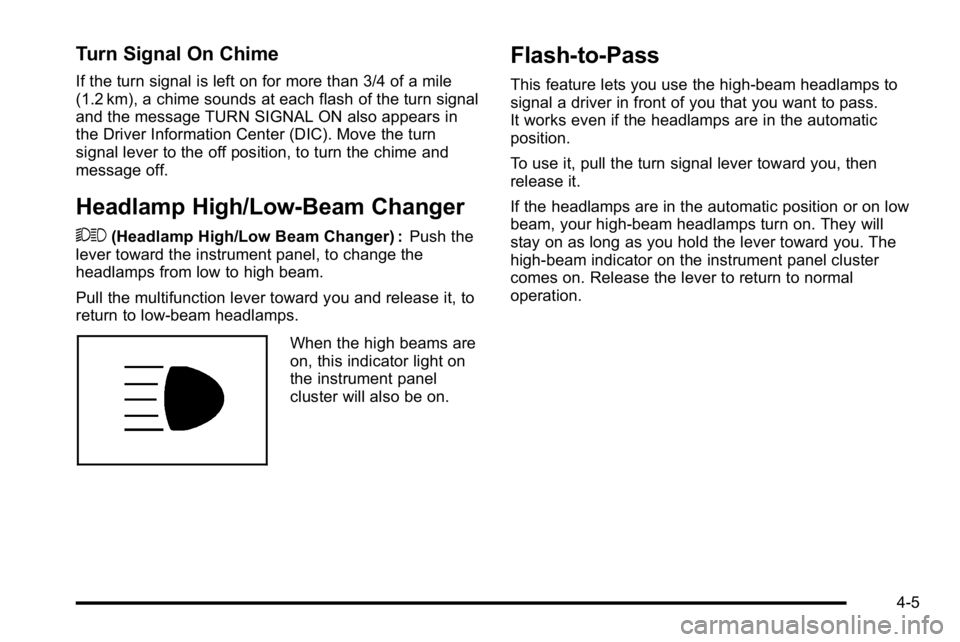
When the high beams are
on, this indicator light on
the instrument panel
cluster will also be on.
Flash-to-Pass
This feature lets you use the high-beam headlamps to
signal a driver in front of you that you want to pass.
It works even if the headlamps are in the automatic
position.
To use it, pull the turn signal lever toward you, then
release it.
If the headlamps are in the automatic position or on low
beam, your high-beam headlamps turn on. They will
stay on as long as you hold the lever toward you. The
high-beam indicator on the instrument panel cluster
comes on. Release the lever to return to normal
operation.
4-5
Page 183 of 550
2(Headlamps) : Turns on the headlamps together with
the following:
.Parking Lamps
.Instrument Panel Lights
.Taillamps
.License Plate Lamps
When the headlamps are turned on while the vehicle is
on, the headlamps turn off automatically 10 minutes
after the ignition is turned off. When the headlamps are
turned on while the vehicle is off, the headlamps will
stay on for 10 minutes before automatically turning off
to prevent the battery from being drained. Turn the
headlamp control to off and then back to the headlamp
on position to make the headlamps stay on for an
additional 10 minutes.
Push the turn signal/multifunction lever toward the
instrument panel to change the headlamps from low
beam to high beam.
Headlamps on Reminder
A reminder chime will sound when the headlamps or
parking lamps are manually turned on and the ignition is
off, in LOCK/OFF, ACC/ACCESSORY, or a door is
open. Turn the light off, then back on, to stop the chime.
Daytime Running Lamps (DRL)
Daytime Running Lamps (DRL) can make it easier for
others to see the front of your vehicle during the day.
Fully functional daytime running lamps are required on
all vehicles first sold in Canada.
The DRL system comes on when the following
conditions are met:
.The ignition is on.
.The exterior lamps control is in AUTO.
.The engine is running.
.The light sensor determines it is daytime.
When the DRL system is on, only the DRL lamps are
on. The taillamps, sidemarker, instrument panel lights,
and other lamps will not be on.
When it begins to get dark, the automatic headlamp
system switches from DRL to the headlamps.
To turn off the DRL lamps, turn the exterior lamps
control to the OFF position and then release. For
vehicles first sold in Canada, the transmission must be
in the P (Park) position, before the DRL lamps can be
turned off.
4-11
Page 238 of 550
TRACTION CONTROL OFF
If your vehicle has StabiliTrak, this message displays
when the Traction Control System (TCS) is turned off.
Adjust your driving accordingly. SeeStabiliTrak
®
Systemon page 5‑6for more information.
TRAILER CONNECTED
On vehicles with the Integrated Trailer Brake Control
(ITBC) system, this message displays briefly when a
trailer with electric brakes is first connected to the
vehicle.
This message clears itself after several seconds. This
message also clears if you acknowledge it. After this
message clears, the TRAILER GAIN/OUTPUT display
appears in the DIC.
See“TRAILER GAIN/OUTPUT” underDIC Operation
and Displays (Using Trip Odometer Reset Stem)
on
page 4‑44or DIC Operation and Displays (Using DIC
Buttons)on page 4‑48and “Integrated Trailer Brake
Control System” underTowing a Traileron page 5‑42for more information.
TRANSMISSION HOT IDLE ENGINE
Notice: If you drive your vehicle while the
transmission fluid is overheating and the
transmission temperature warning is displayed on
the instrument panel cluster and/or DIC, you can
damage the transmission. This could lead to costly
repairs that would not be covered by your warranty.
Do not drive your vehicle with overheated
transmission fluid or while the transmission
temperature warning is displayed.
This message displays along with four chimes if the
transmission fluid in the vehicle gets hot. Driving with
the transmission fluid temperature high can cause
damage to the vehicle. Stop the vehicle and let it idle to
allow the transmission to cool. This message clears and
the chime stops when the fluid temperature reaches a
safe level.
TURN SIGNAL ON
This message displays and a chime sounds if a turn
signal is left on for 3/4 of a mile (1.2 km). Move the turn
signal/multifunction lever to the off position.
4-66
Page 253 of 550
(Information) (AM-FM Radio) :Press to switch the
display between the radio station frequency and the
time. While the ignition is off, press this button to
display the time.
Speed Compensated Volume (SCV) : Radios with
Speed Compensated Volume (SCV) automatically
adjusts the radio volume to compensate for road and
wind noise as the vehicle's speed changes while
driving, so that the volume level stays consistent.
To activate SCV:
1. Set the radio volume to the desired level.
2. Press the MENU button to display the radio setup menu.
3. Press the softkey under the AUTO VOLUM (automatic volume) tab on the radio display.
4. Press the softkey under the desired Speed Compensated Volume setting (OFF, Low, Med,
or High) to select the level of radio volume
compensation. The display times out after
approximately 10 seconds. Each higher setting
allows for more radio volume compensation at
faster vehicle speeds.Finding a Station
BAND : Press to switch between AM, FM, or XM™,
if equipped.
f(Tune): Turn to select radio stations.
©SEEK¨:Press either arrow to go to the previous
or to the next station and stay there. The radio only
seeks and scans stations with a strong signal that are in
the selected band.
To scan stations, press and hold either arrow for a
few seconds until a beep sounds. The radio goes to a
station, plays for a few seconds, then goes to the next
station.
Press either arrow again to stop scanning.
For the AM-FM Radio, the station frequency flashes
while the radio is in the scan mode.
For the AM-FM Radio, scan presets within the current
selected band by pressing and holding either seek
arrow for four seconds until a double beep sounds. The
radio goes to a stored preset, plays for a few seconds if
a strong signal is present, then goes to the next stored
preset. The station frequency flashes while the radio is
in the scan mode.
4-81
Page 286 of 550
XM Radio Messages
XL (Explicit Language Channels) :These channels,
or any others, can be blocked at a customer's request,
by calling 1-800-852-XMXM (9696).
XM Updating : The encryption code in the receiver is
being updated, and no action is required. This process
should take no longer than 30 seconds.
No XM Signal : The system is functioning correctly, but
the vehicle is in a location that is blocking the XM™
signal. When the vehicle is moved into an open area,
the signal should return.
Loading XM : The audio system is acquiring and
processing audio and text data. No action is needed.
This message should disappear shortly.
Channel Off Air : This channel is not currently in
service. Tune in to another channel.
Channel Unauth : This channel is blocked or cannot
be received with your XM Subscription package.
Channel Unavail : This previously assigned channel is
no longer assigned. Tune to another station. If this
station was one of the presets, choose another station
for that preset button. No Artist Info :
No artist information is available at this
time on this channel. The system is working properly.
No Title Info : No song title information is available at
this time on this channel. The system is working
properly.
No CAT Info : No category information is available at
this time on this channel. The system is working
properly.
No Information : No text or informational messages are
available at this time on this channel. The system is
working properly.
CAT Not Found : There are no channels available for
the selected category. The system is working properly.
XM Theftlocked : The XM receiver in the vehicle could
have previously been in another vehicle. For security
purposes, XM receivers cannot be swapped between
vehicles. If this message is received after having the
vehicle serviced, check with your dealer/retailer.
XM Radio ID : If tuned to channel 0, this message
alternates with the XM™ Radio 8 digit radio ID label.
This label is needed to activate the service.
Unknown : If this message is received when tuned to
channel 0, there could be a receiver fault. Consult with
your dealer/retailer.
4-114