Page 16 of 424
Vehicles with towing
mirrors can be adjusted
manually for a clear view of
the objects behind you.
Manually fold the mirrors inward to prevent damage
when going through an automatic car wash. To fold, pull
the mirror toward the vehicle. Push the mirror outward,
to return it to the original position.
Interior Mirror
Hold the inside rearview mirror in the center to move it
for a clearer view behind the vehicle. Adjust the
mirror to avoid glare from the headlamps behind. Push
the tab, located at the base of the mirror, forward
for daytime use and pull it for nighttime use.
SeeManual Rearview Mirror on page 3-40.
Steering Wheel Adjustment
For vehicles with a tilt steering wheel, the lever is
located on the left side of the steering column.
To adjust the steering wheel:
1. Pull the lever to move the steering wheel up or
down into a comfortable position.
2. Release the lever to lock the steering wheel in
place.
SeeTilt Wheel on page 4-3.
1-10
Page 17 of 424

Interior Lighting
Dome Lamp
The dome lamps come on when any door is opened.
They turn off after all the doors are closed.
To manually turn on the dome lamps, turn the instrument
panel brightness knob, located on the instrument
panel to the left of the steering column, clockwise to the
farthest position. In this position, the dome lamps
remain on whether a door is opened or closed.
E:The dome lamp override button is located next to
the exterior lamps control.
Press the button in and the dome lamps remain off
when a door is opened. Press the button again to return it
to the extended position so that the dome lamps come on
when a door is opened.
Reading Lamps
For vehicles with reading lamps, press the button
located next to each lamp to turn it on or off.
The vehicle may also have reading lamps in other
locations. The lamps cannot be adjusted.
For more information on interior lighting, see:
•Instrument Panel Brightness on page 4-12.
•Entry/Exit Lighting on page 4-13.
Exterior Lighting
The exterior lamps control
is located on the
instrument panel to the left
of the steering wheel.
O:Briefly turn the control to this position to turn the
automatic headlamps and daytime running lamps (DRL)
off or back on.
For vehicles first sold in Canada, the off position only
works for vehicles that are shifted into the P (Park)
position.
AUTO:Automatic operation of the headlamps at normal
brightness and other exterior lamp.
;:Manual operation of the parking lamps and other
exterior lamps, except headlamps.
2:Manual operation of the headlamps and other
exterior lamps.
1-11
Page 20 of 424

©¨:Seek or scan stations.
4:Press to display additional text information related to
the current FM-RDS station or MP3 song. A choice of
additional information such as: Channel, Song, Artist, and
CAT (category) can display. Continue pressing to
highlight the desired label, or press the softkey located
under any one of the tabs and the information about that
tab displays.
For more information about these and other radio
features, seeAudio System(s) on page 4-59.
Storing a Favorite Station
Depending on which radio the vehicle has, radio
stations are stored as either favorites or presets.
For vehicles with a FAV button, a maximum of
36 stations can be stored as favorites using the
six softkeys located below the radio station frequency
tabs and by using the radio FAV button. Press FAV
to go through up to six pages of favorites, each having
six favorite stations available per page. Each page
of favorites can contain any combination of AM and FM
stations.
If the radio does not have a FAV button, up to
18 stations (six FM1, six FM2, and six AM), can be
programmed on the six numbered buttons.
SeeRadio(s) on page 4-62.
Setting the Clock
To set the time and date for the Radio with CD (MP3):
1. Press
Hand the HR, MIN, MM, DD, YYYY
(hour, minute, month, day, and year) displays.
2. Press the pushbutton located below any one of the
tabs that you want to change.
3. Increase or decrease the time or date, depending
on the radio, by pressing
©SEEK¨arrows,
s\REV/FWD buttons, or by turningf
clockwise or counterclockwise.
For detailed instructions on setting the clock for your
specific audio system, seeSetting the Clock on
page 4-60.
Portable Audio Devices
This vehicle may have an auxiliary input jack, located
on the audio faceplate. External devices such as iPod®,
MP3 players, etc. can be connected to the auxiliary
input jack using a 3.5 mm (1/8 in) input jack cable.
See “Using the Auxiliary Input Jack” underRadio(s) on
page 4-62.
1-14
Page 23 of 424

Tire Pressure Monitor
This vehicle may have a Tire Pressure Monitor
System (TPMS).
The Tire Pressure Monitor
alerts you when a
significant reduction in
pressure occurs in one or
more of the vehicle’s tires
by illuminating the low tire
pressure warning light on
the instrument cluster.
The warning light will remain on until the tire pressure is
corrected. The proper tire pressures for your vehicle
are listed on the Tire and Loading Information label
located on the driver side center pillar (B pillar). See
Loading the Vehicle on page 5-17.
You may notice during cooler conditions that the low tire
pressure warning light will appear when the vehicle is
first started and then turn off as you drive. This may be
an early indicator that your tire pressures are getting
low and the tires need to be inflated to the proper
pressure.Note:The Tire Pressure Monitor can alert you about
low tire pressure, but it does not replace normal monthly
tire maintenance. It is the driver’s responsibility to
maintain correct tire pressures.
SeeTire Pressure Monitor System on page 6-65and
Tire Pressure Monitor Operation on page 6-66.
Engine Oil Life System
The engine oil life system calculates engine oil life
based on vehicle use and displays a DIC message when
it is necessary to change the engine oil and filter. The
oil life system should be reset to 100% only following an
oil change.
Resetting the Oil Life System
1. Turn the ignition to ON/RUN, with the engine off.
2. Fully press and release the accelerator pedal three
times within five seconds.
3. Turn the key to LOCK/OFF.
SeeEngine Oil Life System on page 6-18.
1-17
Page 26 of 424
Head Restraints
On vehicles with factory installed seats, the front seats
have built-in head restraints that are not adjustable
in the outboard seating positions.
Front Seats
Manual Seats
{WARNING:
You can lose control of the vehicle if you try to
adjust a manual driver’s seat while the vehicle is
moving. The sudden movement could startle and
confuse you, or make you push a pedal when you
do not want to. Adjust the driver’s seat only when
the vehicle is not moving.If the vehicle has a manual seat, it can be moved
forward or rearward.
1. Lift the bar to unlock
the seat.
2. Slide the seat to the
desired position and
release the bar.
Try to move the seat with your body to be sure the seat
is locked in place.
2-2
Page 28 of 424

Reclining Seatbacks
{WARNING:
You can lose control of the vehicle if you try to
adjust a manual driver’s seat while the vehicle is
moving. The sudden movement could startle and
confuse you, or make you push a pedal when you
do not want to. Adjust the driver’s seat only when
the vehicle is not moving.
{WARNING:
If either seatback is not locked, it could move
forward in a sudden stop or crash. That could
cause injury to the person sitting there. Always
push and pull on the seatbacks to be sure they
are locked.
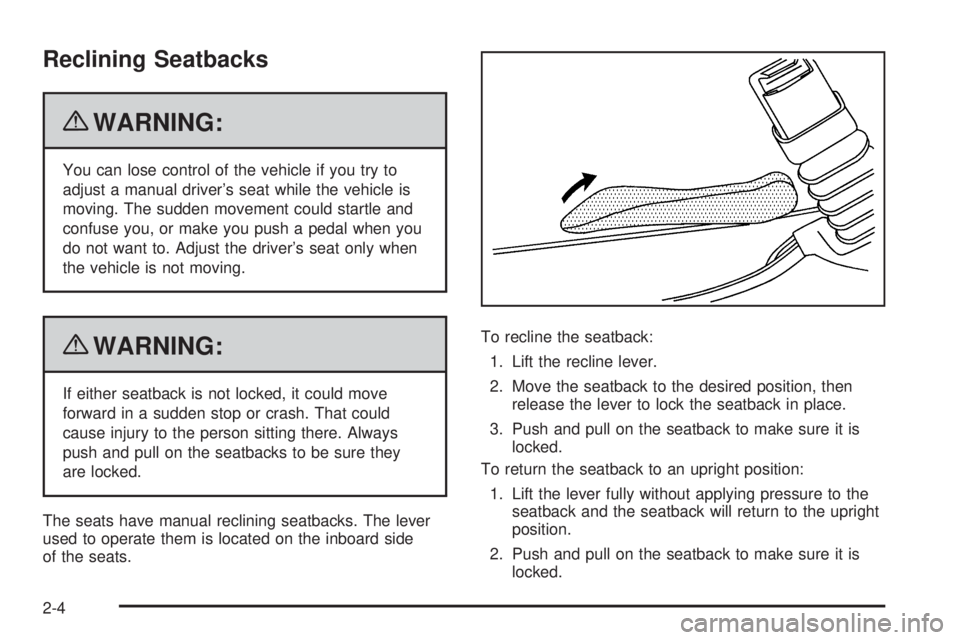
The seats have manual reclining seatbacks. The lever
used to operate them is located on the inboard side
of the seats.To recline the seatback:
1. Lift the recline lever.
2. Move the seatback to the desired position, then
release the lever to lock the seatback in place.
3. Push and pull on the seatback to make sure it is
locked.
To return the seatback to an upright position:
1. Lift the lever fully without applying pressure to the
seatback and the seatback will return to the upright
position.
2. Push and pull on the seatback to make sure it is
locked.
2-4
Page 32 of 424

Replacing the Rear Seats
{WARNING:
A seat that is not locked into place properly can
move around in a collision or sudden stop. People
in the vehicle could be injured. Be sure to lock the
seat into place properly when installing it.
{WARNING:
A safety belt that is improperly routed, not properly
attached, or twisted will not provide the protection
needed in a crash. The person wearing the belt
could be seriously injured. After raising the rear
seatback, always check to be sure that the safety
belts are properly routed and attached, and are
not twisted.1. Position the seat into the open slots in both rails.
Push the seat forward in the rail, hooking both
seat bases onto the pins inside of the rails.
2. Locate the hole in the rail to install the locking pins at
the rear of the seat base. If the vehicle has floor
mats, pull the flap that has been cut into the mat.
3. Insert the locking pins into the seat base and push
the seat to line up the pins with the base.
On a three passenger seat, the pin with the black
cap marked “R” must be installed on the passenger
side and the pin with the gray cap marked “L” on
the driver side.
On a four passenger seat, the pins marked “R”
must be installed on the half of the seat on the
passenger side. The pins marked “L” must be
installed on the half of the seat on the driver side.
2-8
Page 33 of 424
4. Push the pin(s) marked “R” down until they are in
the retaining clip.5. Push the pin(s) marked “L” down until they are in
the retaining clip.
6. If the vehicle has a floor mat, put the flap back to
its original position.
7. Repeat this procedure for the other seat base.
8. Connect the quick-release latch plates for the
lap-shoulder belts by inserting the latch plates
into the buckles attached at the outboard positions
of the bench seat. Do not twist the belt.
9. Check that all locking pins are locked into place
before operating the vehicle. Three Passenger Seat Shown
Three Passenger Seat Shown
2-9